

We’re getting really, really close to finishing the first floor of the house, and it’s really, really exciting. After we got the kitchen in working order, our next focus was on the living room and dining room. That meant finishing the drywall, painting, putting up trim, and figuring out what to do about our ceiling situation.
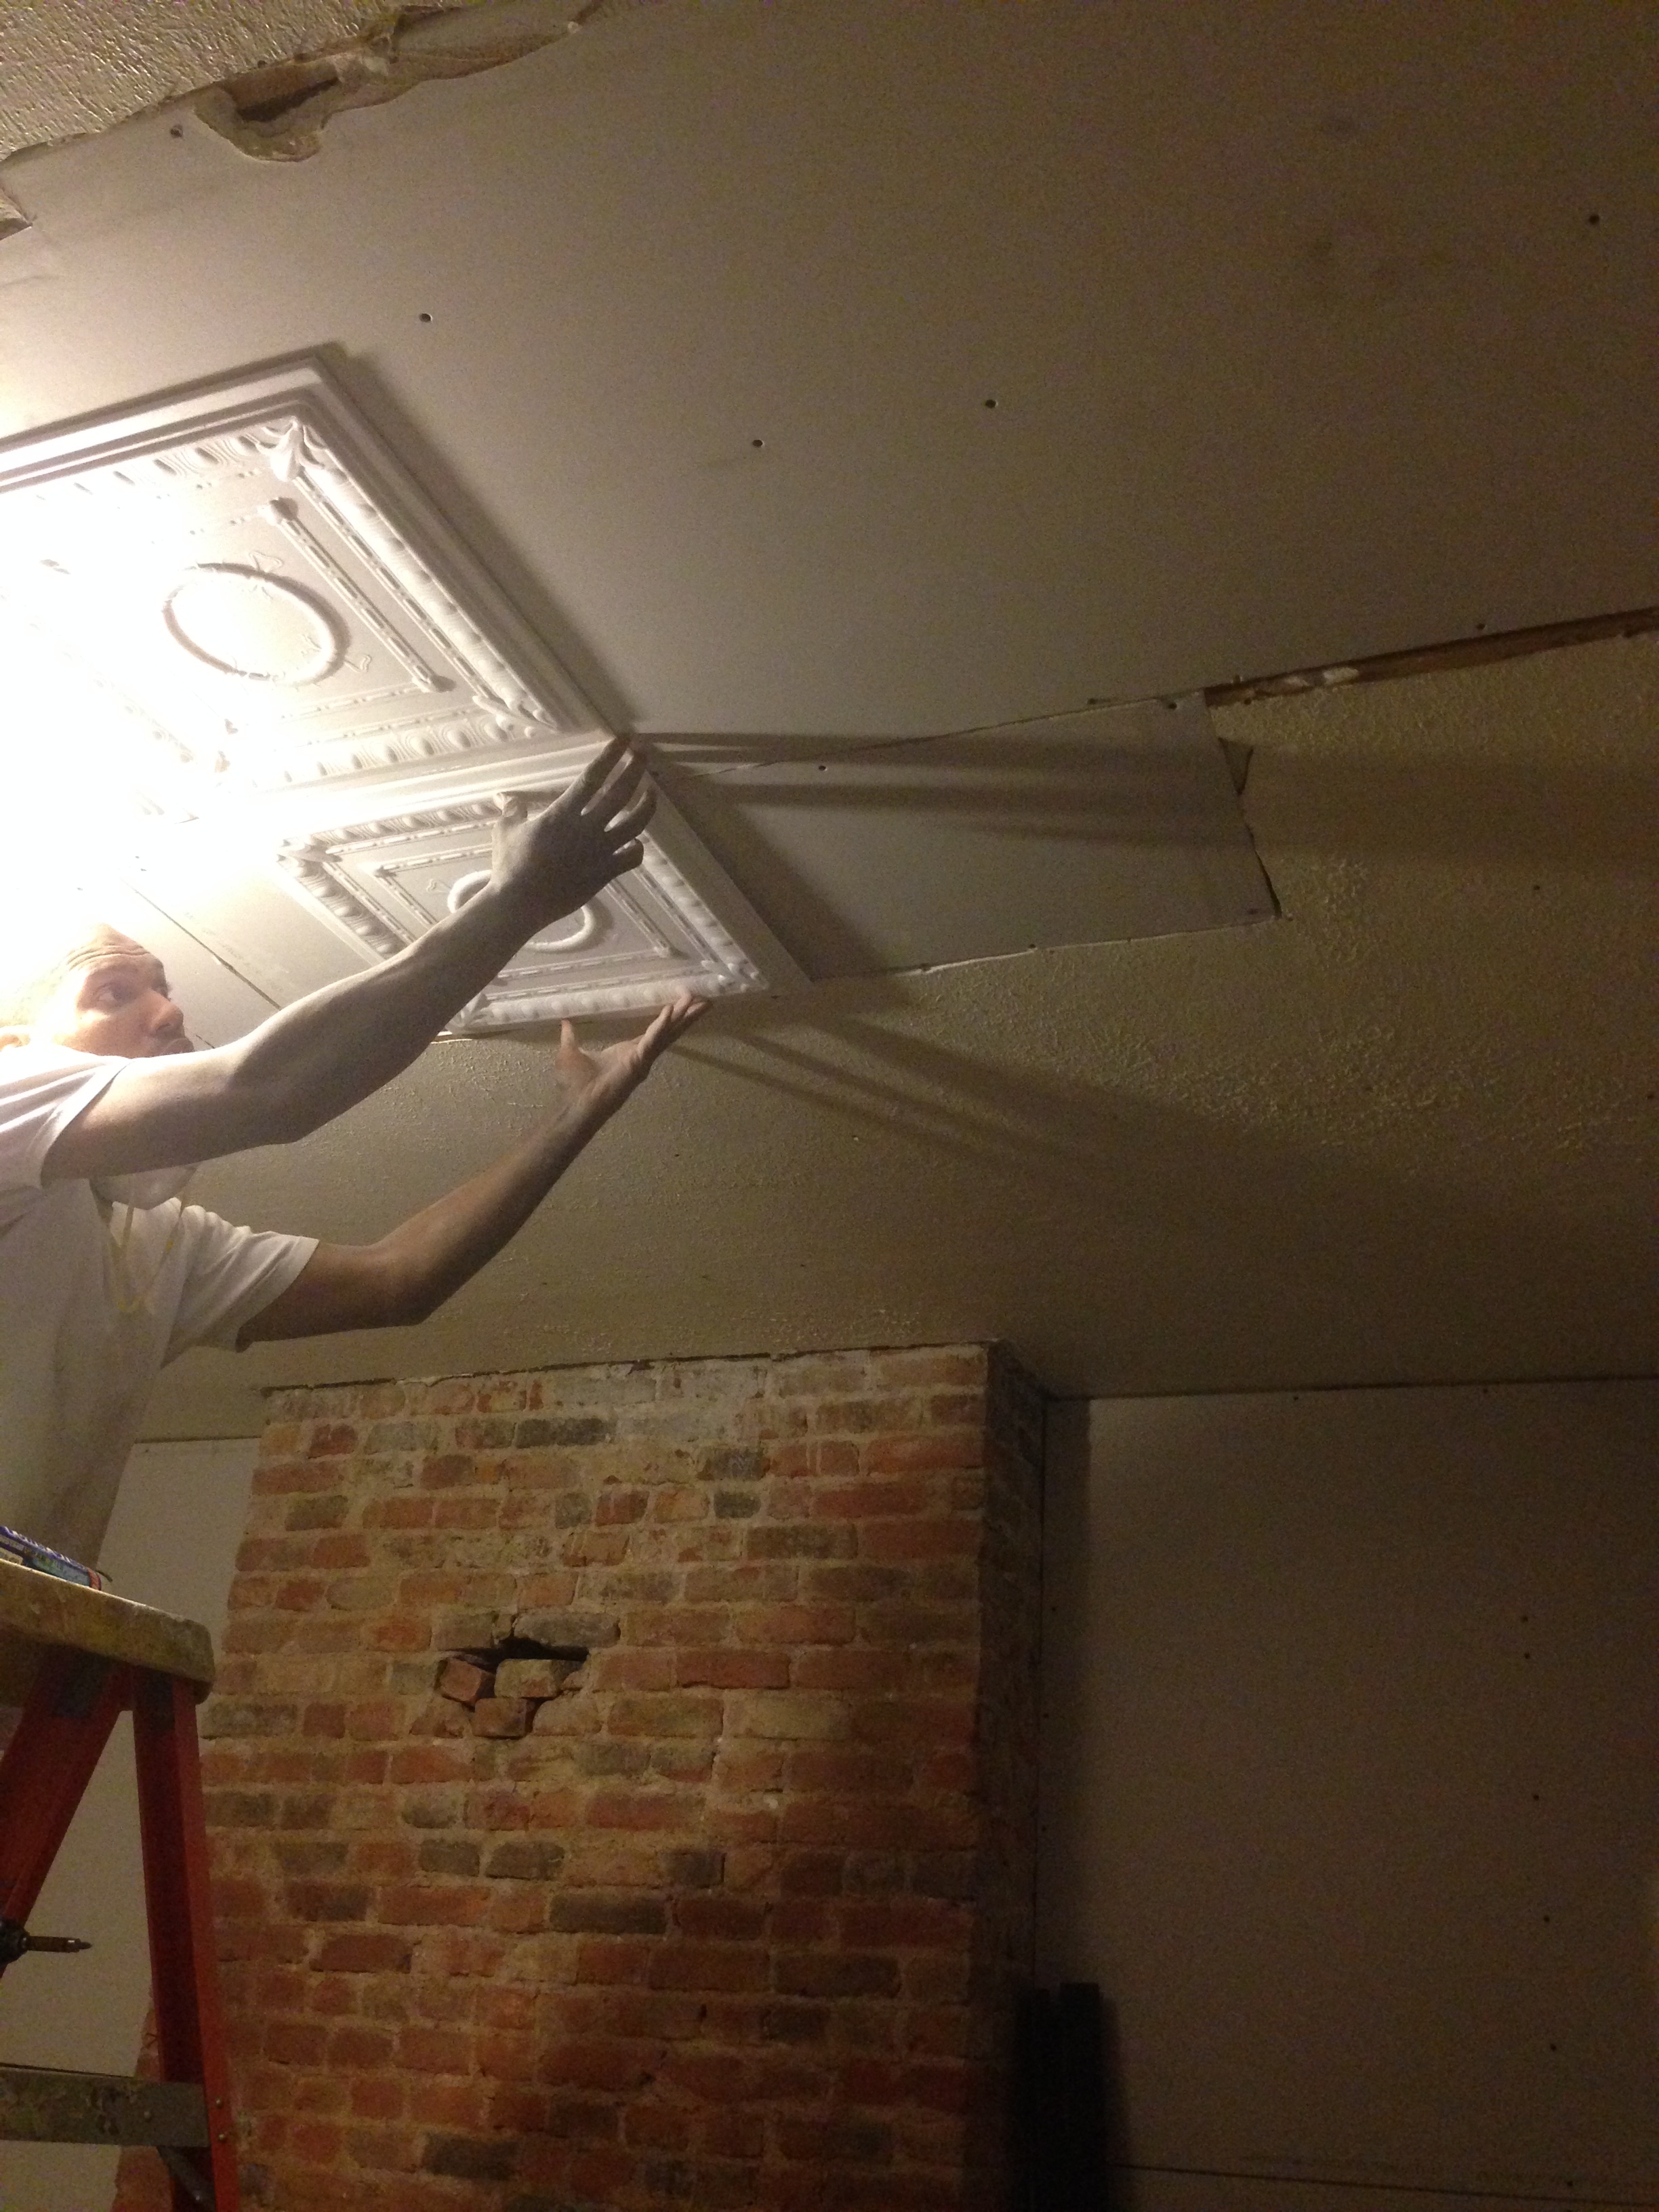
The electricians had to cut holes into our living room and dining room ceilings in order to update the wiring. This is what we were left with.
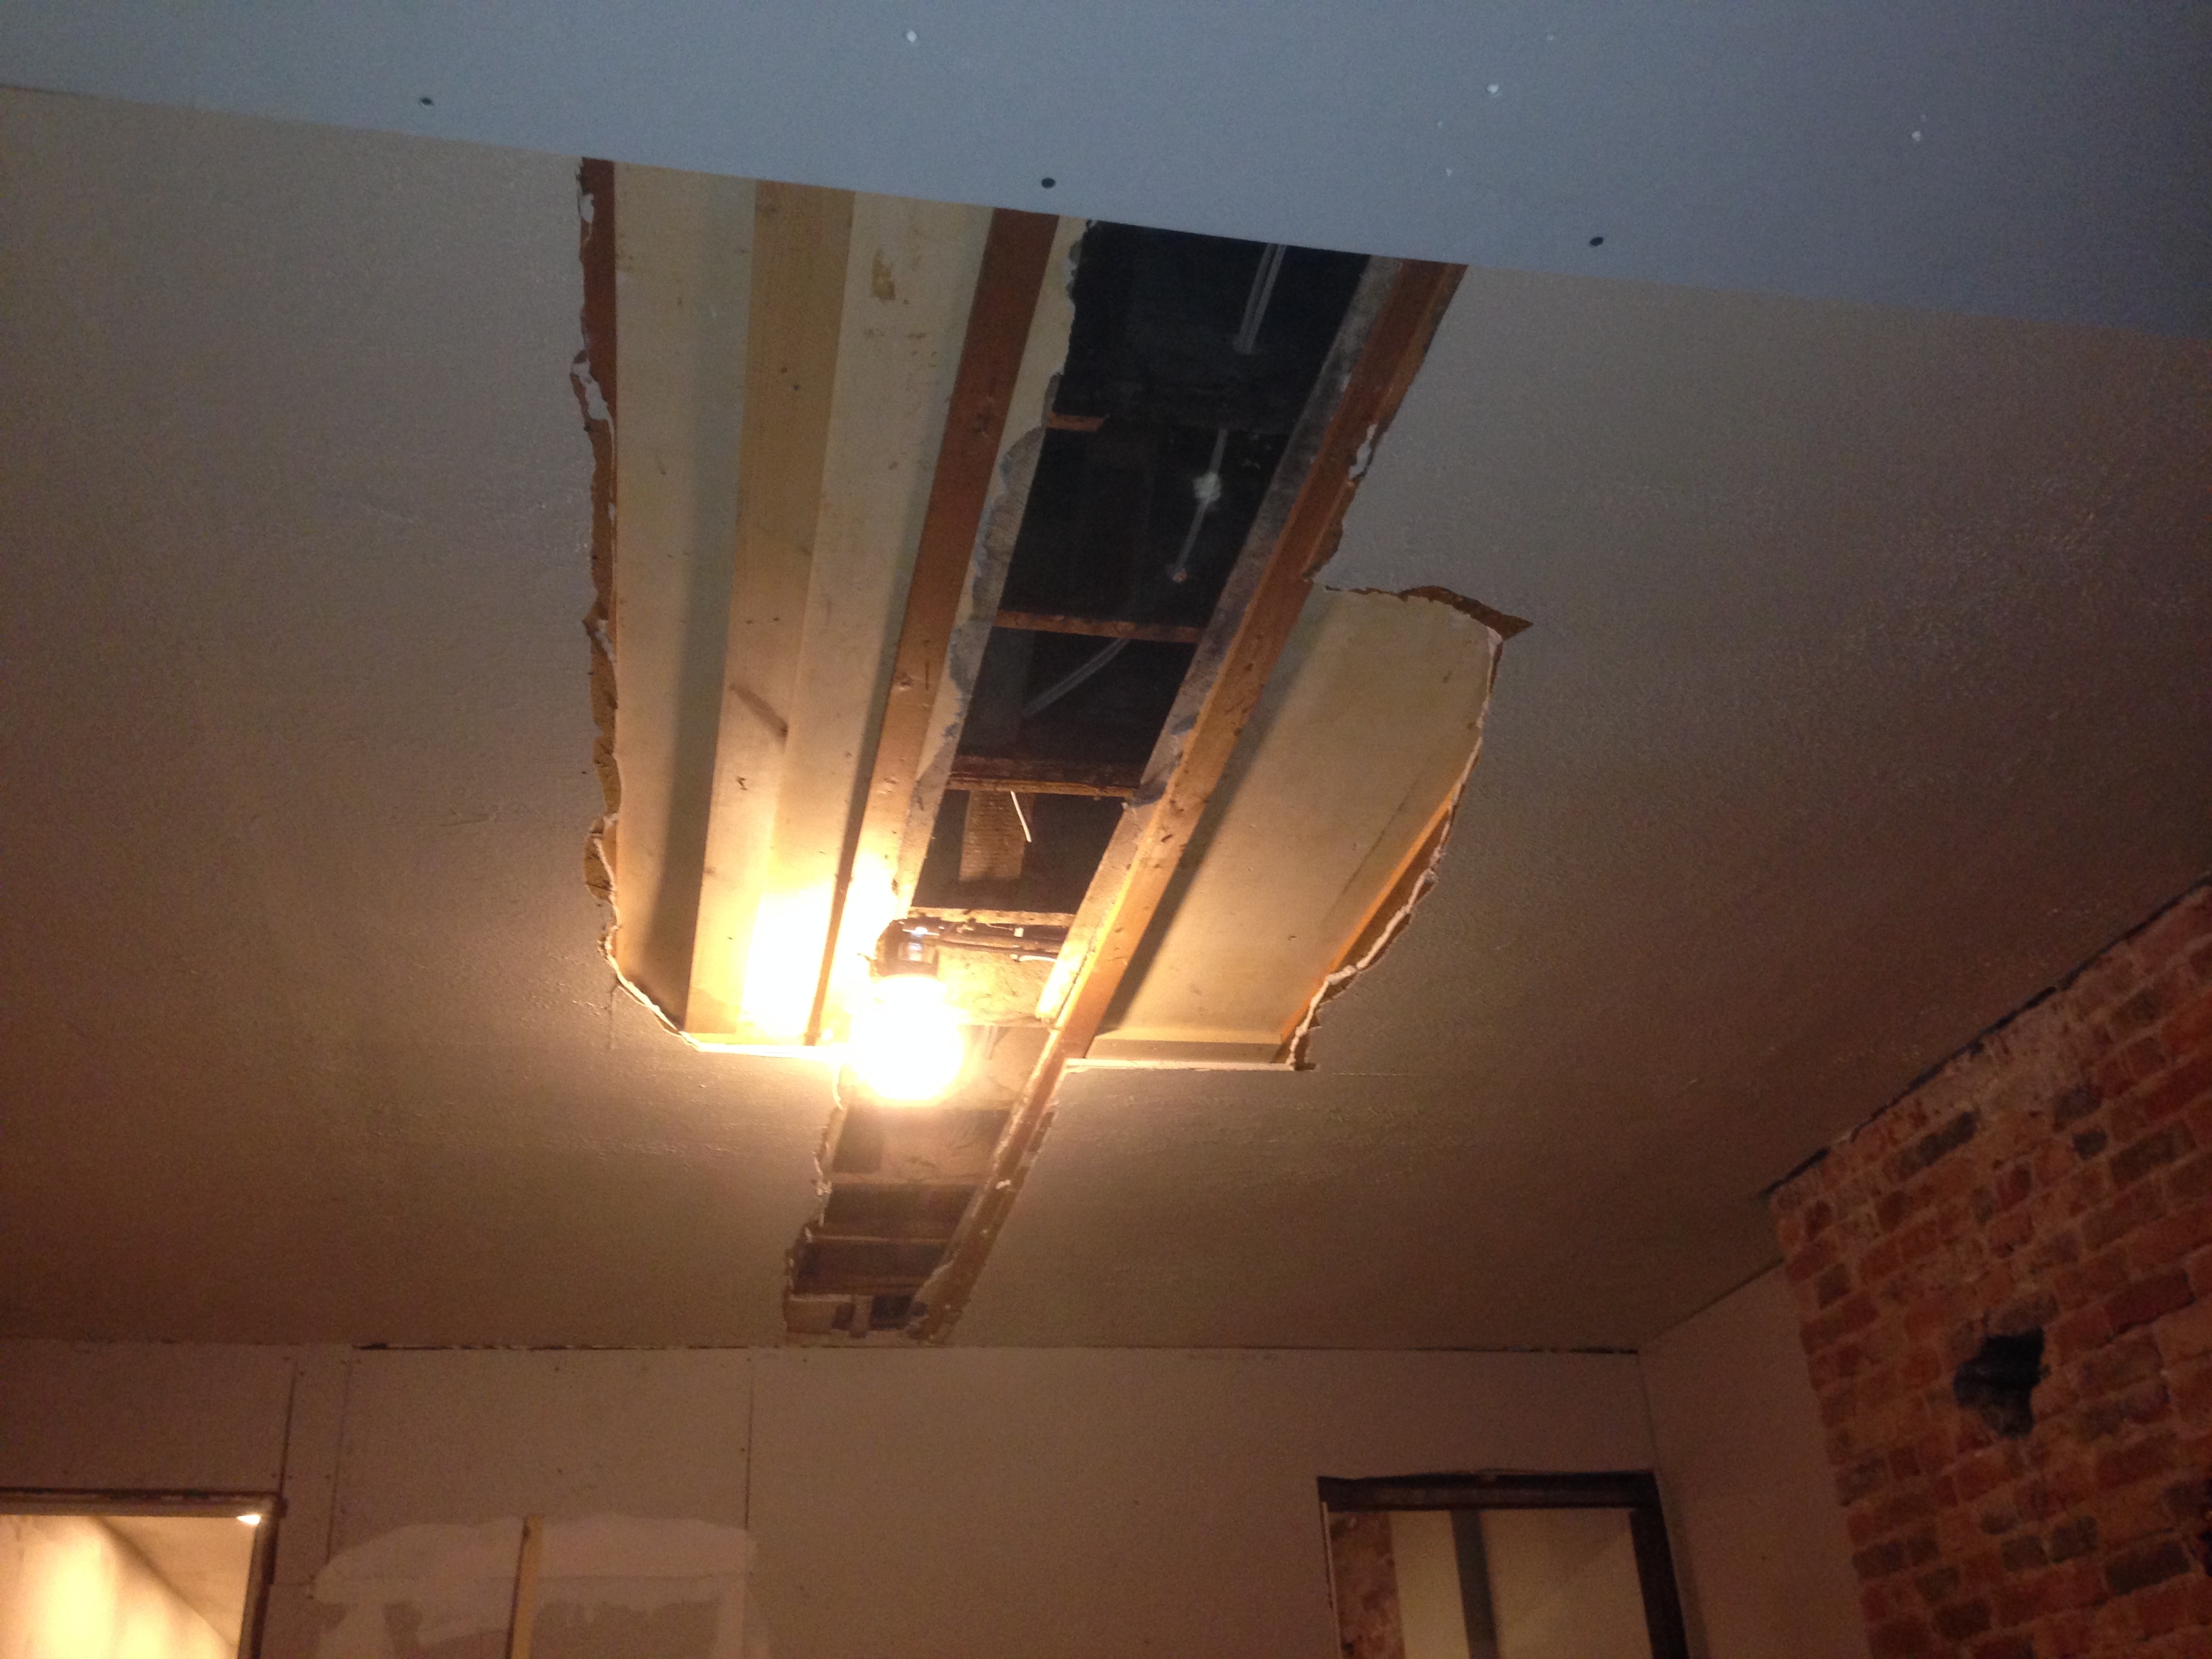
What to do? Drywall over the entire ceiling? Try to patch it? Cover it somehow? If you’ve ever drywalled a ceiling, you know it is anything but fun, so that was our last choice. And, because the existing ceiling was textured, it would have been challenging to try to patch the hole and then recreate the same texture.
So, weighing heavily the time/effort factors, we landed on option C: cover it up. We put up some of our drywall scraps up to cover the hole, and started our search for our new ceiling.

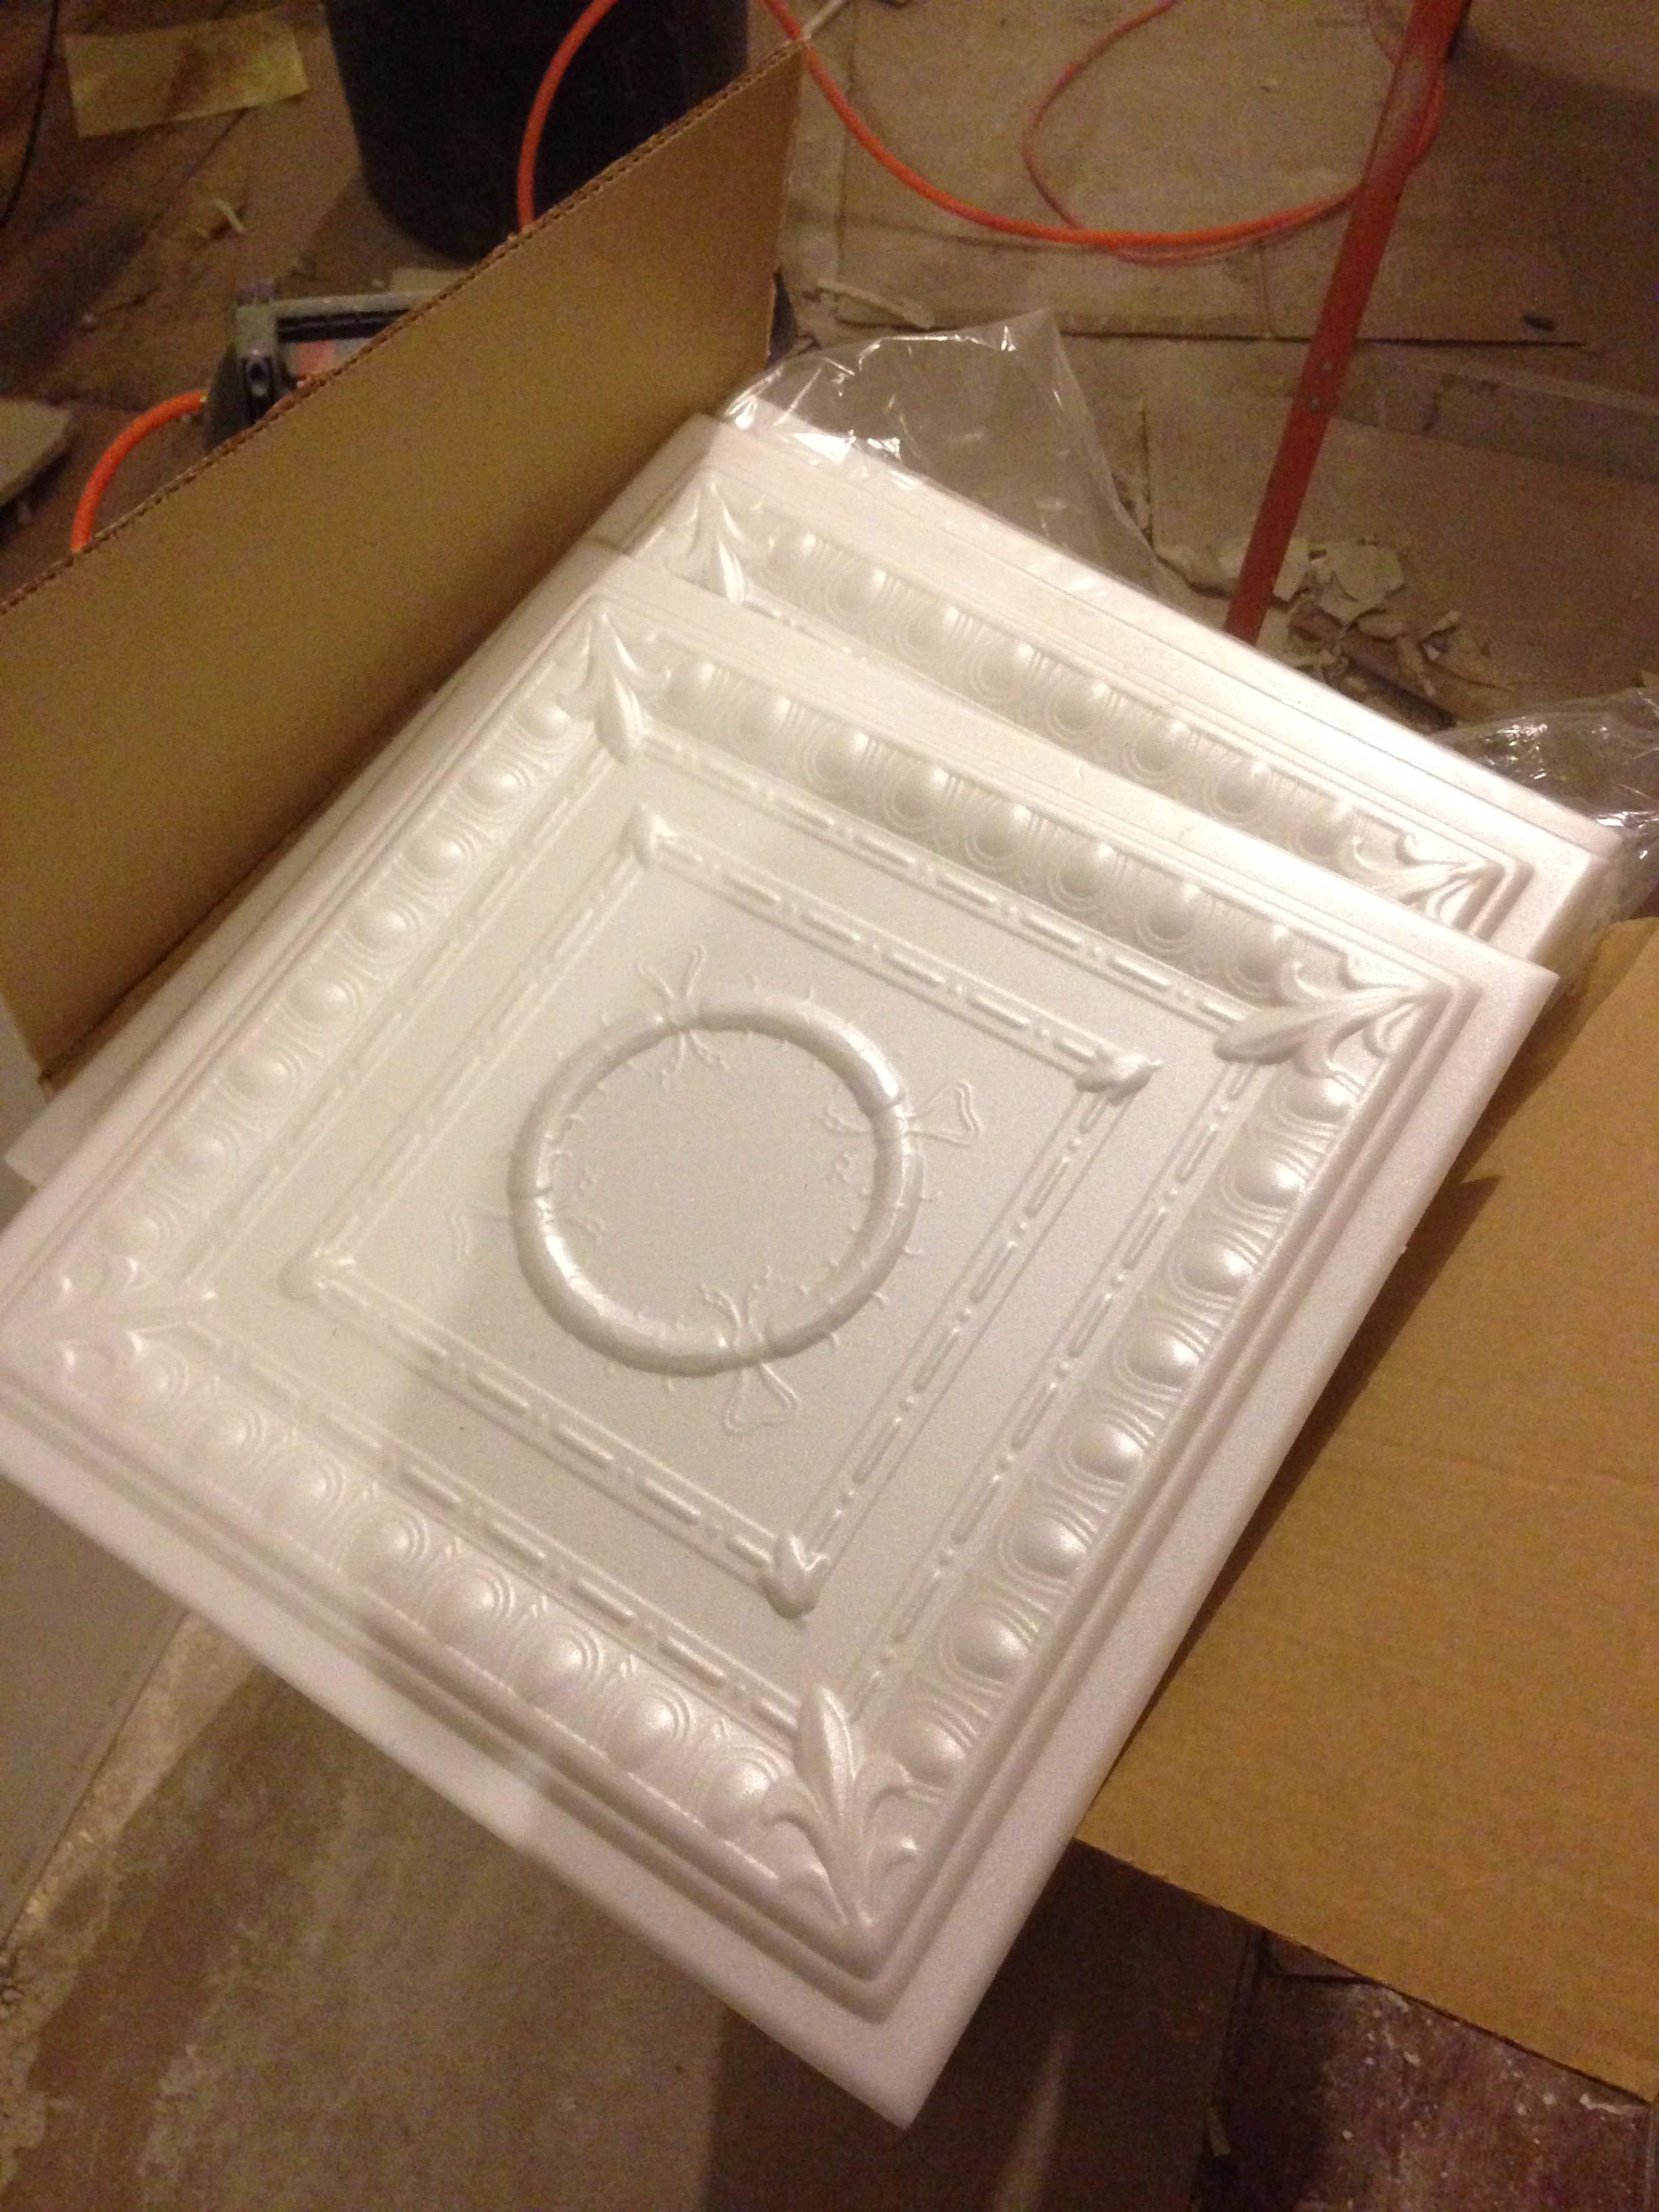
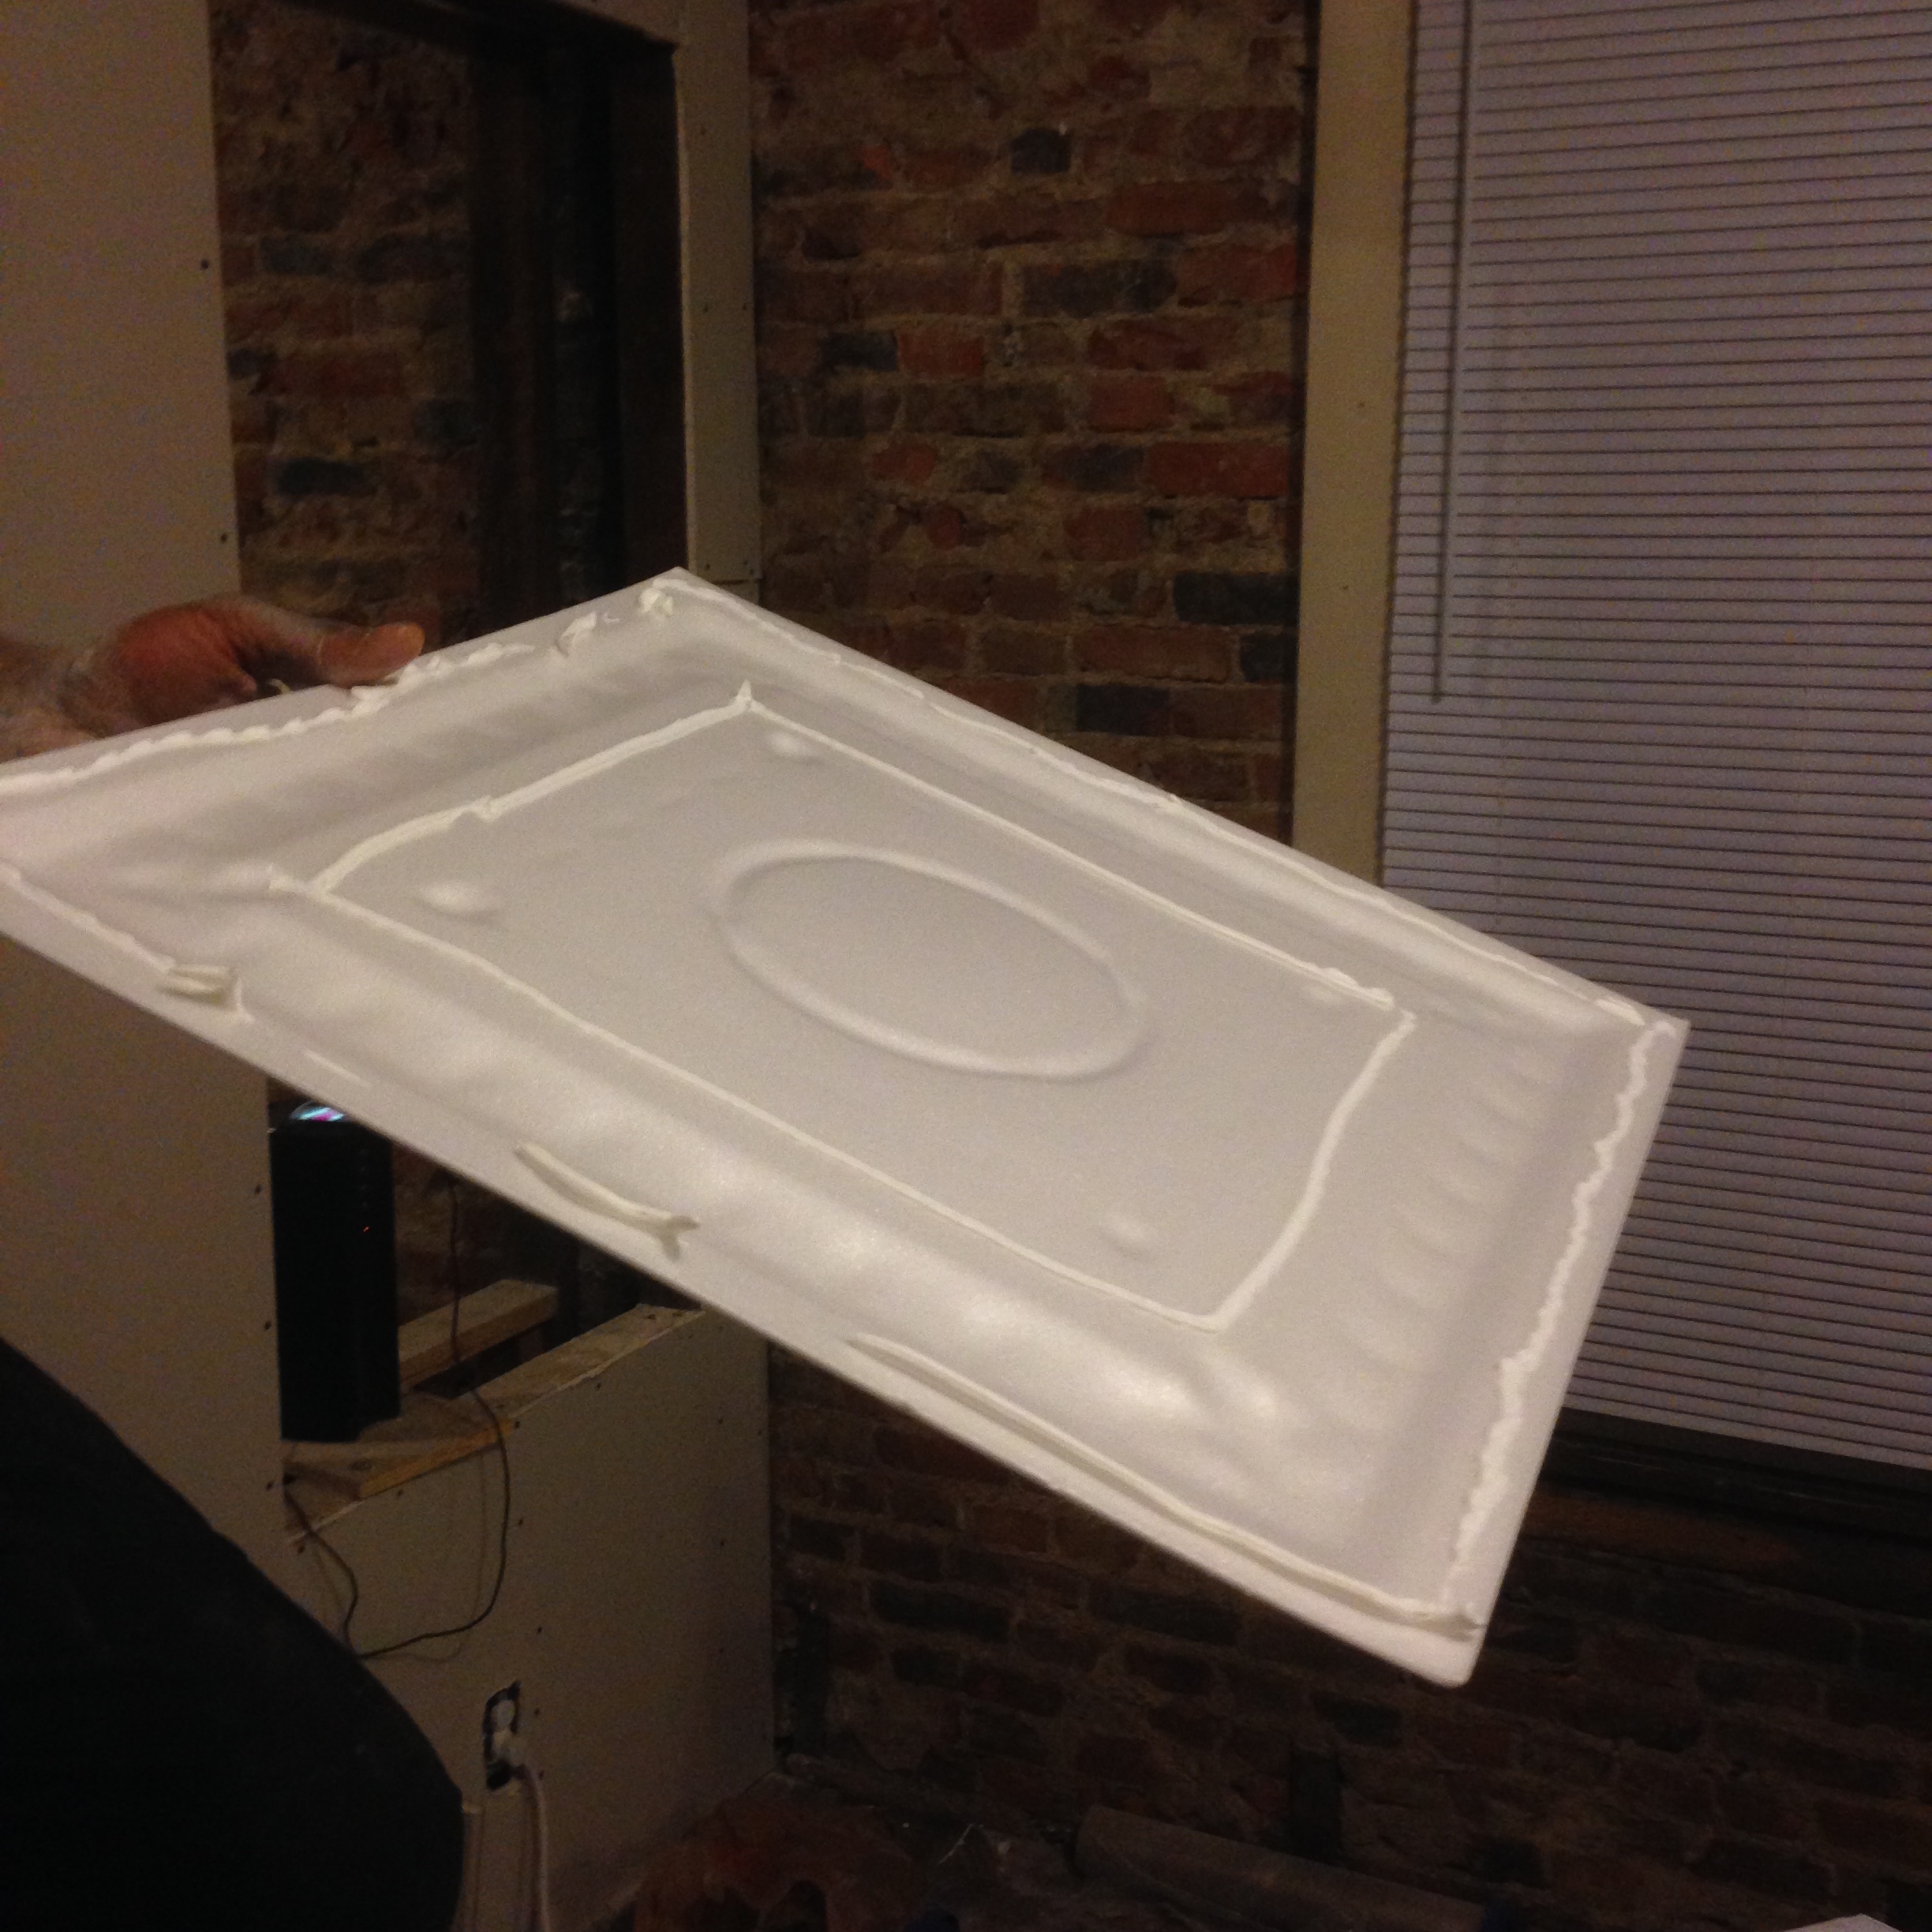
In poking around online, I came across these decorative foam ceiling tiles on Amazon.
It was a great discovery- I had no idea that foam ceiling tiles existed! They were pretty reasonable considering the fact that they were going to save us hours and hours of work, and hopefully look pretty awesome.

The size of each tile is 20″ x 20″, or 2.78 sq ft. Since our living room and dining room are roughly 14′ x 14′ each, I figured we would need about 71 tiles per room (14×14 = 196 / 2.78 = 70.50). I always tack on extra for scrap, so ordering two boxes of 40 for each room worked perfectly (4 boxes total). The first two were priced at $88 per box ($176 total), but by the time I bought the second two, the price had gone up to $100 per box of 40 ($200 total). Should have ordered them all in the beginning! Oh well. We have about 10 tiles left over, which may be good in case one of them gets damaged down the line.
PS, they also sell these tiles individually if you have a smaller space to work with. They seem to be $2.50-$3.00 each. Here’s the link: Ancona White (Foam) Ceiling Tile – Decorative Ceiling Tile (single tile) The catch is that the shipping seems to be the same whether you order 1 or 40!
Anyway, I wasn’t sure what to expect when ordering them – how thick they would be, how heavy, etc. When I got the box in the mail, I was pleasantly surprised. They were super thin and lightweight, but appeared to be sturdy and realistic.

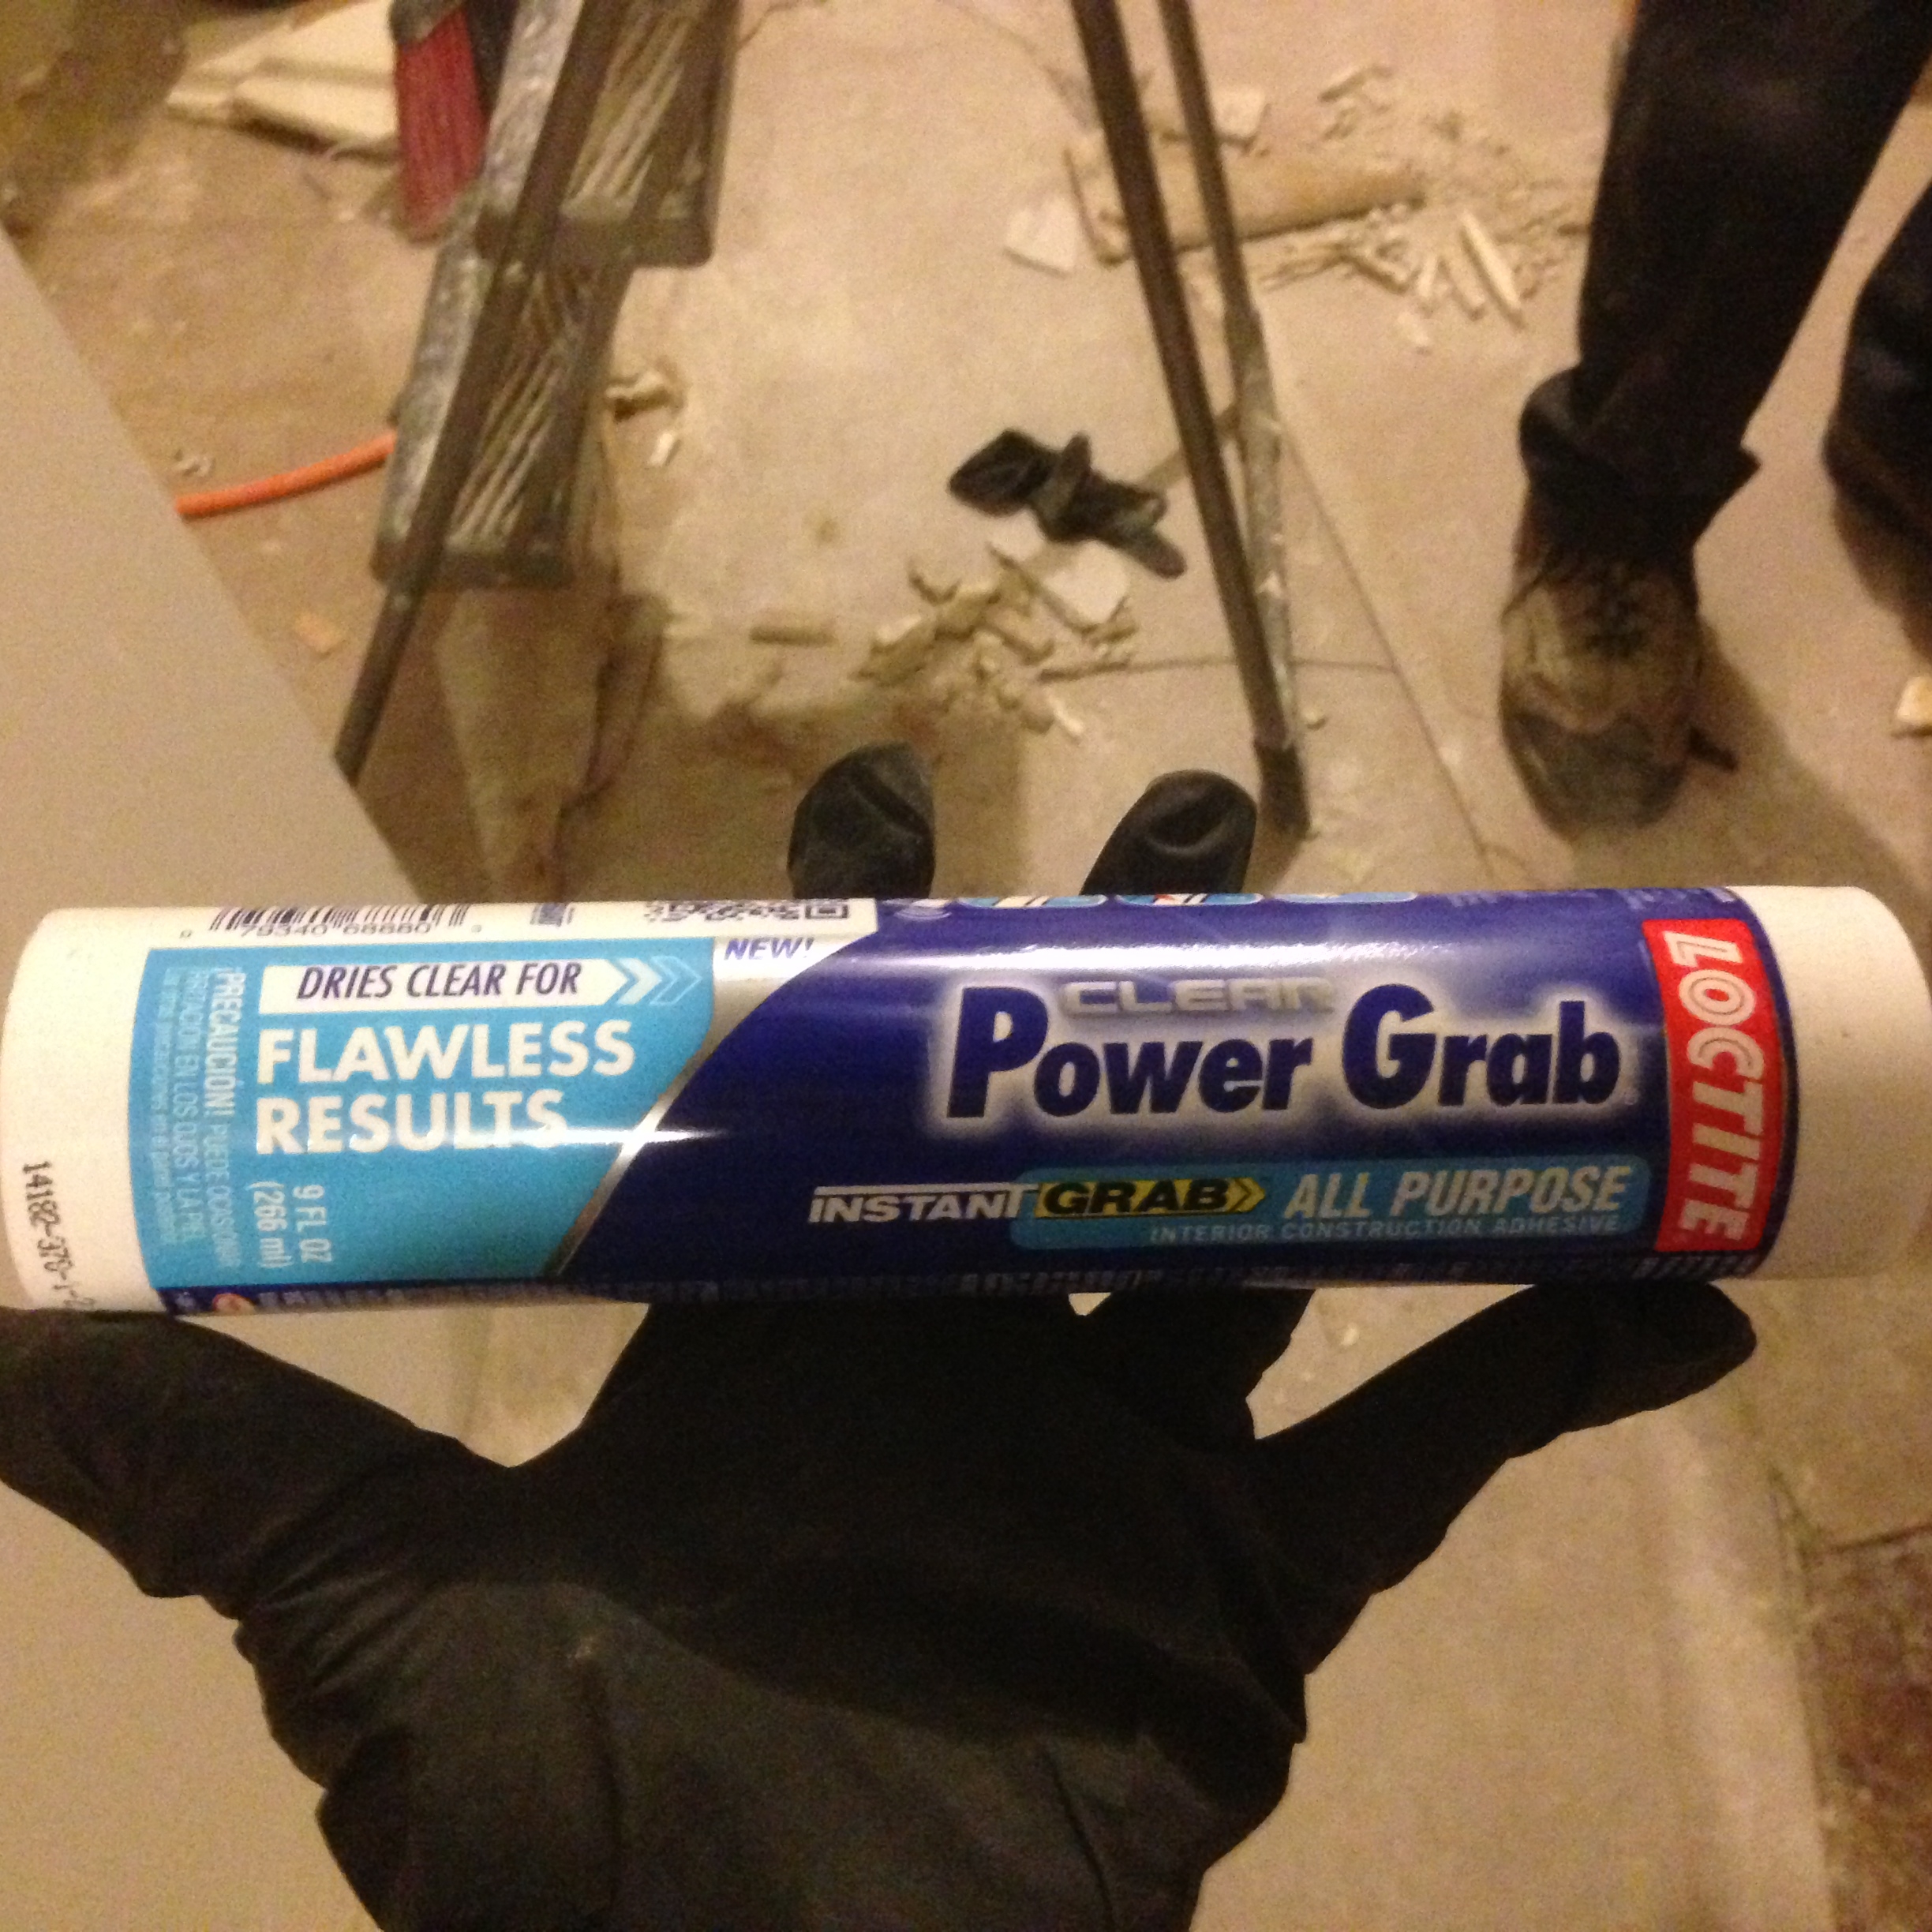
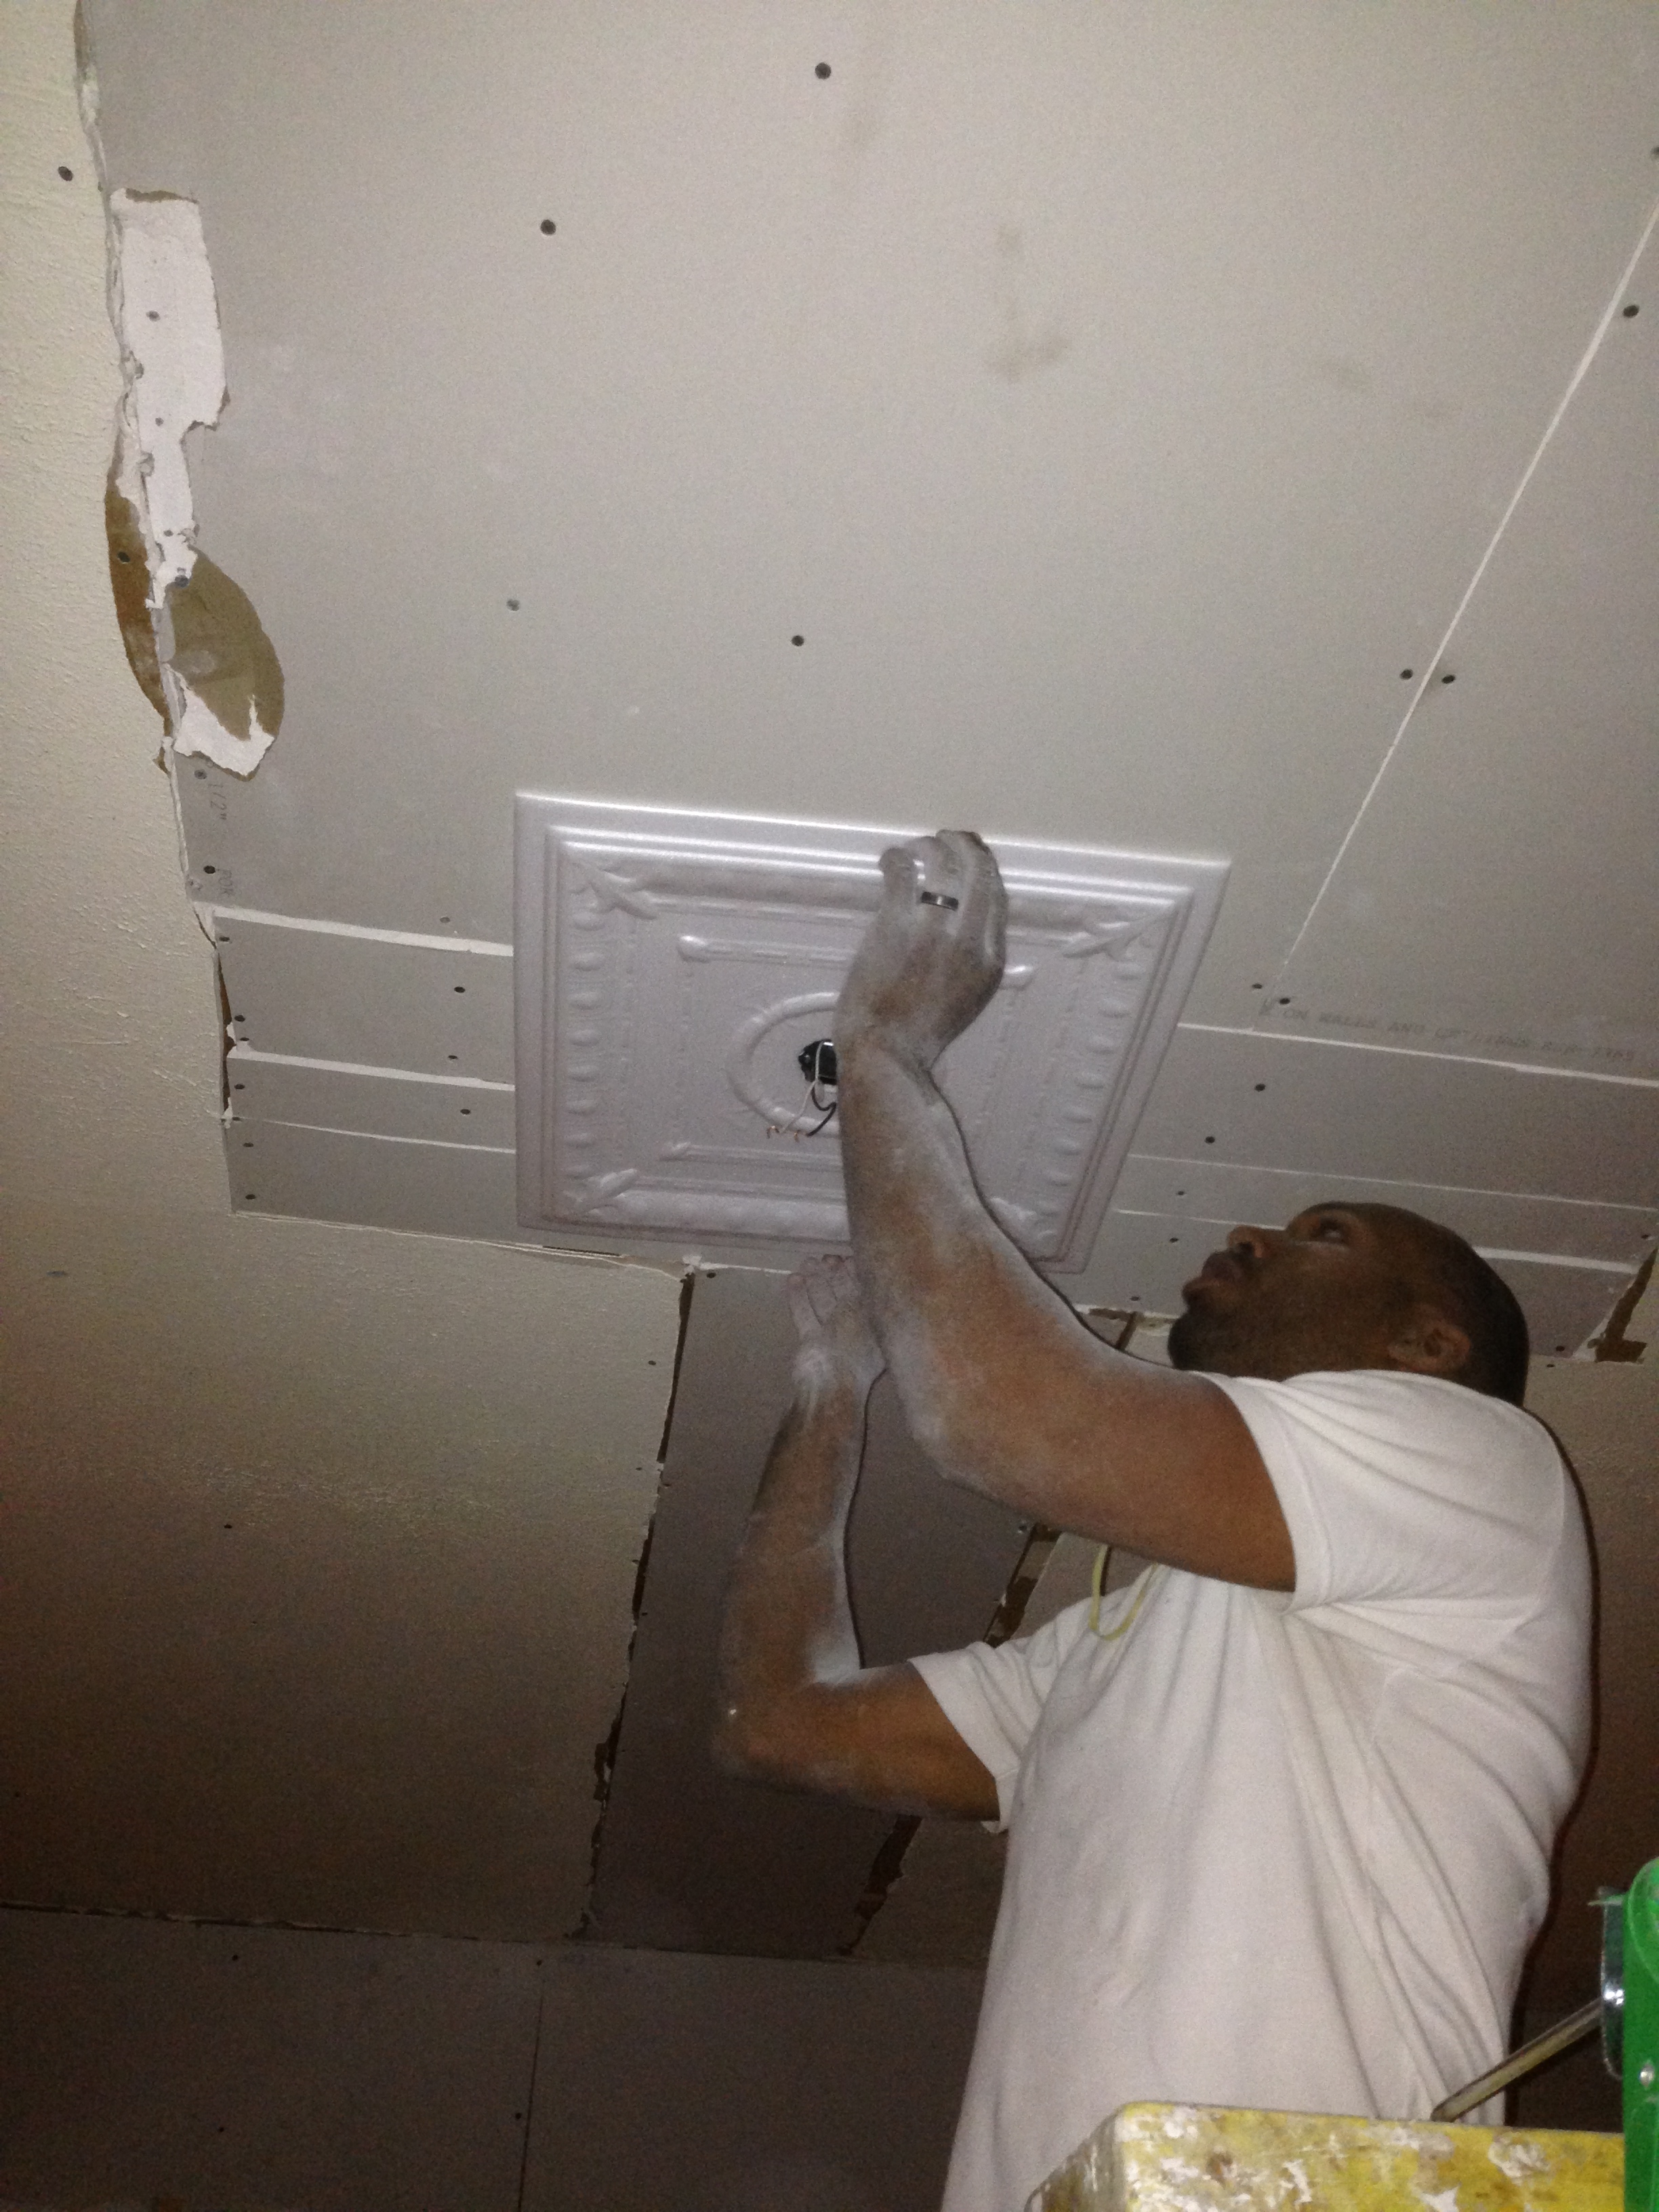
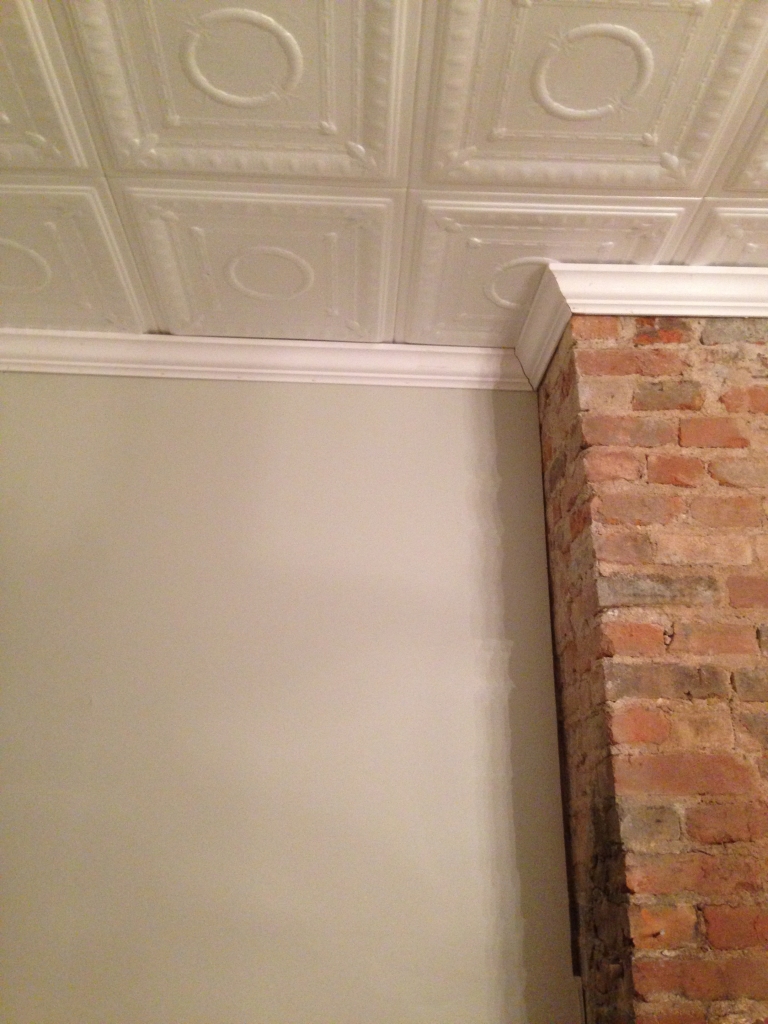
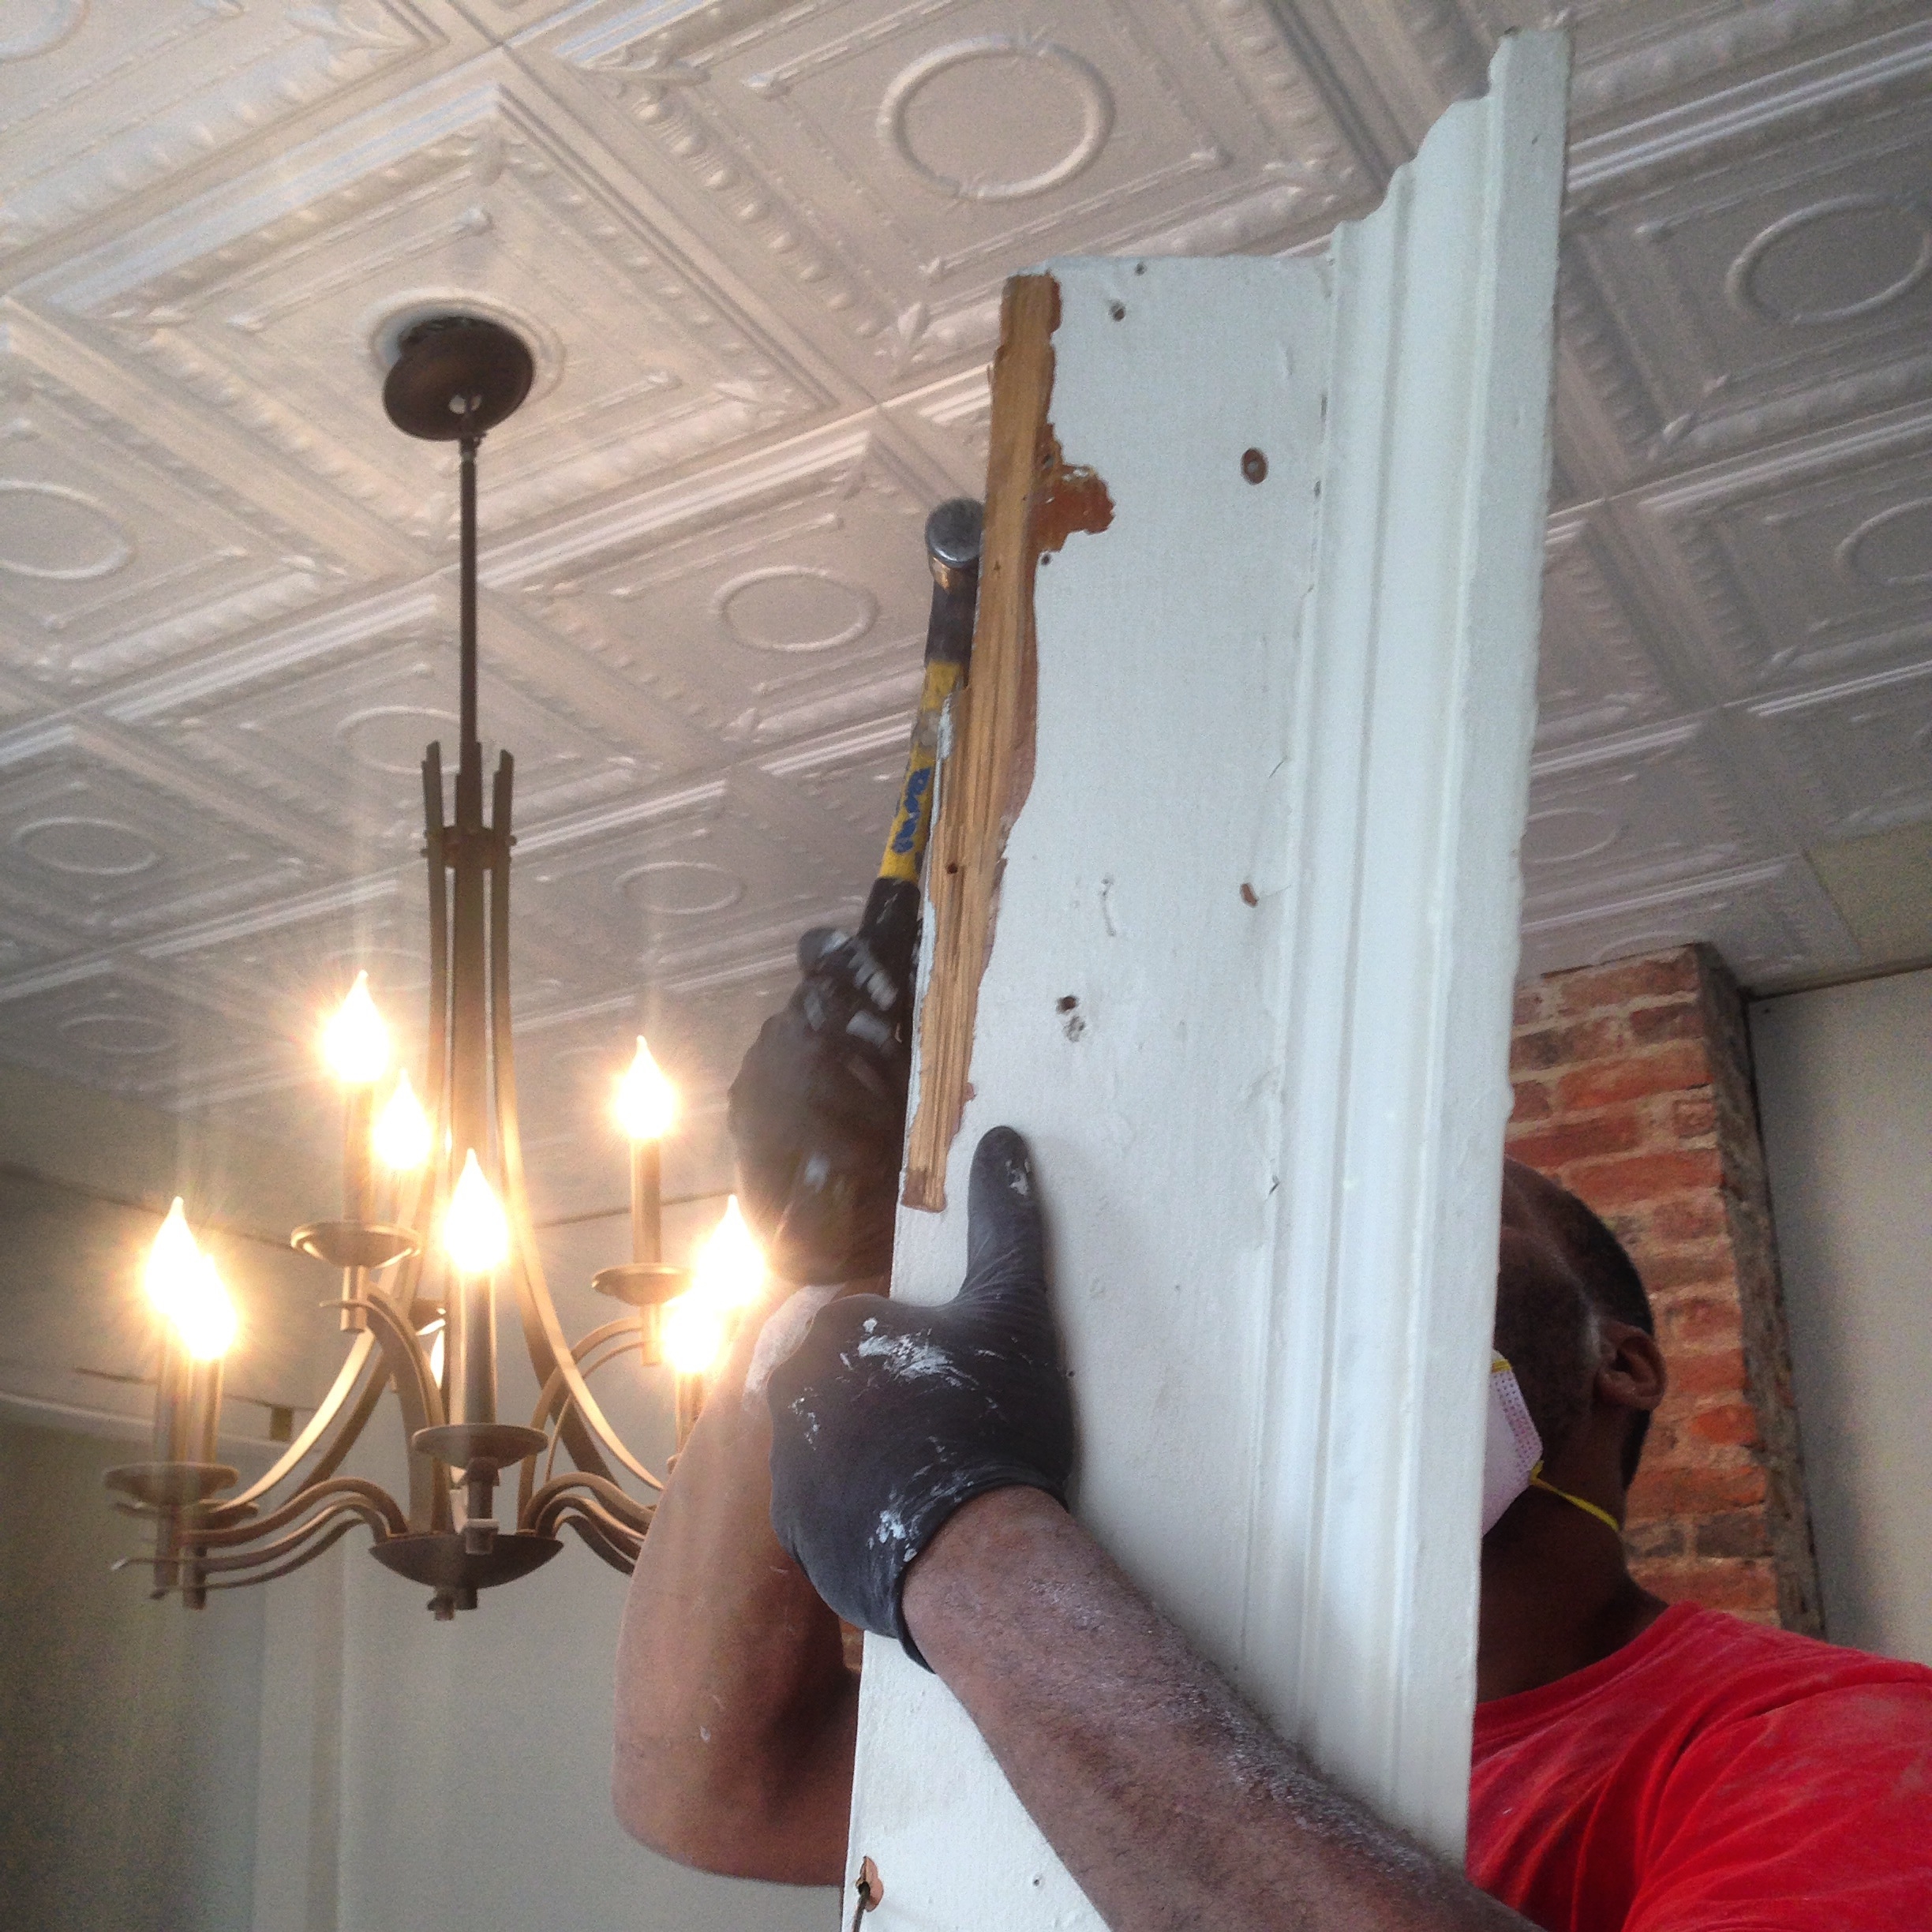
These tiles were so easy to work with. All we did was put adhesive on the back of each one and pressed it onto the ceiling. I’ll admit, we didn’t follow the instructions on how to ensure the tiles stay square with the wall, but it turned out fine. We started with one square in the middle where our light fixture was, and cut a hole out inside the circle, which actually lined up perfectly with the pattern of the tile. We used standard scissors to cut the tiles as needed.


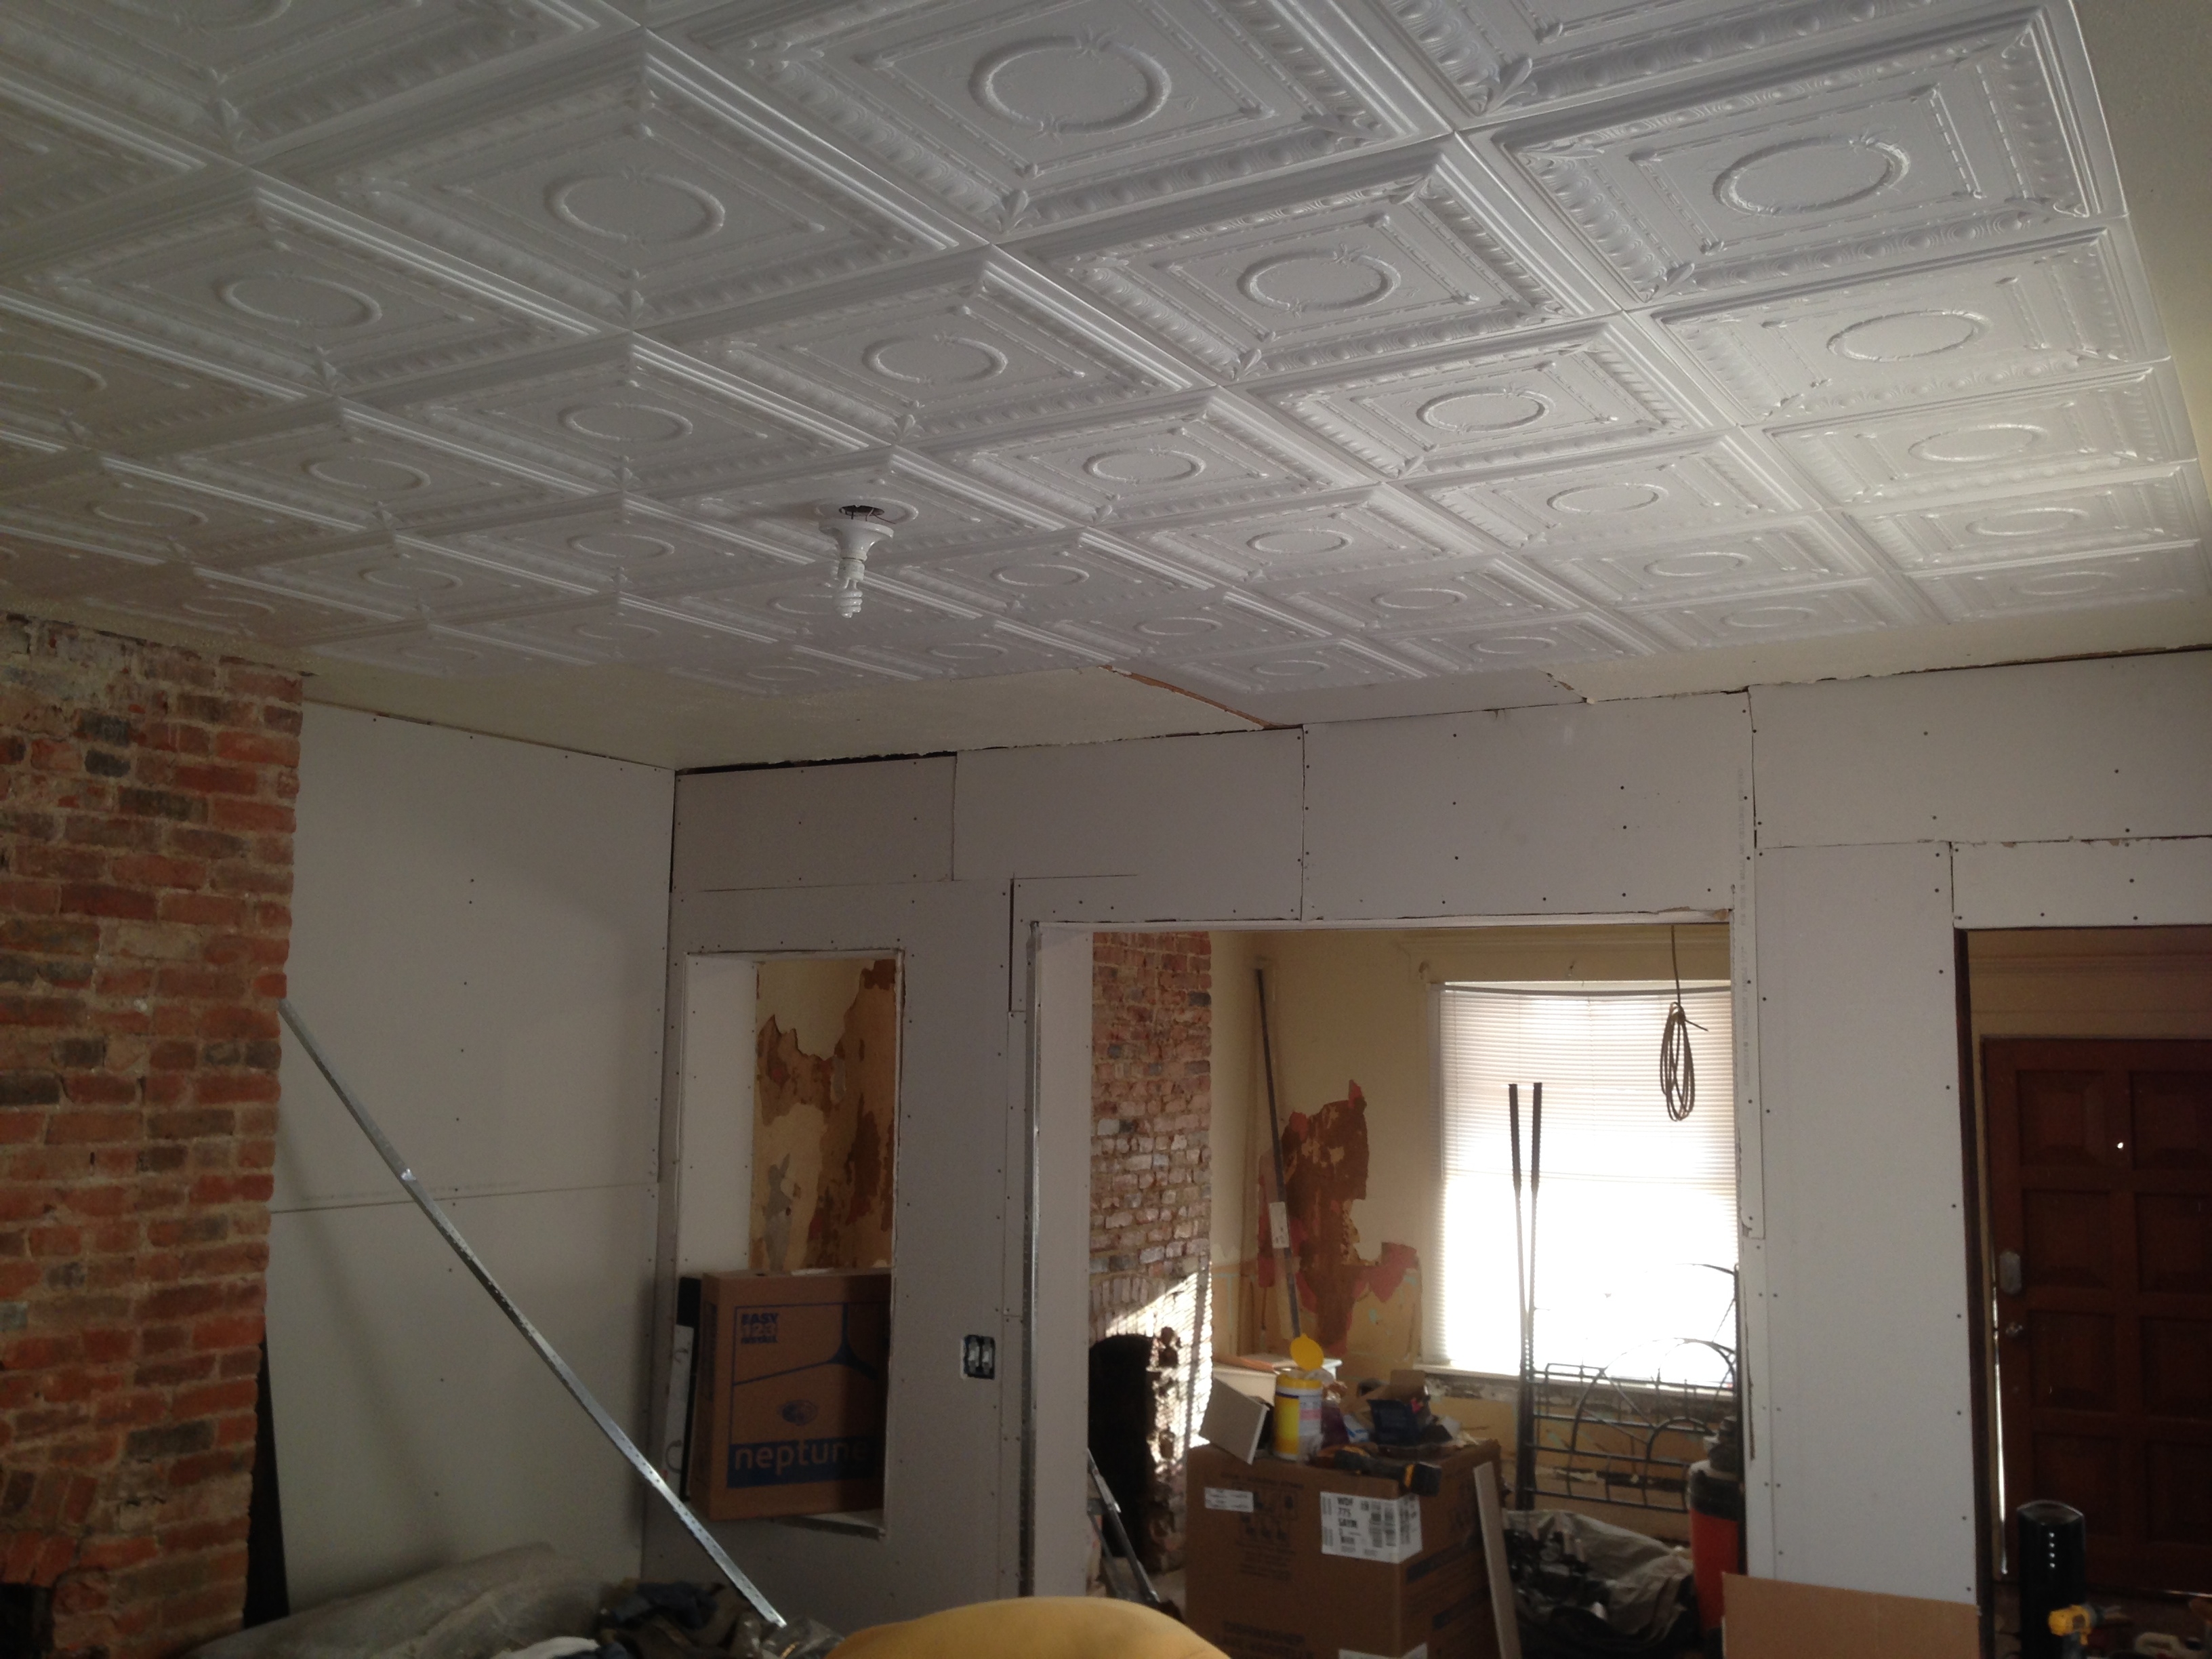
How fantastic does it look?! It adds so much character to both rooms. Everyone who has come into the room is shocked when we tell them it’s made of foam.
We finished off the ceiling with some crown molding, which we found at Lowe’s for $9 per 16 ft piece. This one particular kind was way cheaper than the rest, but it got the job done!
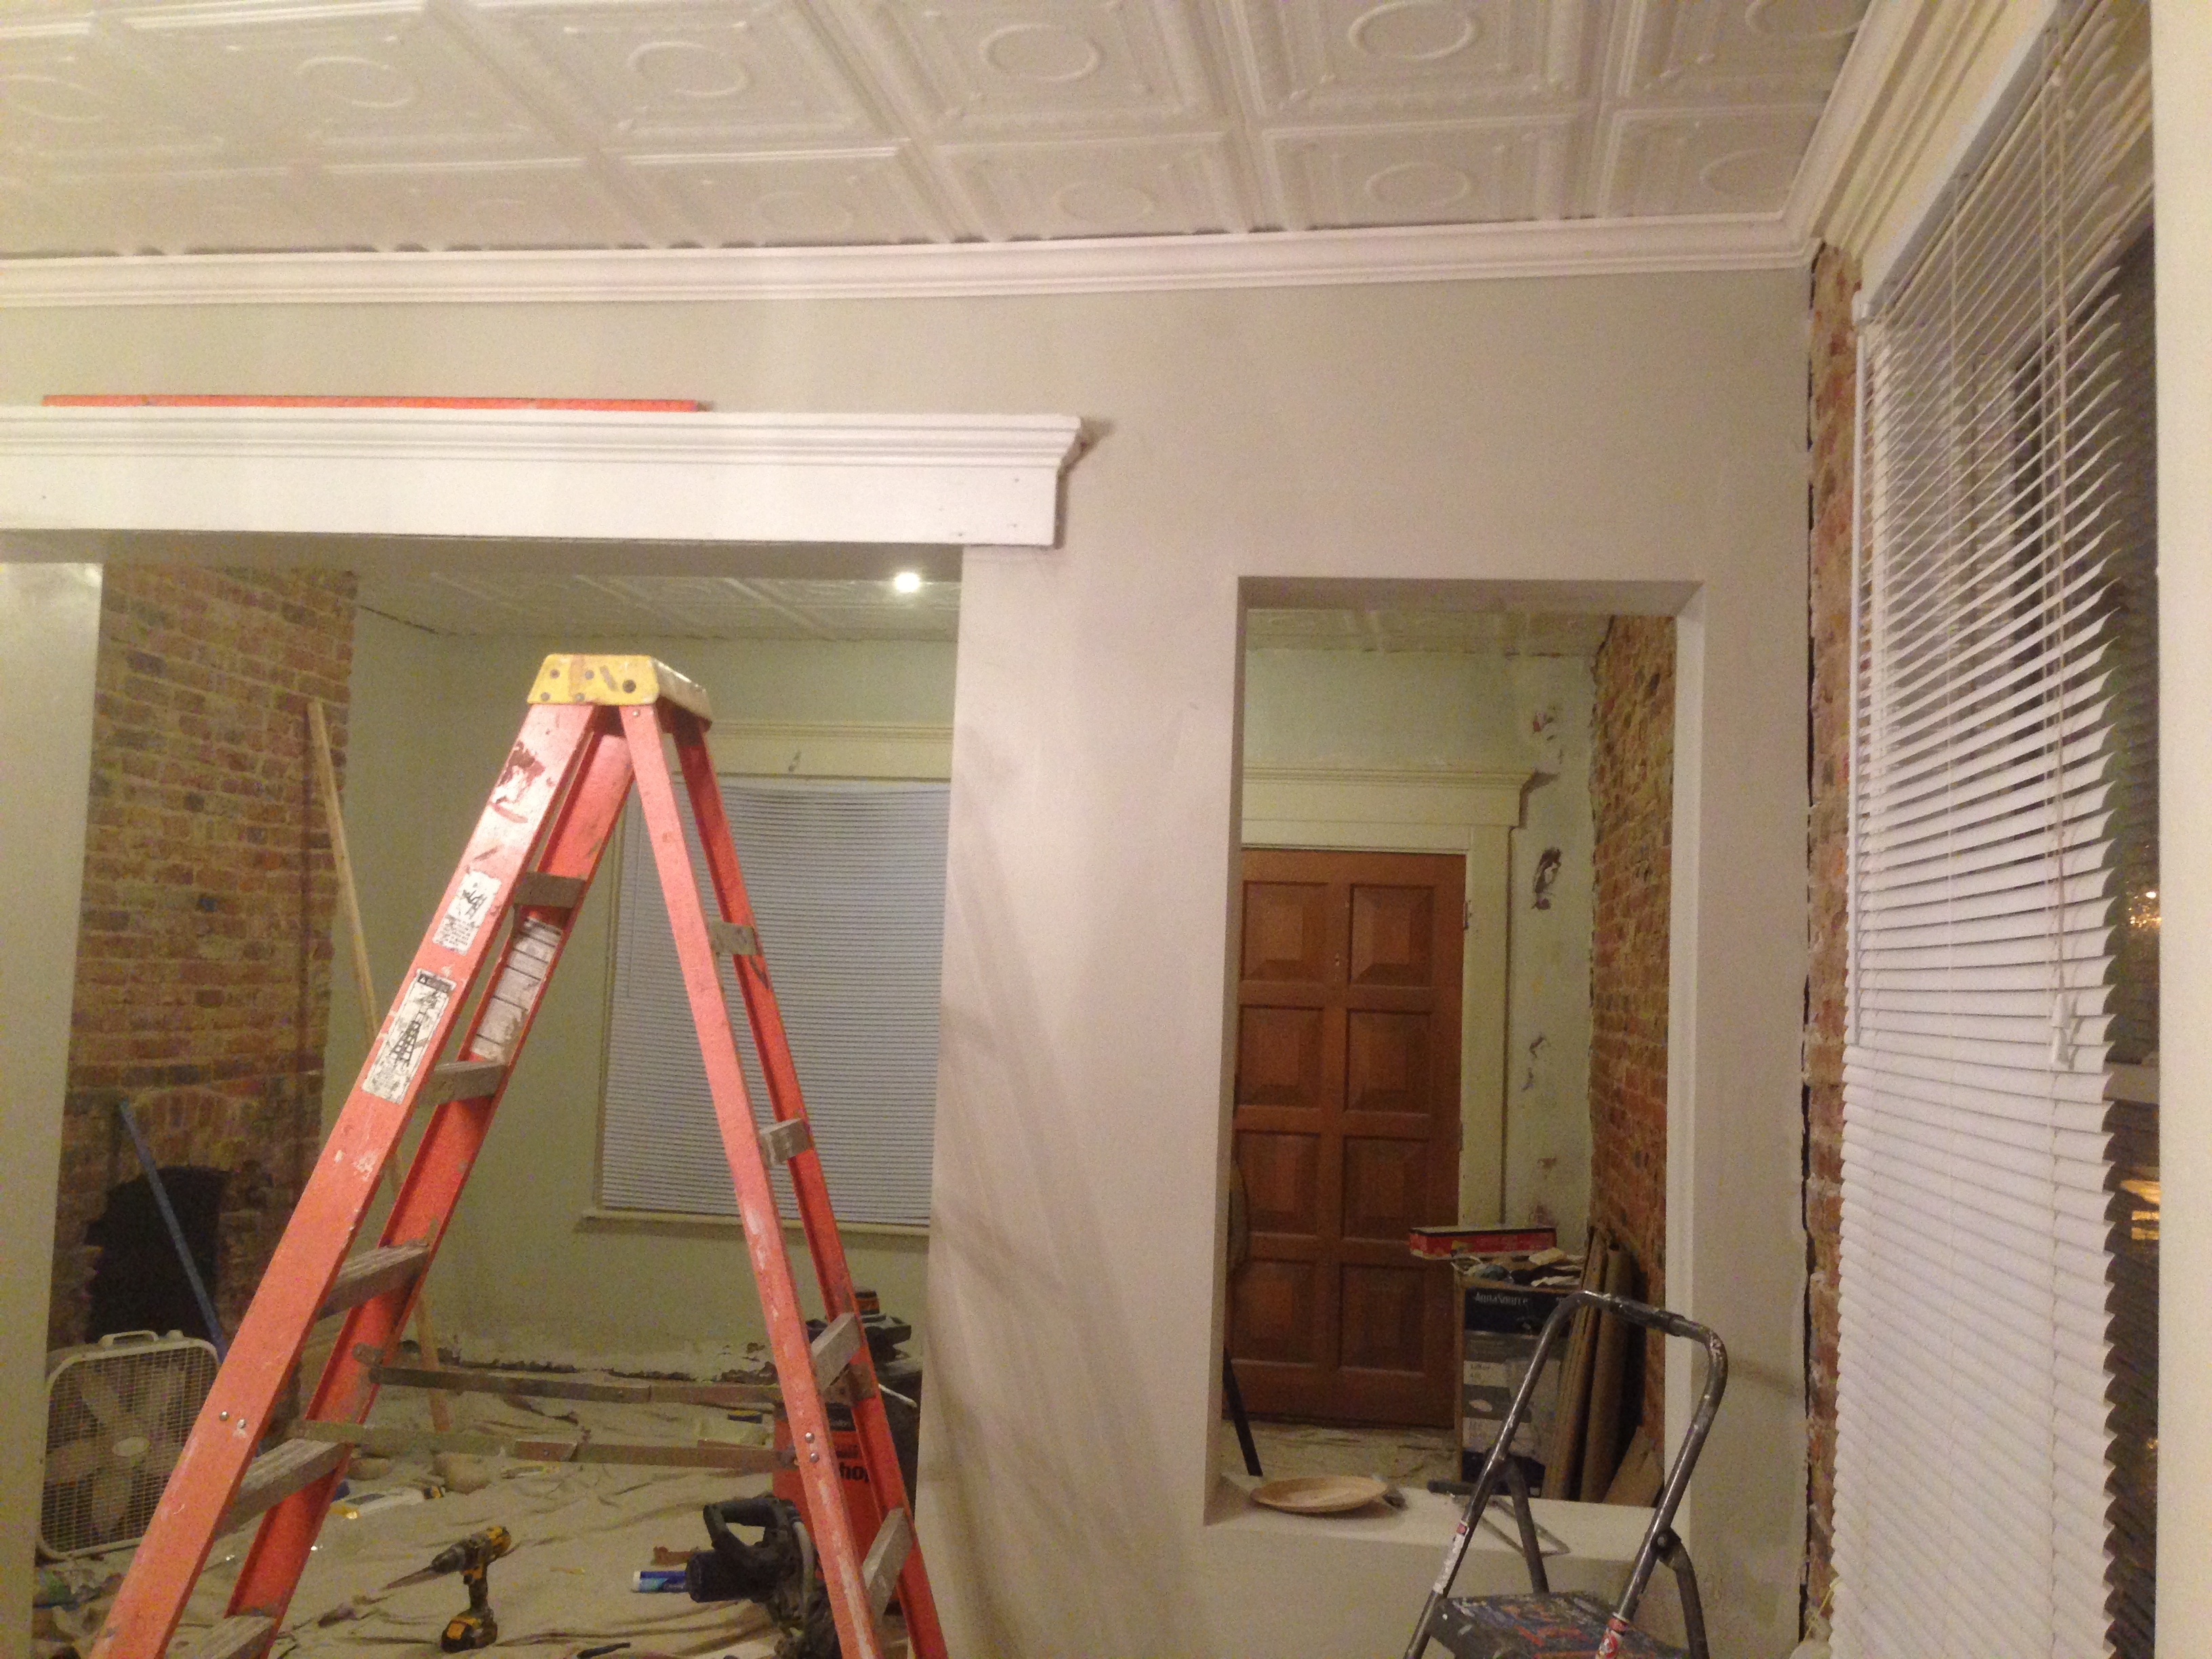
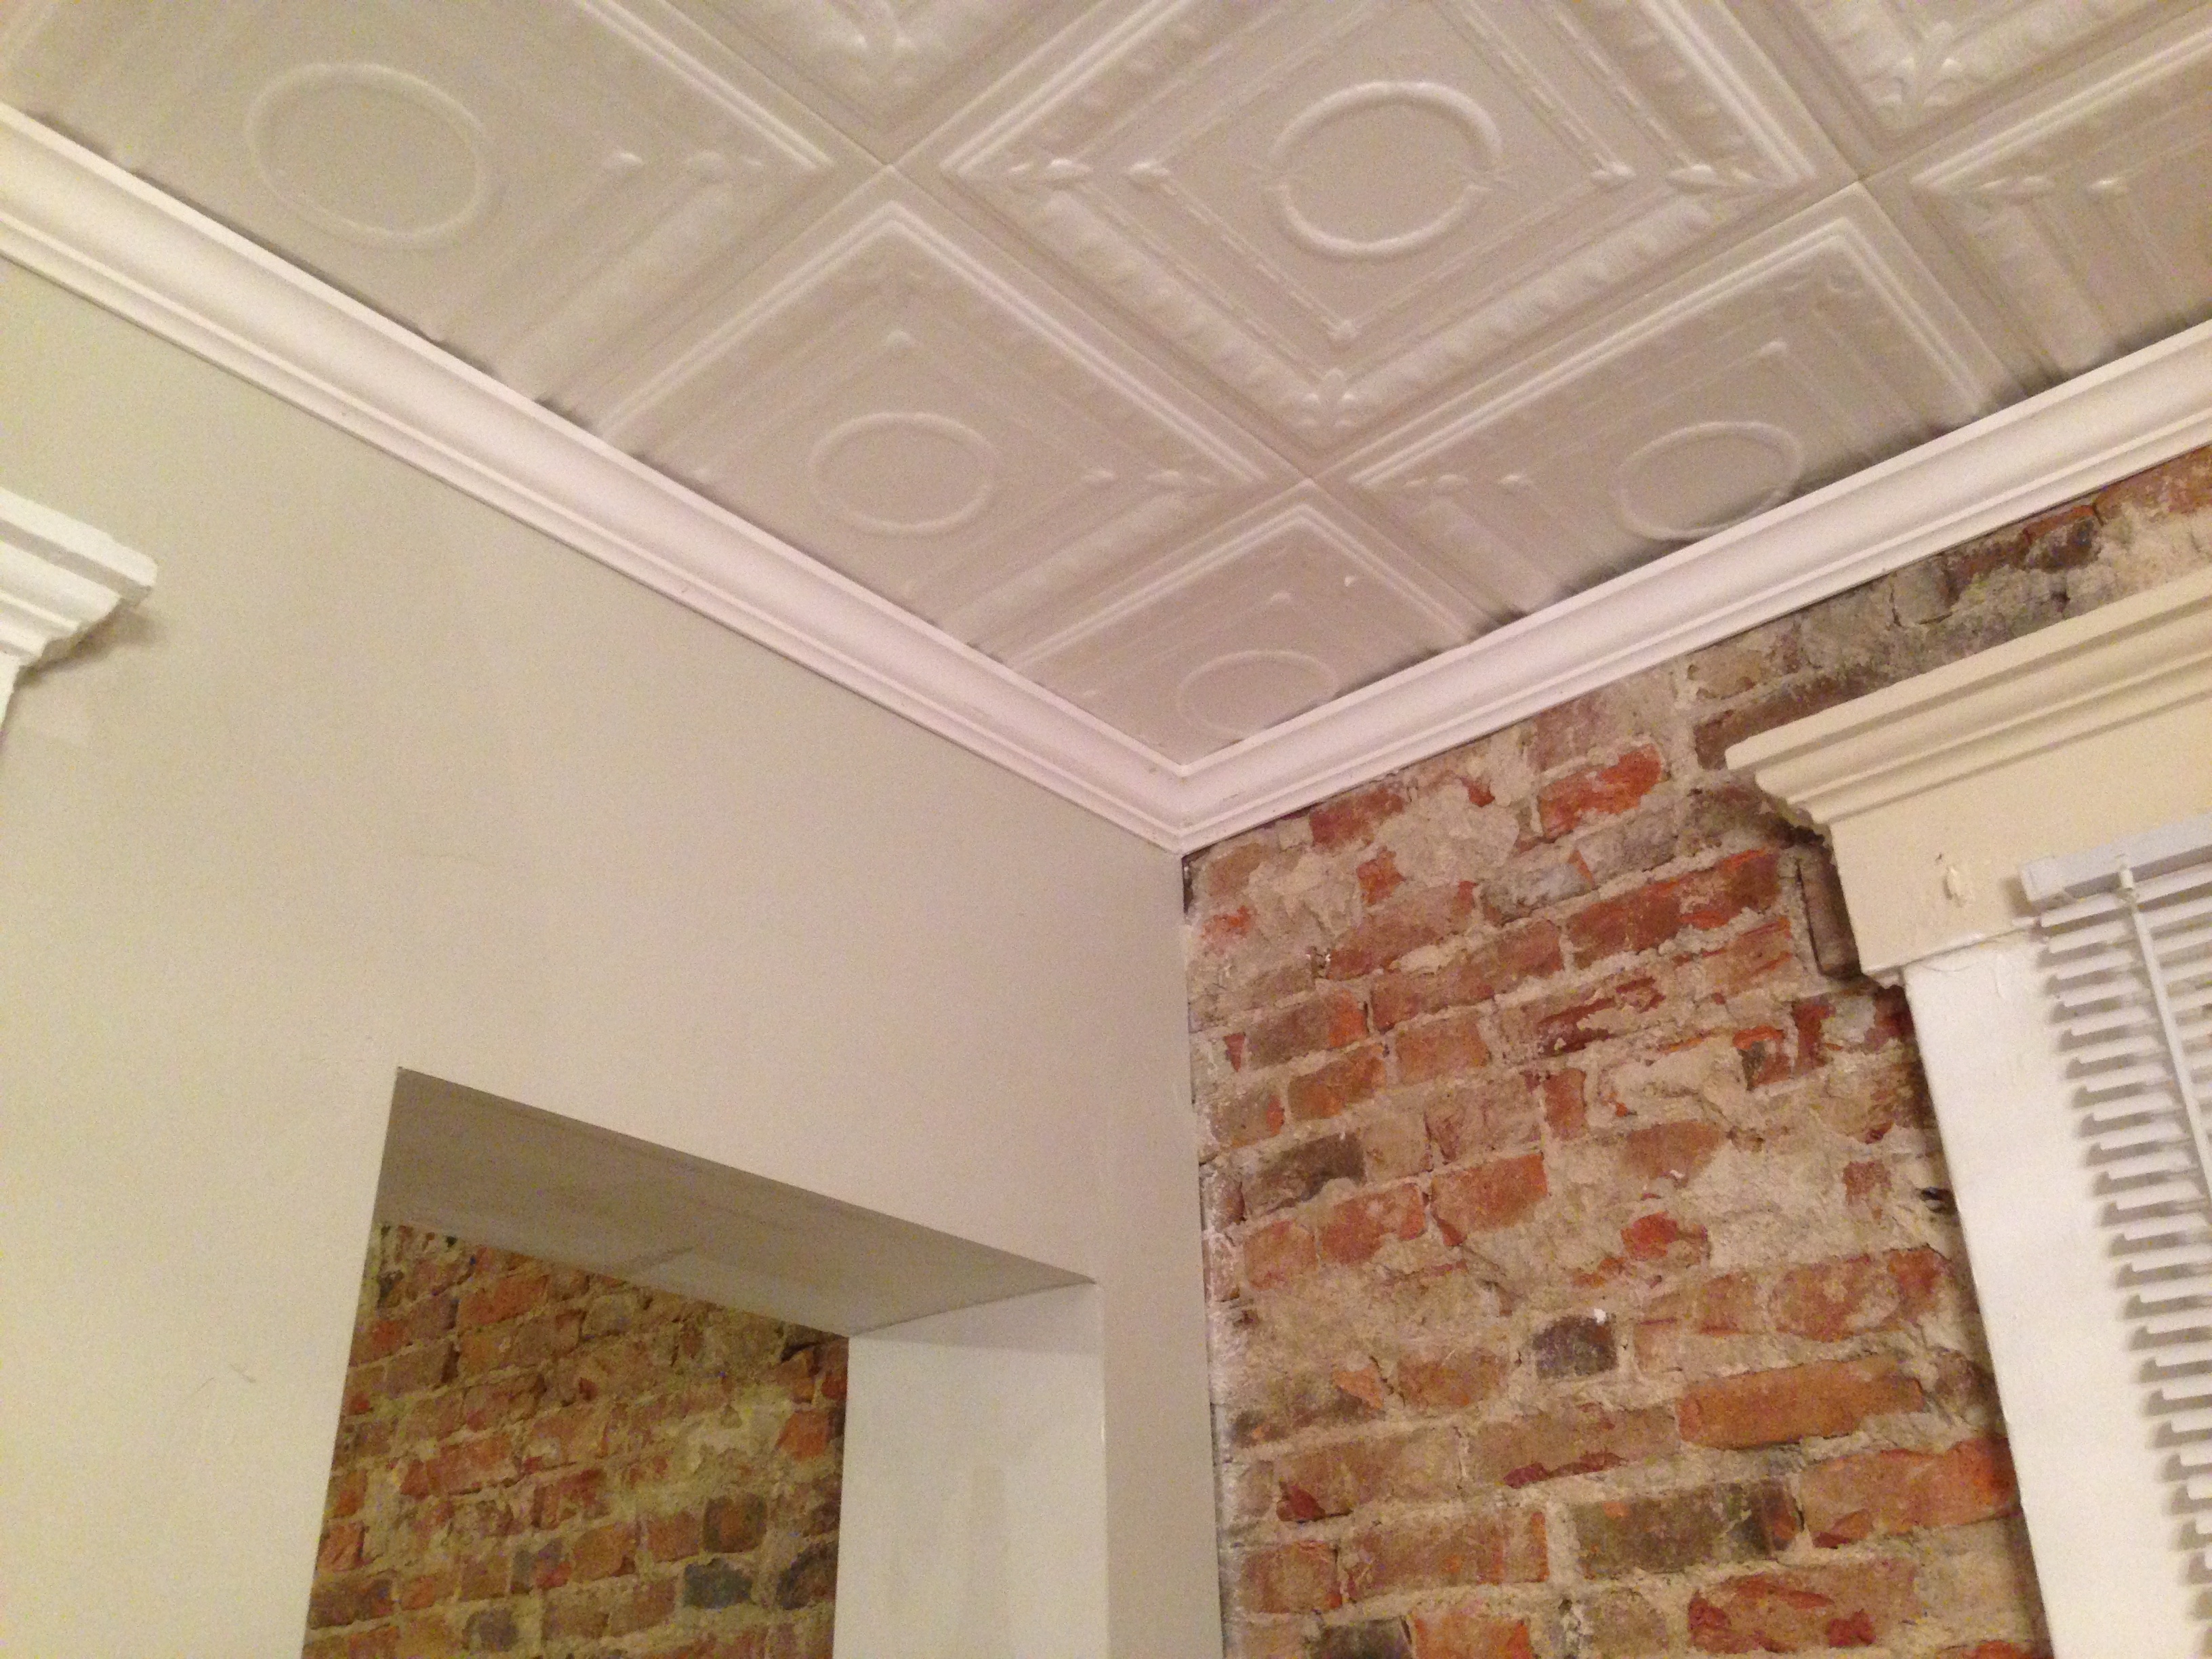
We also painted all the walls, and started putting the trim back up. During our demo process, we were able to salvage most of the original baseboards and molding above the windows and doors, which saved us a ton of money.
This weekend, after eating lots of turkey and mashed potatoes, we’re hoping to uncover our floors and take our furniture out of storage. And maybe, just maybe, we’ll be able to start decorating for Christmas!
To see our full before & after tour of this home, click here. And be sure to follow us on Instagram @beginninginthemiddle!


wow the ceiling and trim looks fantastic thanks for sharing xx
Thanks Chris!
Wonder if you can paint them?
They are paintable!
THANK YOU!!!!!! This is actually an answer to prayer! My ceilings are strained and I was going to try and wallpaper them…. I want to stress TRY… this is so much better and I’m sure easier! I don’t want to appear overly dramatic but you just have no idea how excited I am! Thank you and have a very Merry Christmas I feel as though you just gave a gift to me!
Melody- thank you so much for your kind words! I’m so, so happy this came at the perfect time for you! I’m tellin ya, you wont be disapppinted. They’re so easy to work with and honestly look so realistic. Good luck!! Merry Christmas 🙂
Can I use them over my popcorn ceiling?
Mary – yes you can! The product description mentions that you can just glue them up right on top of popcorn ceilings without having to do any prep work.
THANKS FOR SHARING THIS ABOUT THE CEILING!!! My house was built in 1939 and everything is lathe and plaster. At some point in time the living room and dining room ceilings were covered up with some kind of cellulose tiles. They used paneling adhesive to adhere them to the ceiling. Some of them had fallen down and I have now lived with it like this for 4 years because I haven’t been able to figure out what I could do. This is my answer!!! I love it and I think I will be doing the kitchen too. Thanks again!!!
Toni- Yay! Good luck!
I am in the process of renovating the woodwork shop into an art studio and didn’t know what to do with the ugly ceiling! thanks for sharing. You saved my day:)
That makes me happy, Myka! Good luck!
Great job! What’s the price on these and where did you order them?
Hi Carol – we paid $88 for each of the first two batches of 40 ($176), and $100 for each of the second two batches of 40 ($200). It seems that the seller, Antique Ceilings, changes their prices periodically. We purchased them through Amazon because the shipping costs seemed to be better than purchasing directly through the company’s site. If you scroll up a bit in the post, I have a link to the exact ones we purchased (click on the photo of the tile with the yellow background, 4th photo from the top of the post). Hope this helps!
[…] For details on how we did our faux tin ceiling, click here. […]