

This post is sponsored by Lowe’s Home Improvement.
Guysssss. It’s a very, very exciting day! We finished renovating the first space on the other side of our Pearl duplex, which means that we’re one step closer to having it listed as our newest vacation rental this summer. We bought the duplex in May of 2015, moved into one side (#thepearlstproject on Insta) and intended to renovate the other side right away, but decided to take on other projects instead so it sat vacant for a few yrs. Renovating it & renting it out as a vacation rental has been a big part of our business plan from the beginning, and we’re just so excited to be moving in the direction of getting it finished!
kitchen design series recap
Before we jump into before/afters, let’s take a quick walk down memory lane in case you’re new here. Last fall, we partnered with Lowe’s to tackle the first space on the other side of the duplex: the kitchen. Over the course of a few months, we shared our design plans & progress for the kitchen, and also shared a how-to kitchen series with lots of tips & tricks on kitchen design. Our goal for sharing all of this was to help equip you with the knowledge you may need to tackle a kitchen yourself, and hopefully save you from making a few of the mistakes we’ve made in the past. If you missed the series, you can catch up here:
- The Big Before Tour
- How to Plan a Kitchen Layout + Tips for Selecting Appliances That Fit
- How to Select Finishes & Colors to Create a Cohesive Kitchen Design
- How to Create a Lighting Plan That Will Make your Kitchen Shine
- How to Install a Hidden Range Hood
THE “BEFORE”
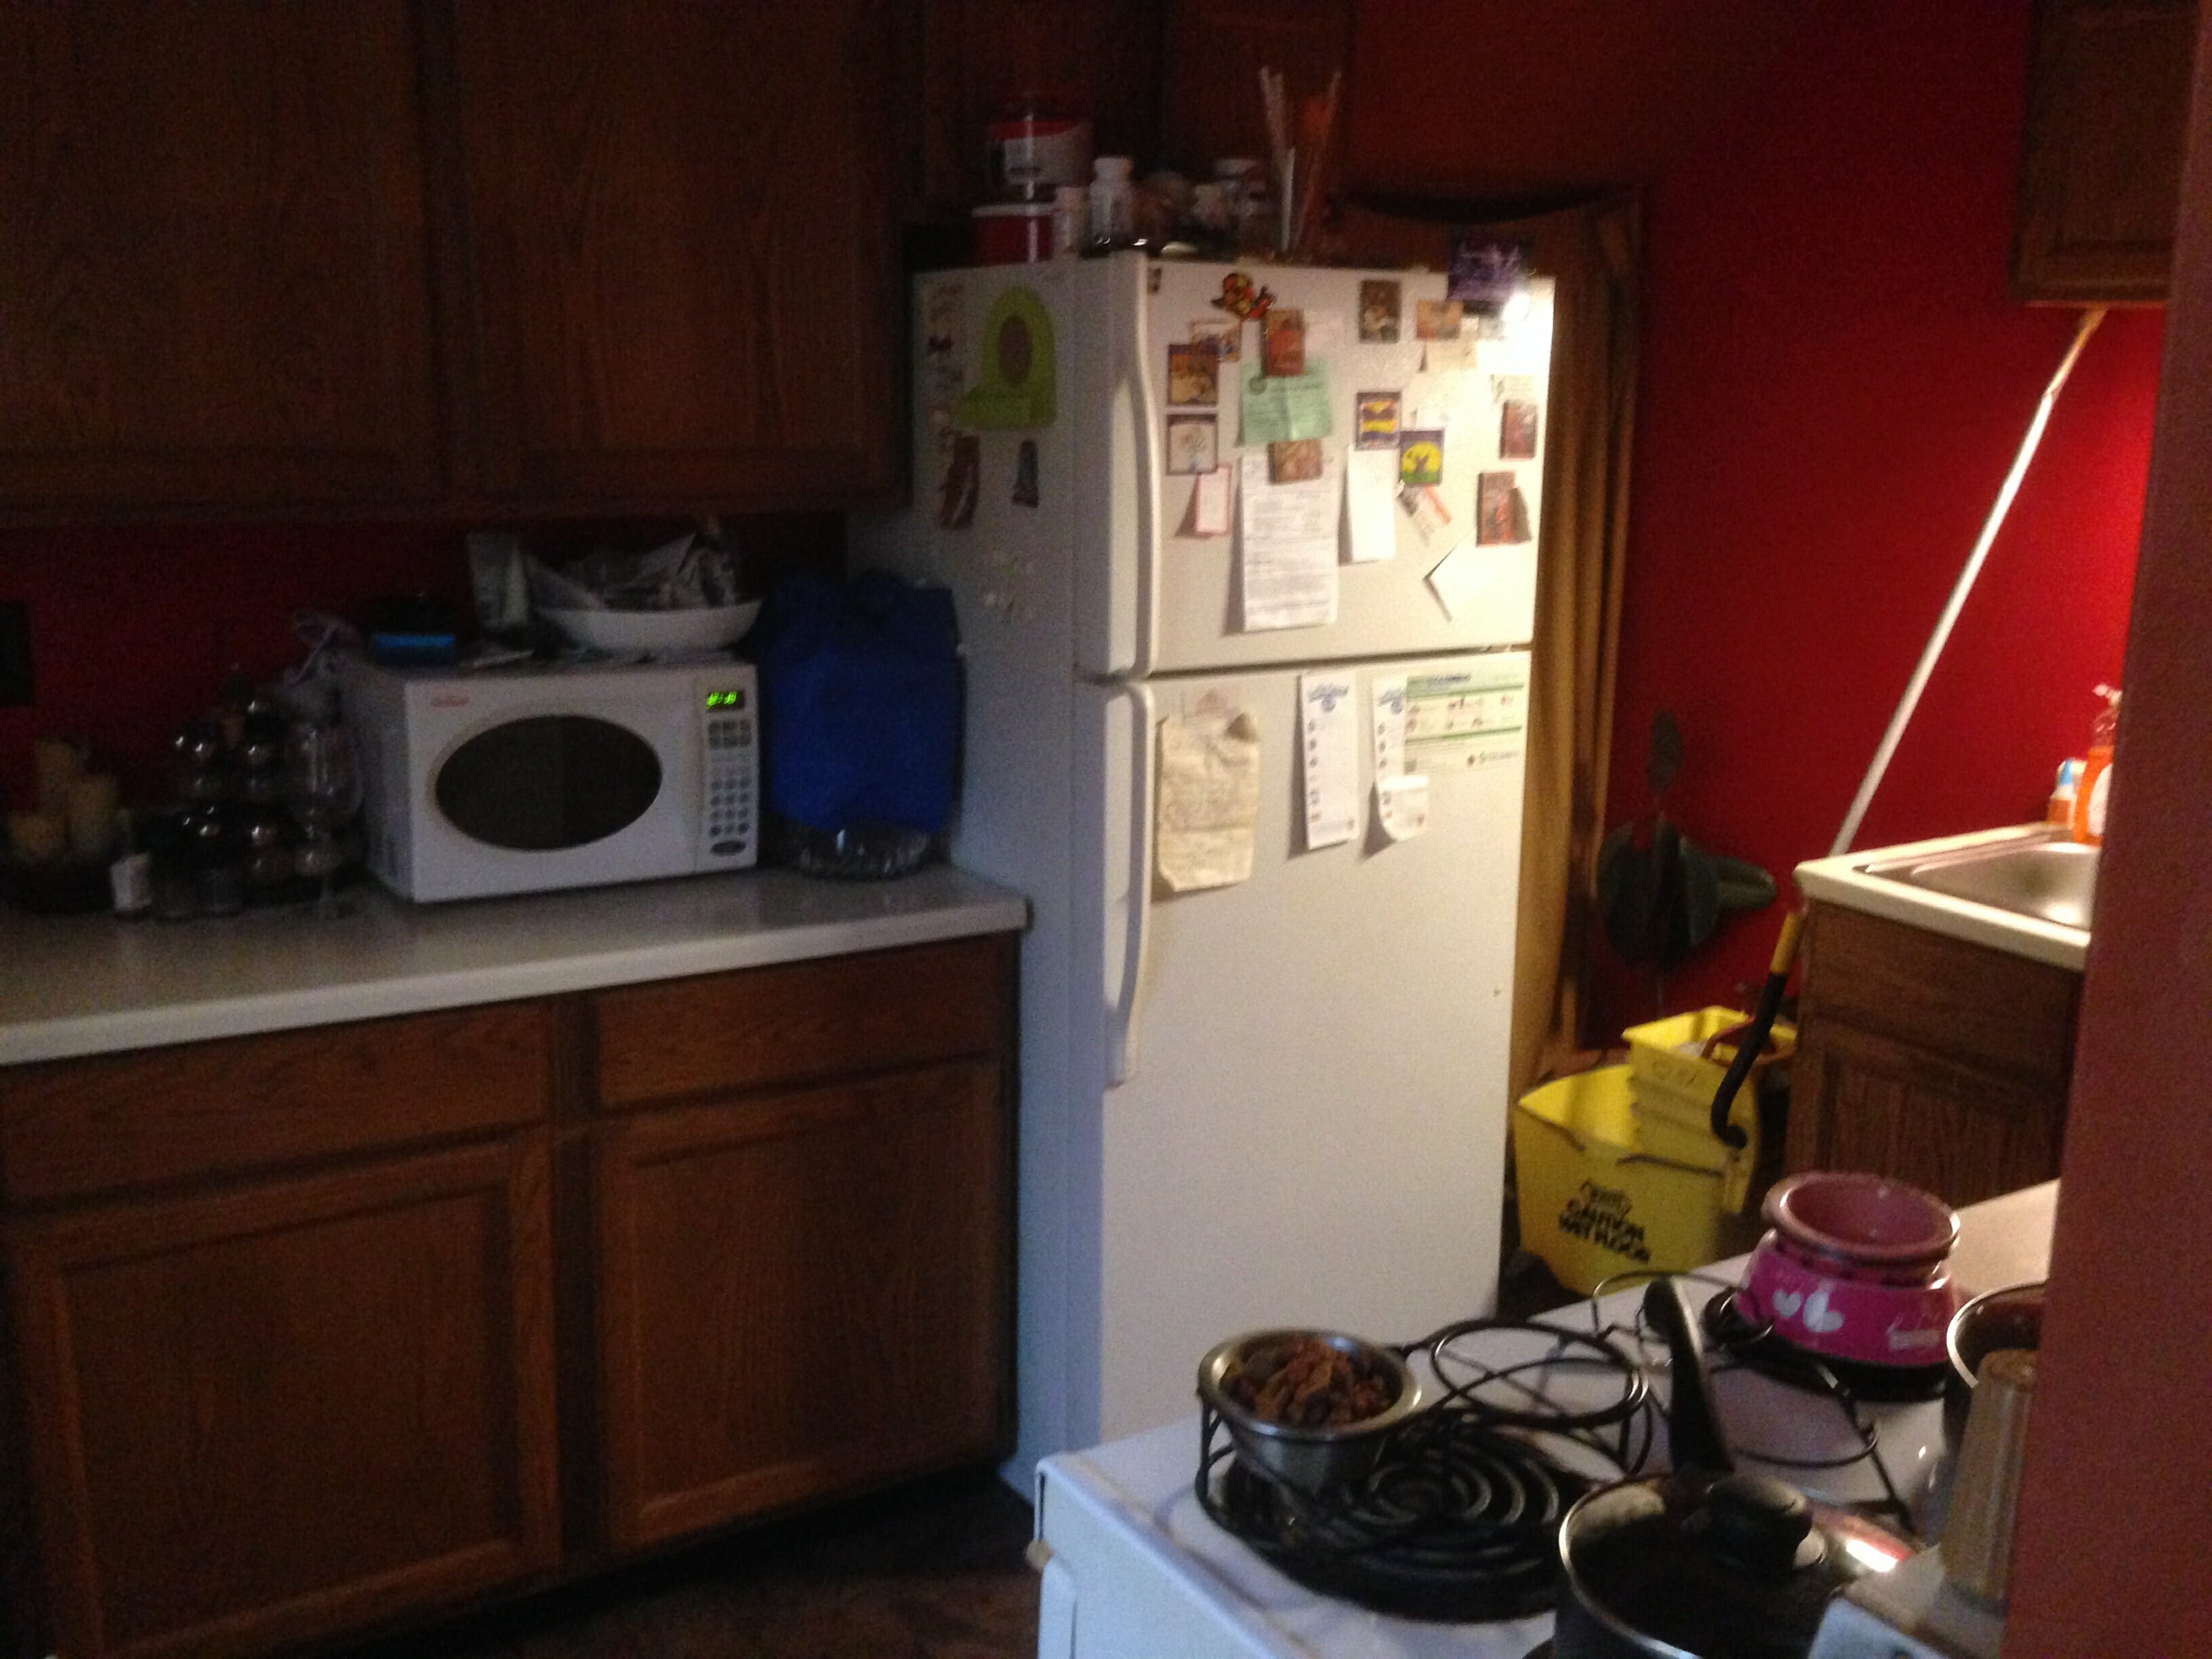
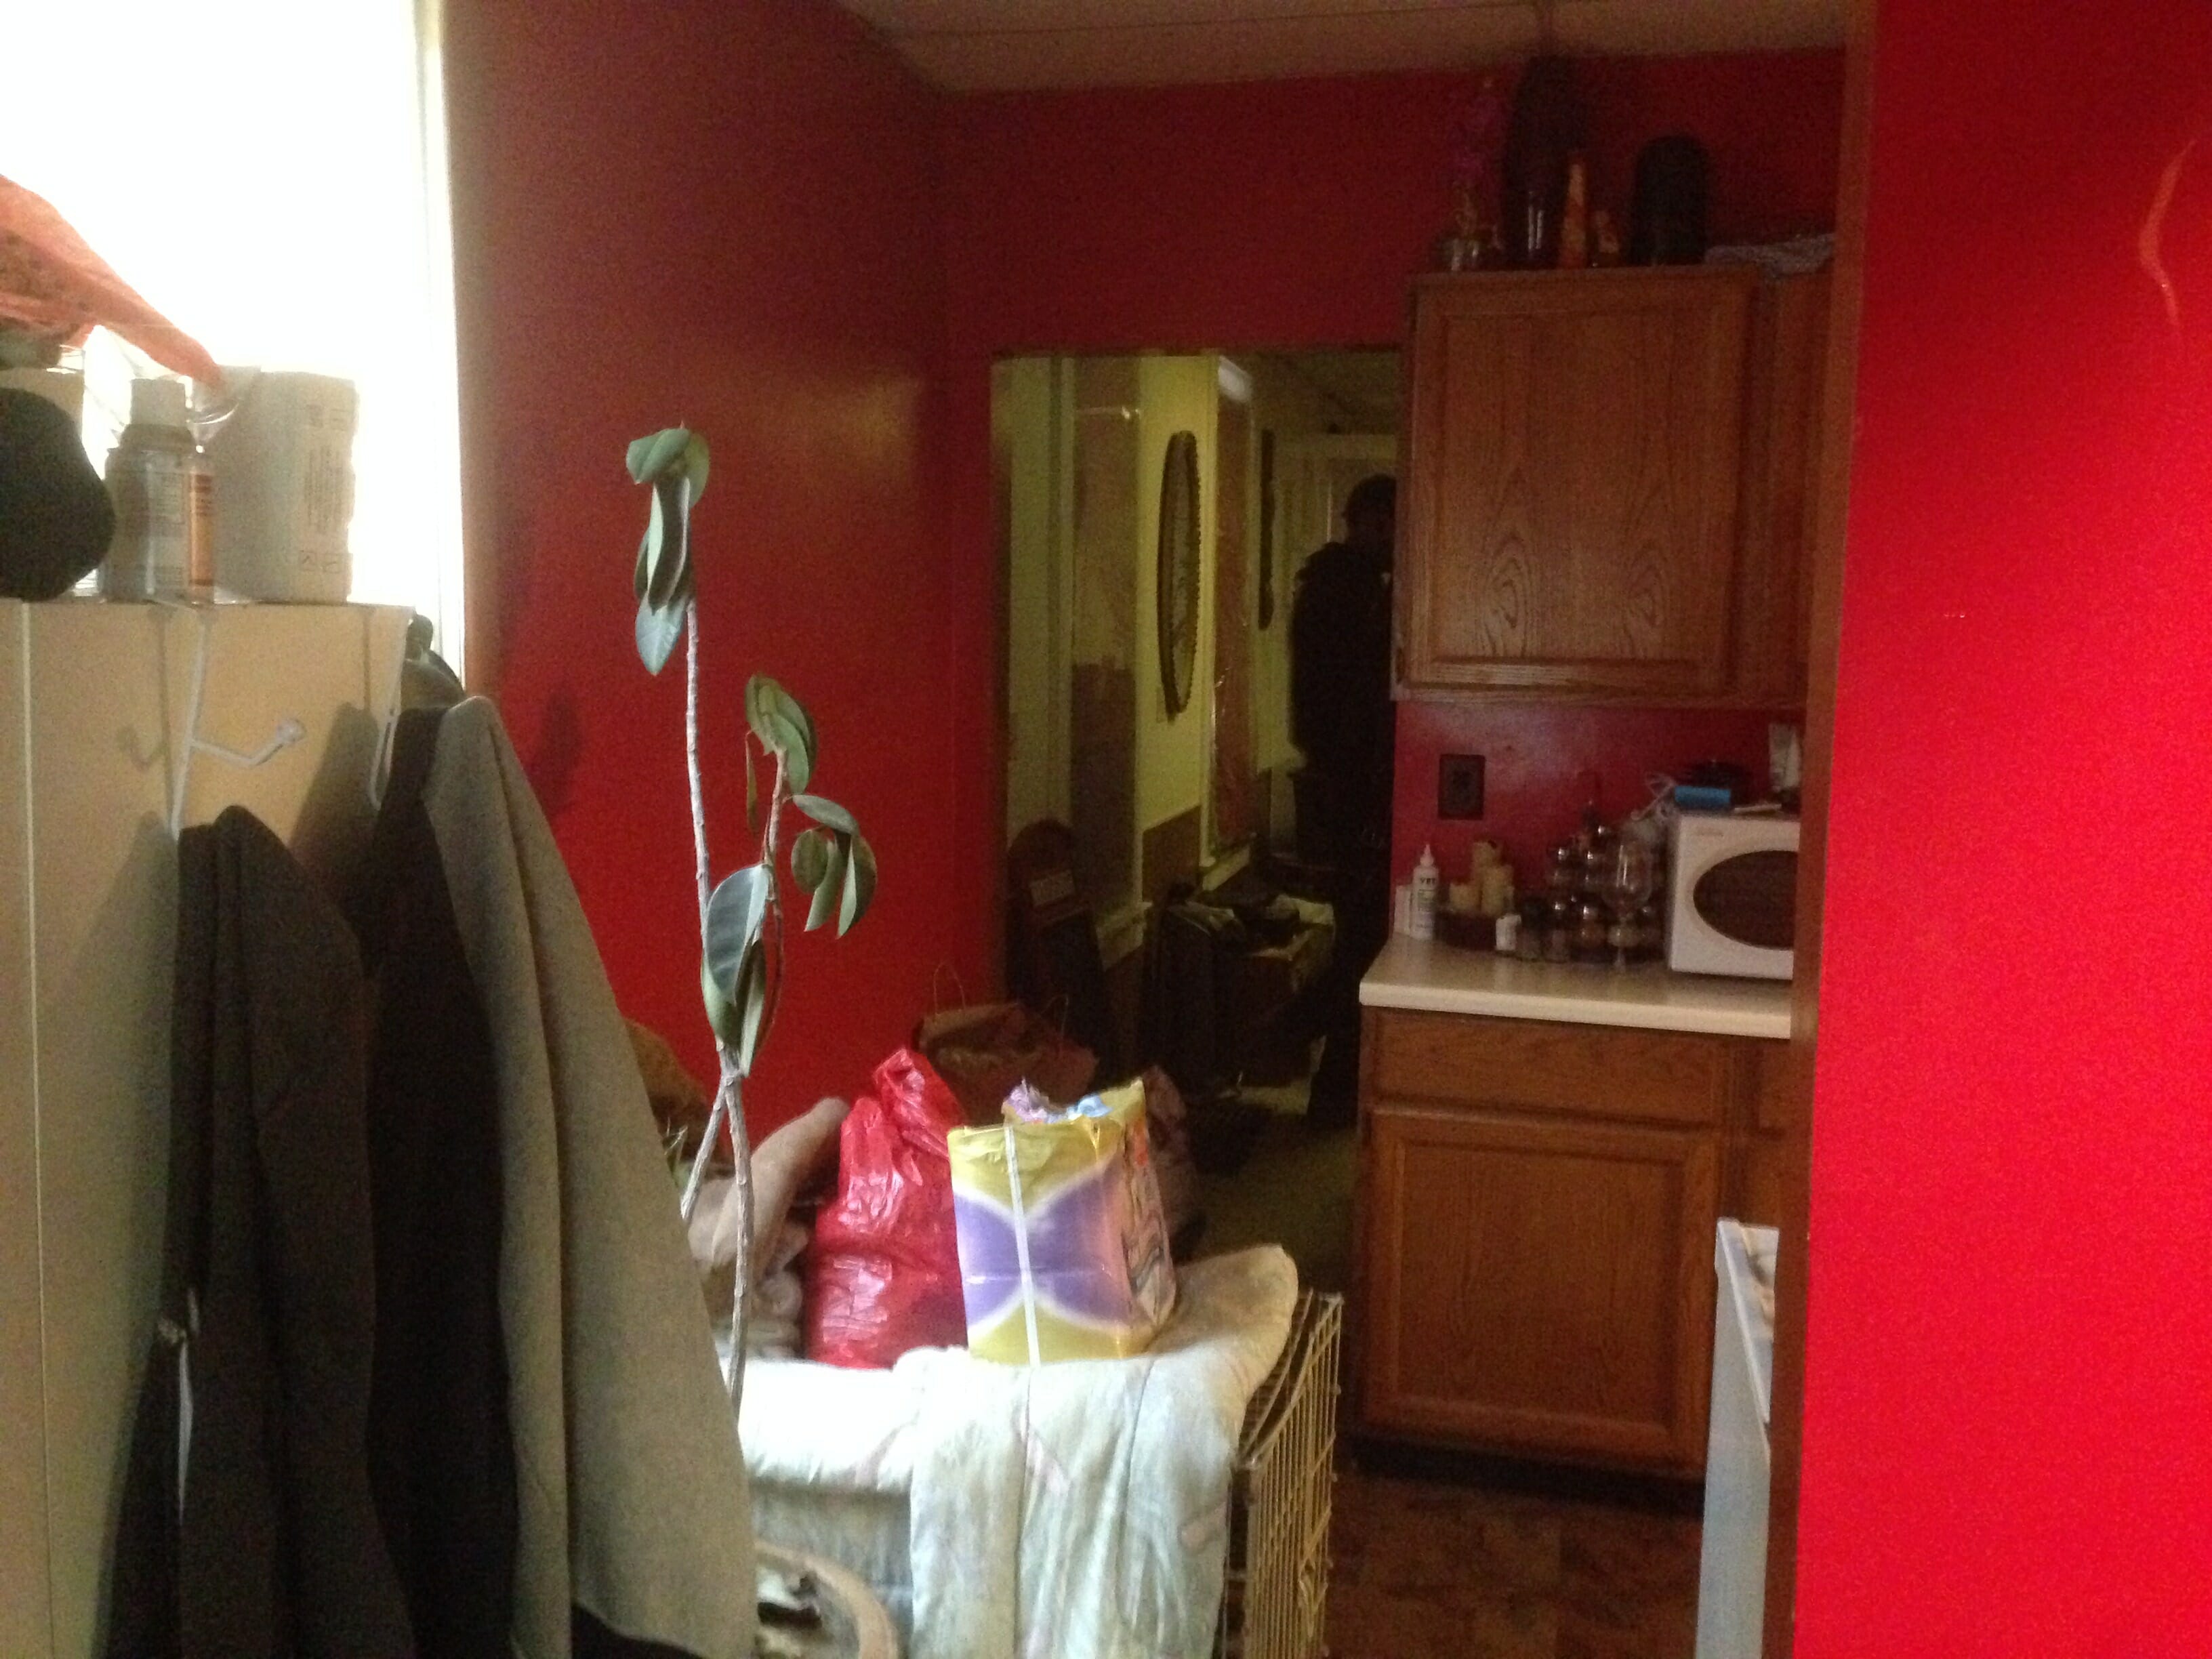
We share lots more before photos in our previous blog posts, but why not share a few of our faves (or should we say least faves?) again. When we first purchased the property, the kitchen looked like this…
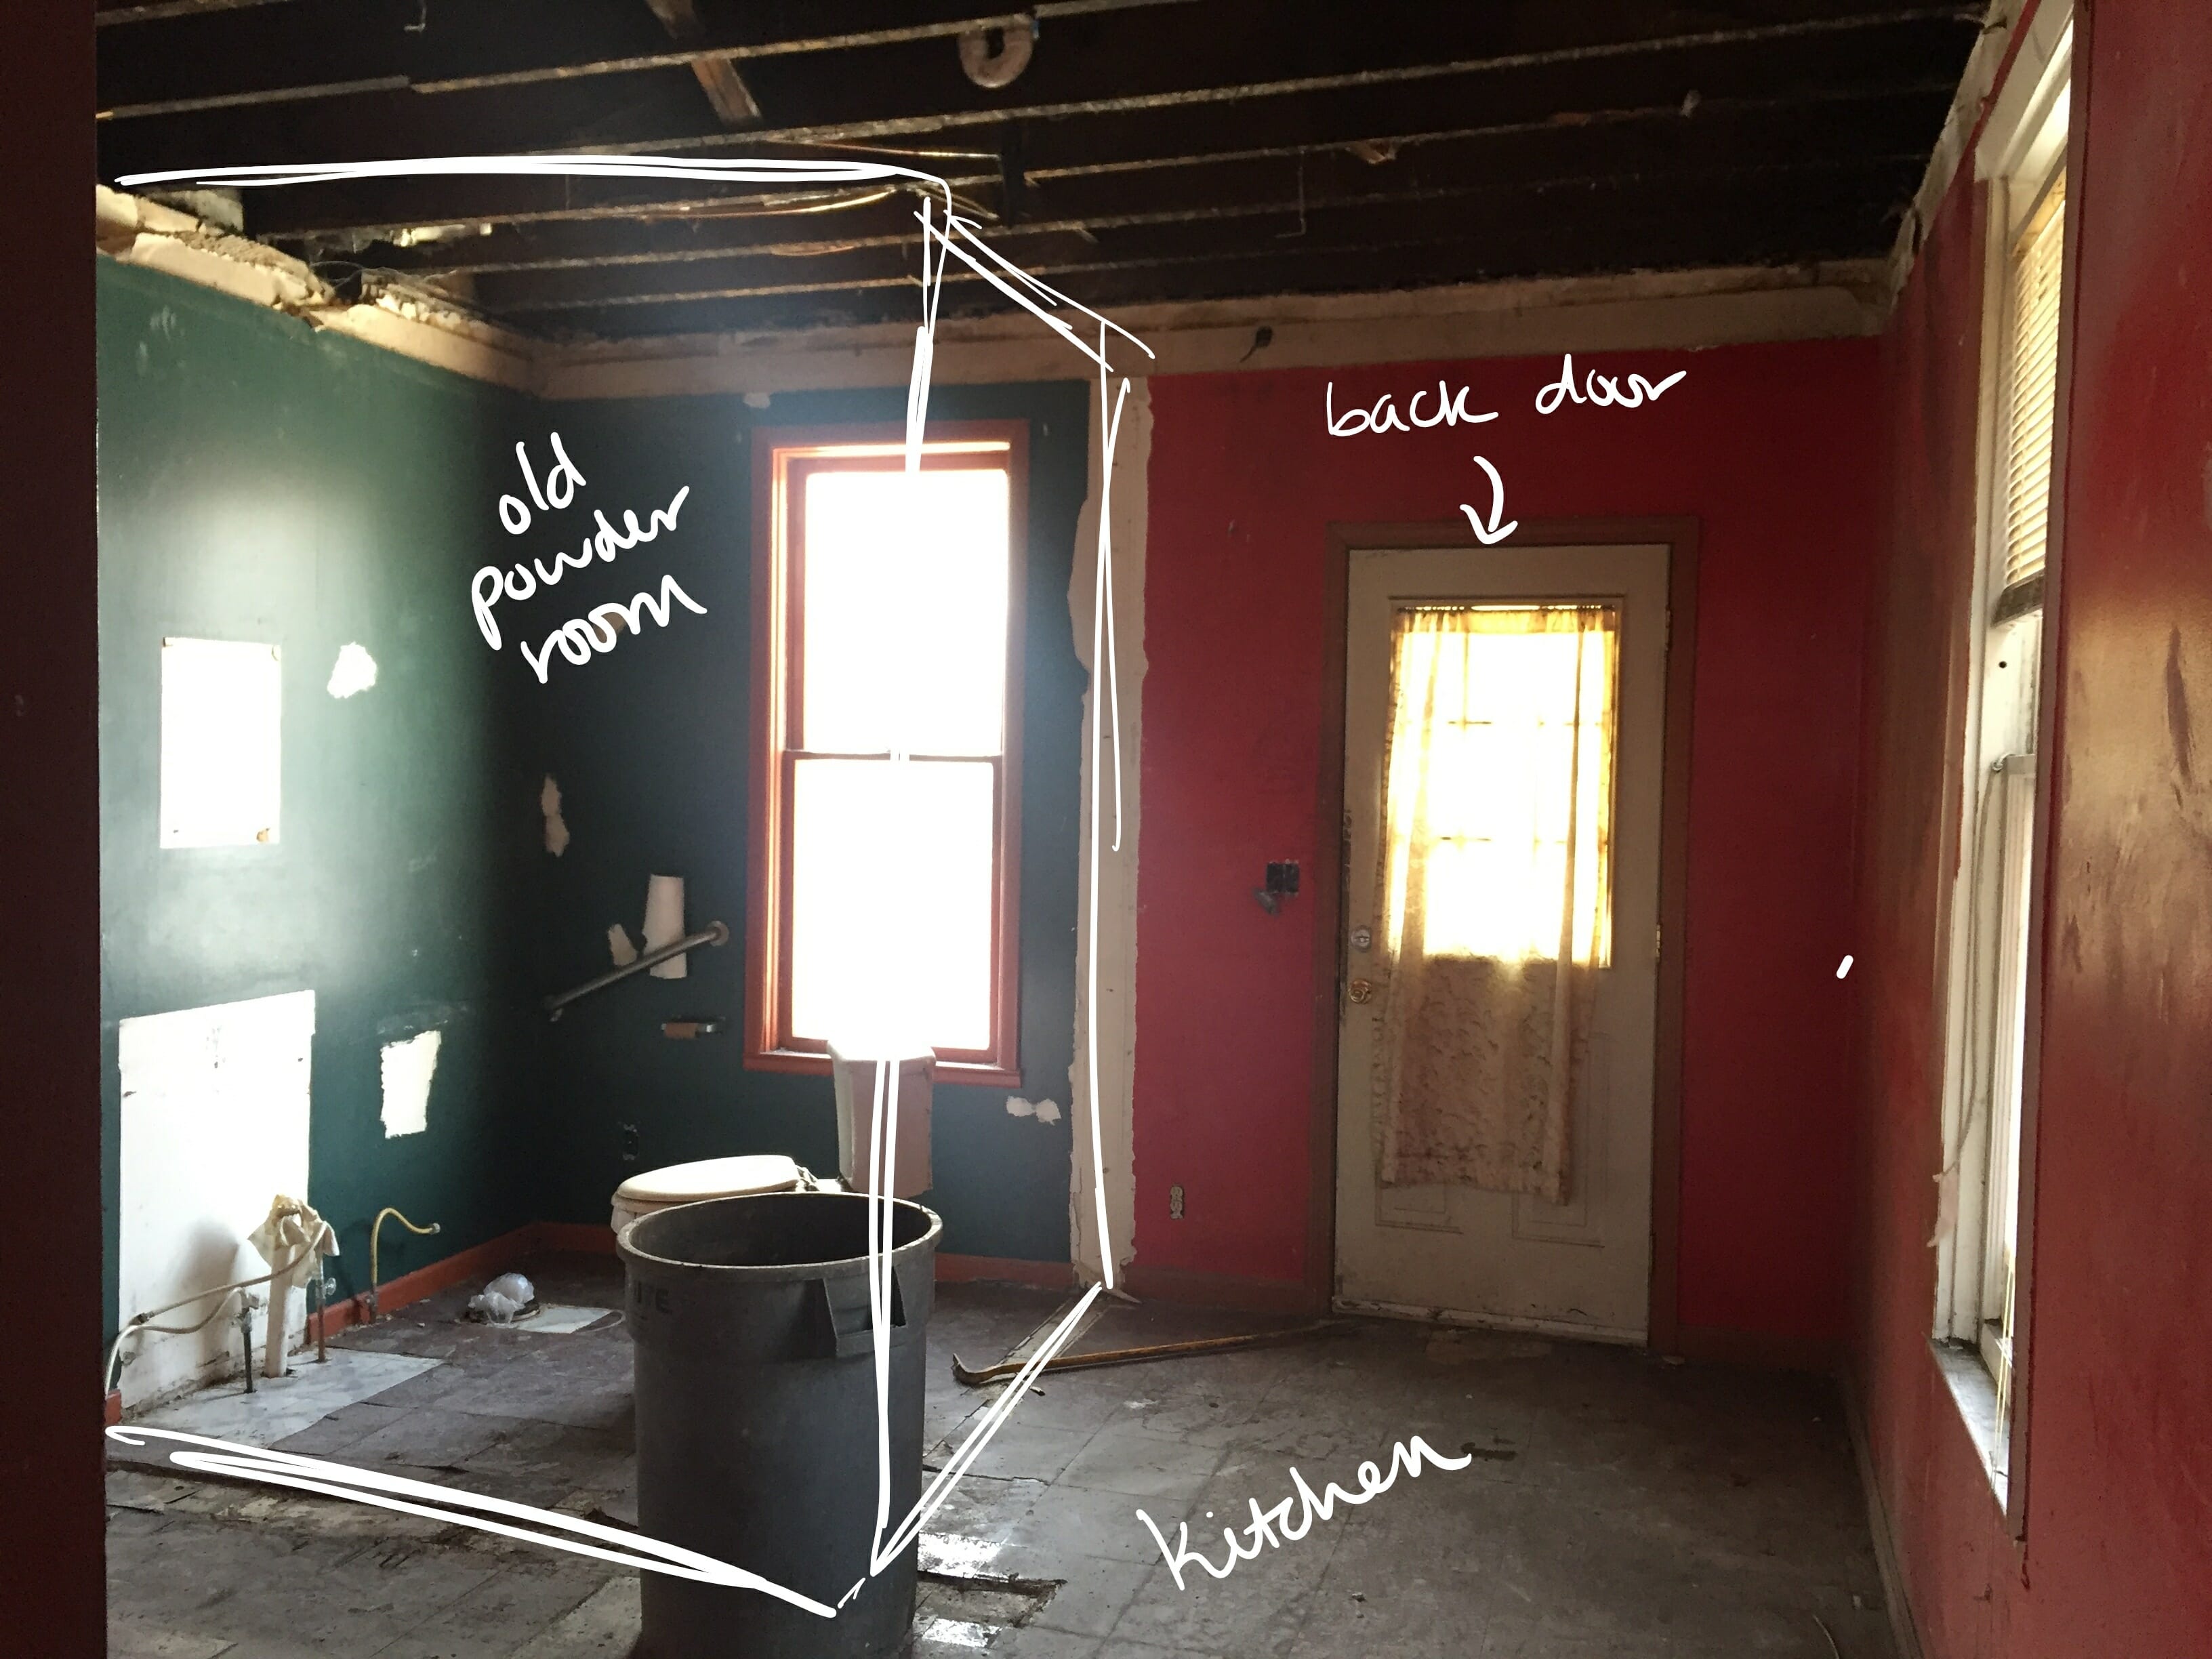
We got rid of everything so we could rework the layout. After removing the old powder room wall, we saw how much light was being blocked from the back window & knew we had to keep it open. We ended up moving the powder room to the other side of the room and shrinking it down a bit to make room for more kitchen space. This is the view from the dining room looking toward the back of the house.
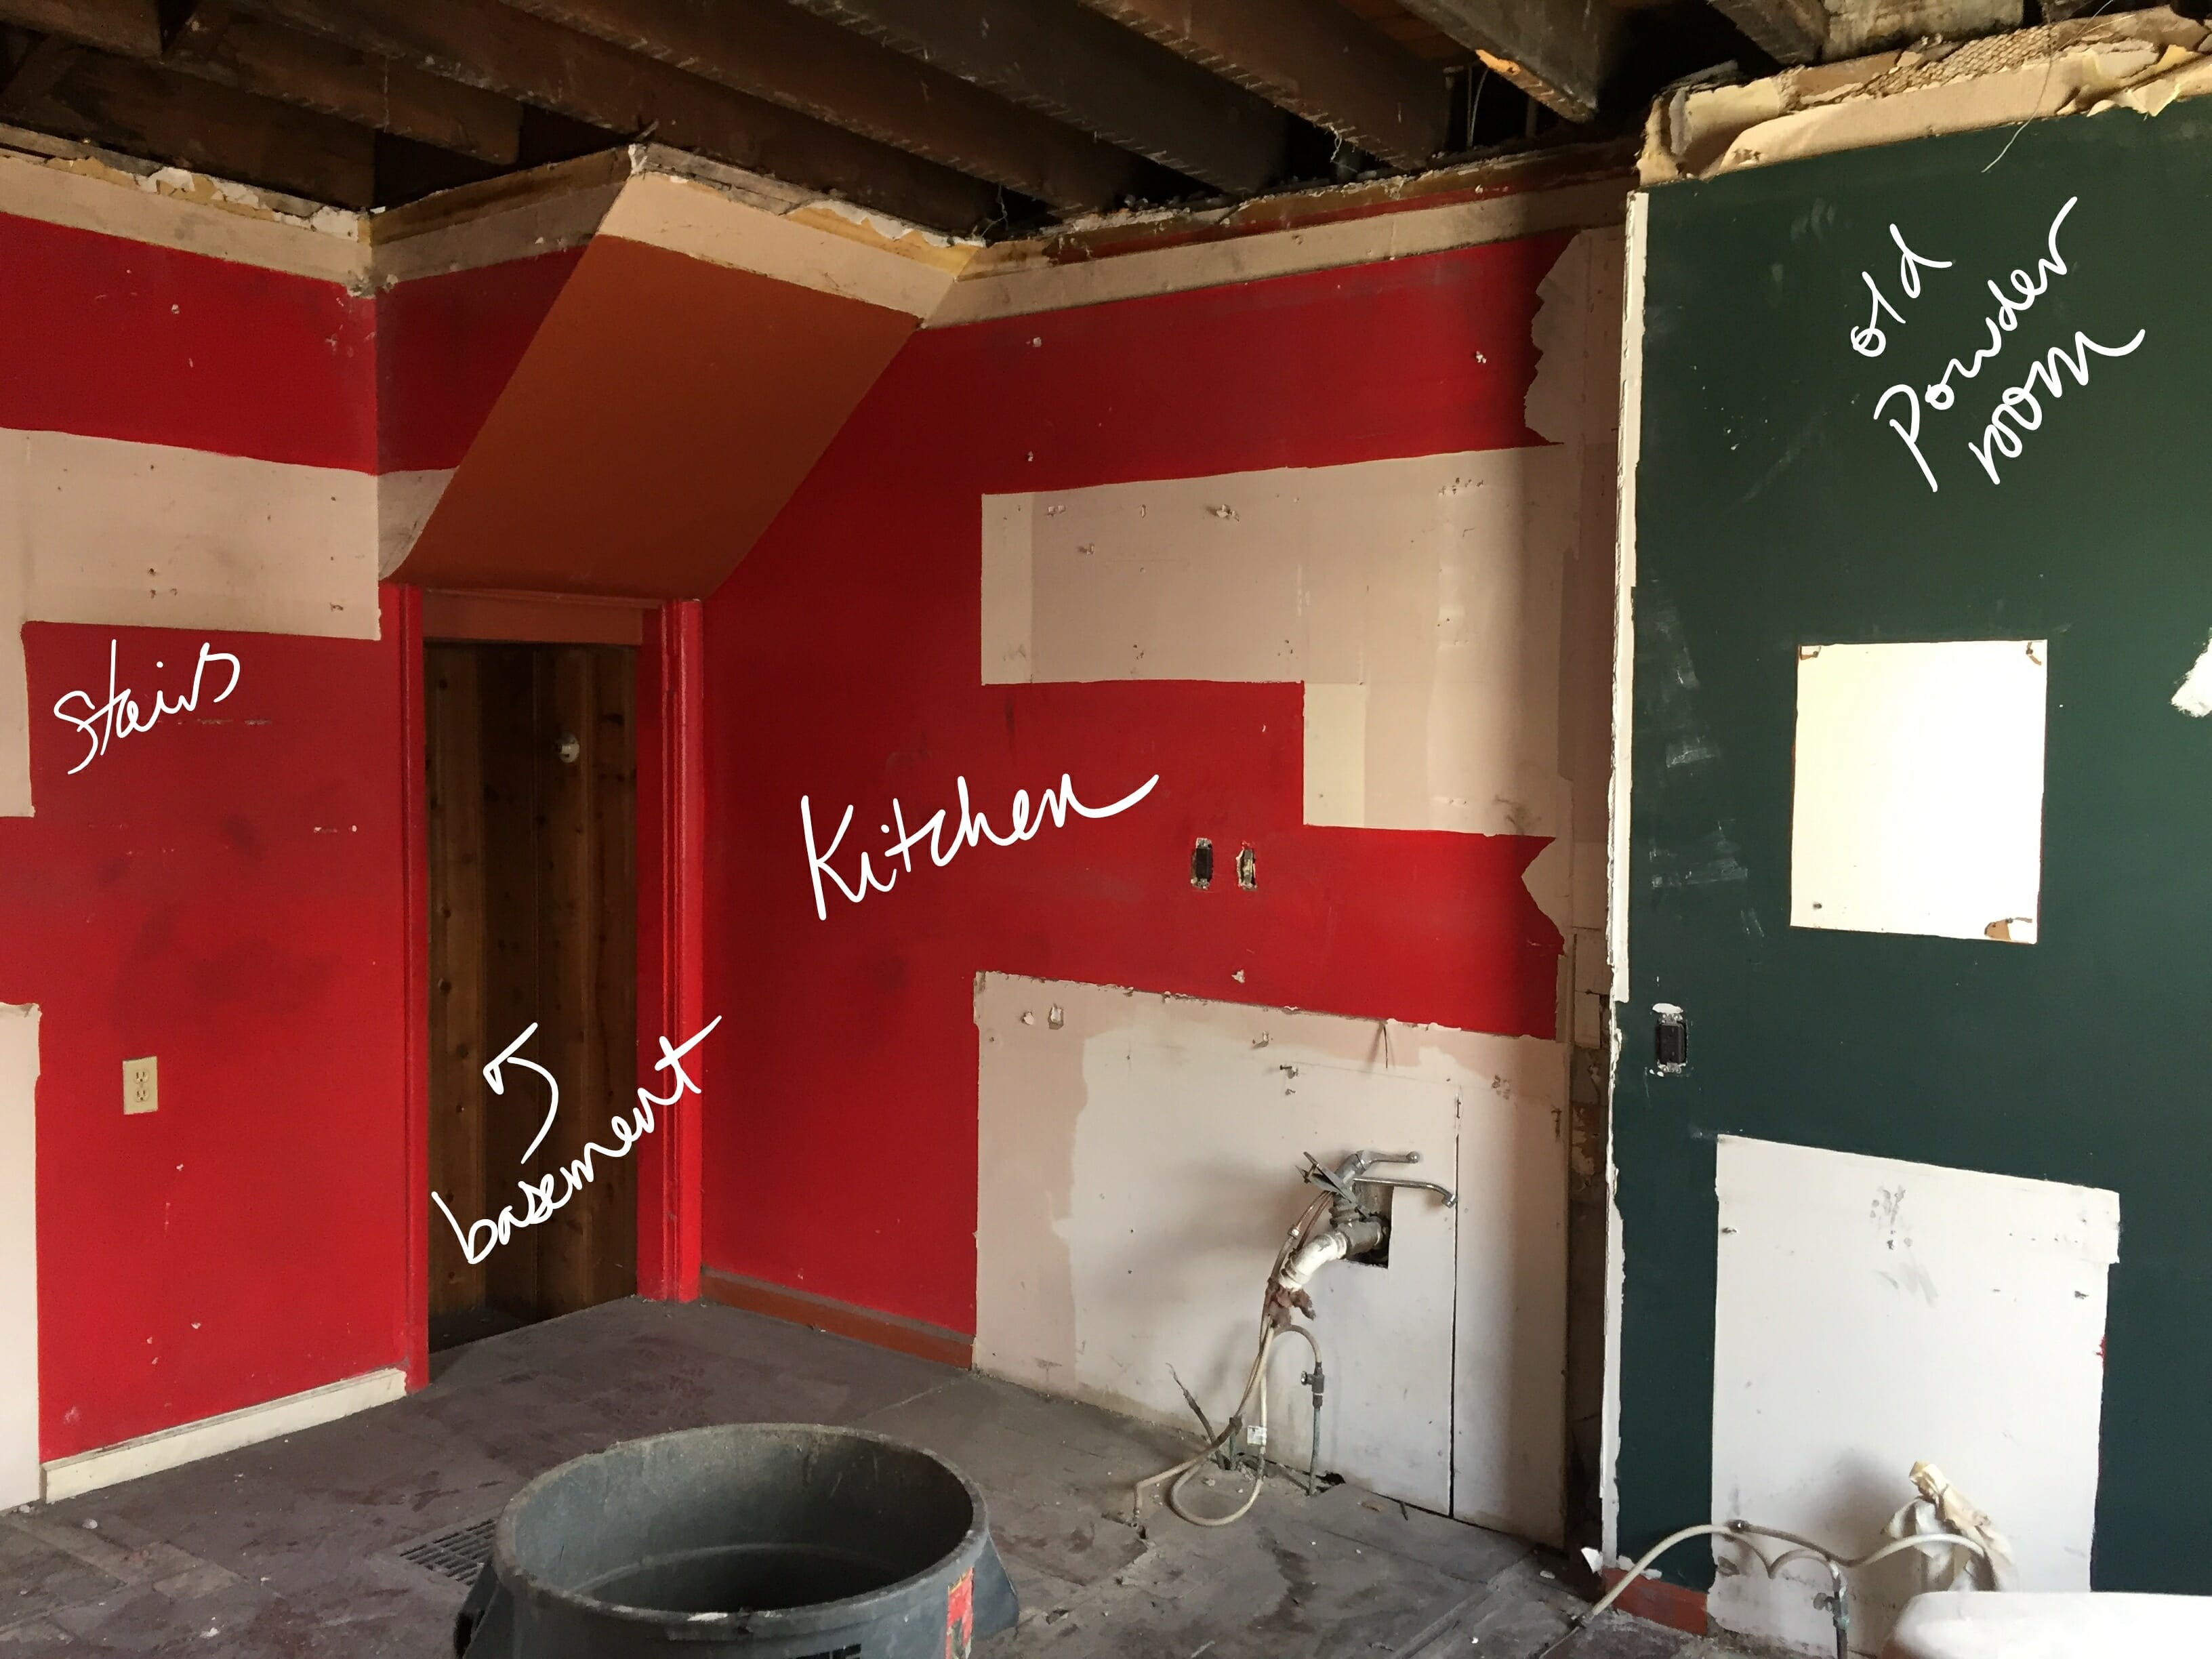
This is the view from the back of the house looking toward the old basement entrance, which is now where the new powder room is located. We closed up the basement entrance from the kitchen & moved it to the other side of the stairs, where the living area is.
THE PLANS
We went back and forth on a bunch of different layouts, but ultimately landed on this one as the winner. The right side of the drawing is the back of the house, and the left side is where the old basement entrance used to be. You can read more about how we landed on this layout here.
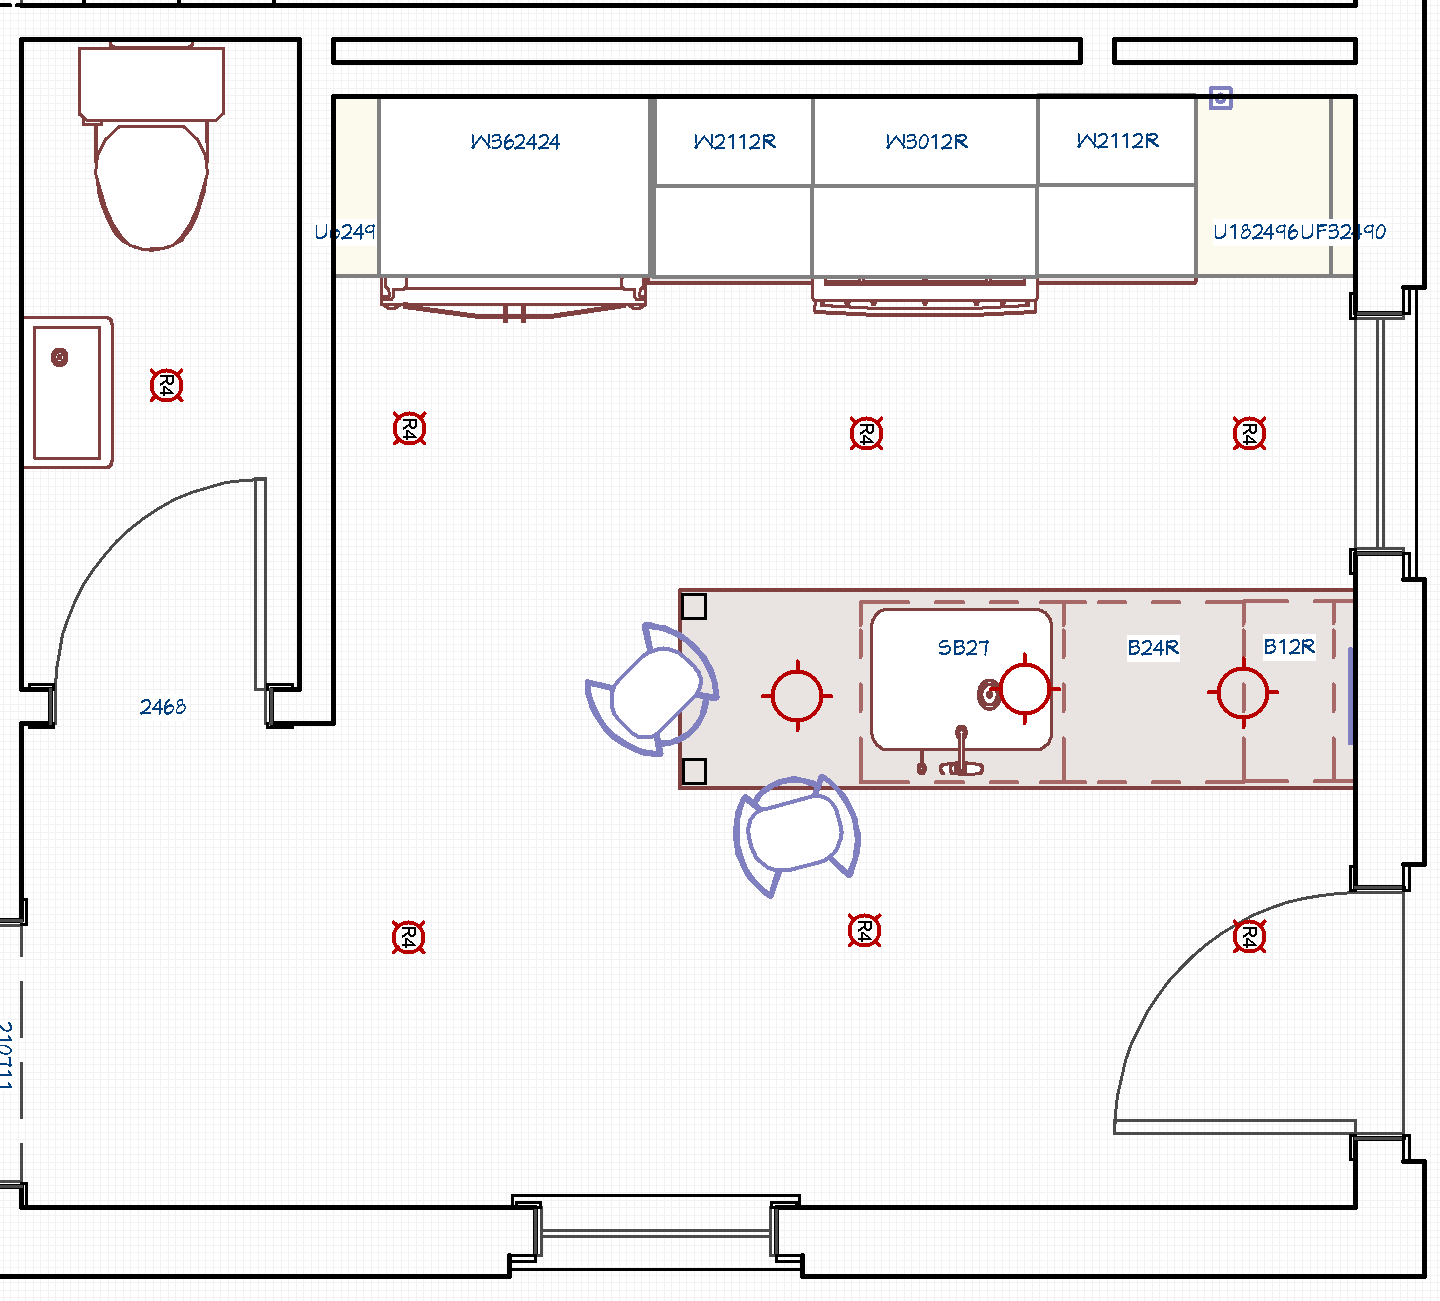
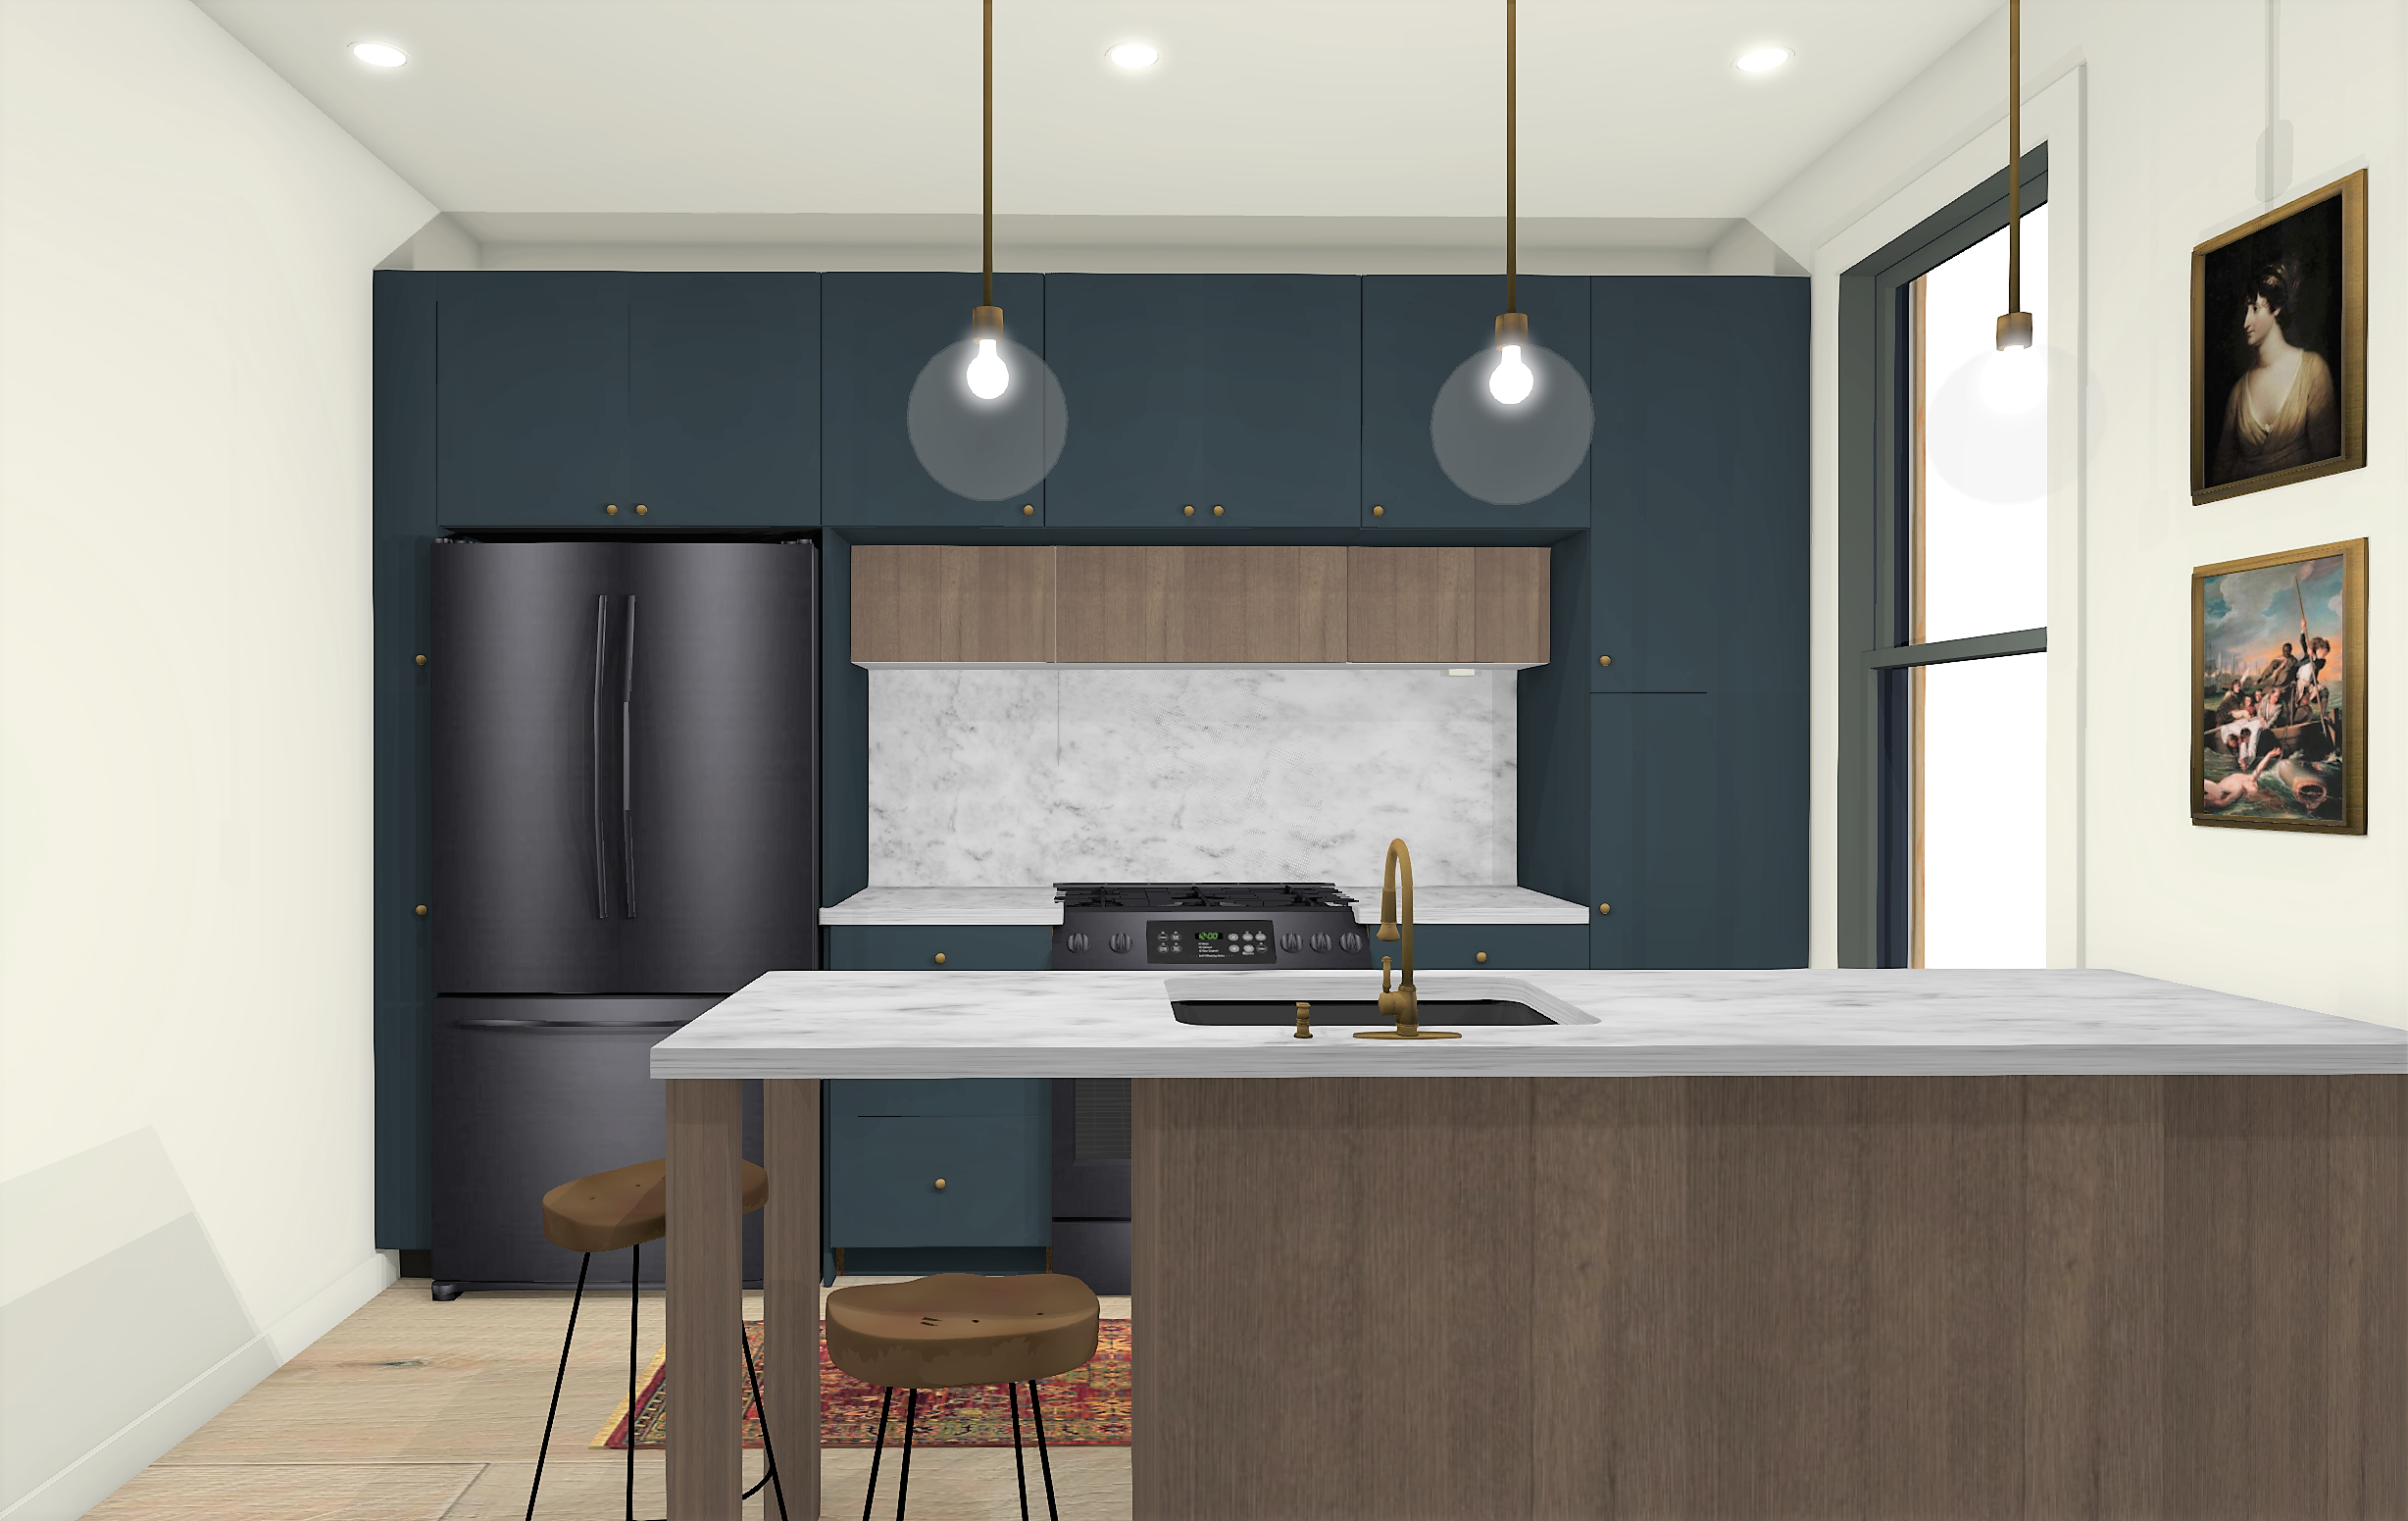
From there, we created renderings in our software so we could get a good idea of what the space would look like when we were finished.
We also created a corresponding mood board with all of the products and finishes we planned on incorporating (you can read more about that here).
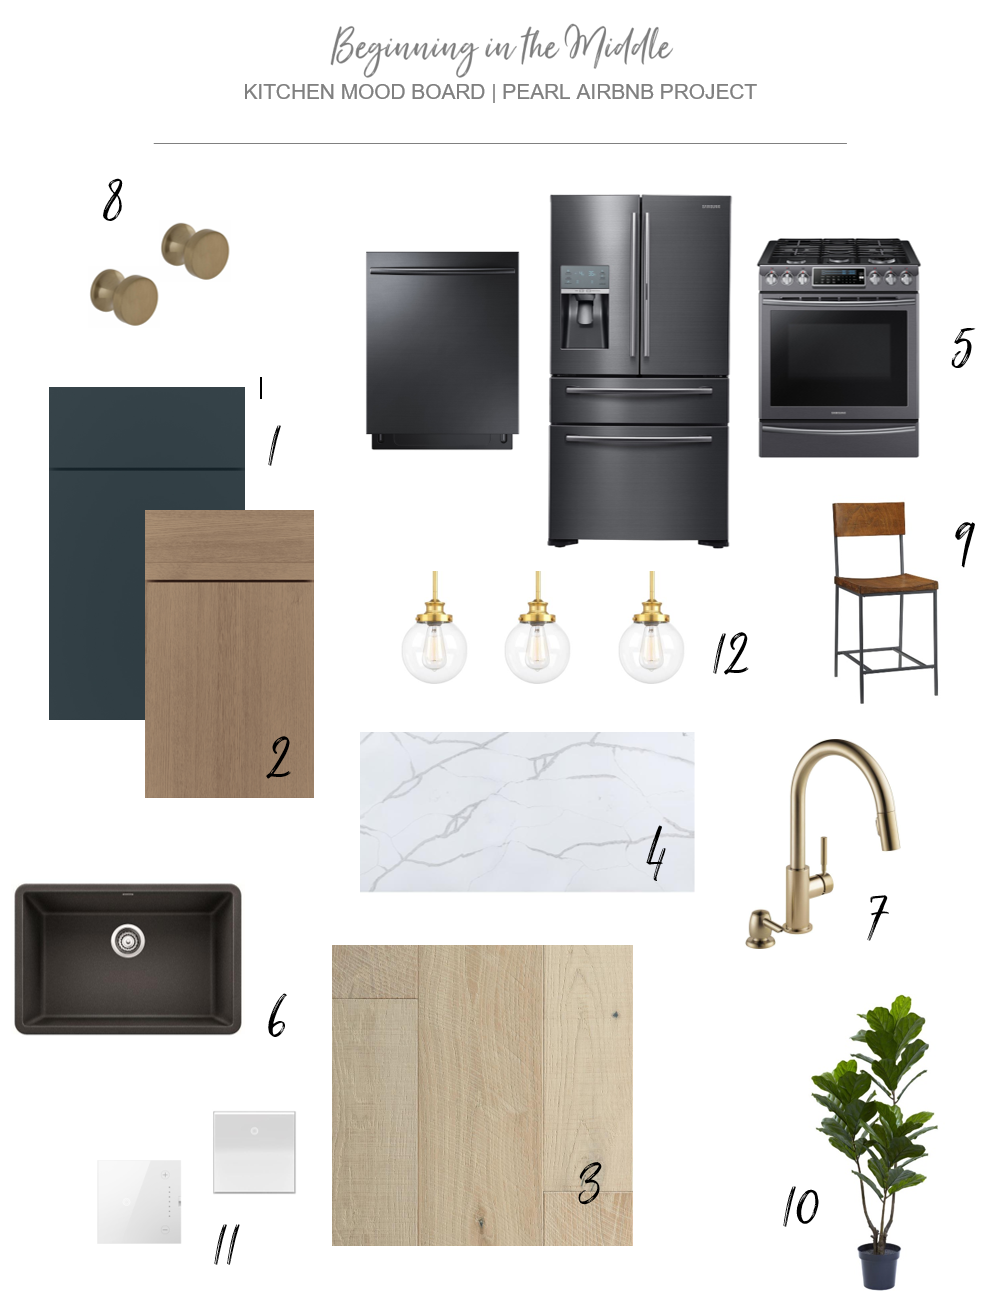
Mood board product links: 1 || 2 || 3 || 4 || 5 – 5 – 5 || 6 || 7 || 8 || 9 || 10 || 11 || 12
We measured everything, and had Lowe’s come measure as well, to make sure it would all work. Once we got the green light, we ordered everything and anxiously awaited delivery!
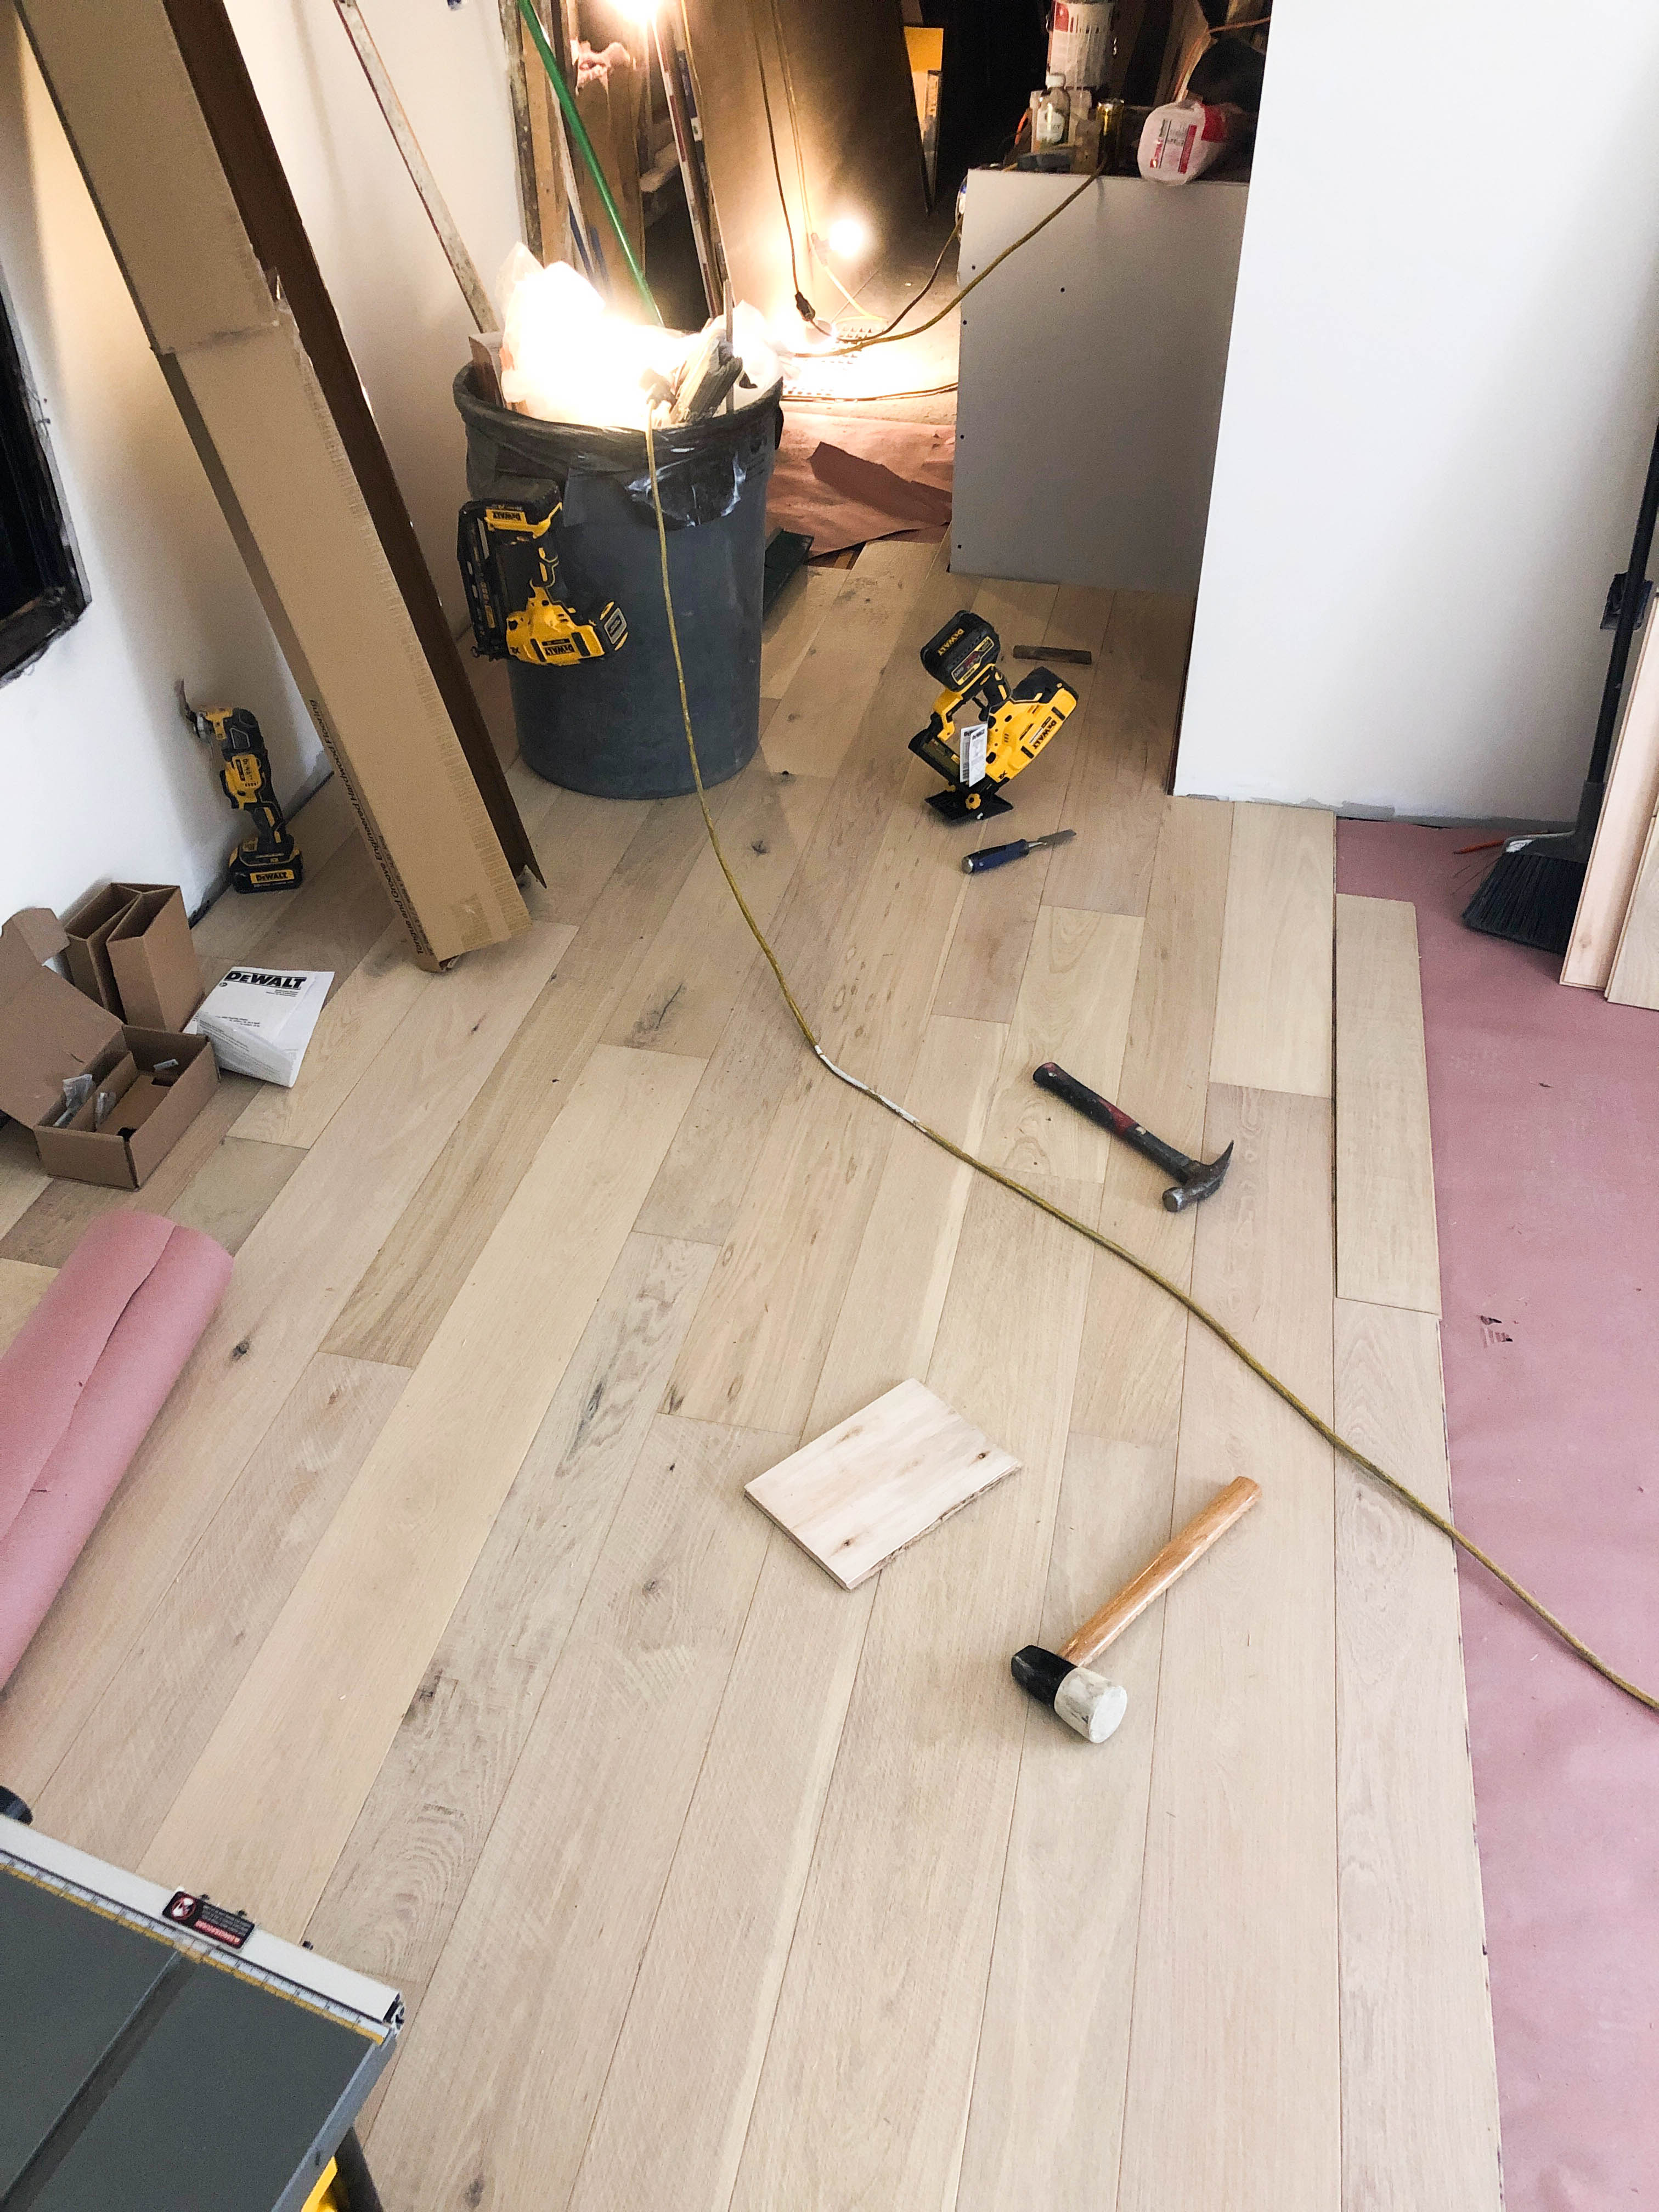
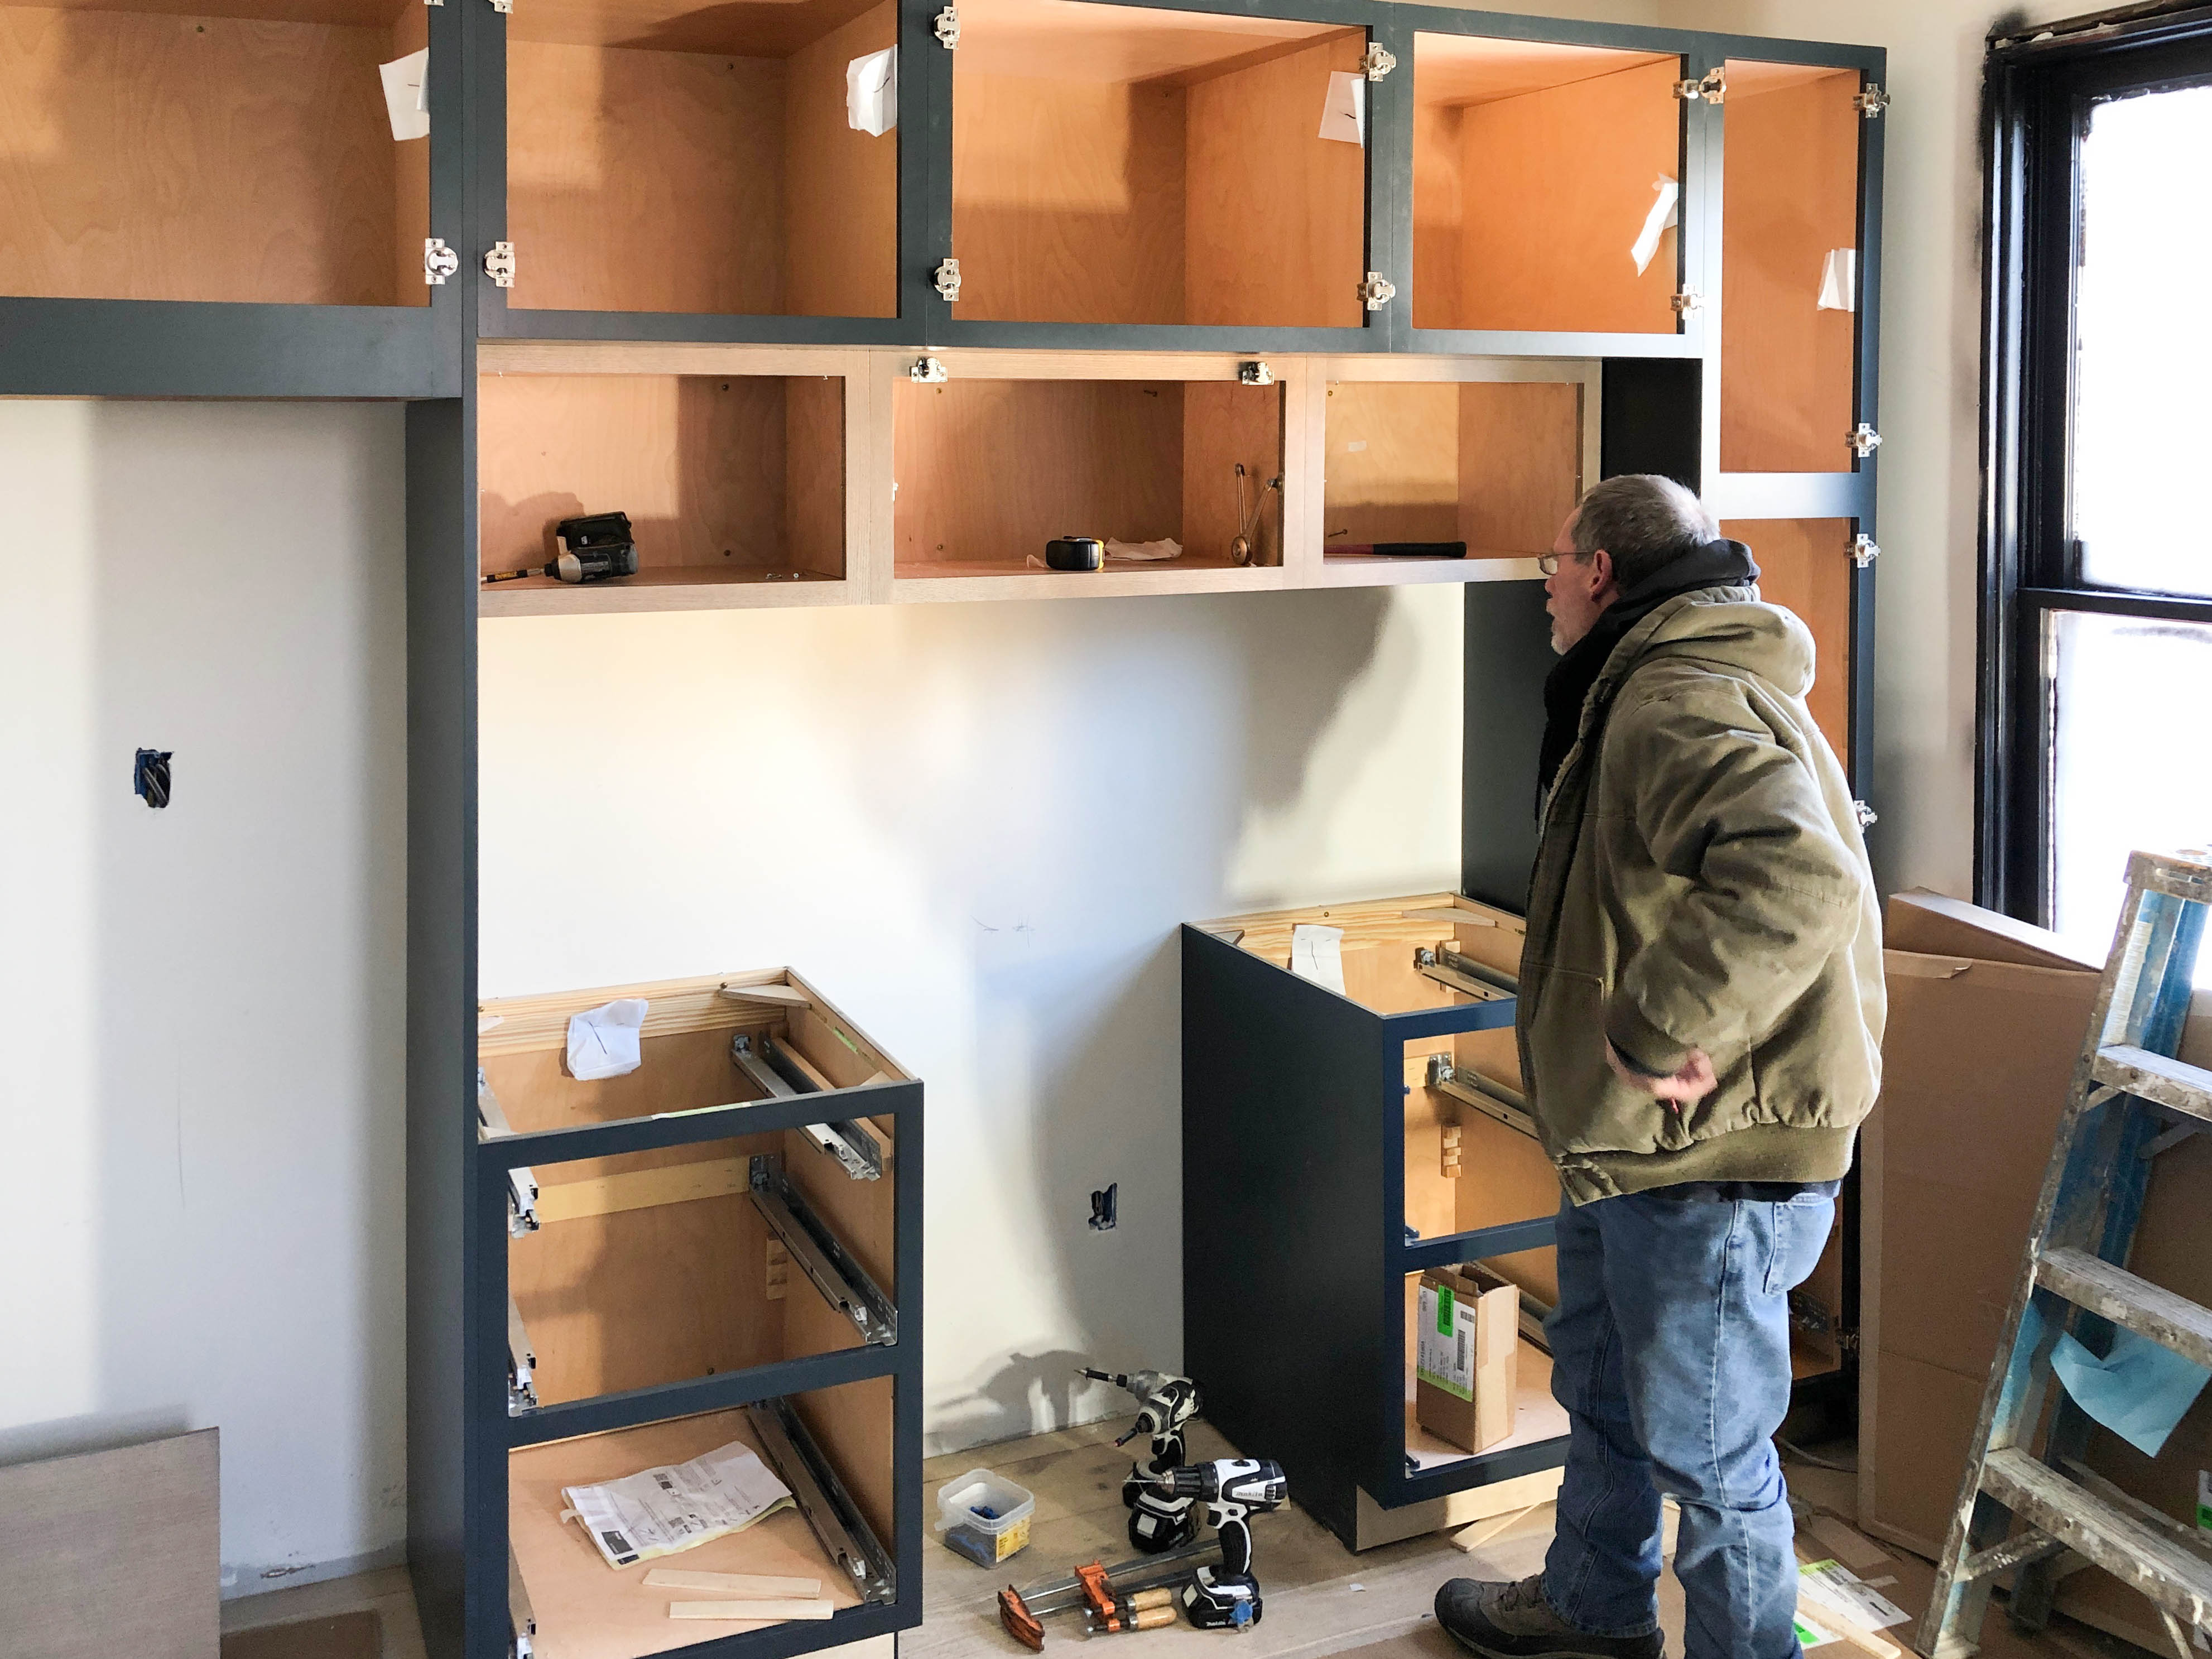
the progress
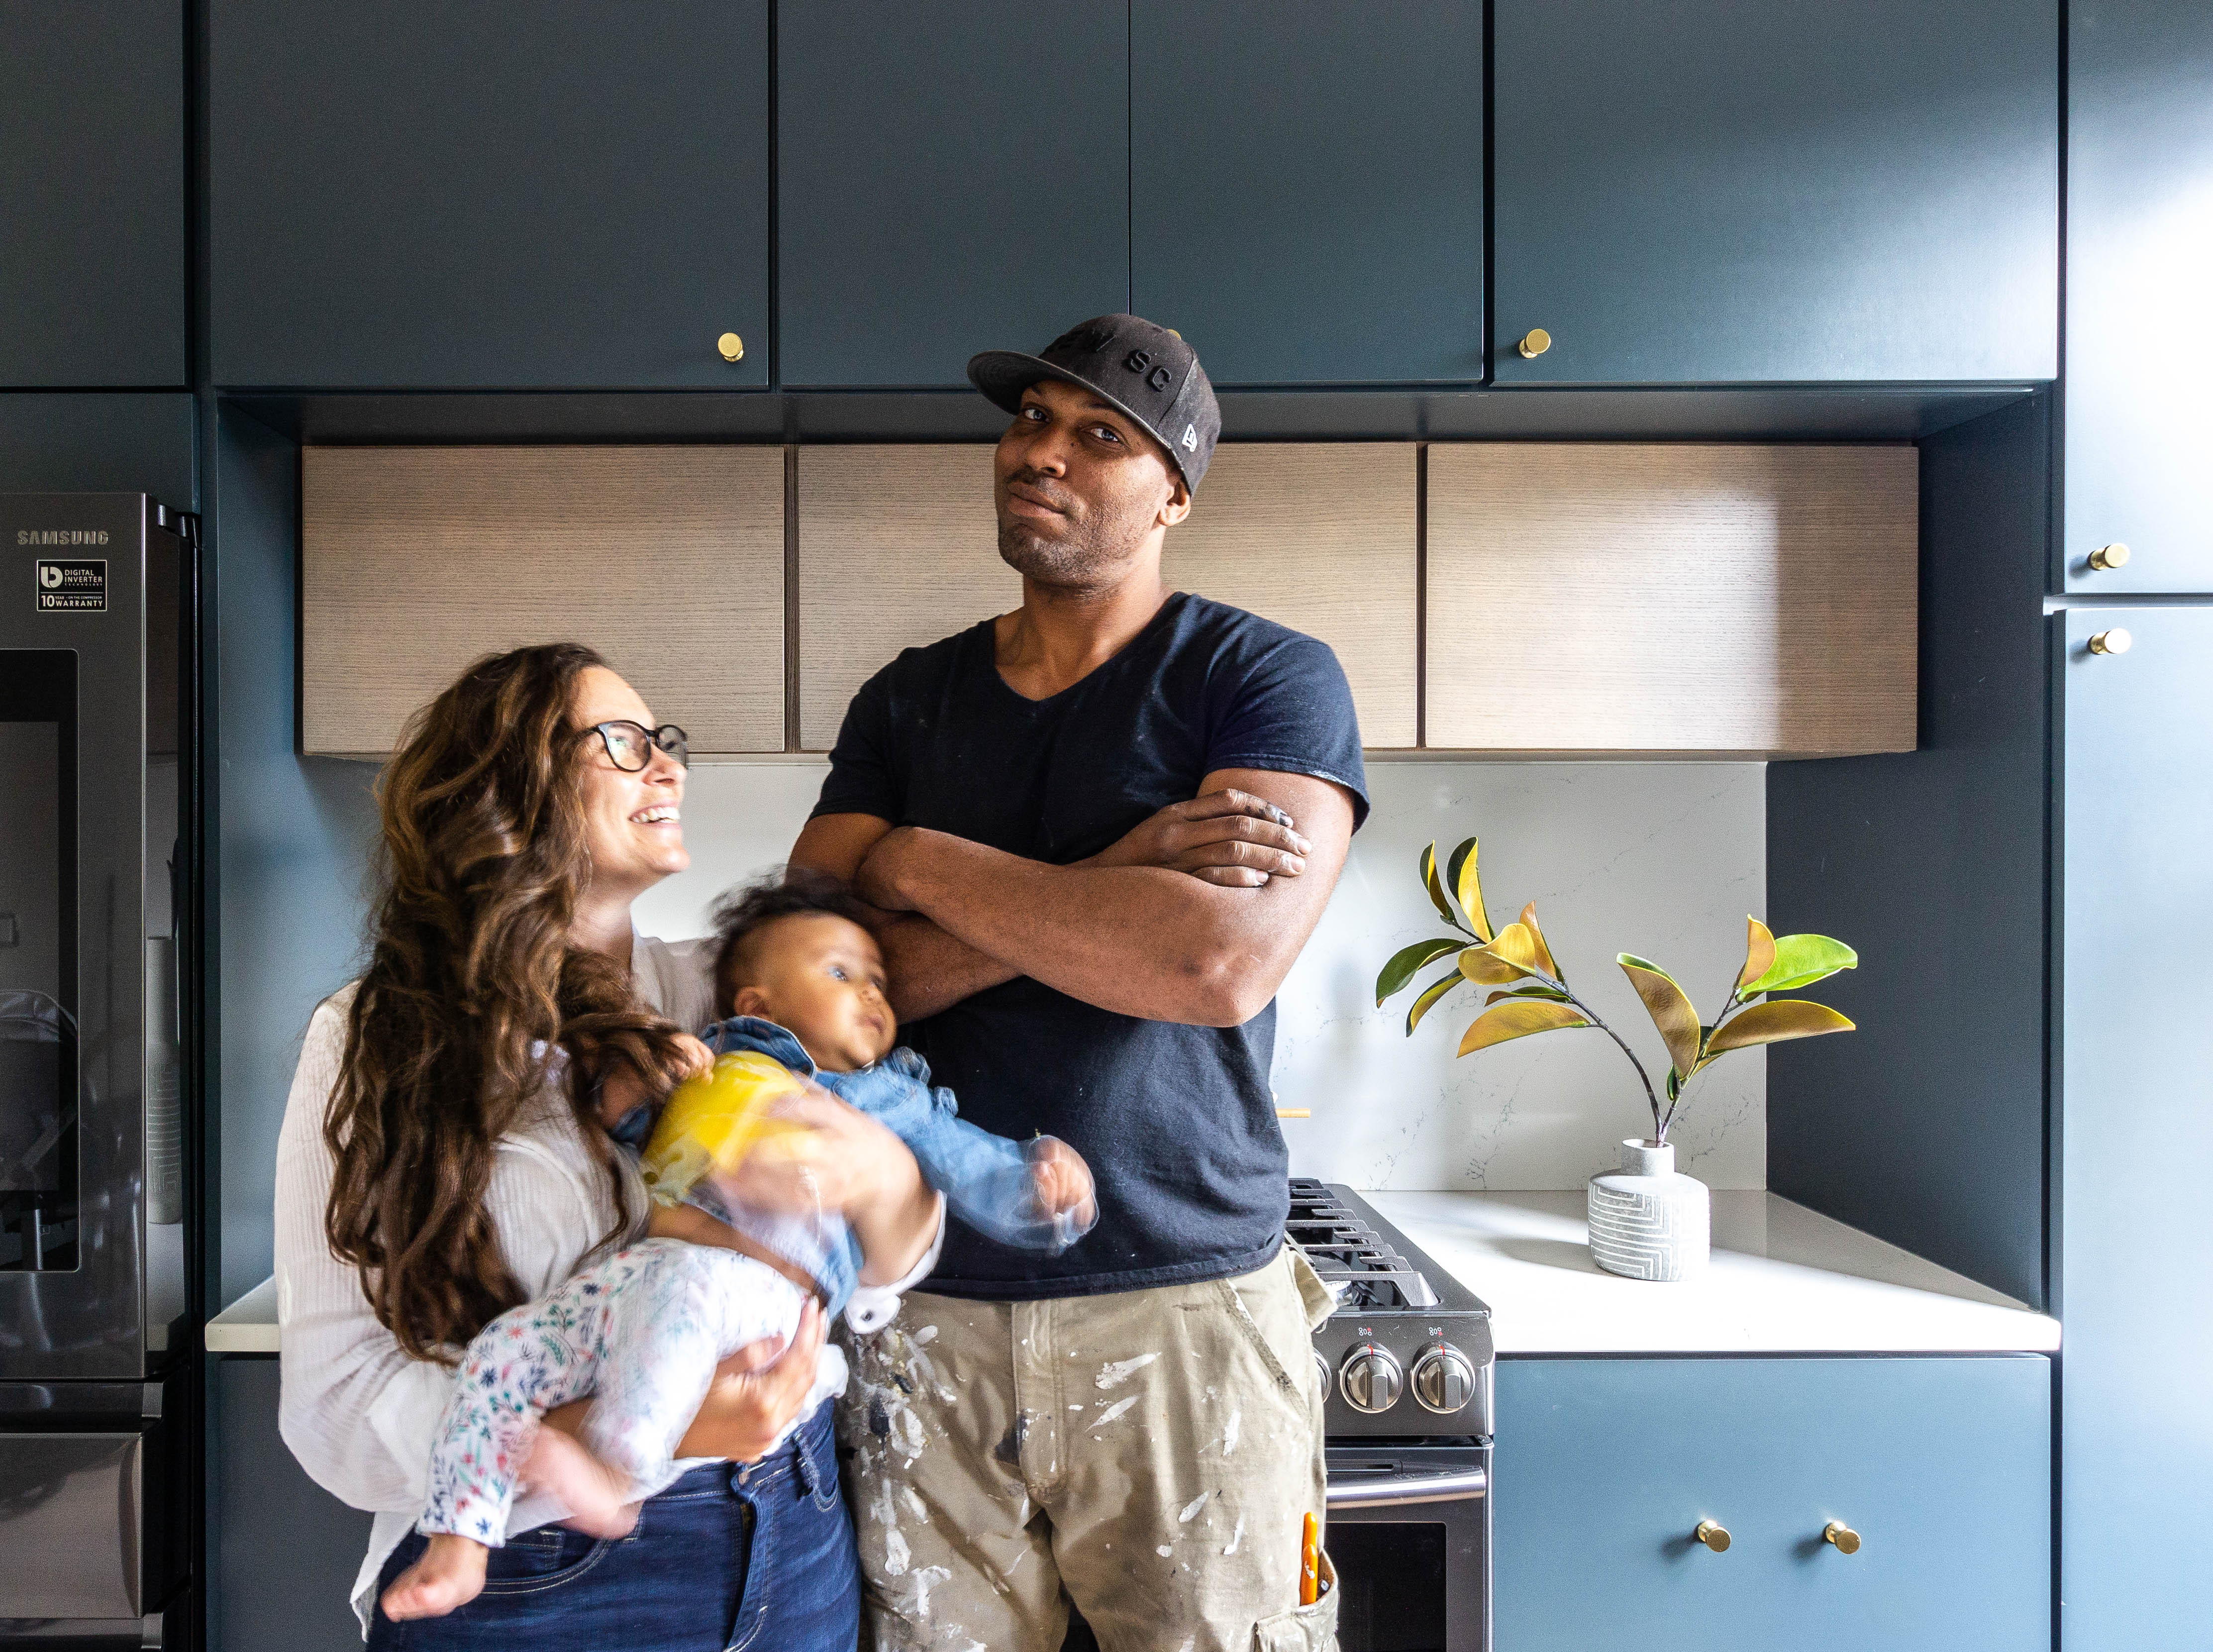
We saved ourselves a few thousand bucks by framing, drywall hanging, painting, range hood install and floor install ourselves. We hired subs for plumbing, electrical and drywall finishing, and the Lowe’s team installed the cabinets & appliances for us. Bianca was born a few days before our cabinet install was scheduled, so we were thankful we didn’t rely on an all DIY approach.
the final result
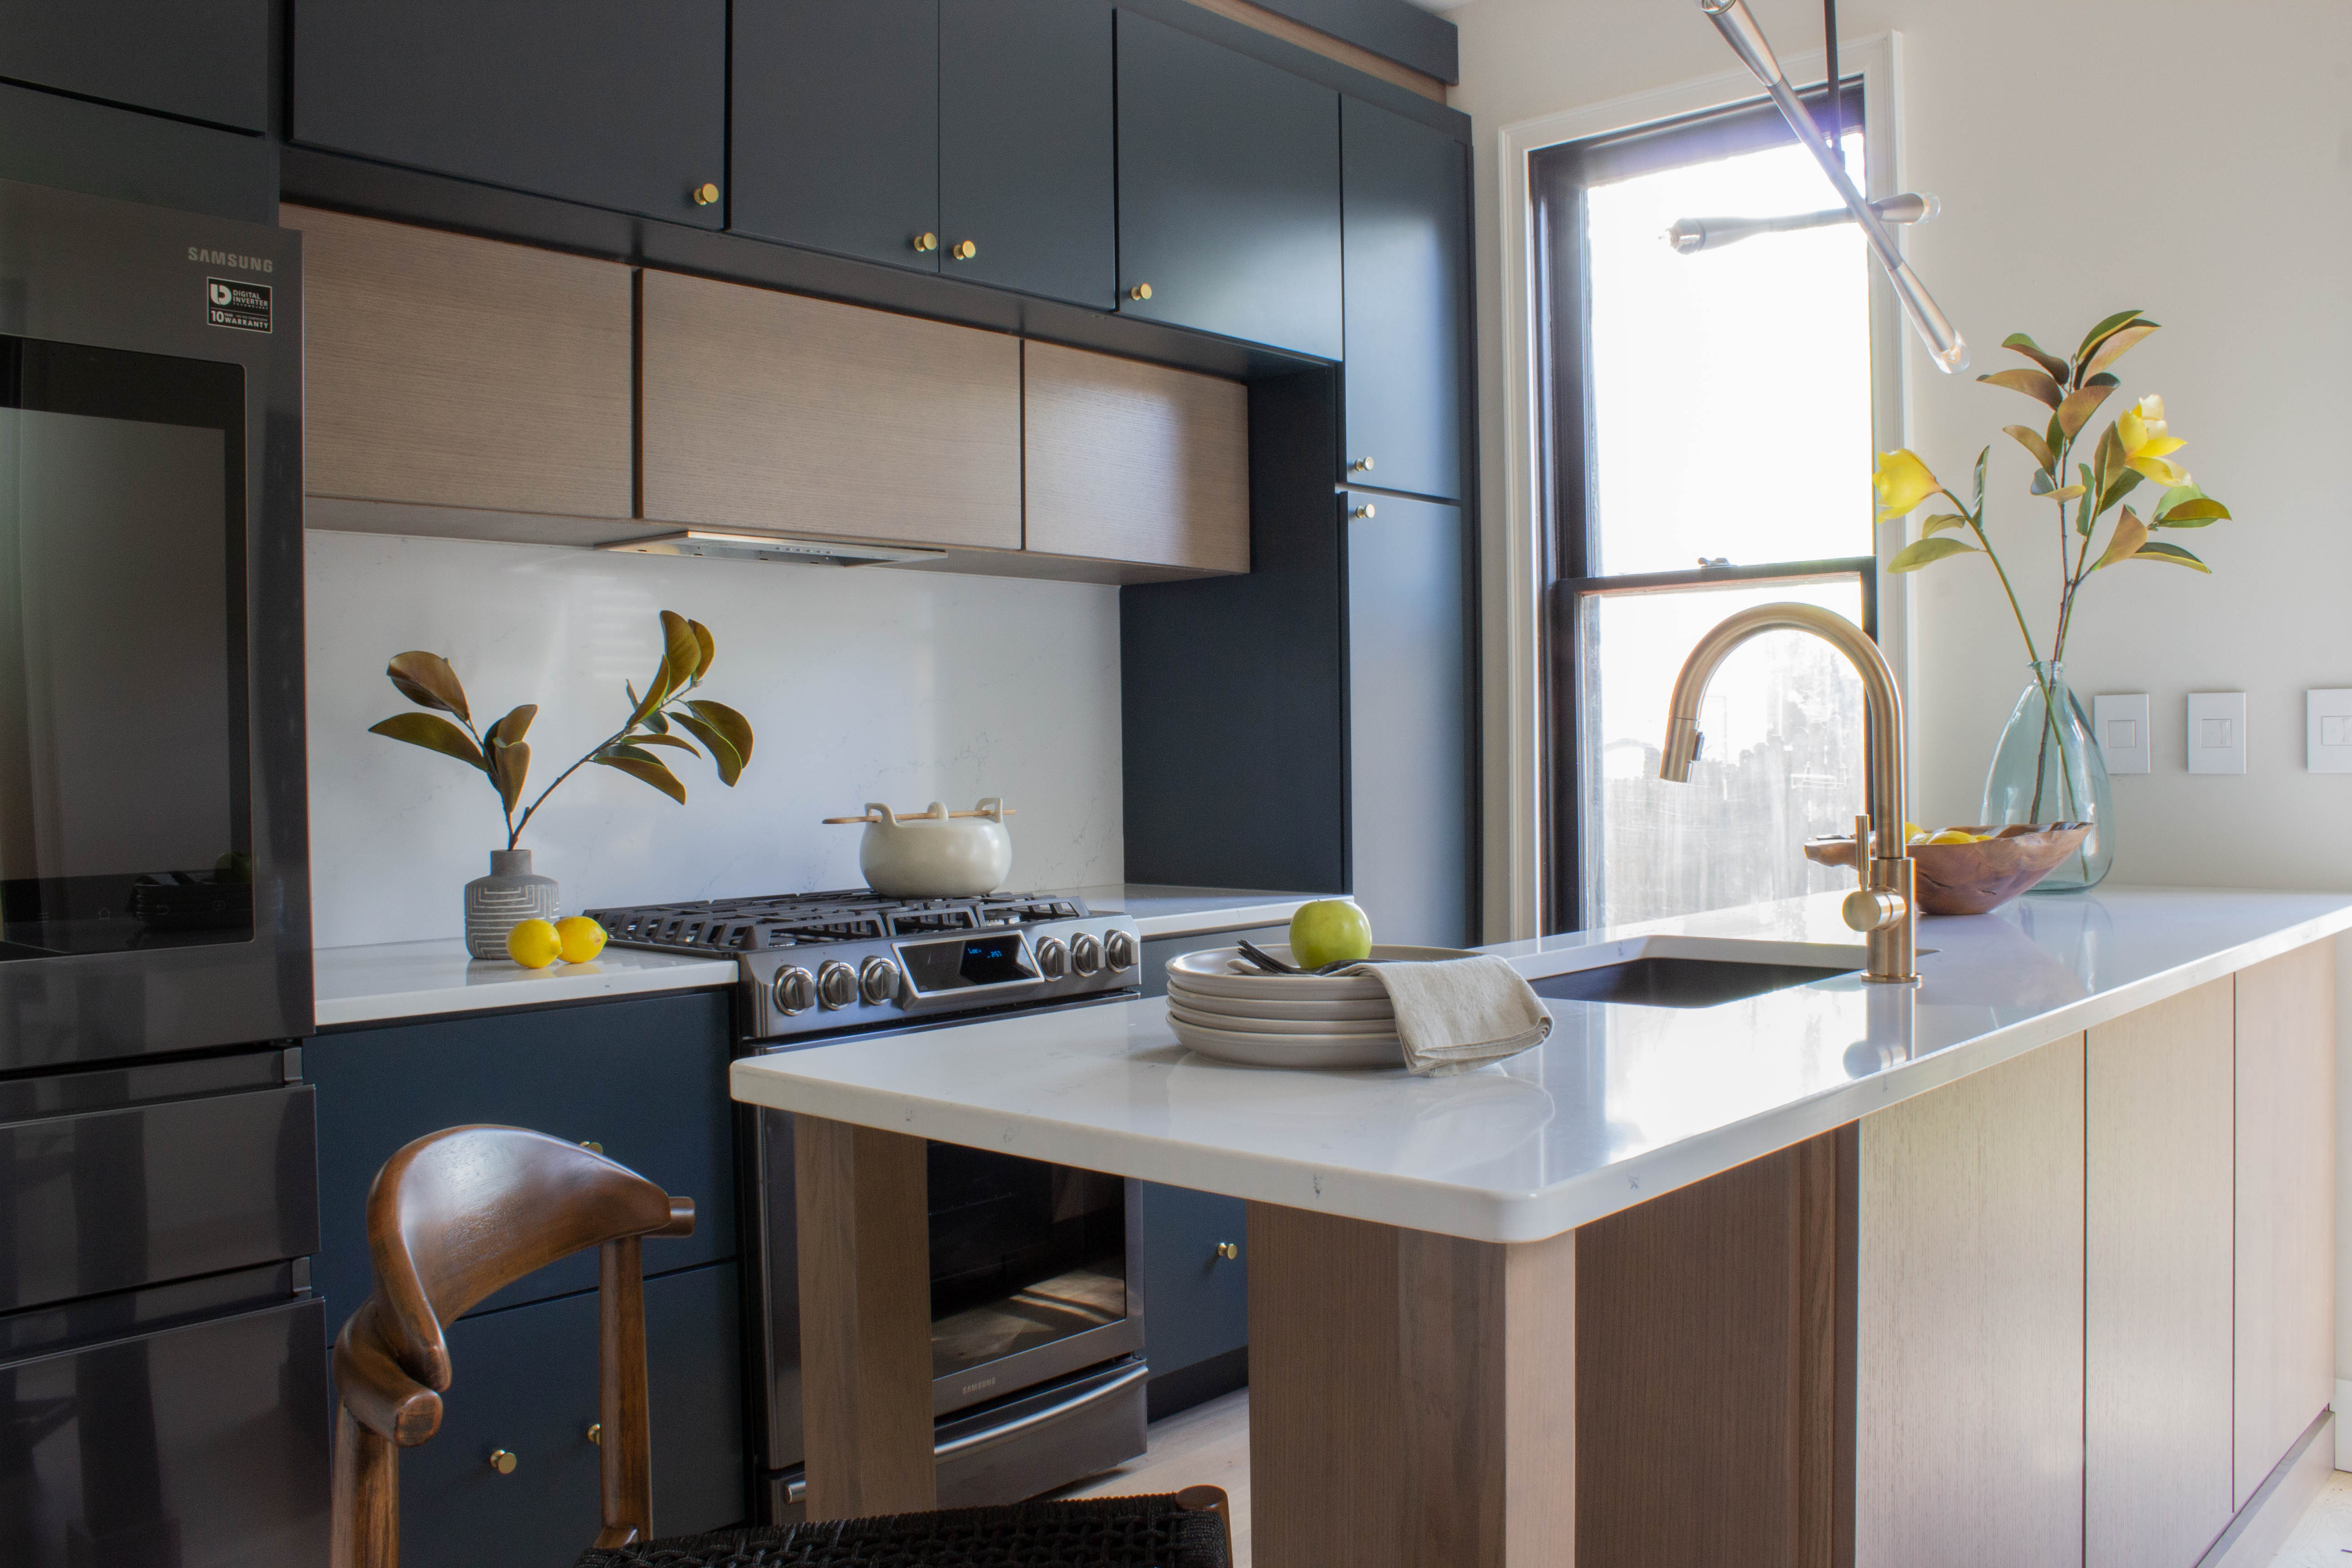
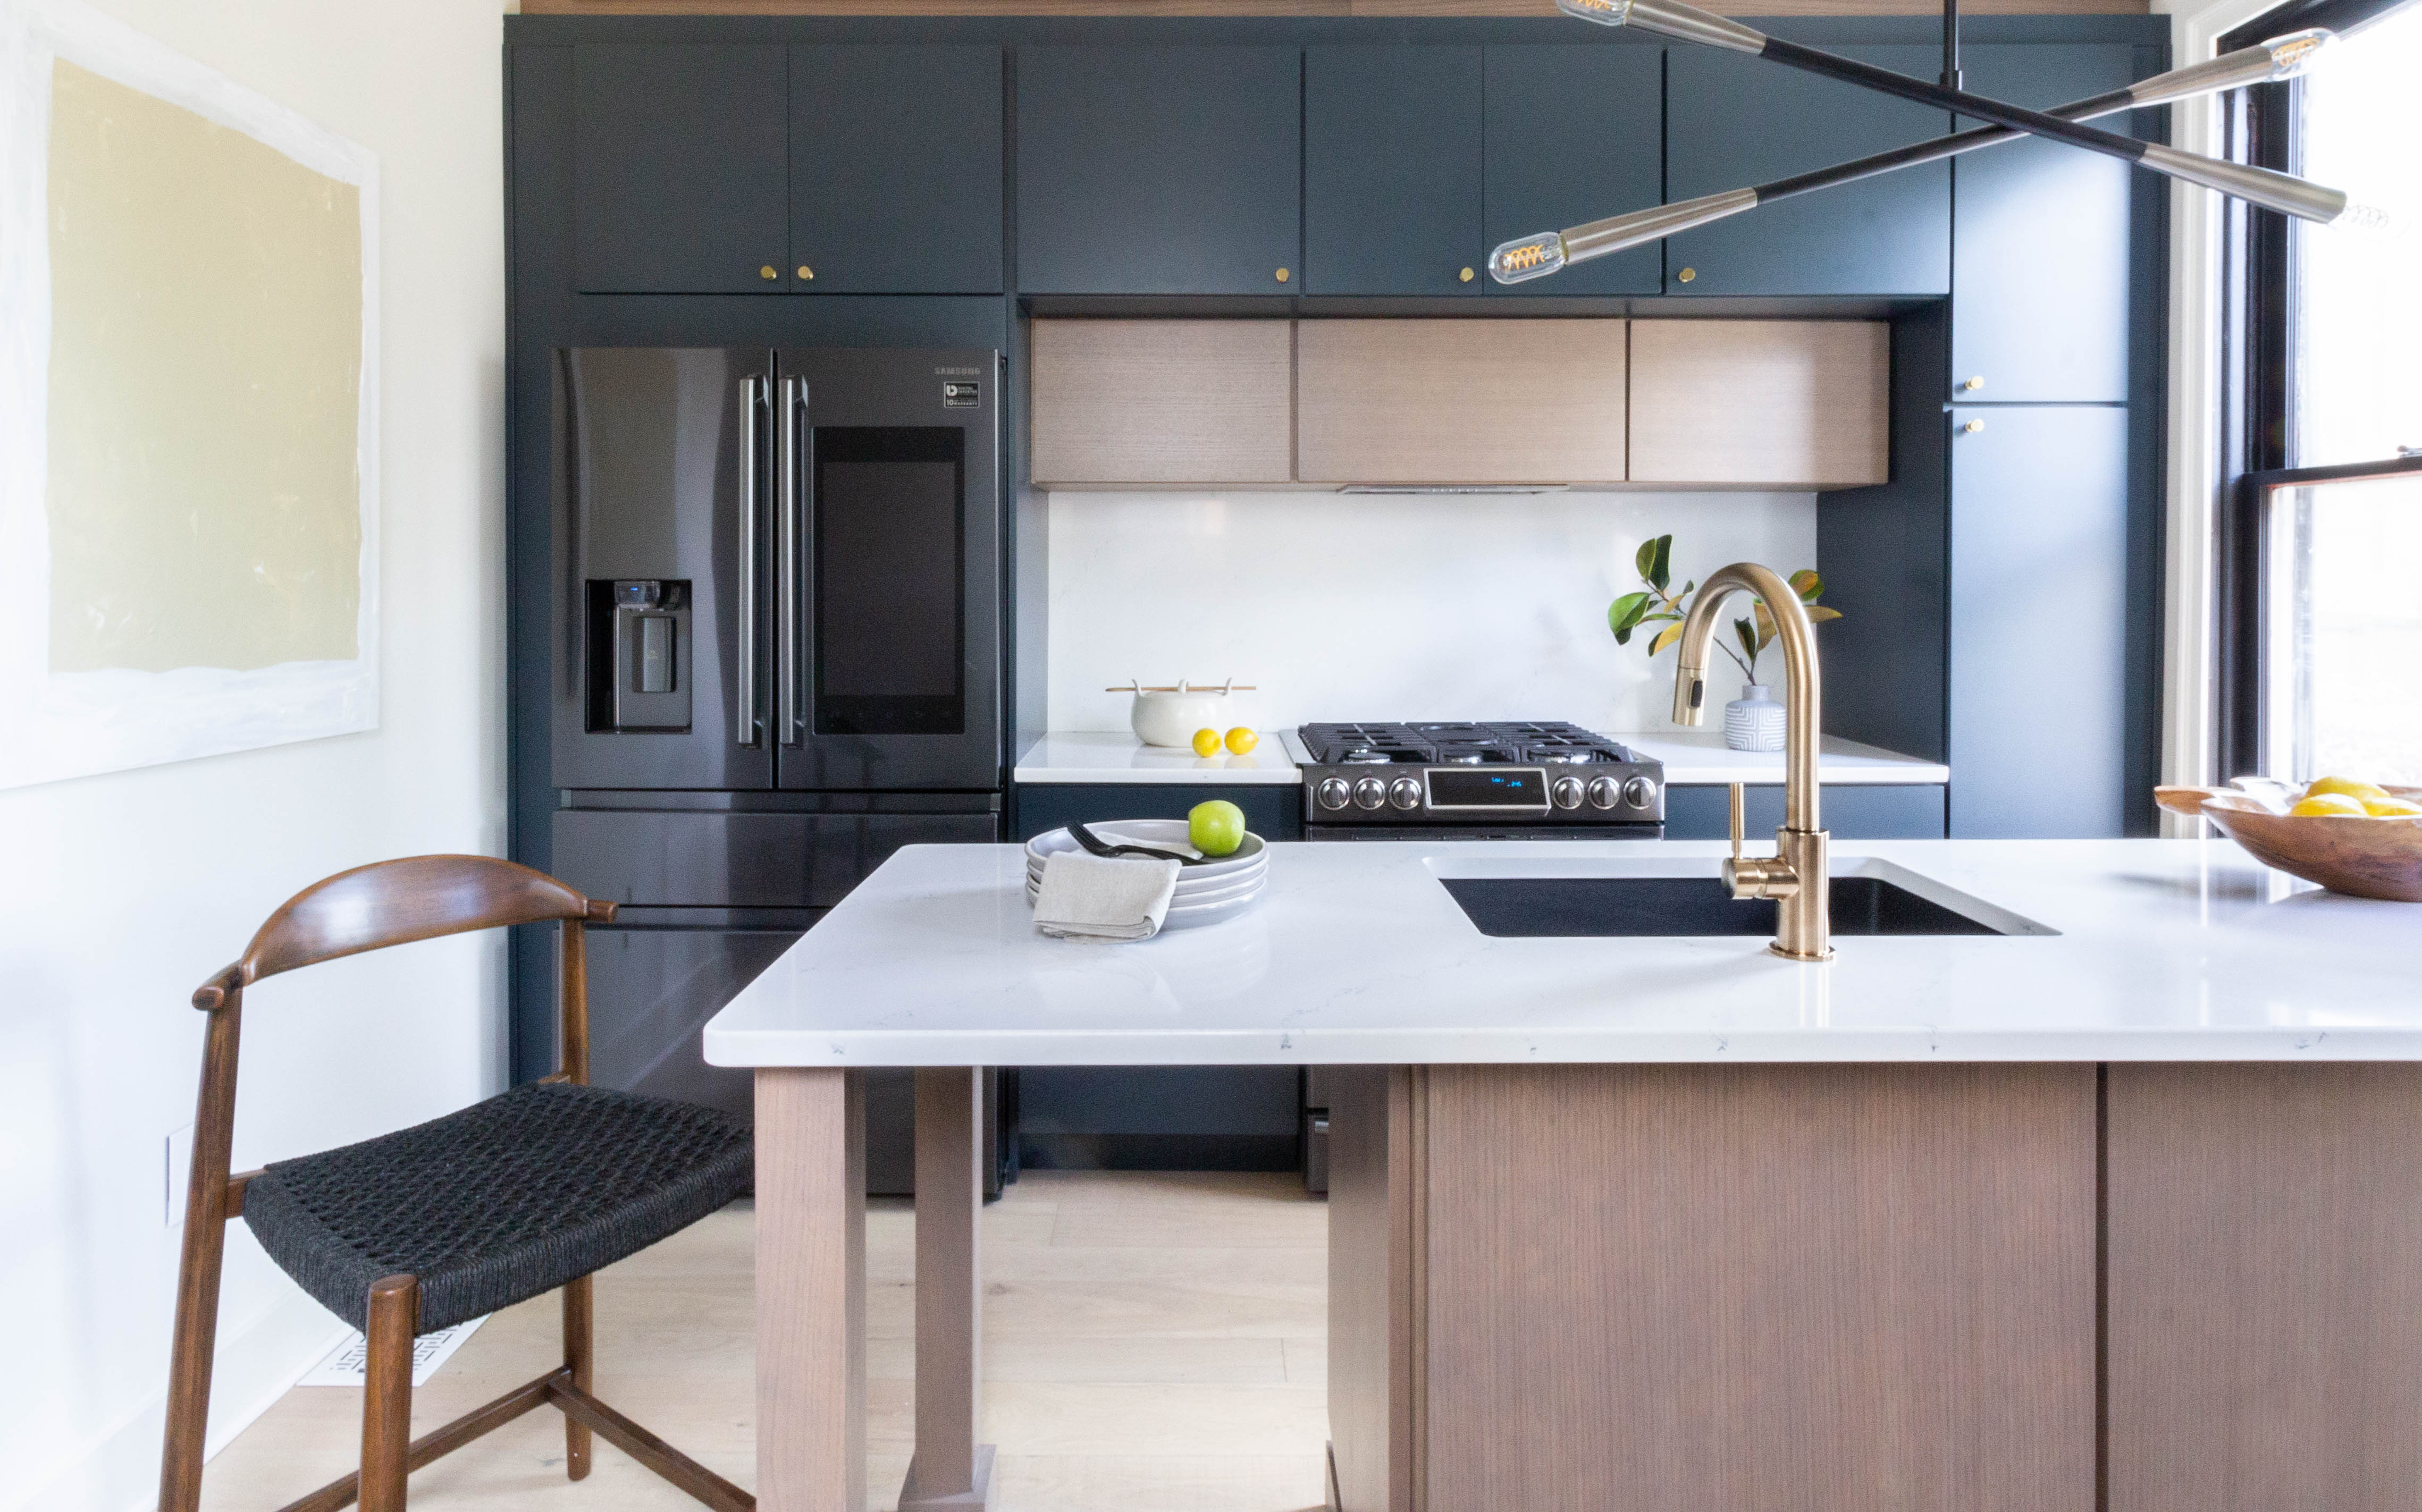
Heeeere she is!

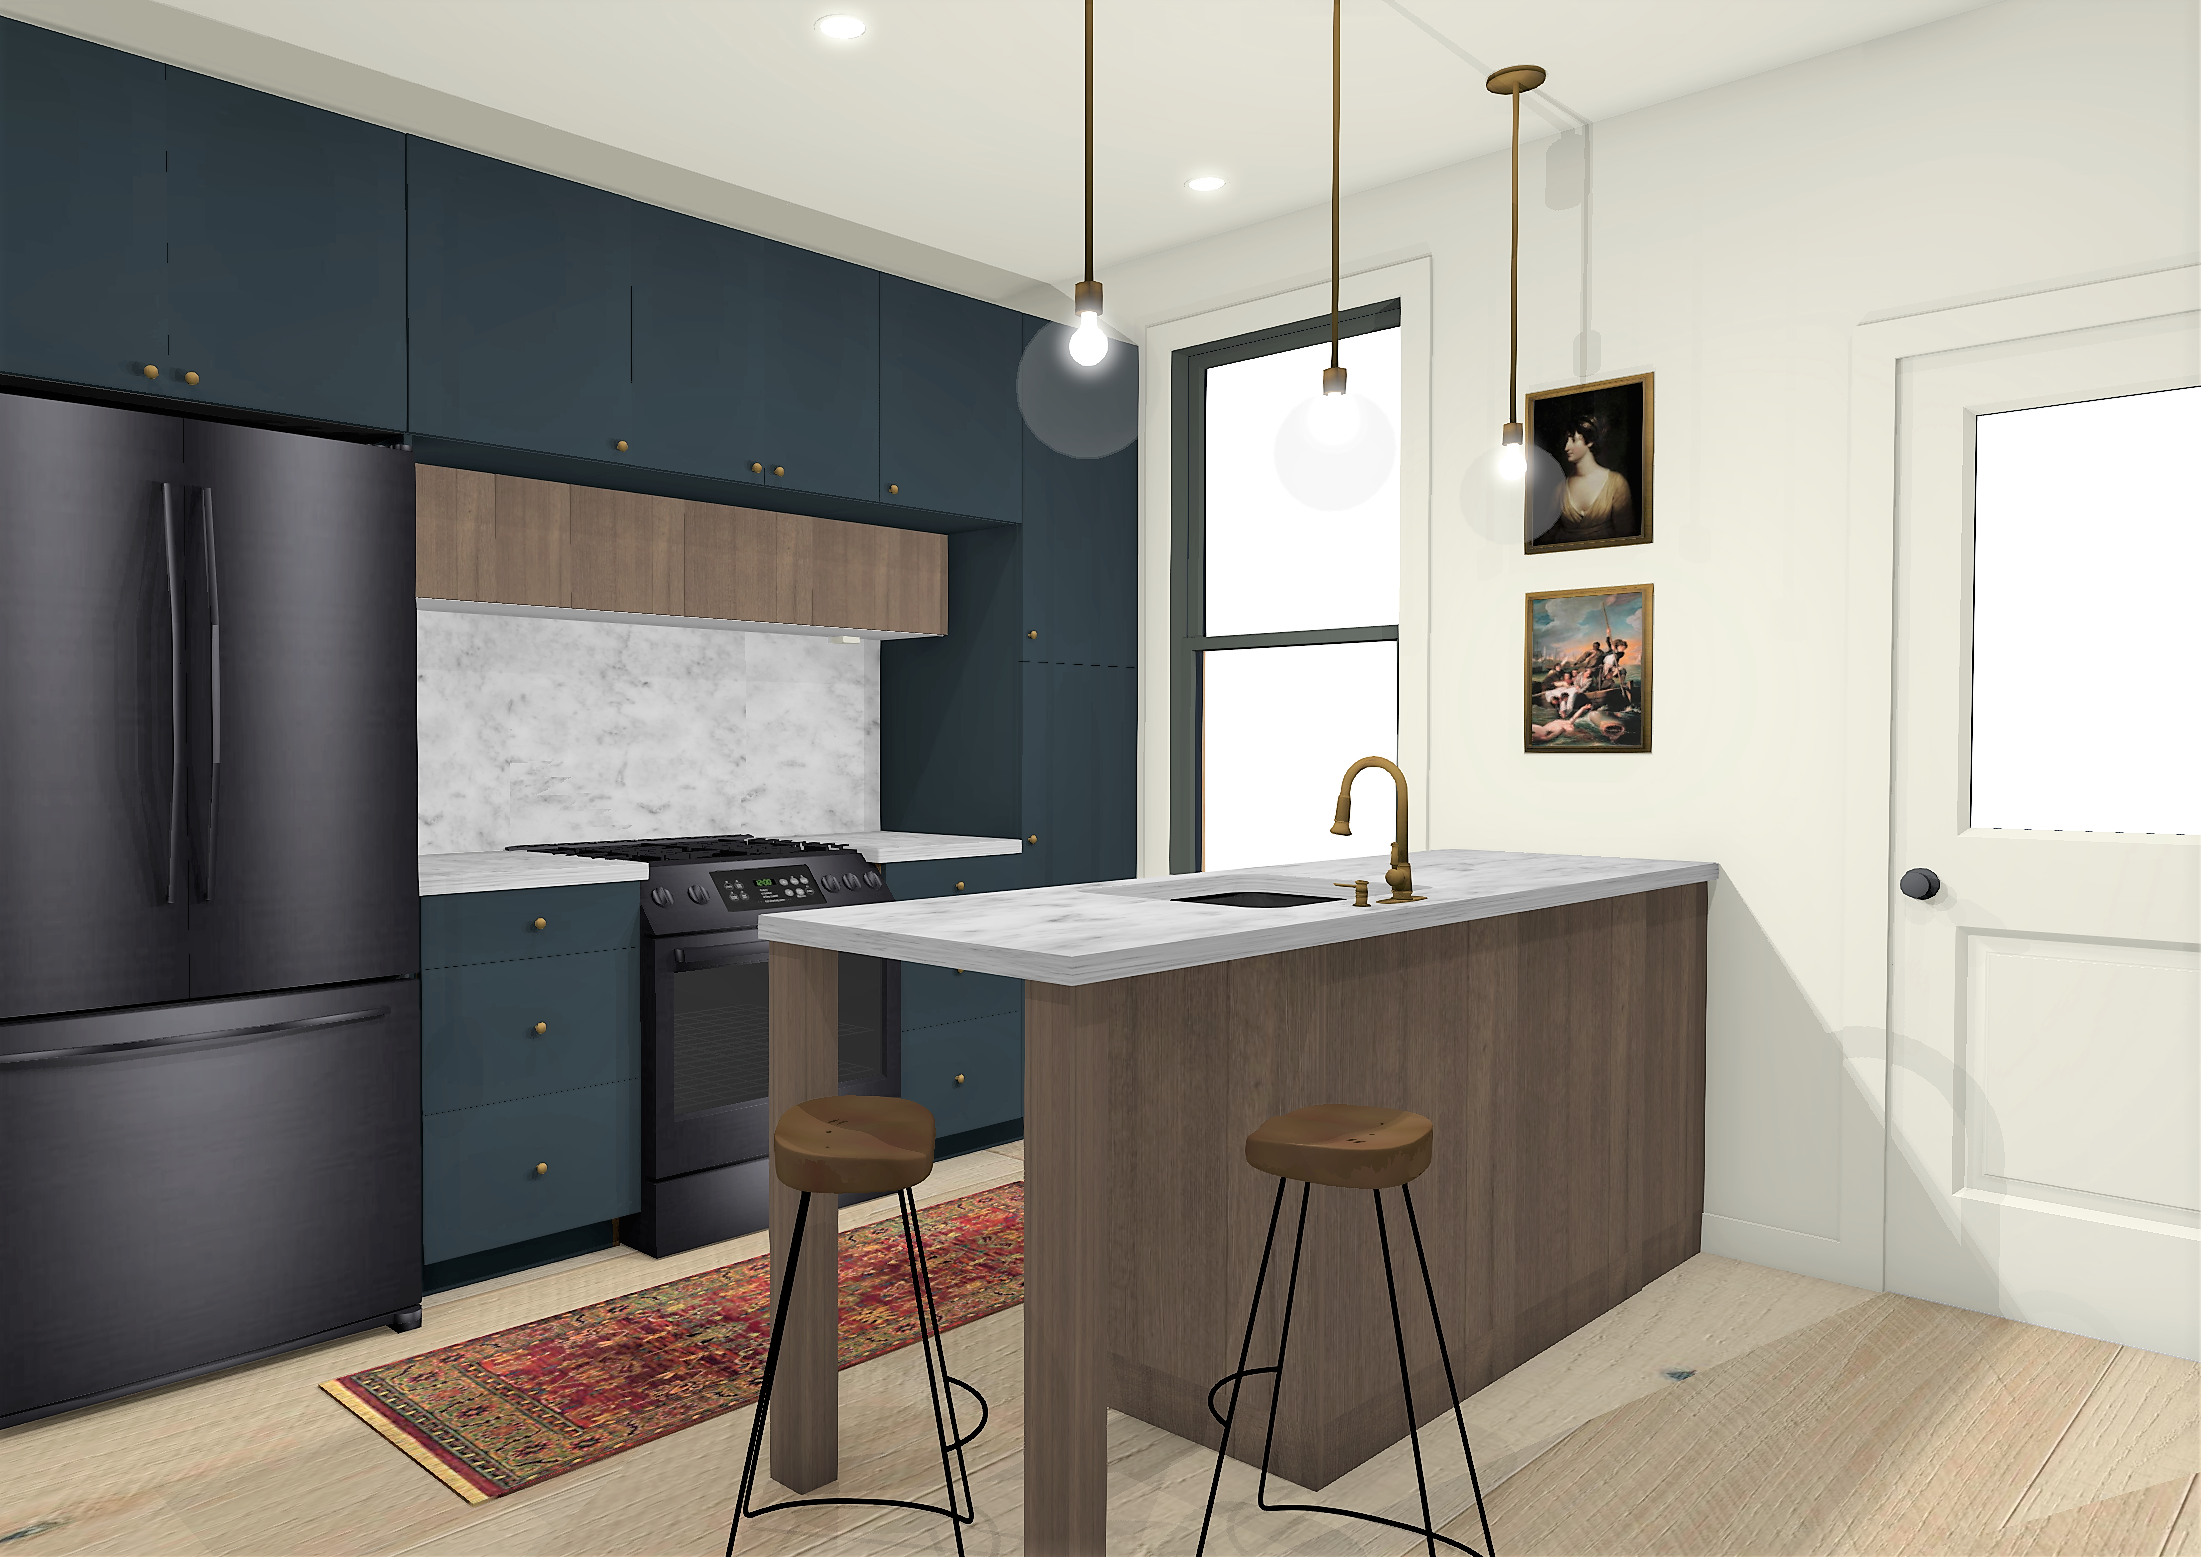
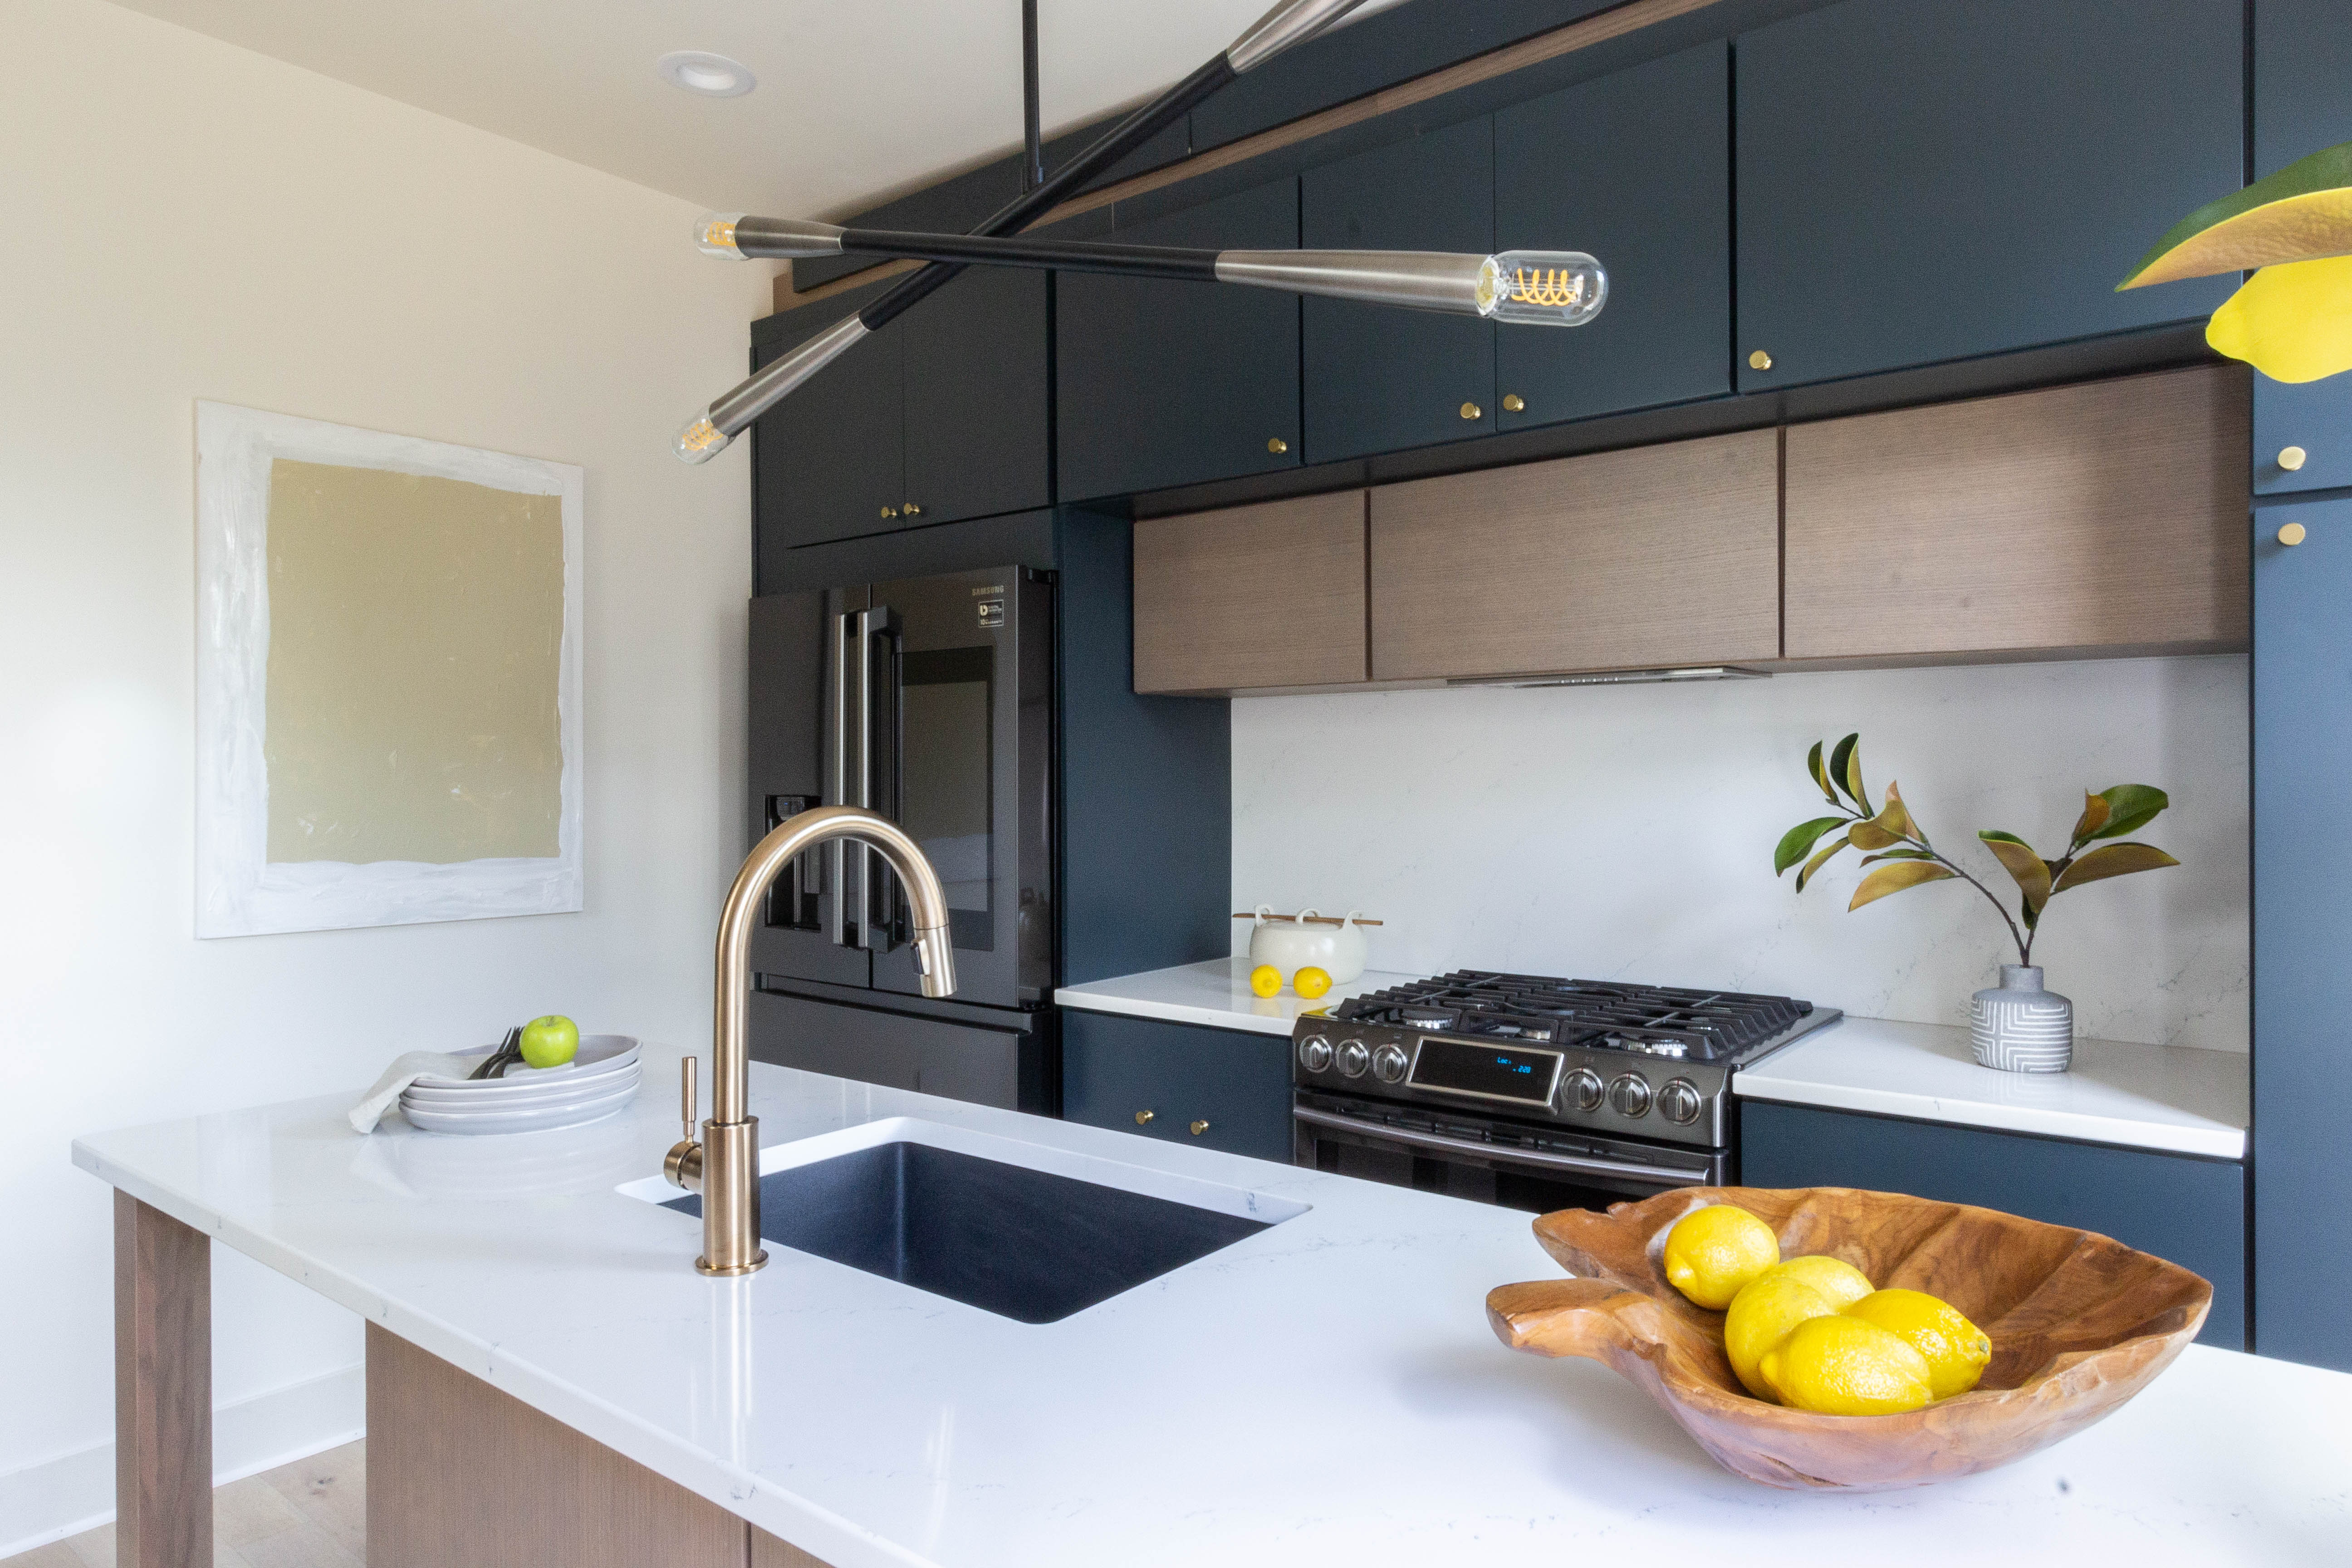
This is our first time going modern in a kitchen, and we have to say, we dig it.
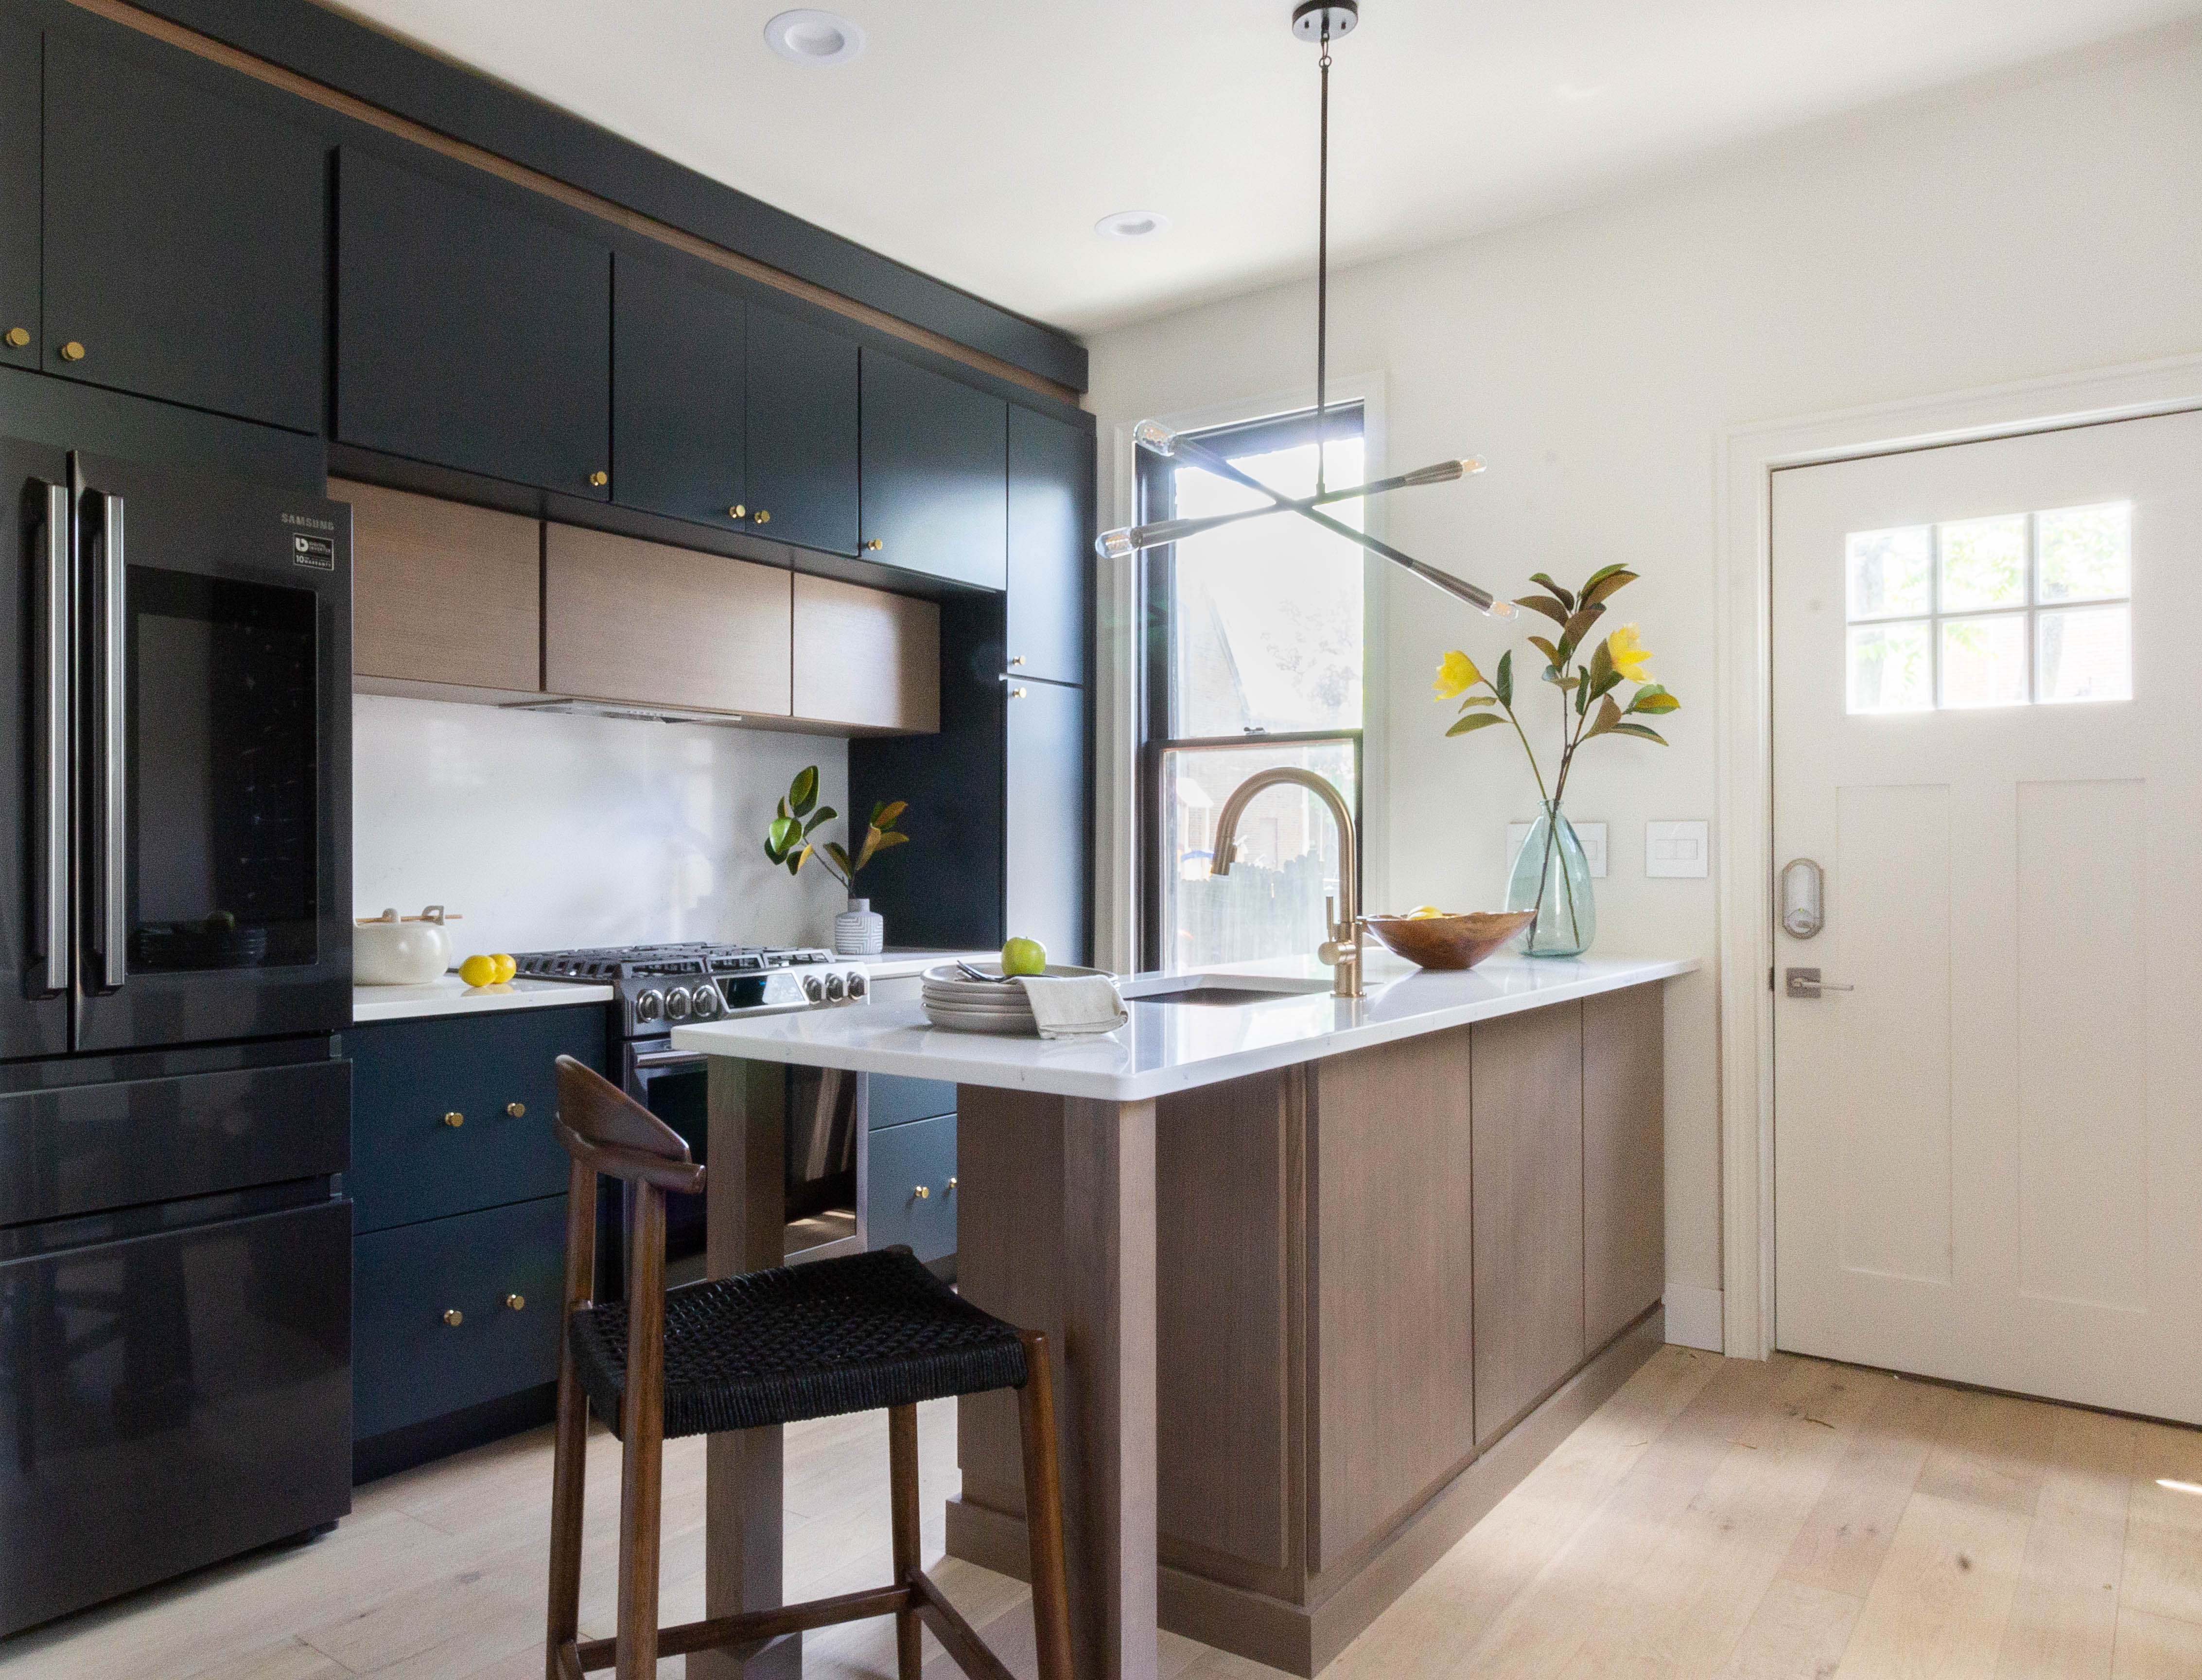
Cabinets & Countertops
We decided to use a mix of two different cabinet door finishes in this kitchen. Both are the Willa style doors from the Diamond line at Lowe’s, so even though they have a different finish, they match up perfectly. The blue doors are painted maple with a smooth finish in Maritime, which is the prettiest deep blue color. The wood doors are quartersawn oak in the Boardwalk finish. The wood texture shows through, and the tone is gorgeous. The Maritime cabinets are all 24″ deep and provide a ton of storage in this small kitchen. The oak cabinets are 12″ deep, so they’re perfect for spices and other cooking supplies. We expect our guests to use the smaller oak cabinets, lower cabinet drawers and pantry cabinet the most, so the upper layer will be great for storage (think: lots of extra toilet paper, paper towels, etc).
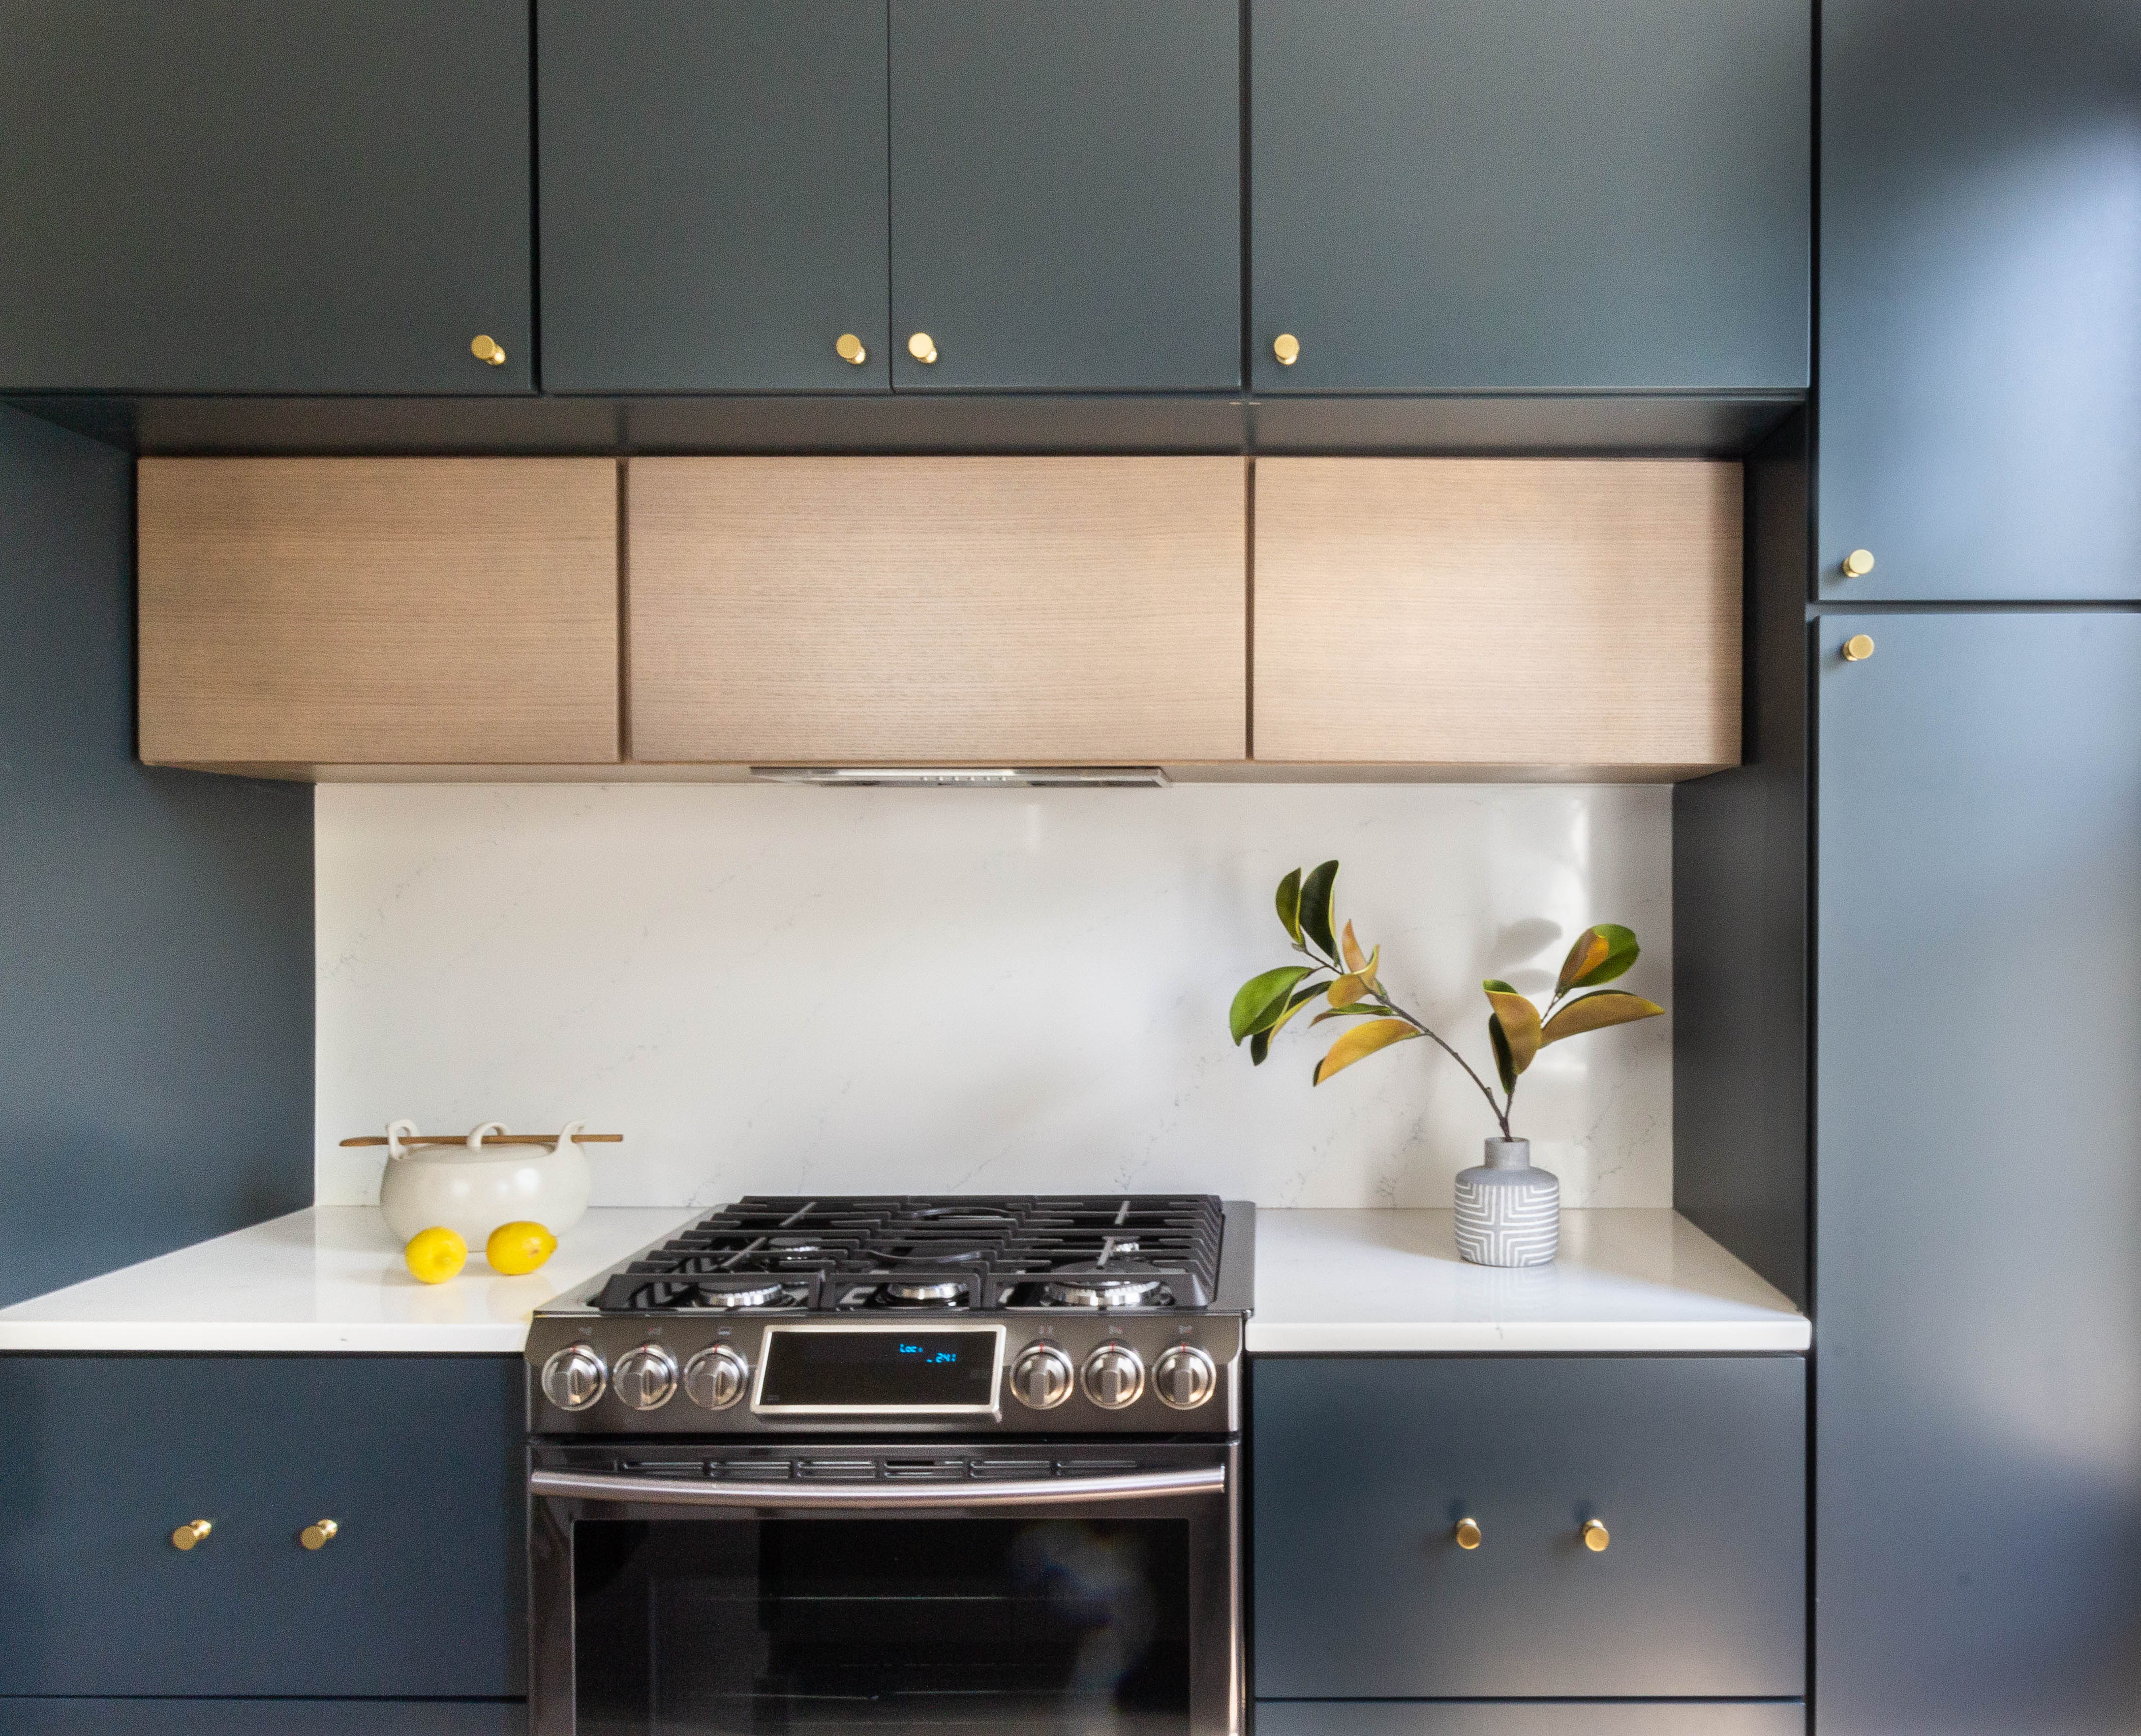
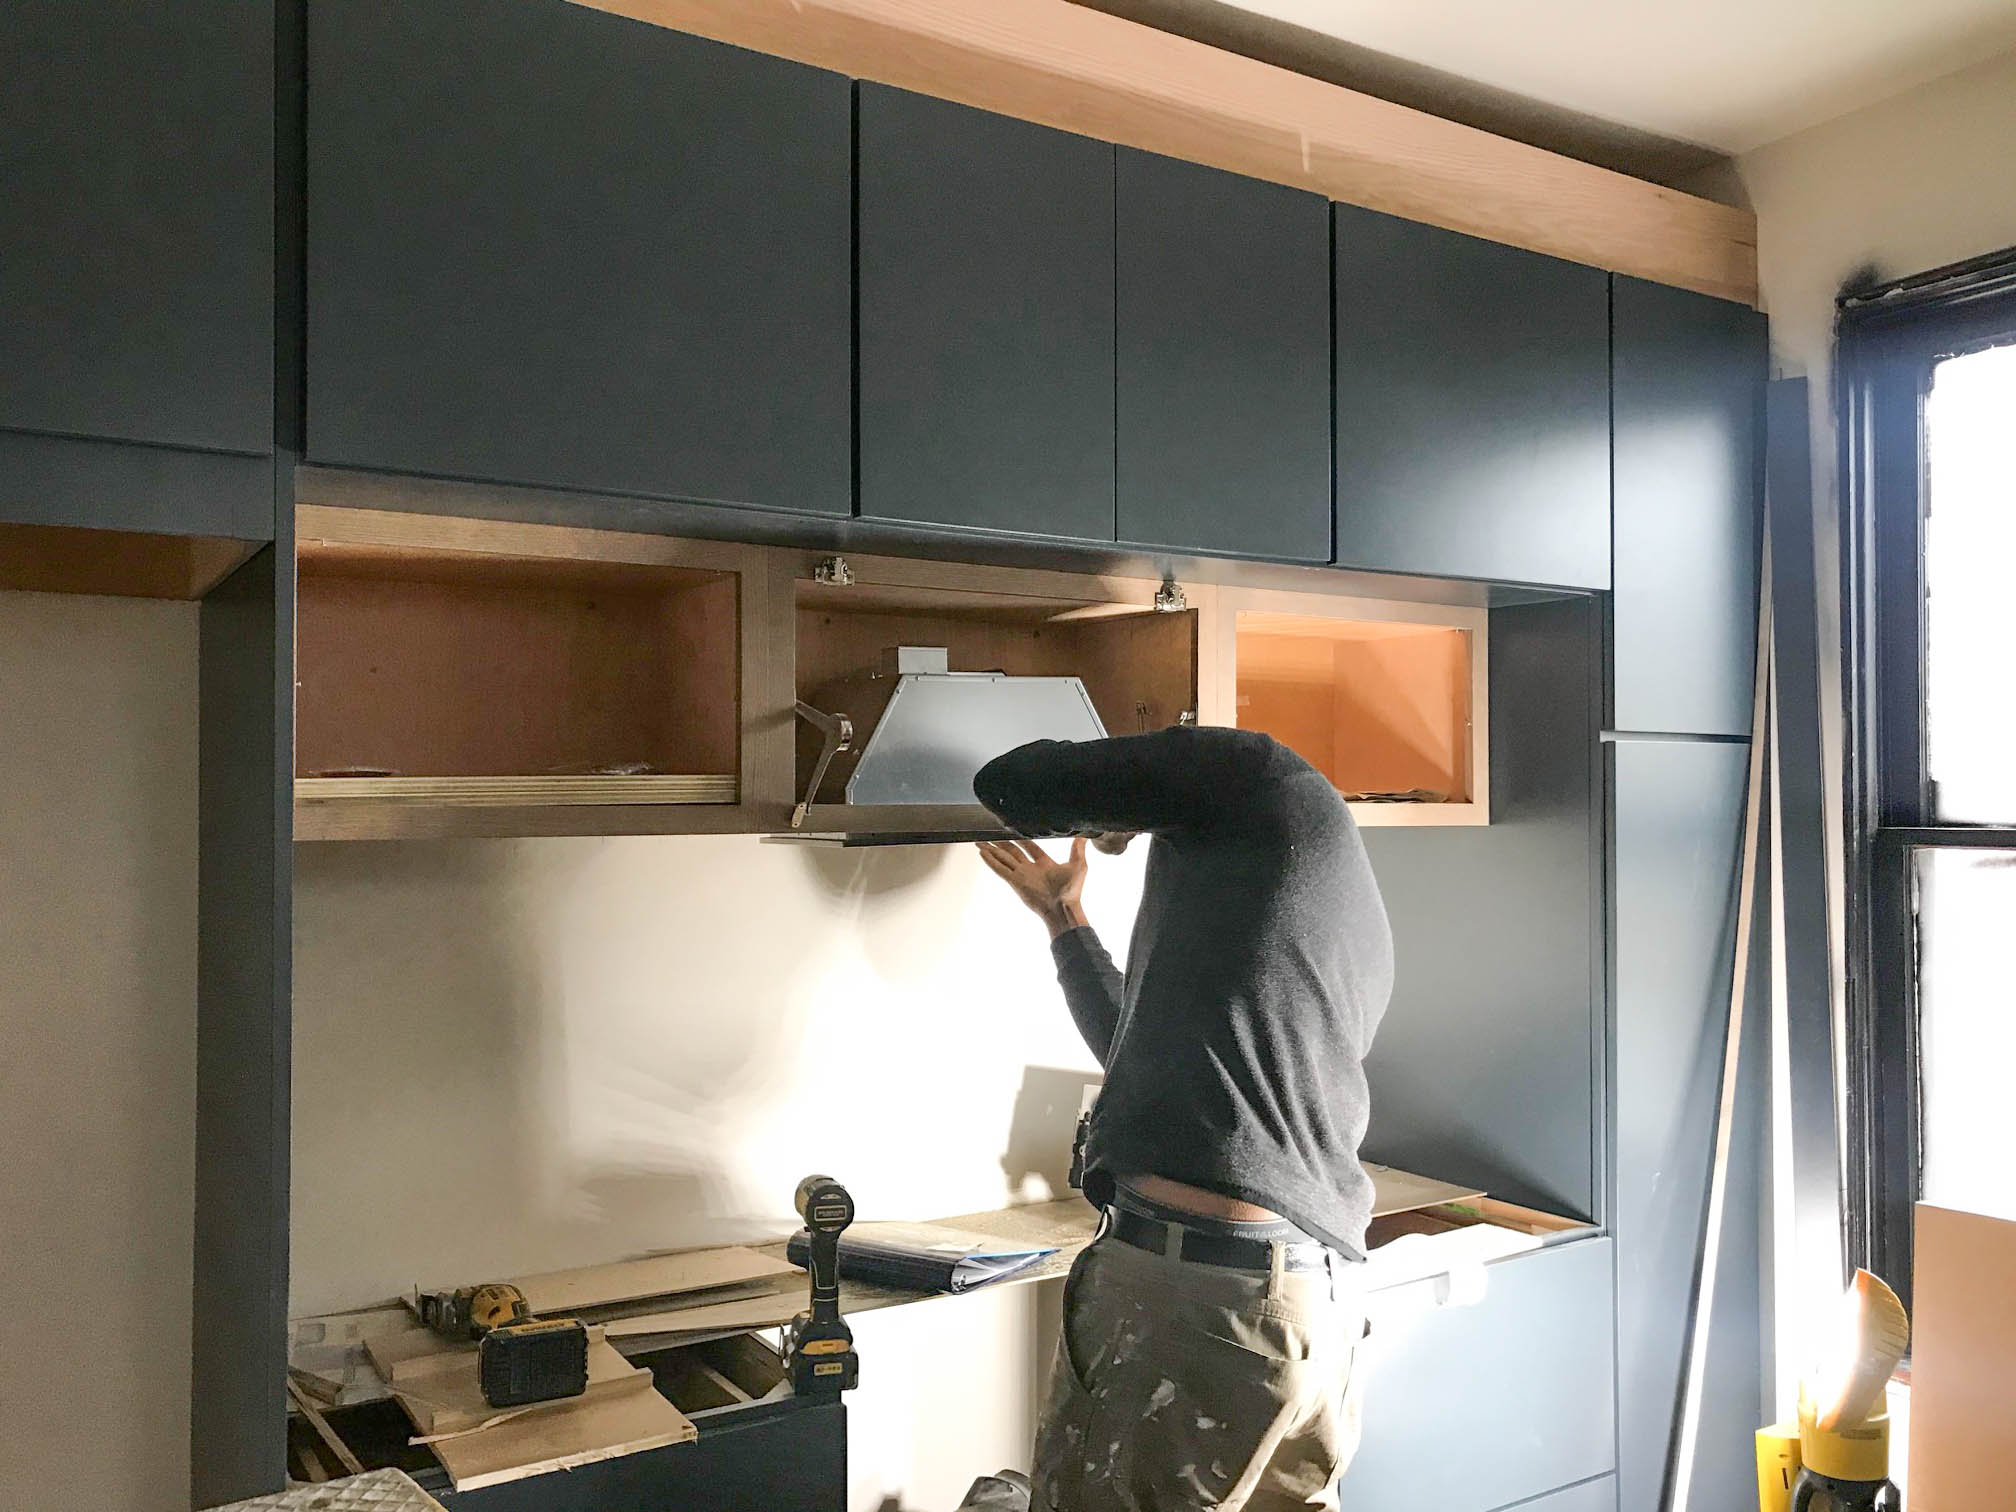
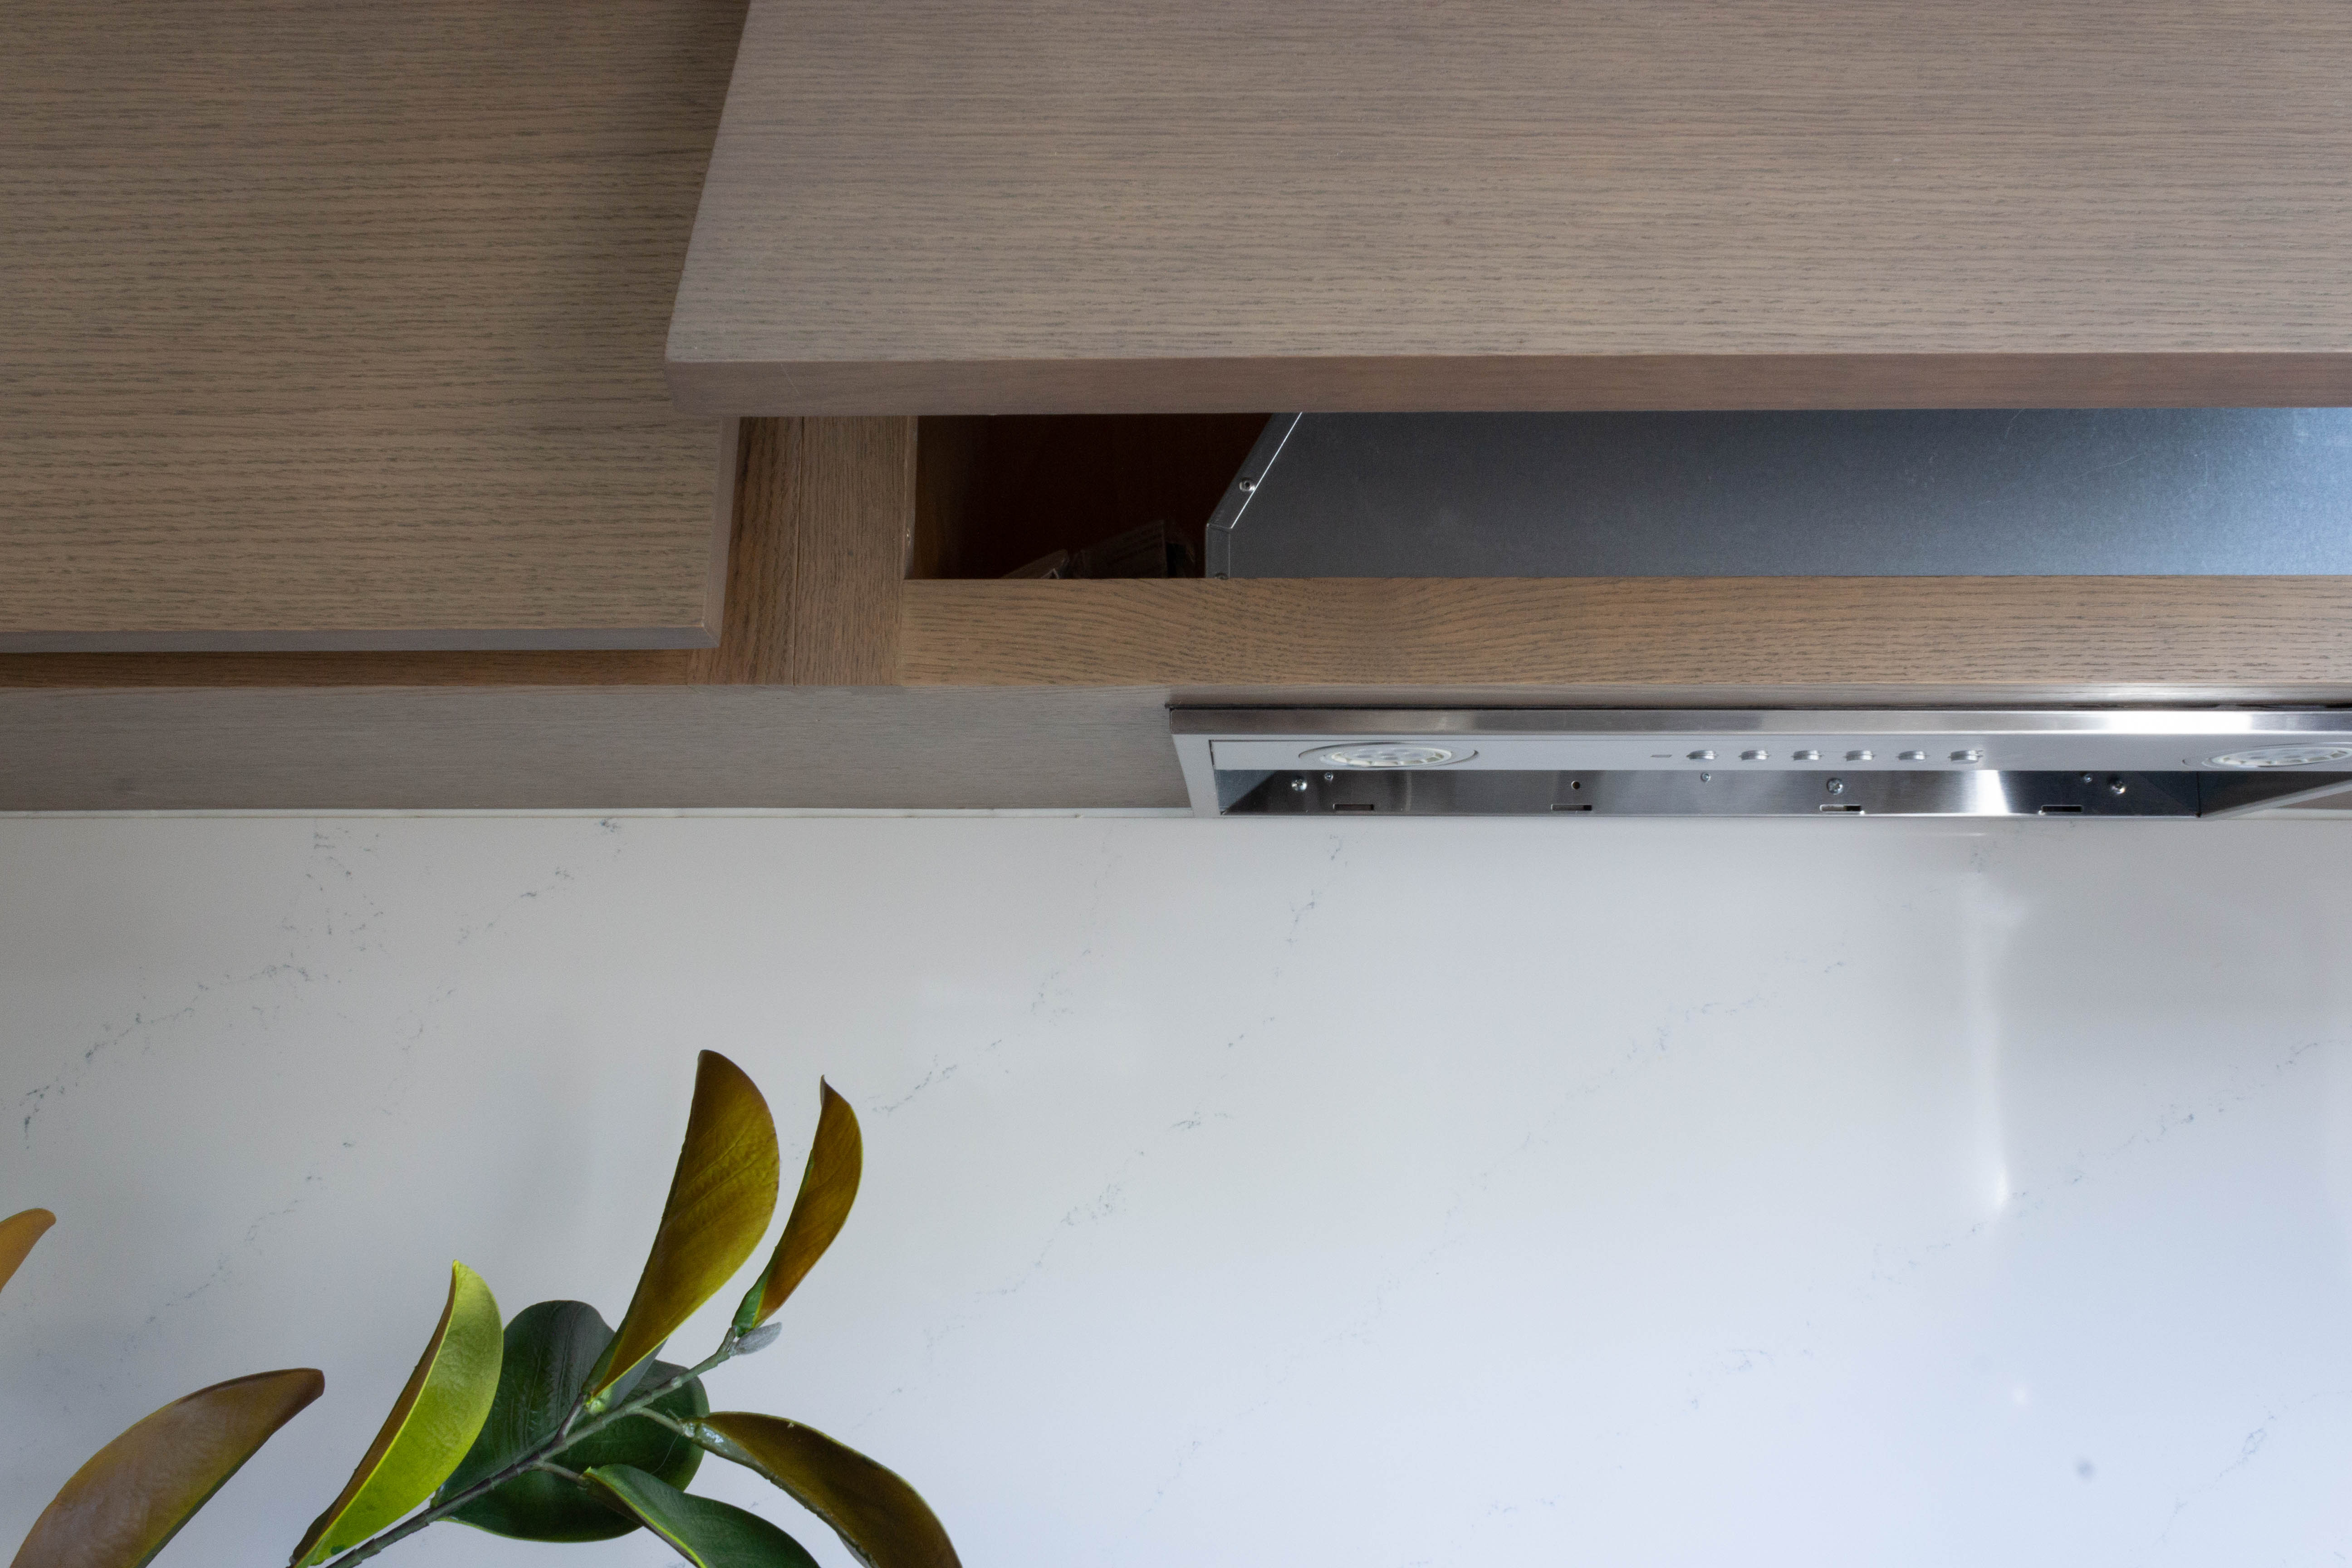
Remember our post on hiding our range hood in one of the cabinets? Our insert fit right into this cabinet and only peaks out a smidge on the bottom. It really keeps the kitchen feeling clean & modern.
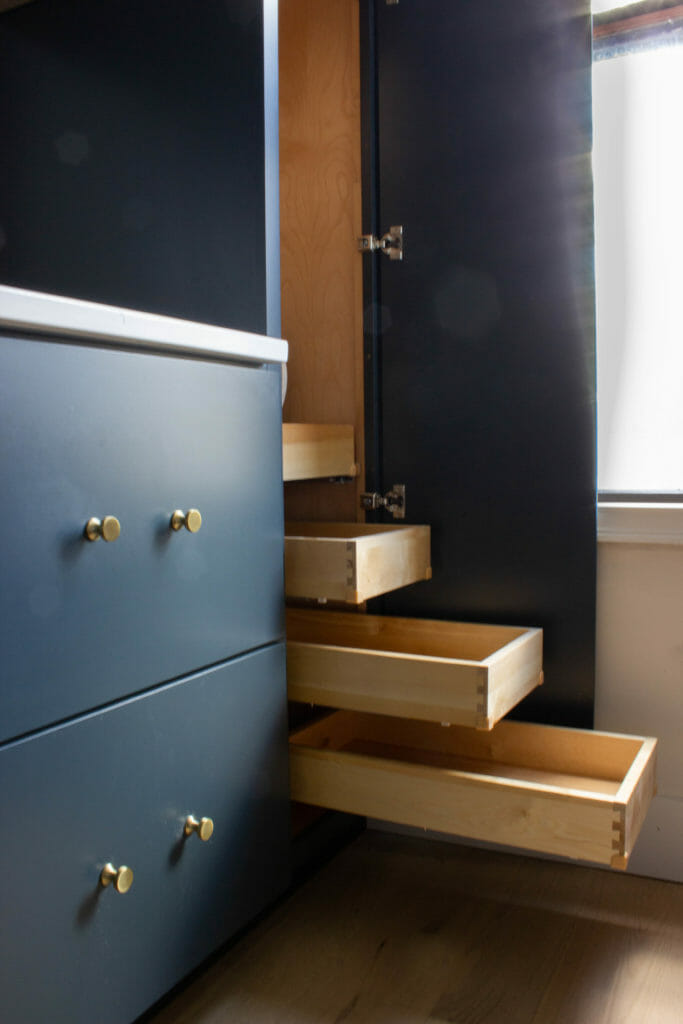
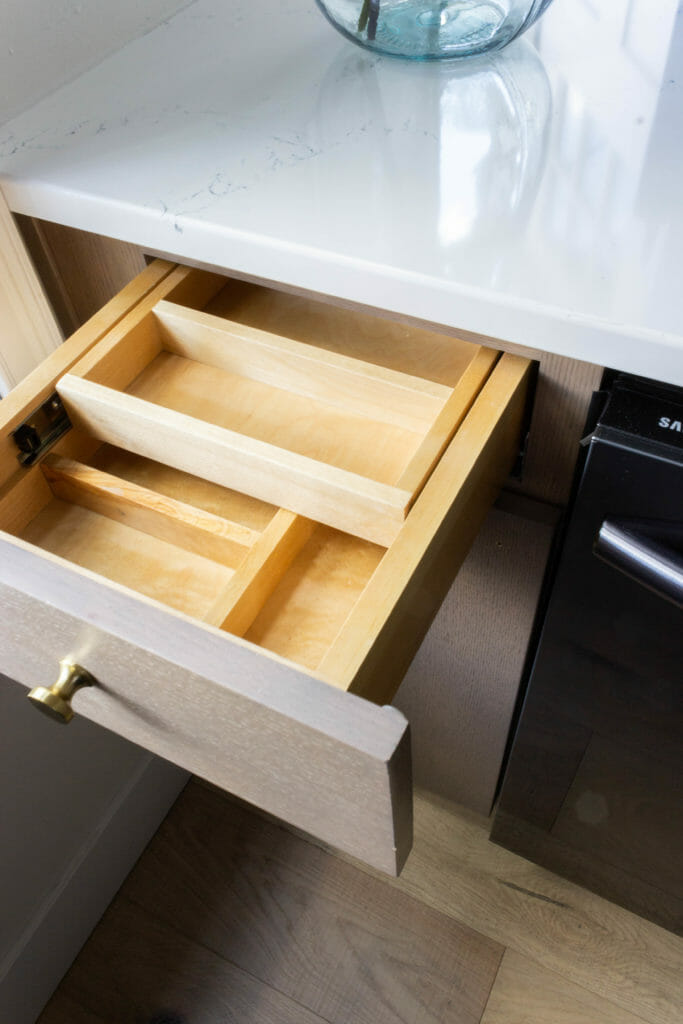
The cabinets were special order at Lowe’s, and they are SOLID. Dovetail joints, all wood, and great construction. We were super impressed & know they’ll stand the test of time. The Lowe’s team helped us understand all of the storage options that were available before we finalized our design, which was so helpful given the fact that the kitchen is small. In the lower drawers flanking the range, we added drawer-in-drawer storage for silverware & cooking utensils. The area of the drawer under the smaller drawer can be used for pots & pans, baking supplies, and dishes.

The pantry cabinet also has tons of easily accessible storage, as well as adjustable pull-out drawers. We’re thinking small appliances, snacks, and extra dishes can go in this cabinet. To the left of the dishwasher, we added a cabinet with another two tiered storage drawer and a pull-out trash bin.
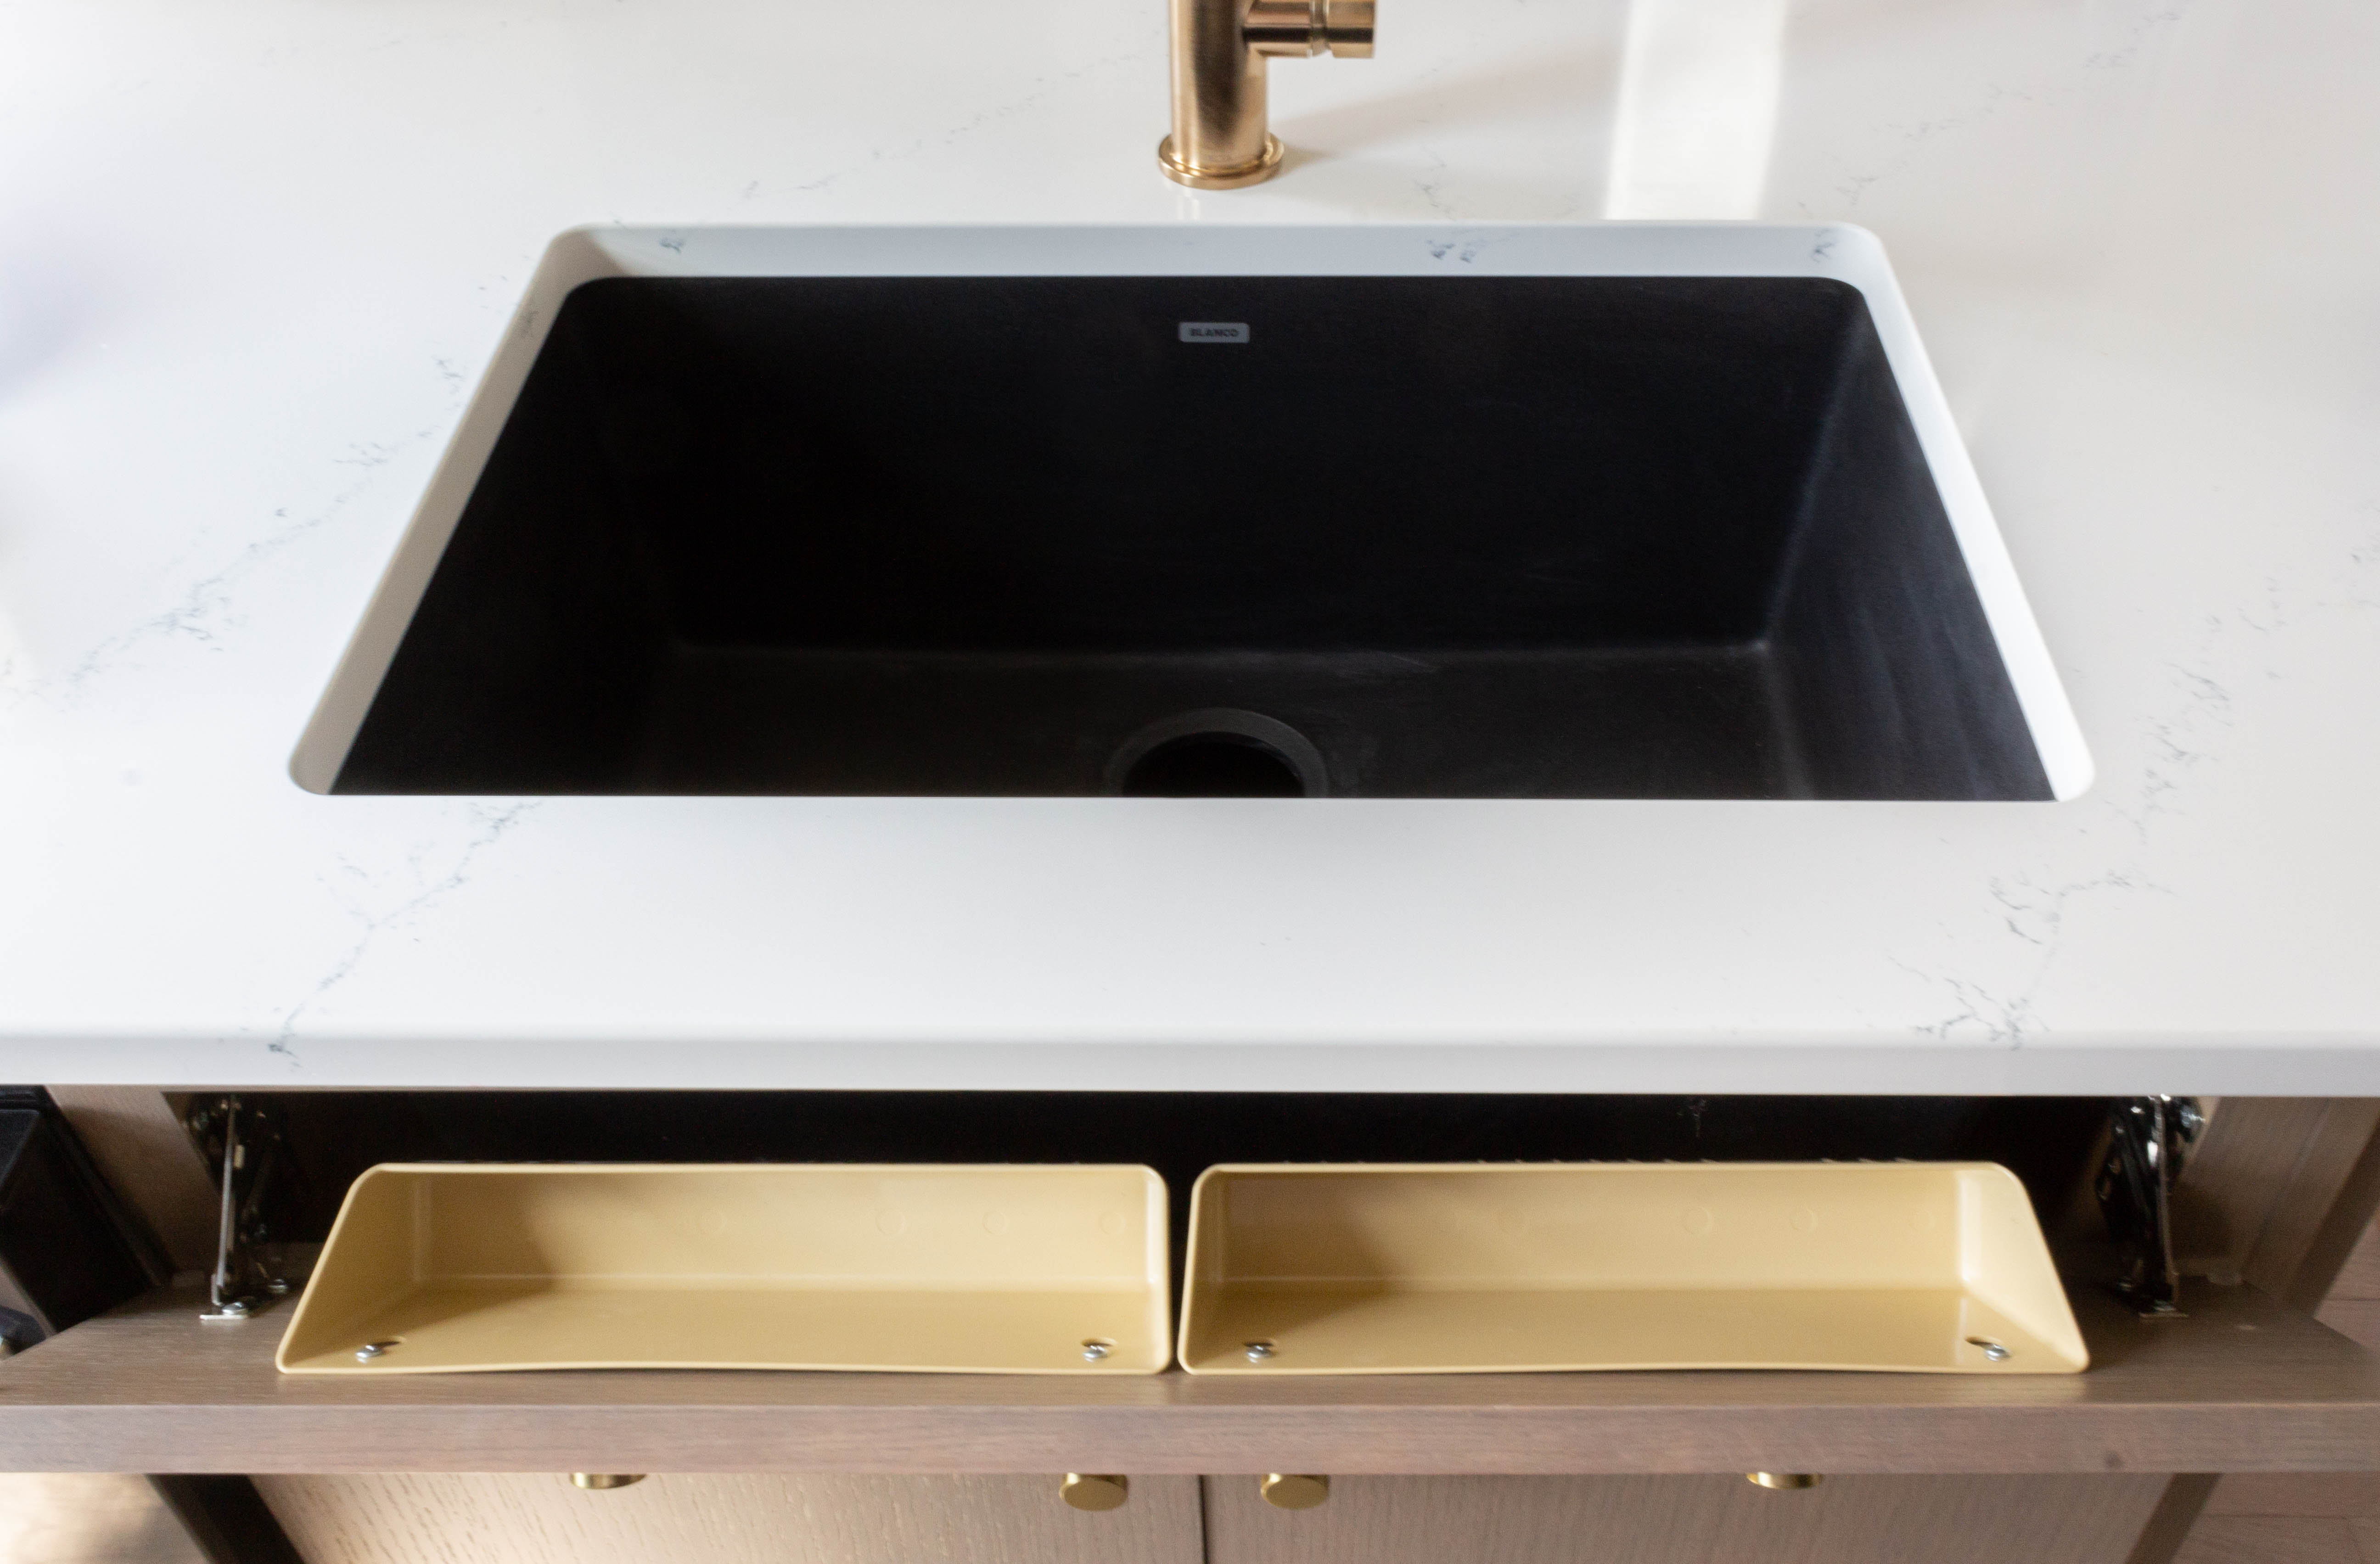
In the sink cabinet, we added a bottom hinged door with storage for scrub brushes and sponges to minimize visual clutter on the counter.
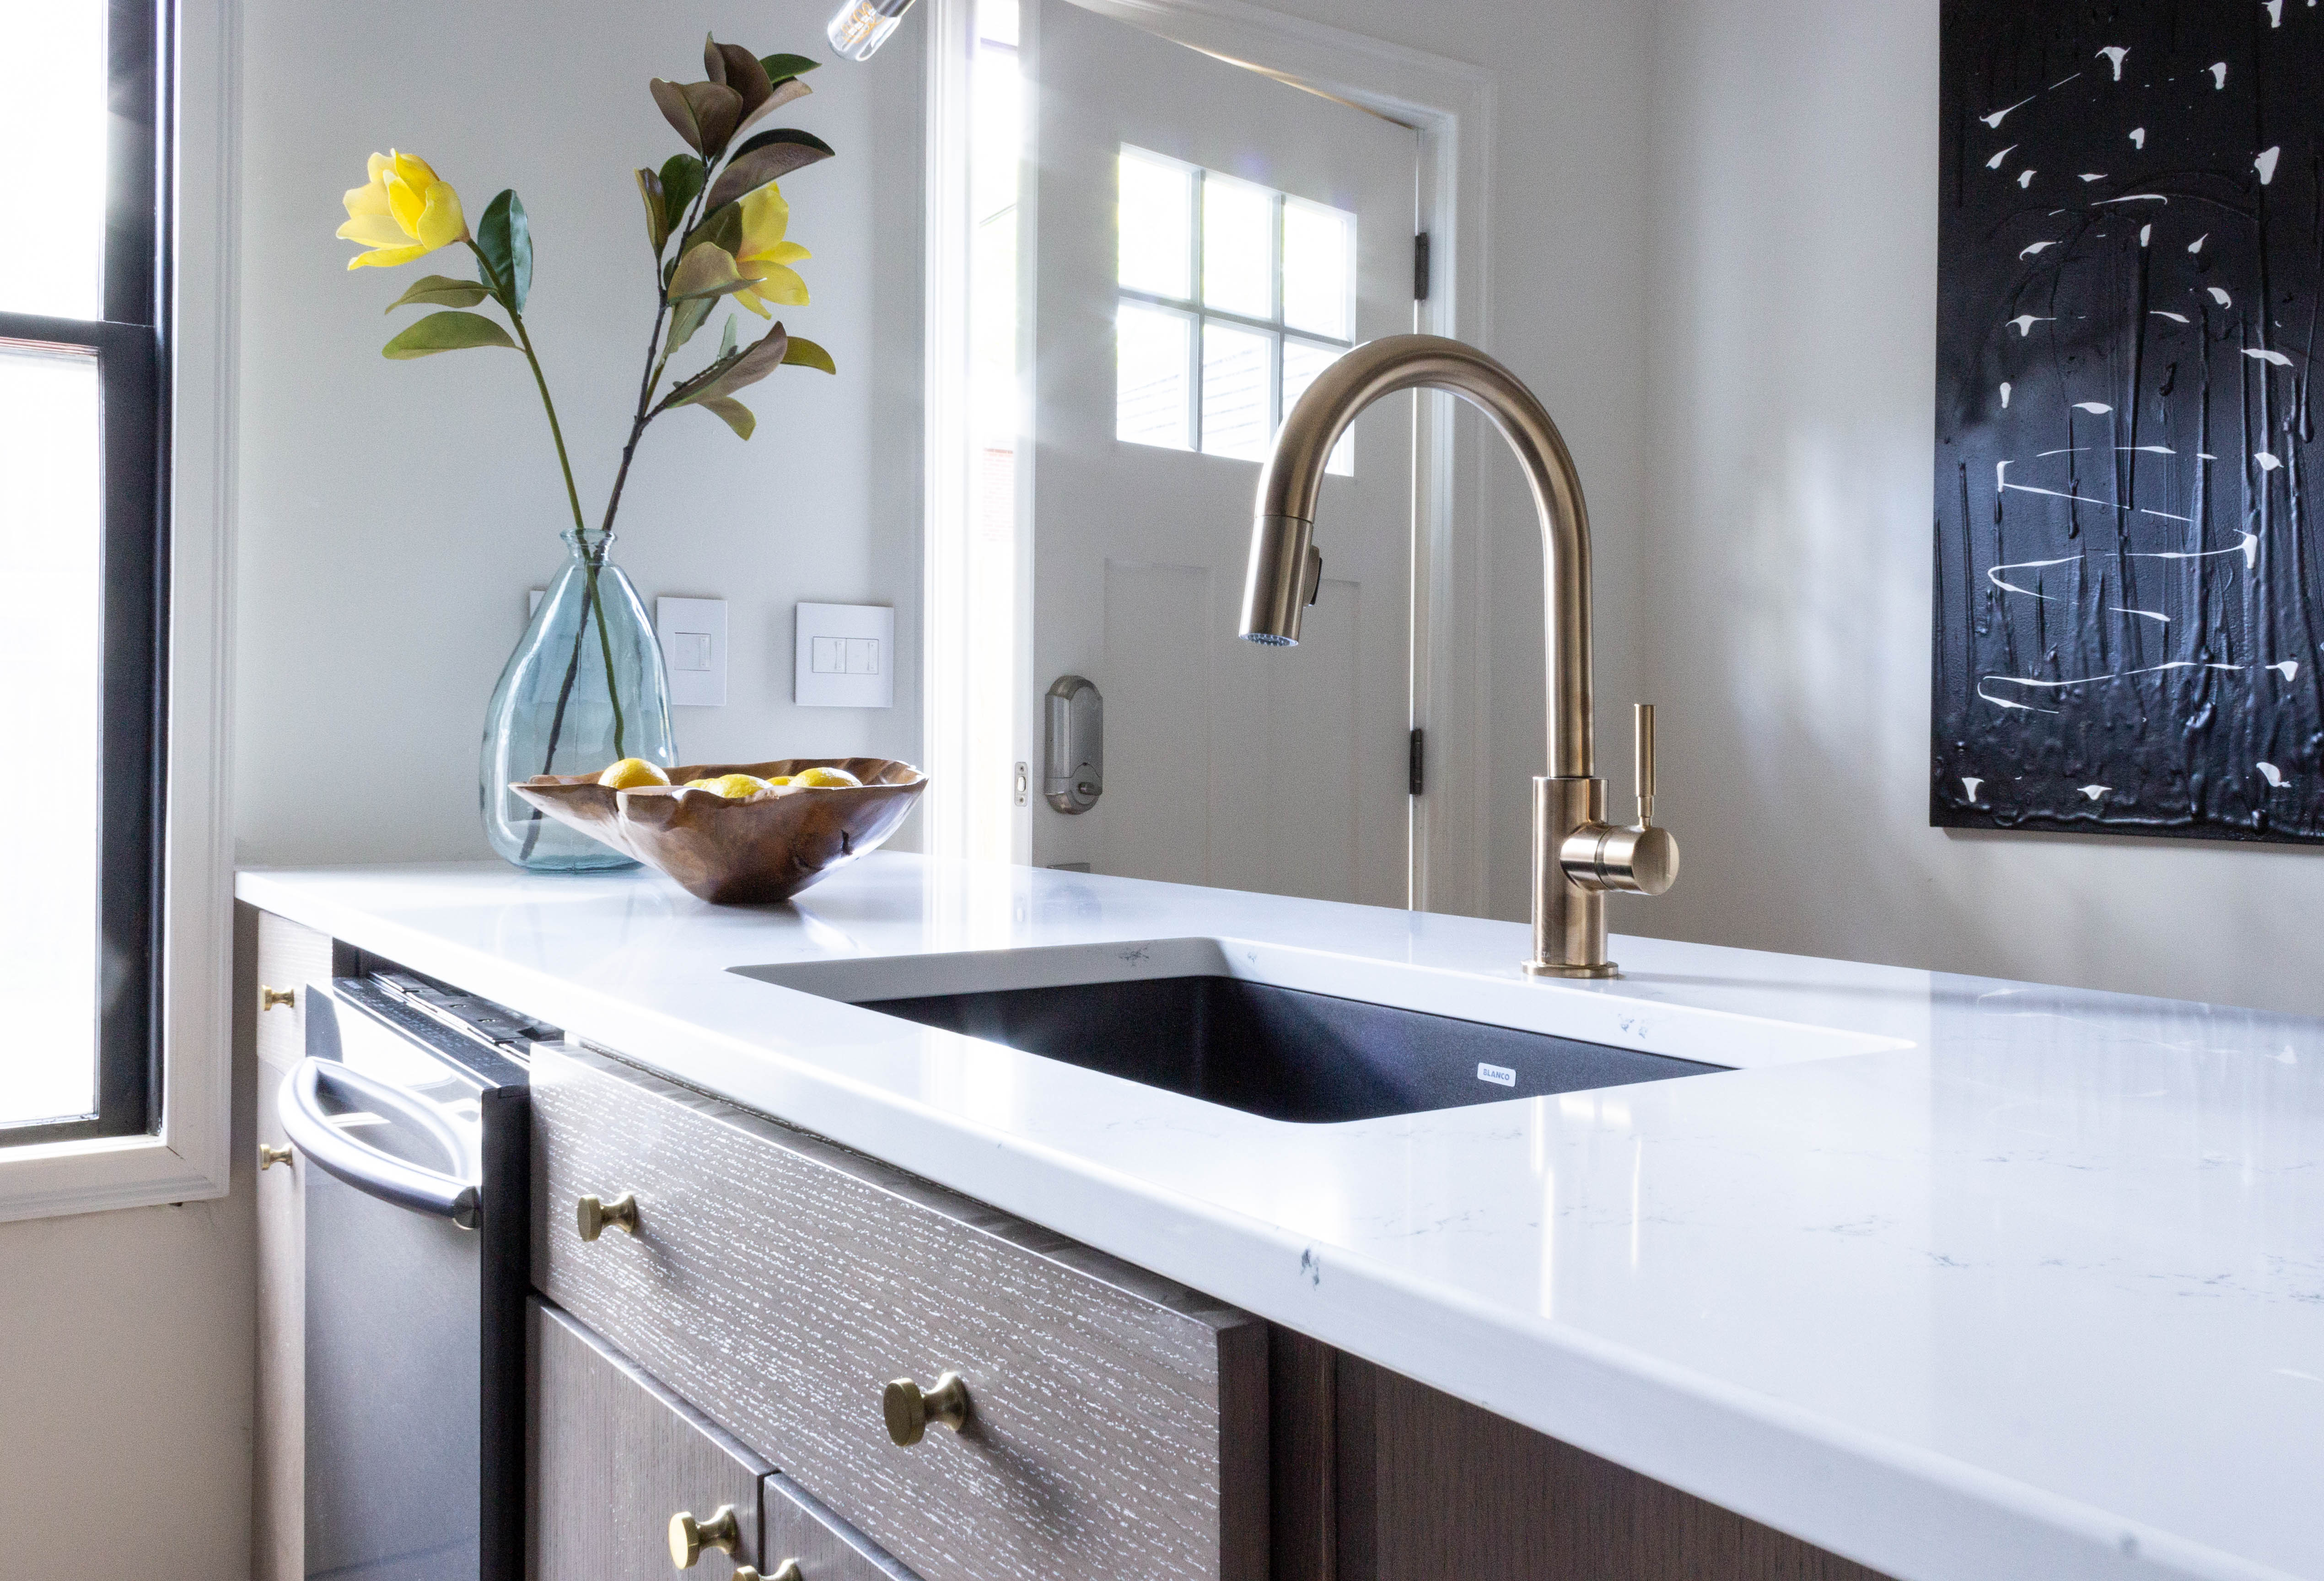
The countertops we chose are Allen + Roth Alluring, which are different than the ones we originally had on our mood board because they were discontinued! It was a little blessing in disguise, because we love these ones. The veins are irregular enough to have a marble look, but they have a grey/blue tint to them which plays well off of the cabinets. They’re quartz, which is the lowest maintenance stone out there & will be great for our rental.

Appliances
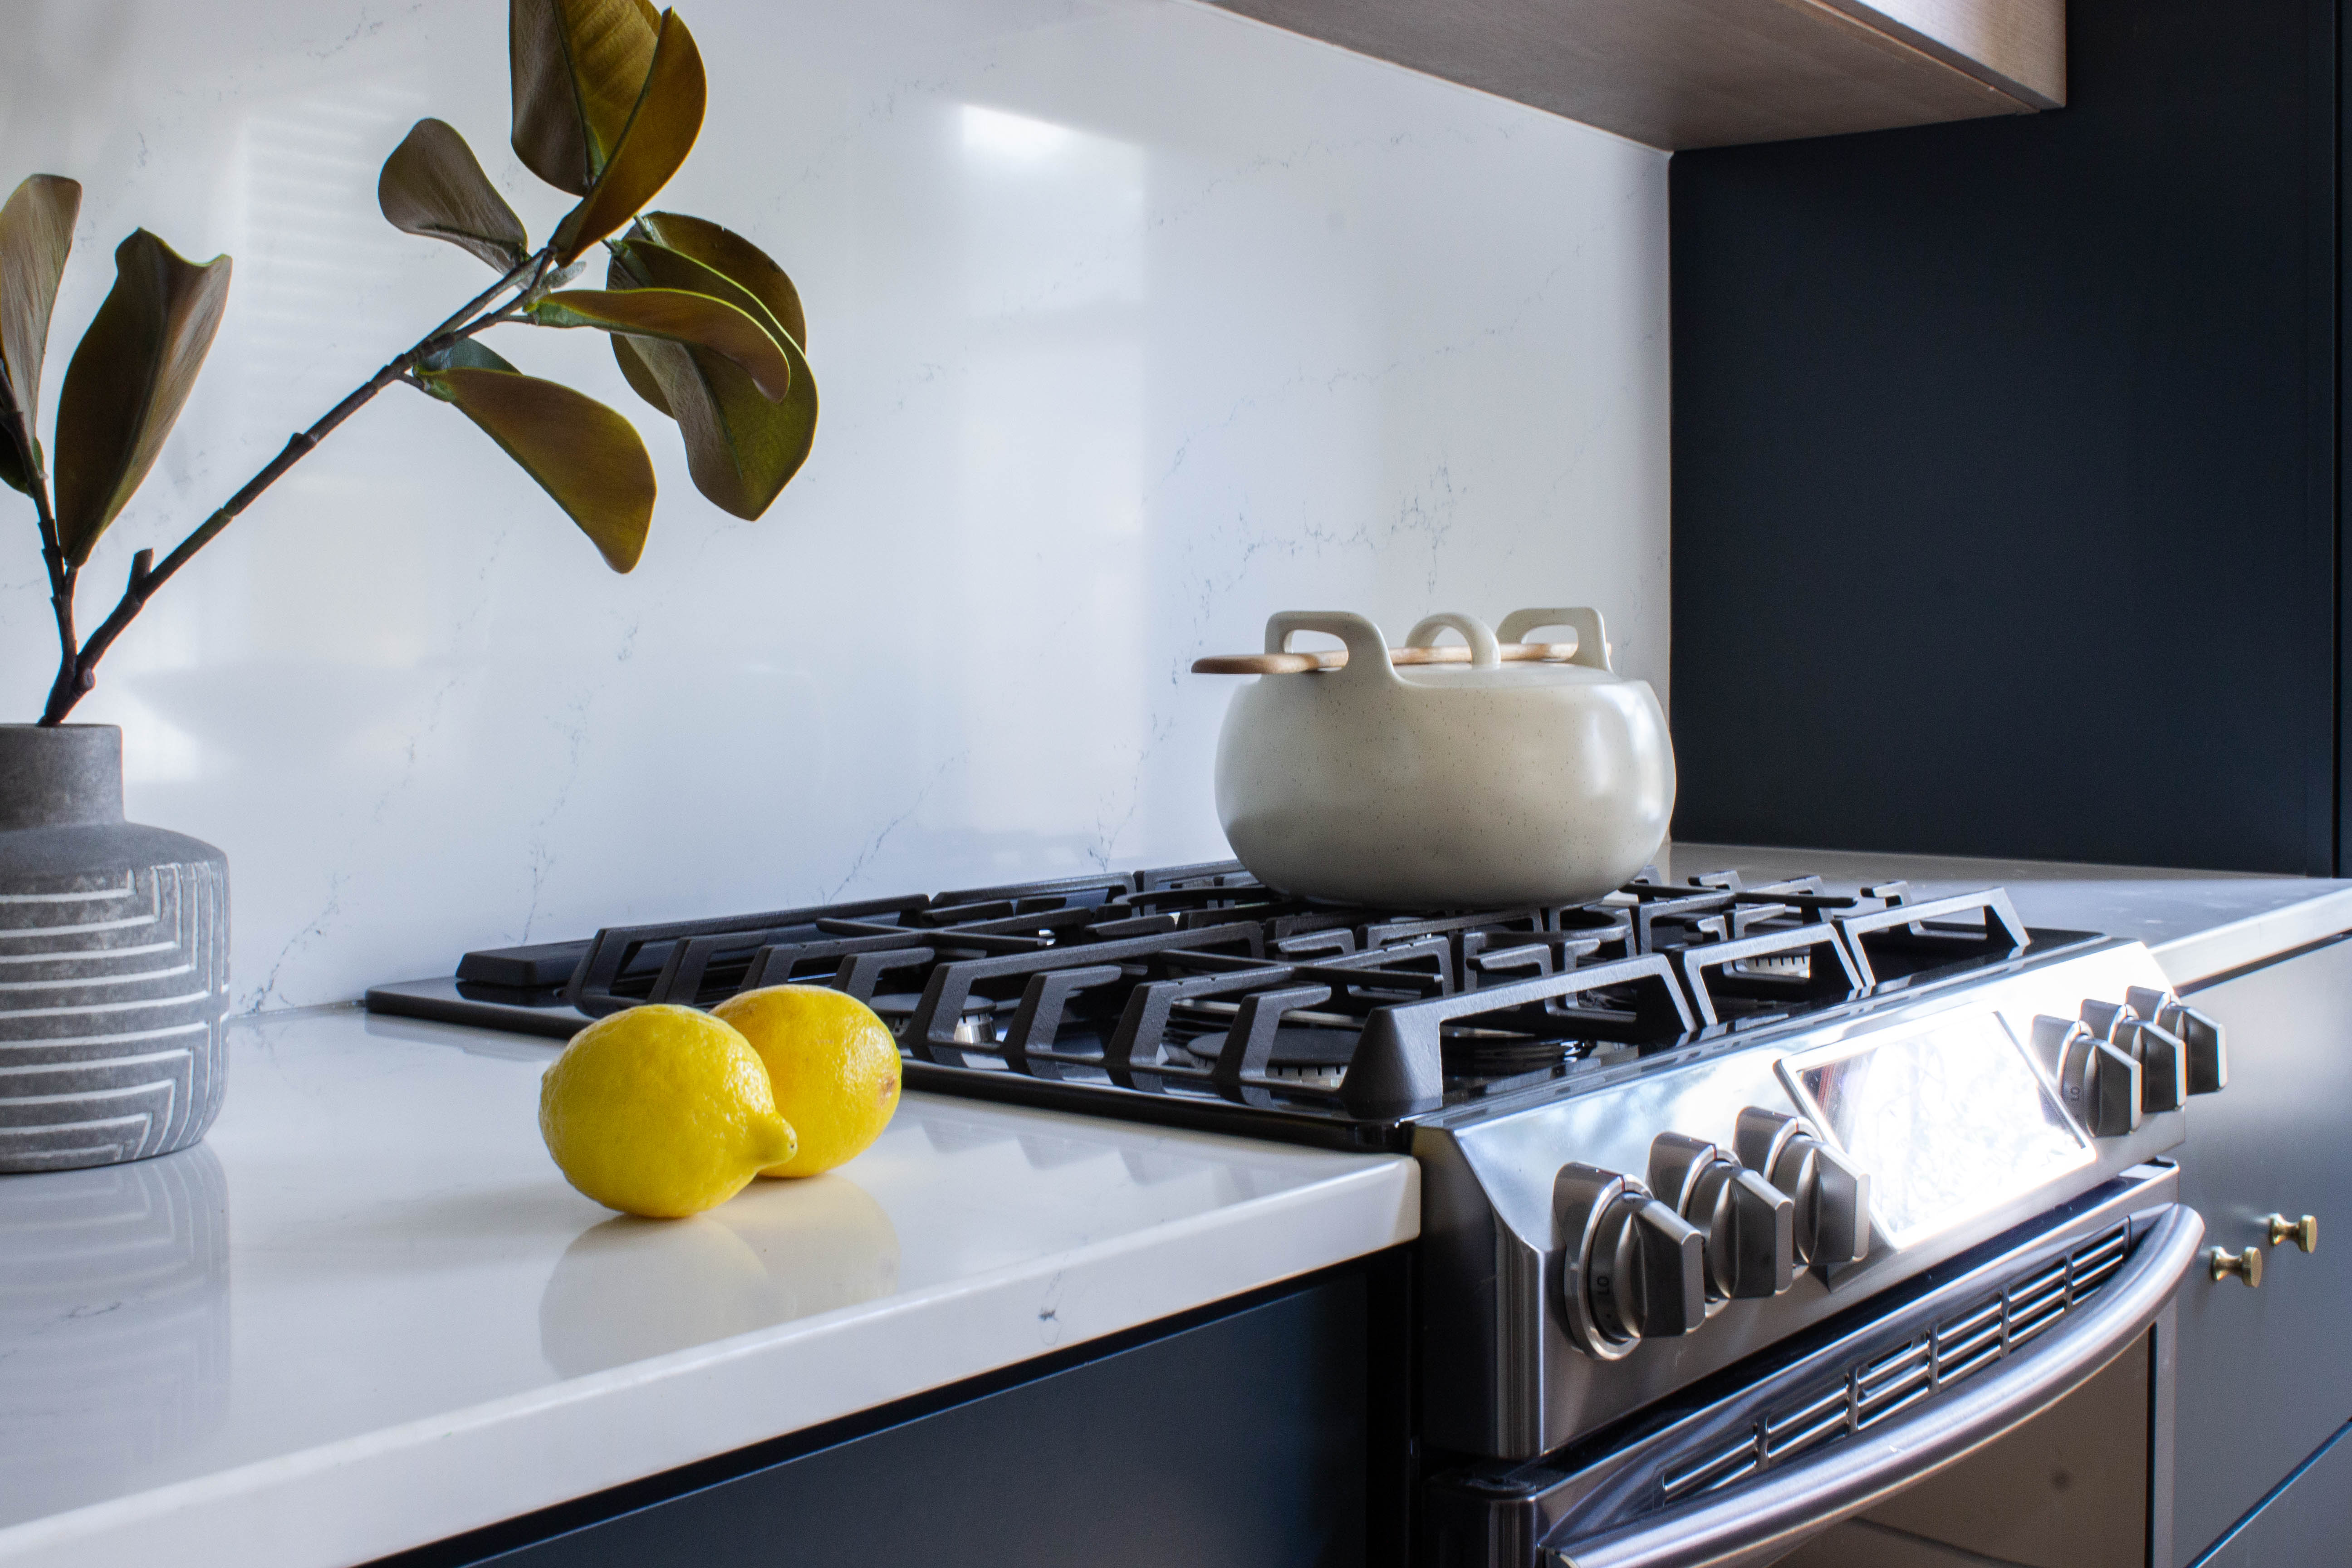
We chose black stainless appliances from Samsung in this kitchen, and love the effect they have on the design as well as their functionality. We chose a slide-in gas range, which has glass touch controls and comes with a cast iron griddle, too. The range has 4.5 stars and 285 reviews, so we knew it was a safe bet.
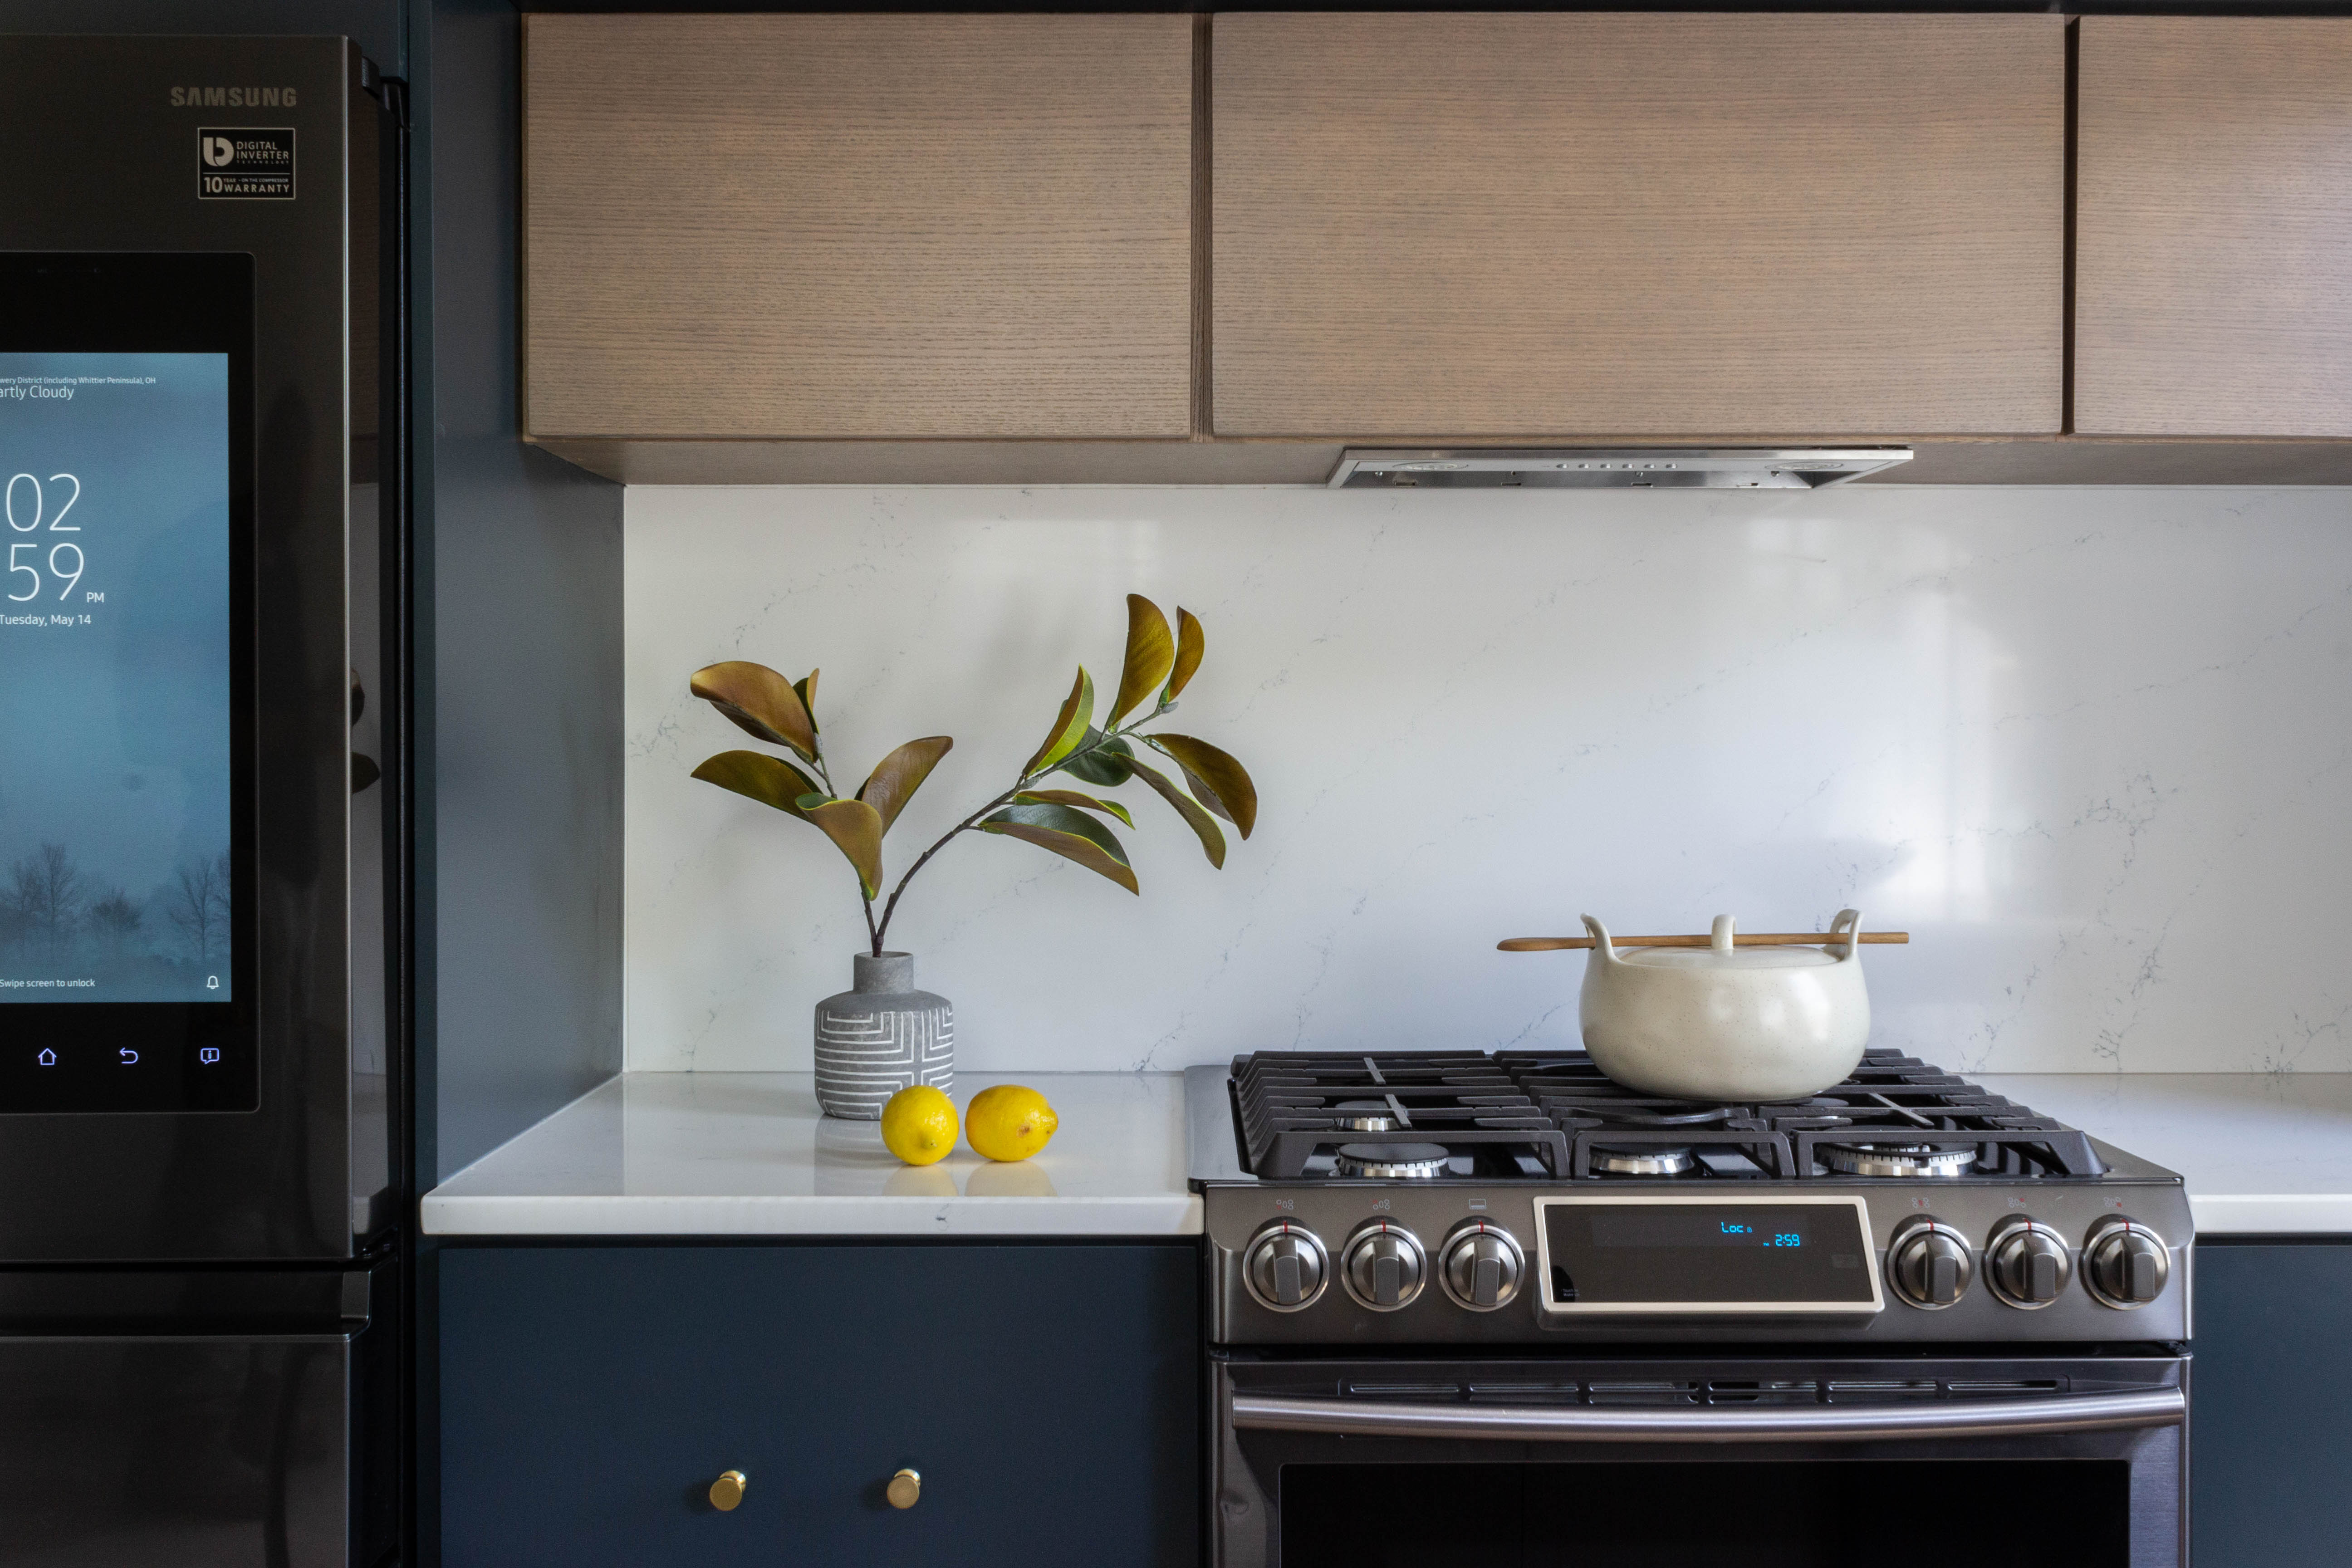
The fridge we ended up with is the Samsung Family Hub, which was different than the one we originally planned on (it was discontinued). It ended up being a great thing because this fridge is SO FUN. It has a touch screen that allows you to play music & listen to the radio, write notes (we’ll be sharing important info for guests, like the wifi password + emergency numbers), create video messages, browse the internet, order groceries, and more. It’s like having an iPad on your fridge and our guests are going to love it!

We don’t have a lot of space to work with, so choosing a counter depth fridge was a must. This model sticks out 3″ beyond the countertops (vs more like 8-10″ for a normal depth fridge) and is surprisingly spacious on the inside. The dishwasher has the controls on the top instead of on the face, which we love design wise. It has great reviews and a few other features we love, like a 3rd rack and a heavy duty wash setting that reduces the need for pre-washing.
Fixtures
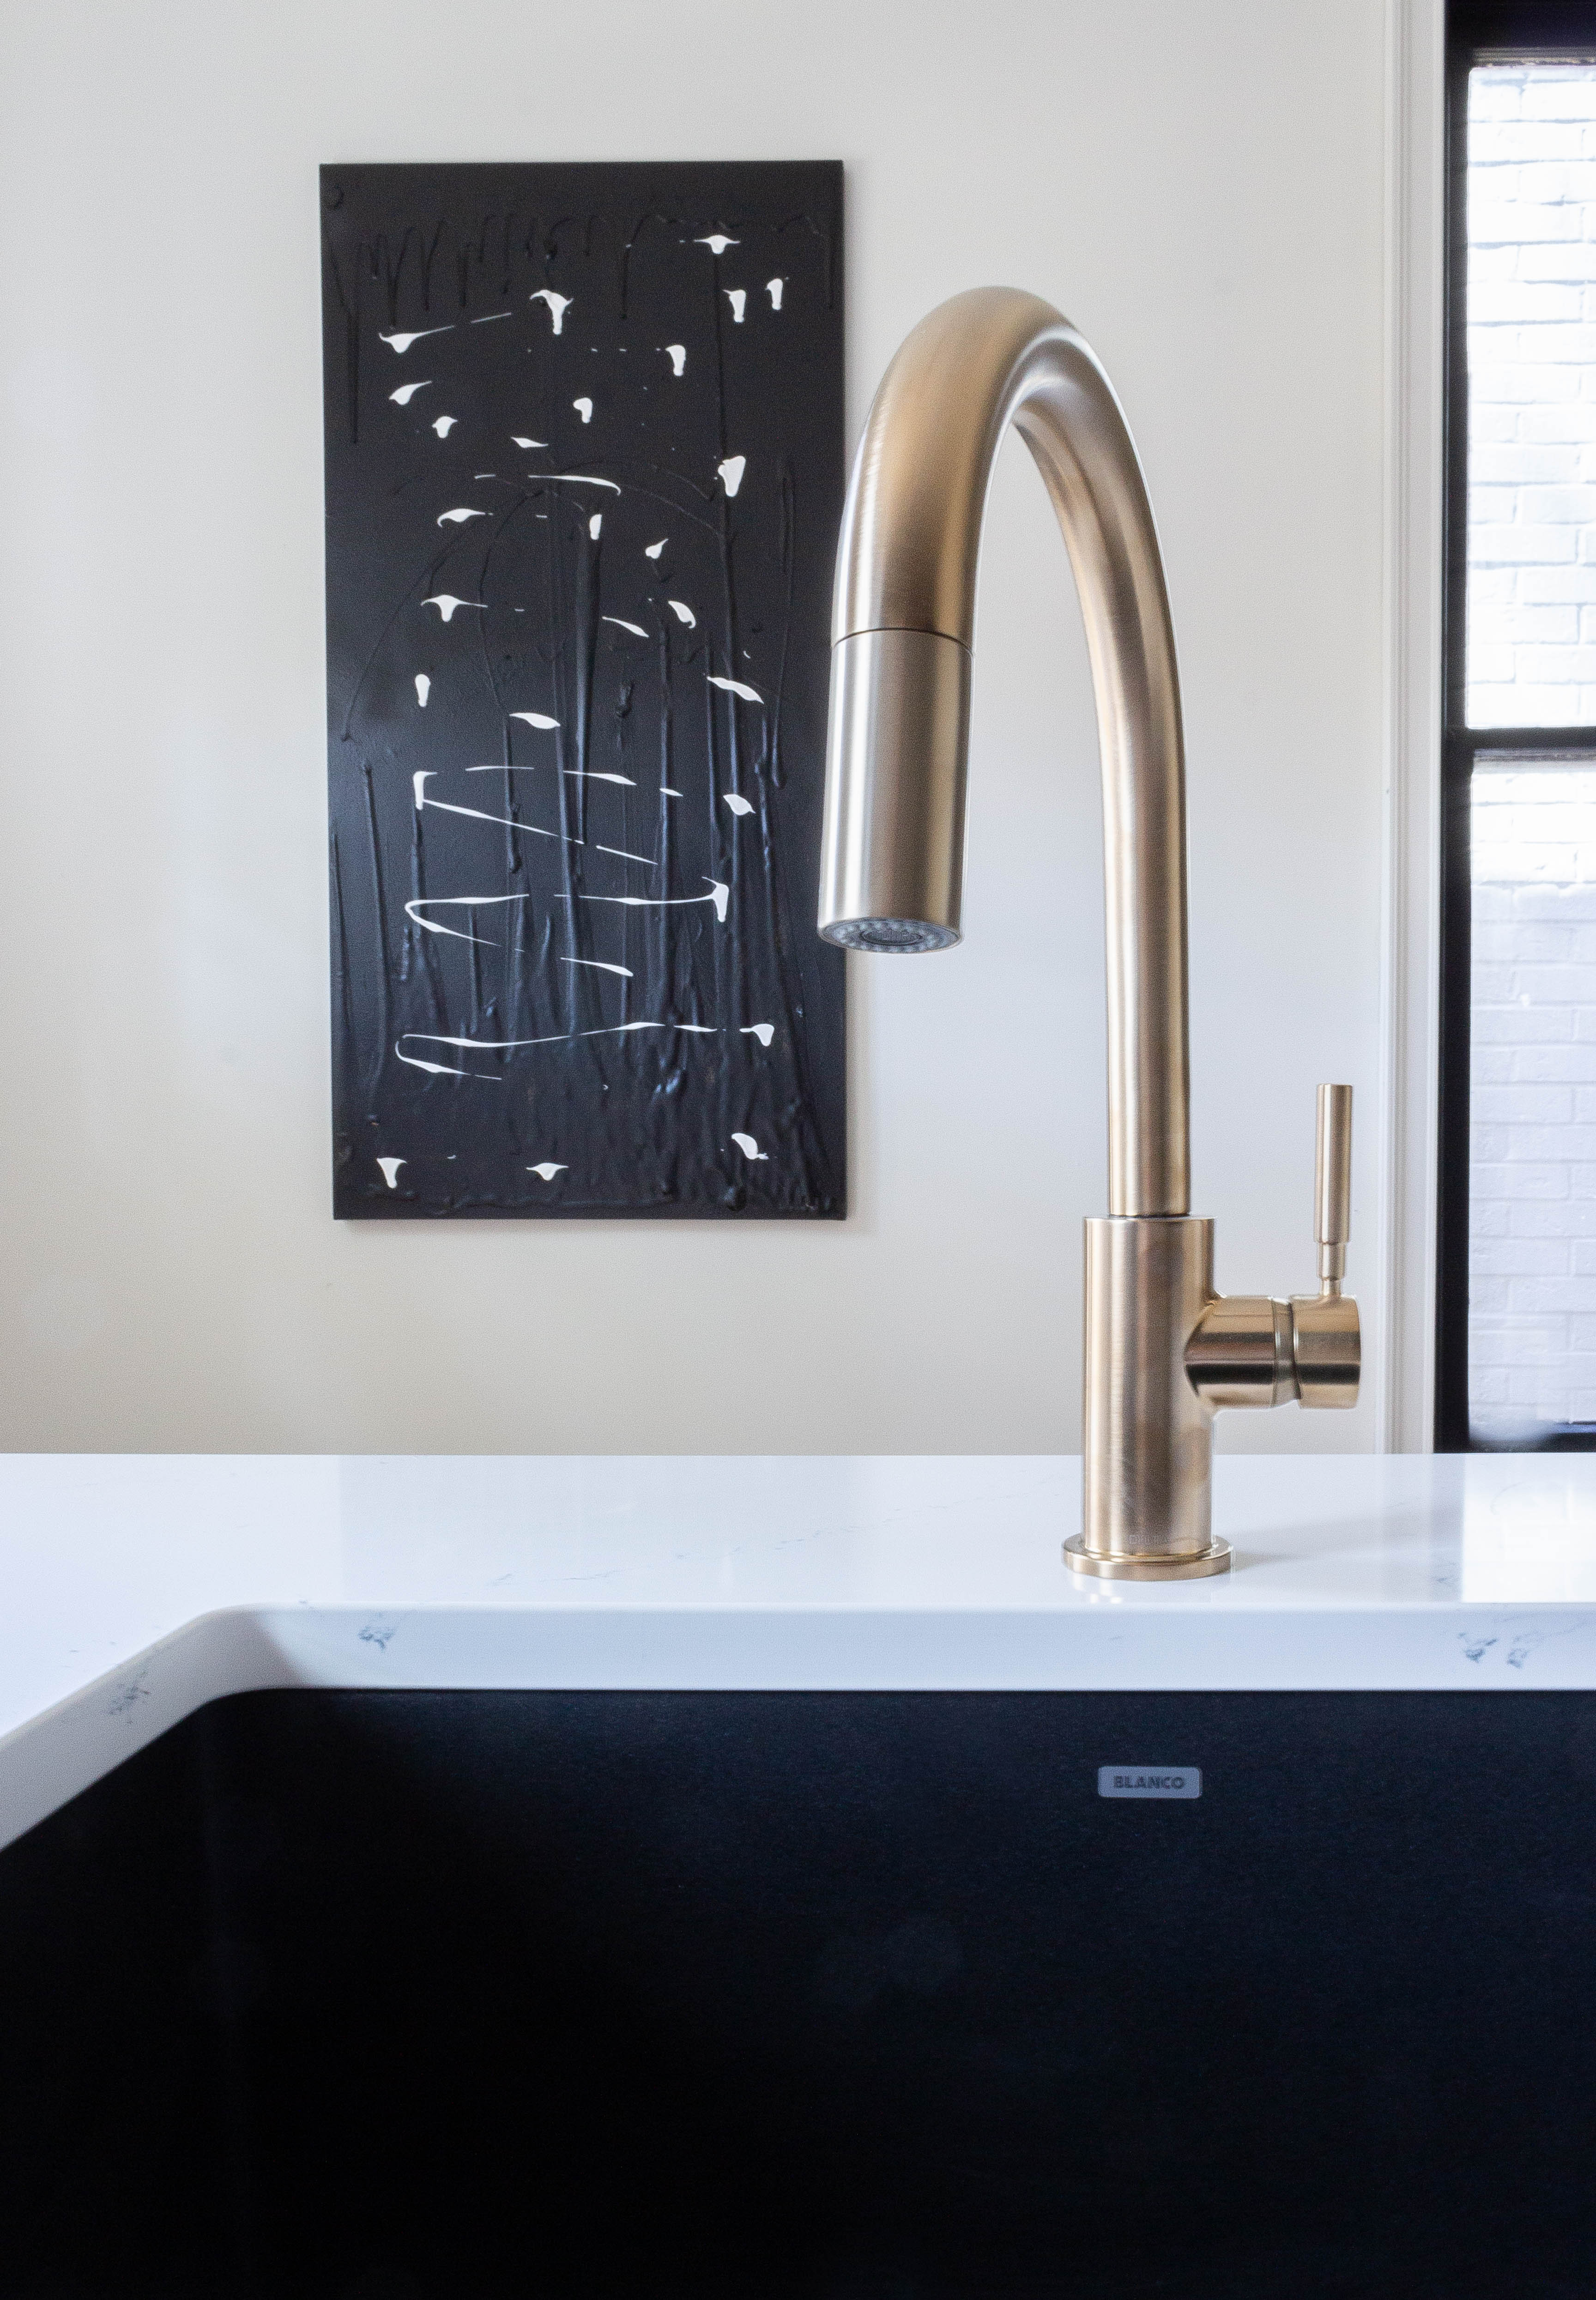
We mixed metals in this kitchen (as per usual :)) by incorporating warmer brass knobs & faucet, with black and grey in the pendant and appliances. Speaking of pendant… we decided to go with one sculptural pendant instead of doing the 3 mini-globes that we originally planned on. We love that it ties in the black from the appliances and sink, and adds some movement to the space.
The granite sink we chose is less than 30″ wide, but feels surprisingly large because it’s deep. It’s as smooth as natural stone and is a nice alternative to stainless steel without compromising durability.
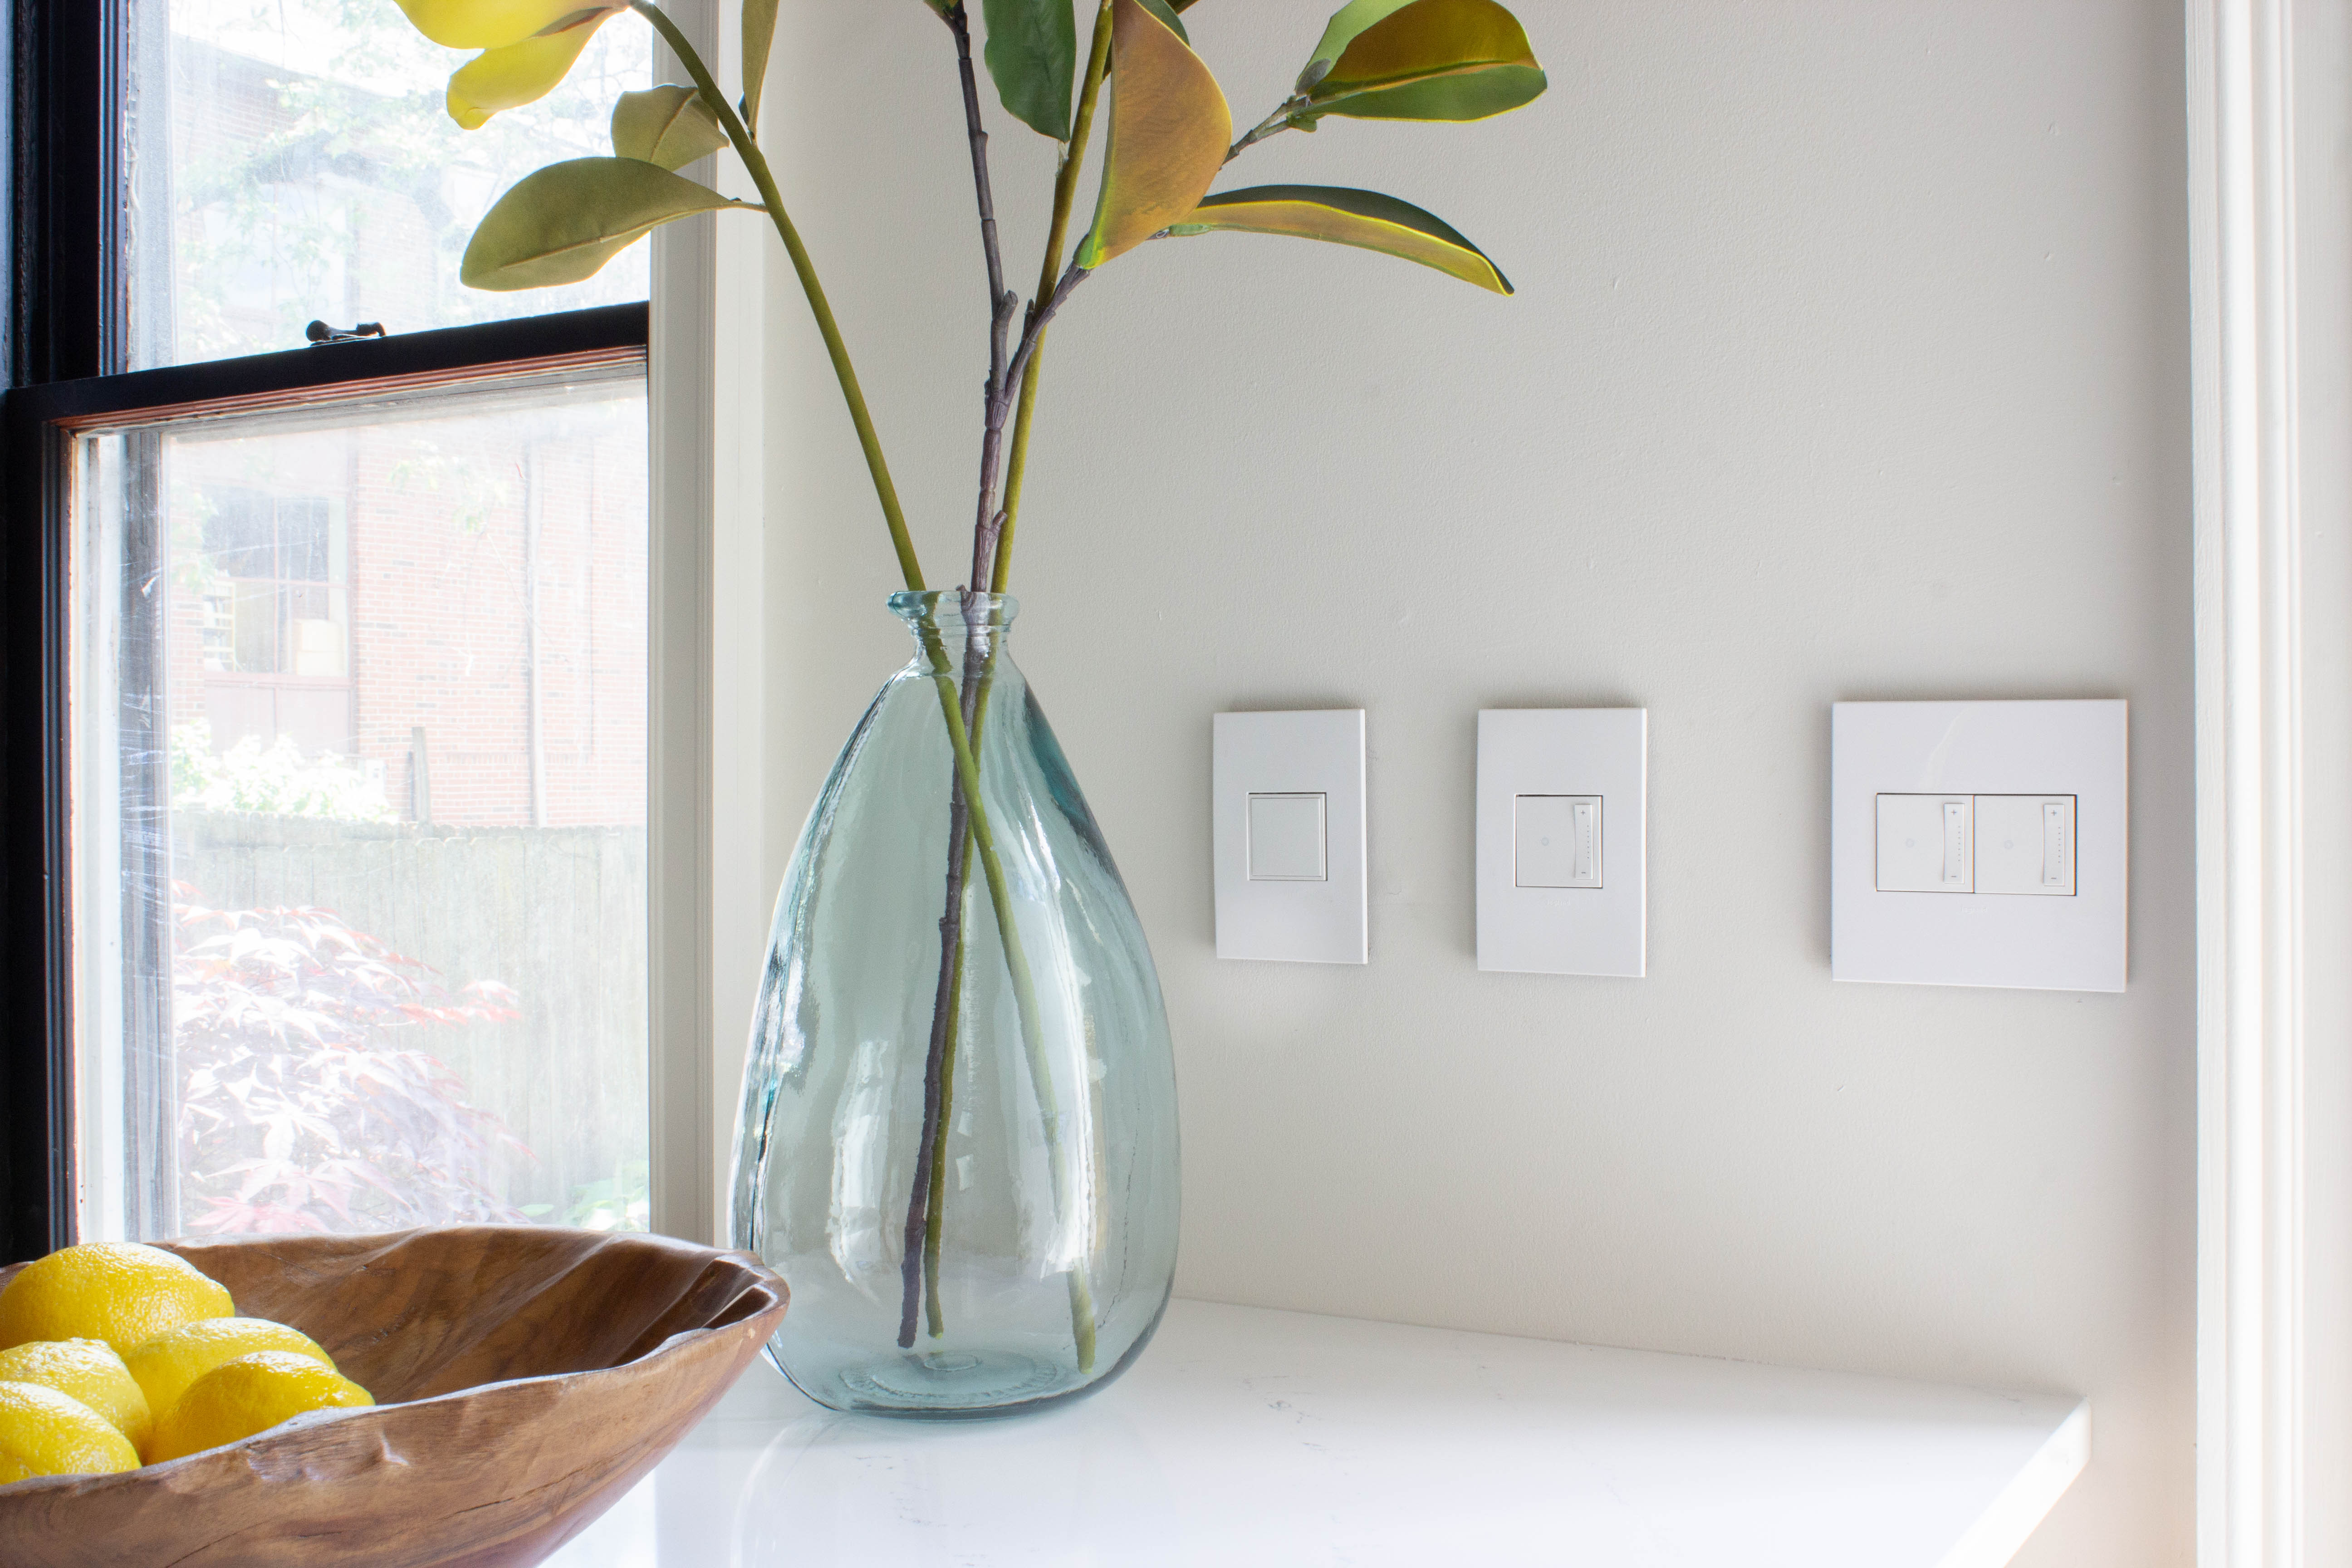
We made it a point in this kitchen to incorporate Legrand dimmer switches and pop-up outlets. They feel fancy and the dimmer functionality works well with our LED lights (it’s not always the case with dimmers!)
One last look, from demo…
… to design plans…
To completion!
And here we are, after 8 attempts at a decent self timer photo – ha!
We can’t wait to welcome our first guests this summer.
sources links
Diamond Cabinets – $10k before discounts (Lowe’s often runs 20-25% off on cabinetry)
Allen + Roth Quartz Countertops + Slab Backsplash – $4k
Engineered Hardwood Floors – $4.99/sq. ft.
Kichler Pendant – $206
Brass knobs – $3.10 each
Delta Trask Faucet in Champagne Bronze – $249
Blanco Granite Composite Sink – $330.86
Legrand Adorne Dimmer Switches – $54.98 each
Legrand pop-up outlet – $43.98 each
Samsung Family Hub Fridge – $3,499
Samsung Gas Slide-In Range – $1,699
Samsung Dishwasher – $749


I love it, looks fabulous!! I couldn’t find the actual dimensions of the room specifically the length of the wall that the fridge and stove are on, thanks!! All the best renting it out, your guests are going to be spoiled!
Thanks Lucy! It’s about 11.5′.
Beautiful! How much space is to the left of the fridge? Currently in Reno process and concerned about ability to open door? Thank you!
Thank you! About 6″.
[…] income from our 3 vacation rentals (we’re in the middle of renovating our 4th and recently revealed the kitchen!), brand sponsorships on Instagram & our blog, and our interior design clients. Our personal […]