

A very special thank you to Lowe’s for sponsoring this post and this project. We feel so grateful to be working with a company that supports the work we do at Beginning in the Middle. As always, all opinions & thoughts are our own.
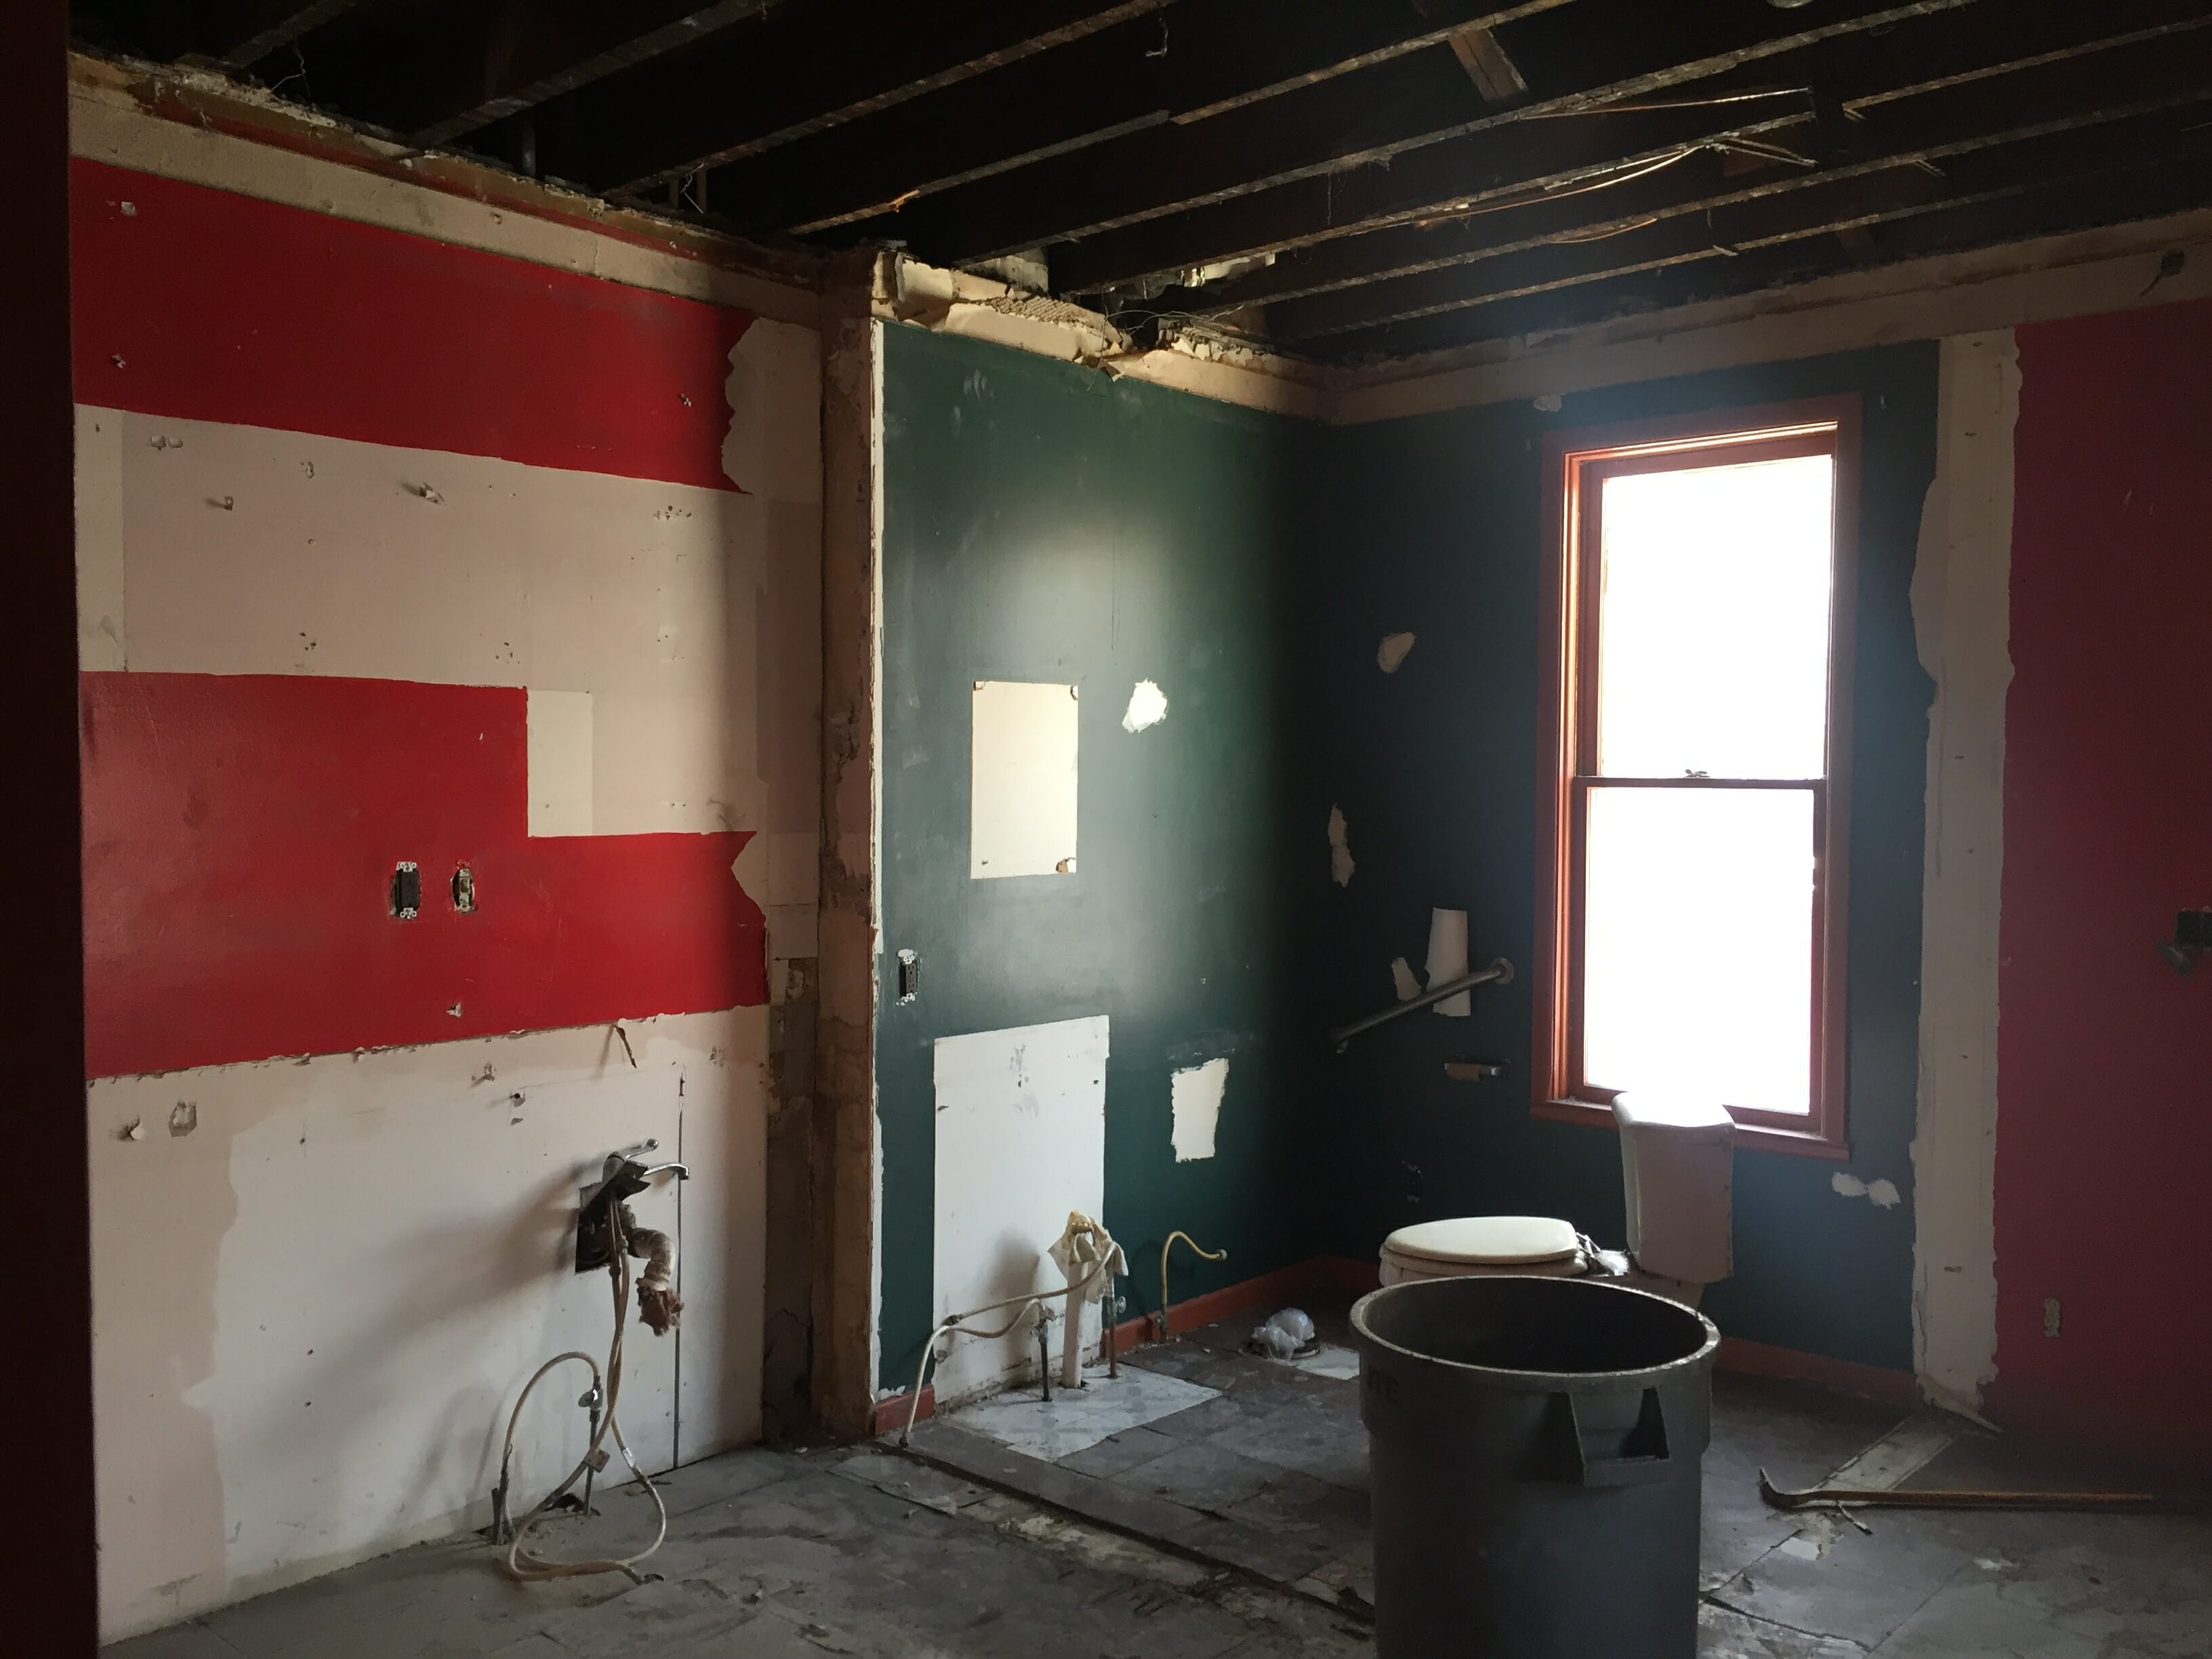
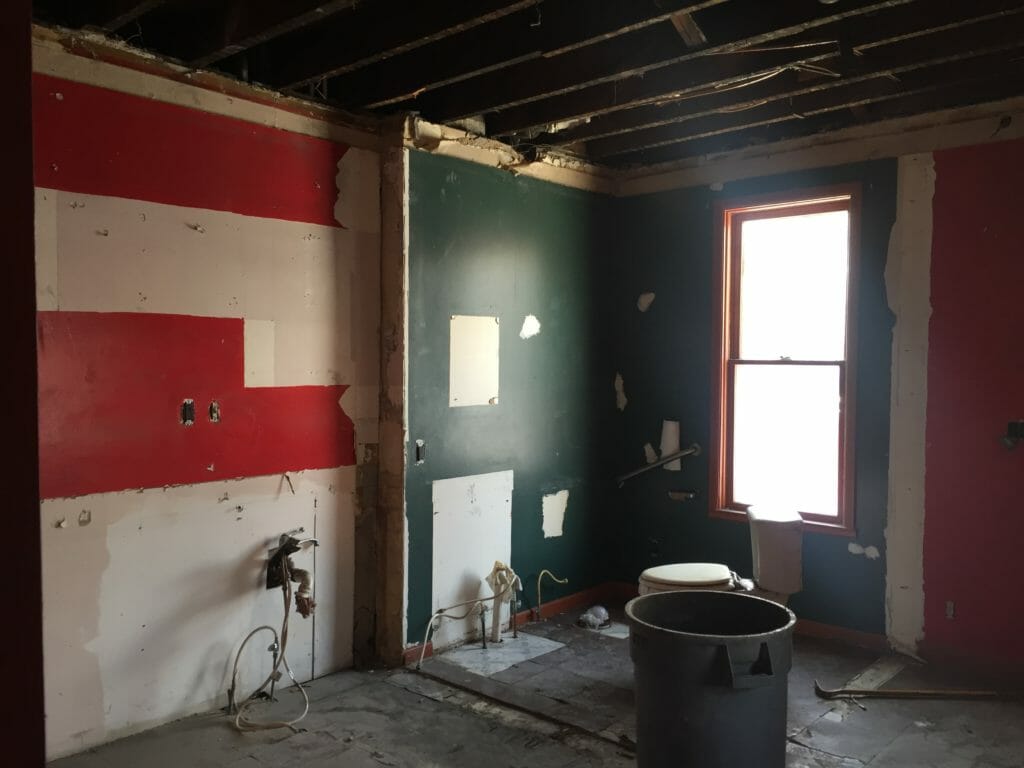
Did you hear the news? We’re starting renovations on the other side of our Pearl duplex this fall! Last week, we posted a peak of the current state of the property for the first time ever (hint: it’s ugly, but has potential), our design inspo, and plans for it when it’s finished in 2019. If you missed the post, you can catch up here.
We’re super excited to be partnering with Lowe’s to tackle the first project on the list: THE KITCHEN. We’ll be designing and renovating the whole thing using products & services from Lowe’s, which is a fun challenge as designers who usually source from a million different places to piece together a plan. We’re not just going to be sharing our renovation progress, either. We’re going to be sharing how-to’s along the way, starting all the way at the beginning with the design planning phase.
Now that you’ve seen our before photos from our intro post, we’re kicking off our kitchen reno series with a big, juicy post all about space planning. There are so many details to consider before the renovation starts, some as big as selecting appliances & choosing a layout, and some as tiny as what to do about an unforeseen 1” gap. (Let me tell you, that 1” gap has caused more than its fair share of problems in the renovations we’ve done!) It’s wise to start doing research online, and talk to designers & architects who can help you create a functional, beautiful kitchen layout months before you think about swinging the hammer. This will set you up for success from the start and hopefully make the whole process less stressful for you & your family.
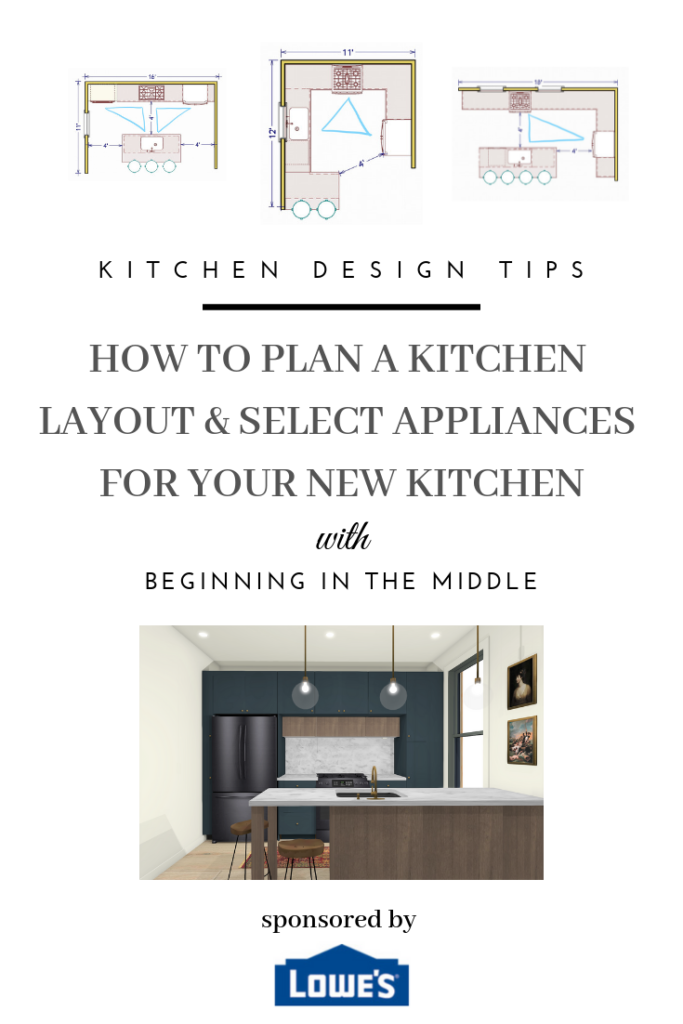
CHOOSING A KITCHEN LAYOUT
Before thinking about what color cabinets you’d like or what type of countertops are your favorite, the very first step in planning a kitchen remodel is to nail down a layout. Kitchens come in all shapes and sizes, and not all layouts will work in every space, so the key is to choose the one that will maximize functionality and flow in YOUR space (not your Instagram pal’s space). There are five basic kitchen layouts, with lots of hybrids and variations of each.
1. The Galley
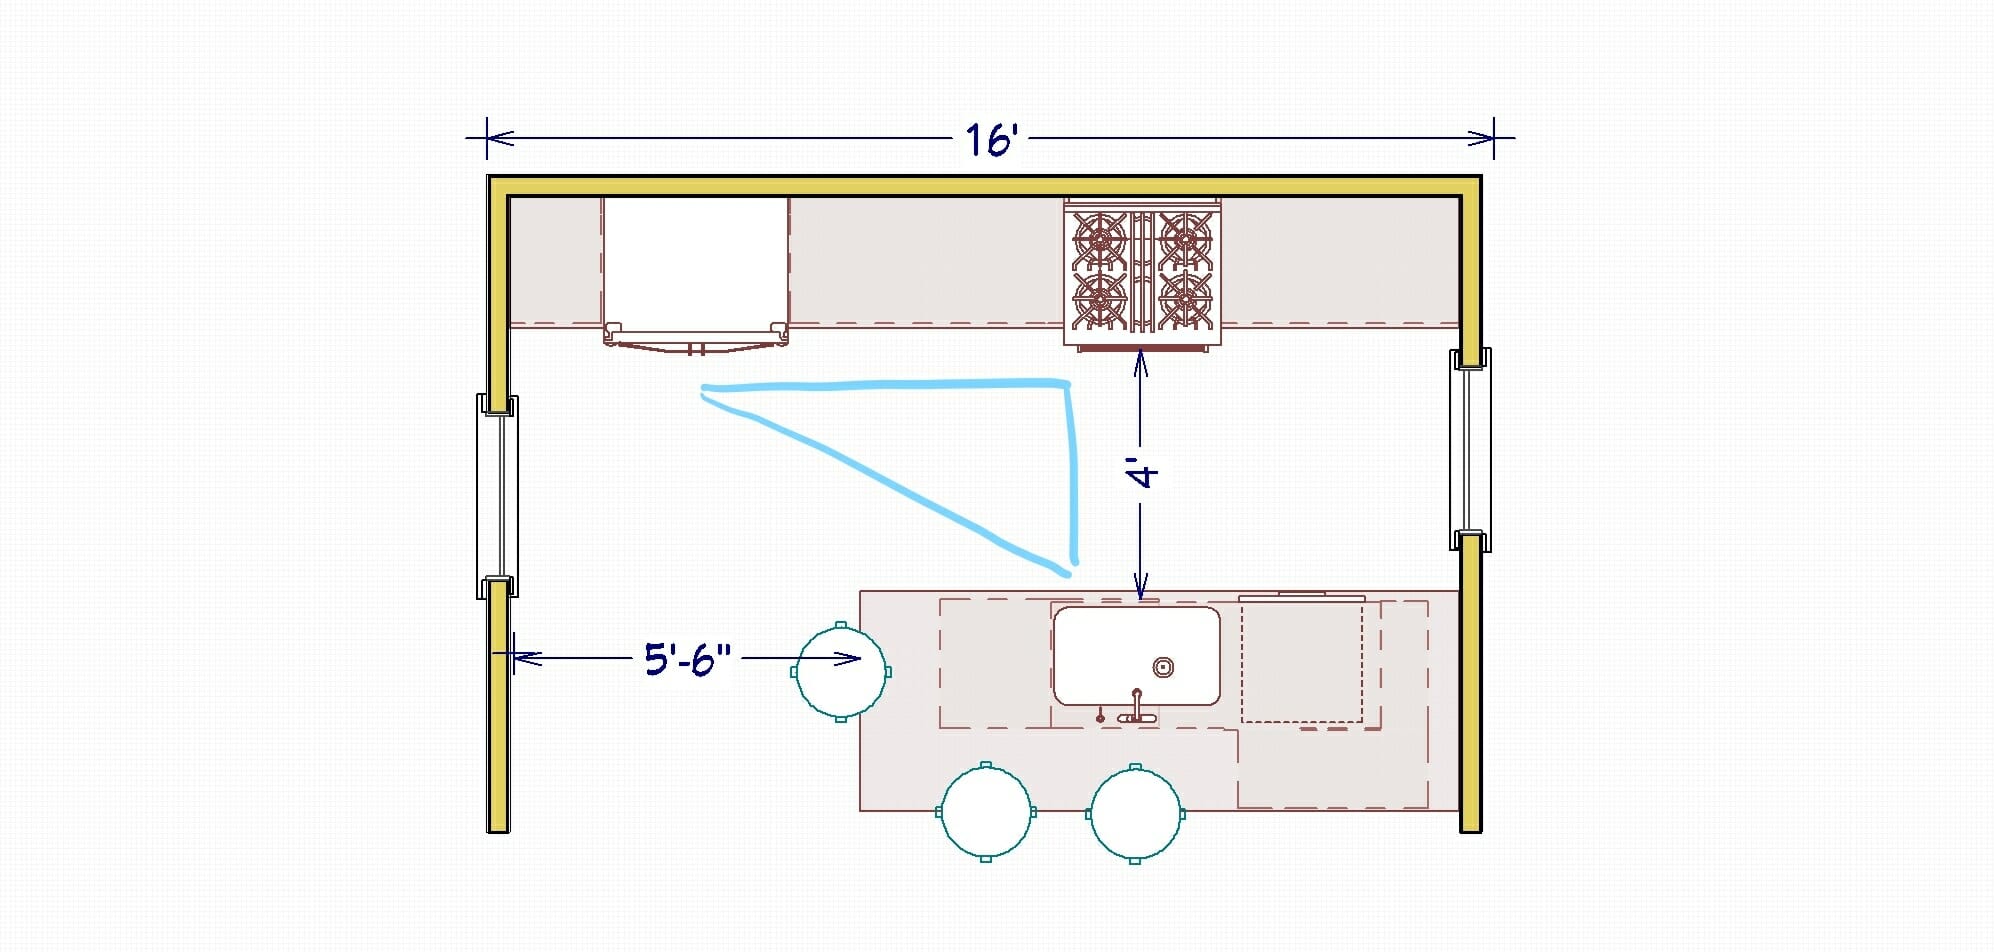 A galley kitchen has two rows of parallel cabinetry & countertop space. It works really well in small spaces to maximize efficiency, but can also work well in larger spaces, too. All appliances are easily accessible from one another & a work triangle is easy to incorporate (we’ll talk more about the work triangle in a bit).
2. The “U”
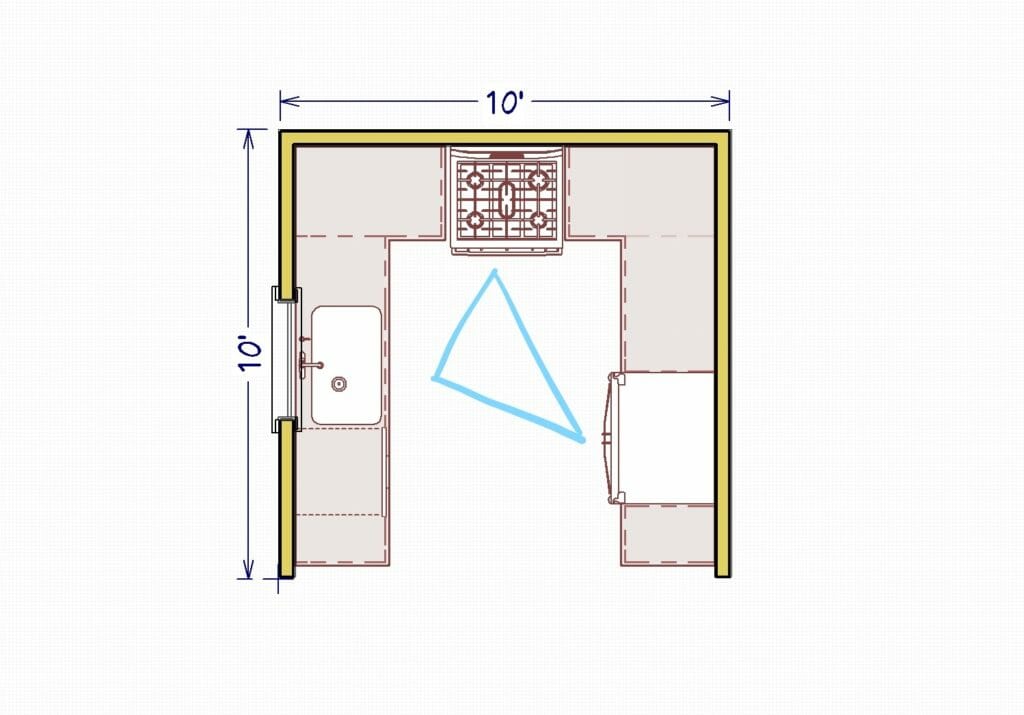
U kitchens are great in spaces that are closed off from other rooms in the home because they utilize three walls, forming a U. U kitchens provide lots of counter space and allow for easy placement of the fridge, range and sink to create a work triangle. In really large kitchens, it’s possible to fit an island within the U for extra seating & storage.
3. The “G”
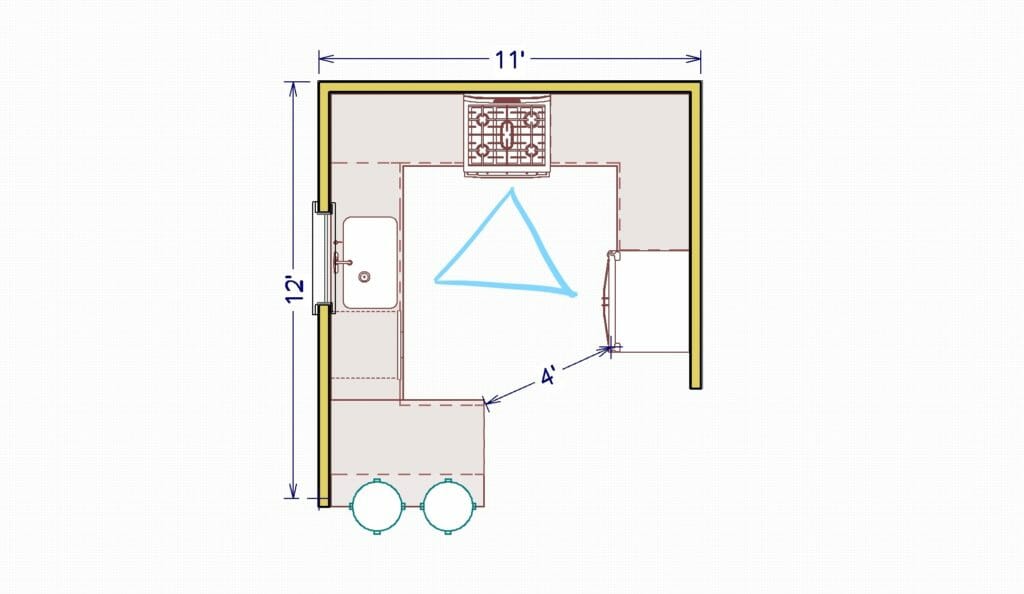
The “G” layout is great if you want to maximize counter space or incorporate an eat-in element in your kitchen, but don’t have the clearance needed for an island. The “G” covers three walls like a U does, but has an extra peninsula that extends off one of the walls. In order to do a G, your kitchen typically needs to be bigger than a U to allow enough clearance between all cabinets, walls and appliances (ideally 3.5-4’, minimum) for good flow.
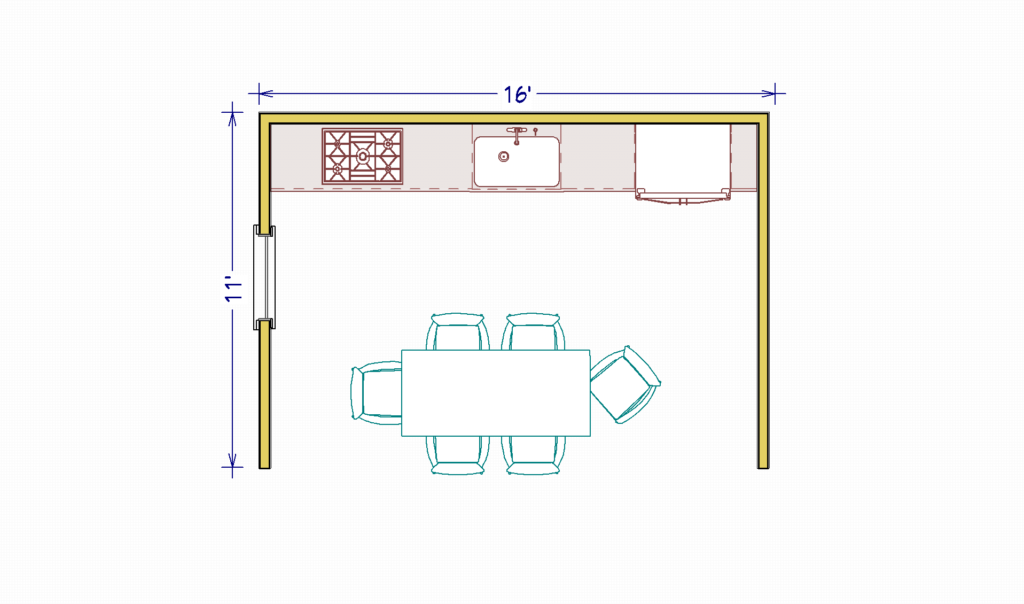
4. The “L”

The “L” kitchen is a really popular layout, especially in homes that have more open floor plans. Two walls of the kitchen are used for cabinetry & appliances forming an L. Often, the other two sides of the room are open to another part of the home (living/dining) or have obstructions, like lots of windows that could prevent the cabinets from wrapping around onto the third wall. If there’s enough space, islands are great to incorporate into L kitchens to create more functional storage, prep and seating space. A good rule rule of thumb is to have a minimum clearance of 3.5-4’ around the entire island for good flow.
5. The Single Wall
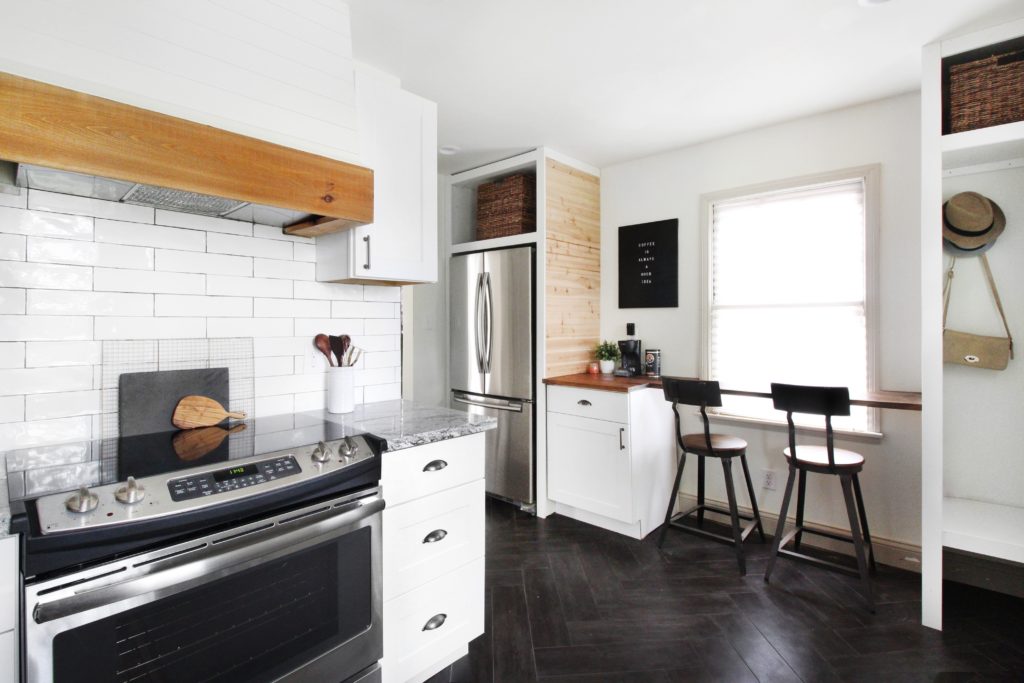
A single wall kitchen is just that: all cabinetry & appliances are on one wall instead of two or three like L and G and U kitchens. Similar to the other kitchen layouts, if the room is big enough, an island can be added in front of that single wall for additional counter space & provide another location for the sink or cooktop. In this example, we incorporated a wall oven and fridge on either end of the back wall to create a symmetrical focal point around the cooktop & range hood.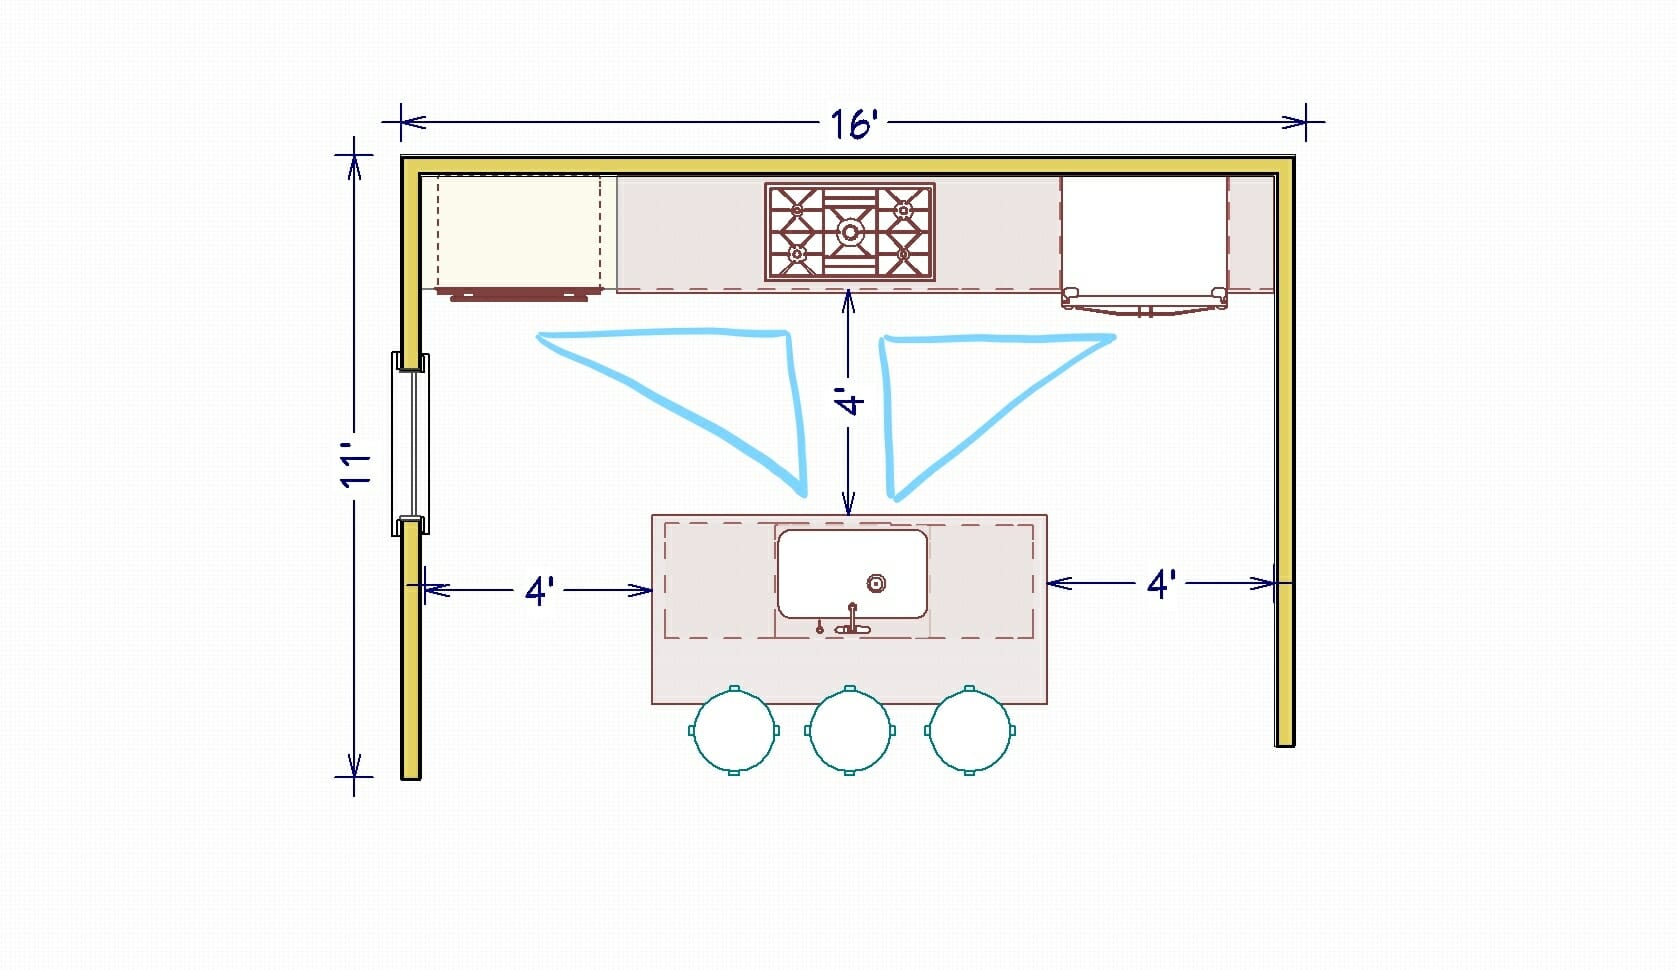
DESIGN TIPS FOR PLANNING YOUR KITCHEN LAYOUT
After you’ve thought through layout options for your kitchen, the next layer of planning is to make sure you’re maximizing functionality within that layout. Here are a few tips.
1. The Infamous Work Triangle
Try (very hard!) to incorporate a work triangle into your space. If you scroll back up to the kitchen layouts, the blue lines indicate the work triangle incorporated into each design. The theory of the work triangle was developed a long time ago and states that the range, sink and fridge in a kitchen should form an unobstructed triangle. To take it one step further, the total distance between those 3 points should be between 13-26 feet-ish… so not too close, not too far.
If you can’t incorporate a work triangle into your space, it doesn’t mean that the whole project is lost. Another great way to incorporate functionality is by creating individual work zones in the kitchen. A baking/cooking zone, for example, can have all of your cooking & baking essentials close by. A prep zone can have a sink & garbage disposal, trash, and access to prep supplies like knives and peelers. We also like pairing a fridge & microwave together because they tend to be used together when pulling things out of the fridge/freezer to be microwaved.
Our Chesterfield remodel is a good example of a project where a work triangle was not possible, so we had to work with what we had. The sink, dishwasher and range are in the L part of the kitchen, and the fridge is on another wall that was previously unused.
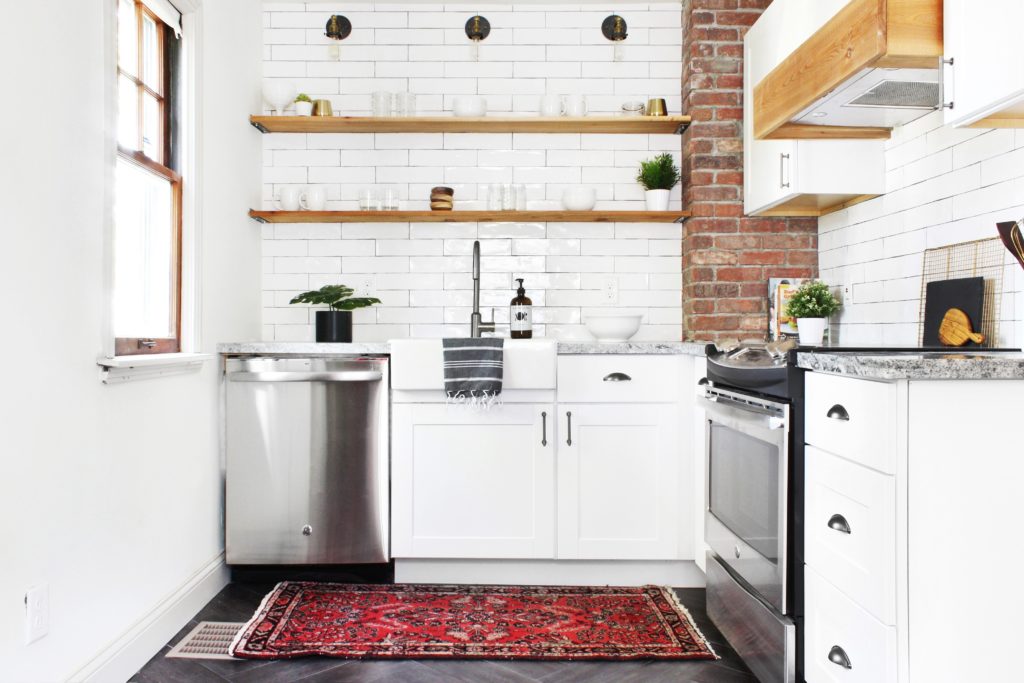
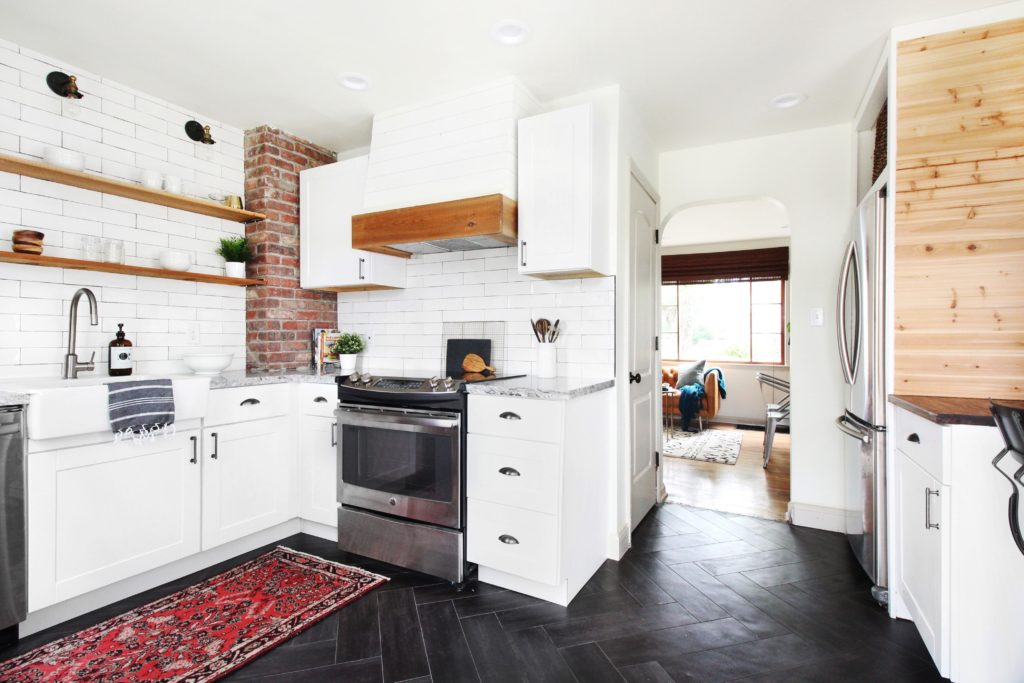
We added functionality to the fridge wall functional by incorporating counter space & a coffee bar/microwave surface next to the fridge, so that it’s easy to pull milk, frozen meals, etc. out & use them right there. The fridge is also easily accessible from the living room, which is convenient for grabbing a quick snack. Keep in mind that despite the lack of the perfect work triangle in this kitchen, it works because it’s small. The fridge is only a few steps from the range, even though it’s out of the triangle.
2. Traffic Flow
Ideally, there should be 3.5 – 4 feet between all appliances, walls, cabinets, and around the island to allow for easy traffic flow throughout the kitchen. If you have bar stools at your island, tack on another 1-2 feet to that number behind the island to allow room for walking behind the stools when they’re being used. We say “ideally” because this isn’t a rule that’s set in stone, it’s more of a rule of thumb. We’ve seen kitchens with less than 3 feet of clearance and kitchens with 5 or 6 feet, and those can work, too, depending on the space.
3. don’t forget about Natural Light
Work with & enhance the natural light situation in your kitchen when you’re planning your layout. Having lots of light in a kitchen makes it feel brighter, lighter, and adds energy to the space that you can’t recreate with artificial light. Whenever possible, we try to work with the existing windows or add more, especially if they’re on a side of the house that lets in lots of light. Sometimes, closing up windows is necessary, but we wouldn’t advise it if doing so really darkens the room.
SELECTING APPLIANCES THAT ARE RIGHT FOR YOUr kitchen
Selecting appliances is something that should be done at the very beginning of the kitchen planning process so that cabinetry, electrical and plumbing can be planned around them. The height of your fridge, width of your range and size of your microwave are super important details that should be finalized during the space planning phase, before construction begins. The basic appliances to plan for are your range, fridge, dishwasher and microwave. As we all know, we can get fancy with wine fridges and luxurious French ranges that cost more than a car, but in this post we’ll be focusing on the basics.
1. COOKING
When it comes to cooking, there are several options to consider depending on your budget and lifestyle. Lowe’s offers all of them from cooktops to double ovens to slide-in & freestanding ranges.
The range, we’d argue, is the most important appliance in the kitchen from a design perspective. Often times, the range is made the focal point of the kitchen, and it really has the ability to make the whole space feel more expensive if the right one is selected. For this reason, we tend to select this appliance first before the rest.
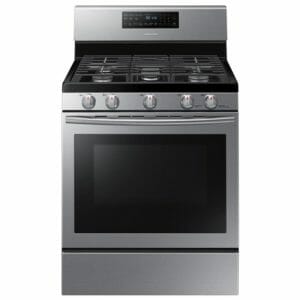
-
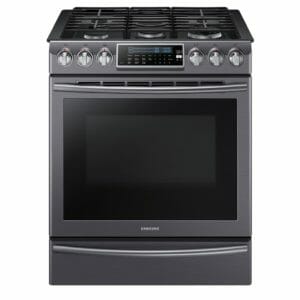
- Samsung Black Stainless Slide-In Range
-
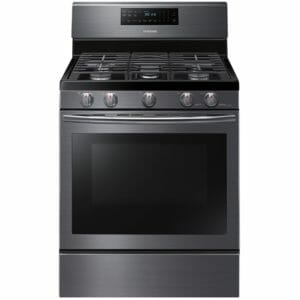
- Samsung Black Stainless Freestanding Range
Slide-in vs Freestanding
Slide-in ranges are our favorite, although they are the pricier of the two options. They are lower profile and have all of the controls in front of the range instead of the back. The built-in look makes it appear more luxe & also allows the backsplash to shine, which we love from a design perspective.
Freestanding ranges are the most common, and are a great option if you’re on a budget. Samsung has lots of great options that look high-end and have many of the same features as the slide-in ranges. Again, this really all comes down to aesthetics and function — which would you prefer?
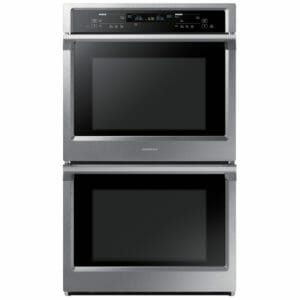
Double vs single ovens
-
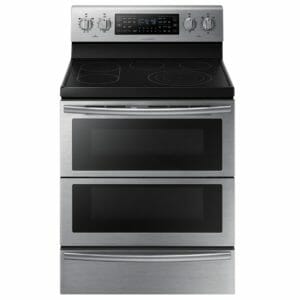
- Samsung 5-Burner Double Oven
-
- Samsung 5-Burner Single Oven
For those of you that cook multiple dishes at the same time frequently, a double oven could be a great upgrade. The one limitation of a double oven is that instead of having one large oven, you have two smaller ovens — and fitting really large roasts and other dishes may be a challenge.
Single ovens are the most common, and what most of our clients choose for their kitchens. Having one big oven space that can be arranged to fit big roasts, multiple casserole dishes, or several racks of cookies is nice to have. Single ovens are also less expensive than double ovens.
Electric vs gas
-
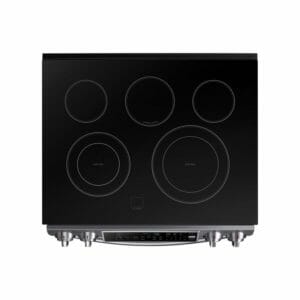
- Samsung Electric Slide-In Range
-
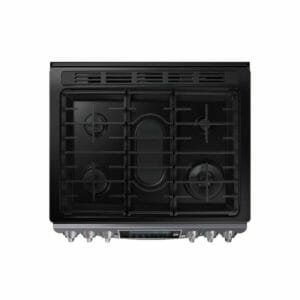
- Samsung Gas Slide-In Range
Choosing an electric vs gas range depends on a few factors. What utility service is available at your home? How much does gas vs electricity cost in your area? Do you prefer cooking on an open flame or a solid heated surface? Which is more aesthetically pleasing?
Gas ranges tend to look more high-end than electric ranges & are used by most professionals. Although they’re slightly more expensive than electric ranges on the front end, they can cost less to operate over time. Electric ranges have their advantages, too. They’re generally considered safer than gas (no open flames, and no potential for gas leaks) and are easier to clean, especially when we’re talking about the ceramic cooktop that most of the newer electric ranges have. Ultimately, the choice is yours!
Cooktops + wall ovens
-
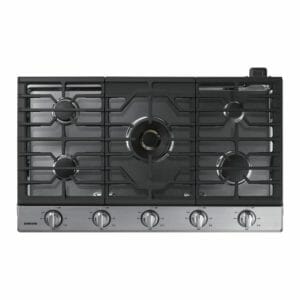
- Samsung 36″ Gas Cooktop
-
- Samsung Double Wall Oven
Some people opt to have a separate cooktop + oven instead of an all-in-one range. A cooktop is a drop-in unit that’s placed on a countertop & cabinet instead of an oven, allowing for extra storage space below. Cooktops can be installed anywhere, like in an island, and because there’s no oven below, you don’t have to worry about having space for opening the oven door. A wall oven, either single or double, can be incorporated elsewhere in the kitchen. The decision ultimately comes down to budget and design. Going with a separate cooktop + oven costs at least 2-3x the amount of a range, but the value can certainly be well worth the cost depending on the kitchen!
2. THE FRIDGE
The most common fridge size is a 36” wide, but other sizes, like 30” and 33”, are also available from Samsung & all major appliance companies. There’s several different types of fridges to choose from, each with their own advantages and disadvantages. Let’s discuss.
French door
-
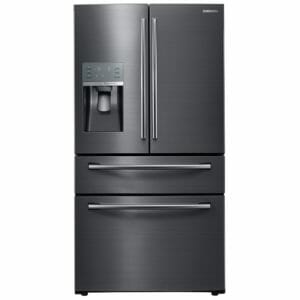
- Samsung 36″ Black Stainless French Door Fridge
-
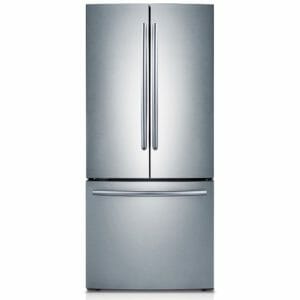
- Samsung Stainless 30″ French Door Fridge
The French door fridge is the most popular fridge design these days. It’s a really great option because it allows for large dishes & containers to be stored in the fridge. Because the fridge is on the top, most of the items on your shelves are at eye level so it’s easy to see what’s in there & access what you need without bending down. The trade off is that the freezer is low to the ground, so if you’re someone who uses the freezer a lot and doesn’t like bending down, this may not be the best option for you.
Side-by-side
-
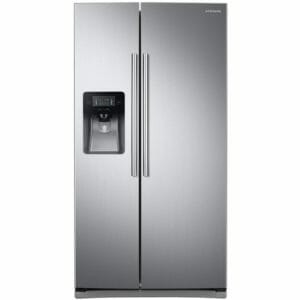
- Samsung Side-By-Side Fridge
-
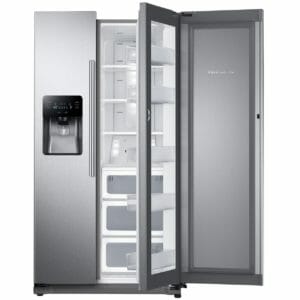
- Samsung Side-By-Side Food Preview Fridge
In side-by-side fridges, the fridge and freezer are next to each other instead of on top of one another. In this design, there’s much easier access to the freezer than in a french door, and there’s usually more organization available in both sections. Another advantage is the price — side-by-sides are less expensive than french door refrigerators. The largest disadvantage is that there’s not much lateral space to work with, so they’re not great for people who like to store large casserole dishes or pizza boxes in the fridge or freezer.
Single door
-
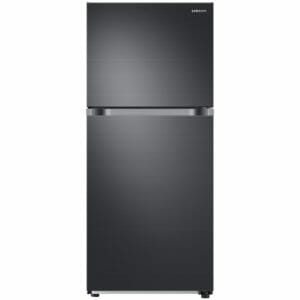
- Samsung Top Freezer Fridge
Single door fridges are typically the most compact and budget-friendly fridge option. Both the freezer and fridge space are easily accessible. The one thing to be aware of is that because these fridges have a single 30″ or 36″ door, they need more clearance when opened than french door or side-by-side fridges , which have two 15-18″ doors. Be sure you have enough clearance in front of the fridge to maneuver around the open door without it obstructing your walkway.
3. THE DISHWASHER
A standard size dishwasher is 24” and is located to the left or right of your sink, under the counter. We typically look for dishwashers that have good reviews and are relatively quiet, but rarely splurge on the highest end model (we’d suggest saving that for the fridge + range!).
4. THE MICROWAVE
One of the biggest design dilemmas we run into is where to put the microwave so that it’s functional without being a focal point (ahem, over the range). We’ll admit that although we try to avoid the over-the-range microwave, sometimes it just makes sense, and that’s okay. If you don’t want your microwave over the range, you can opt for a smaller counter sized one that can sit inside a pantry cabinet, or one that fits inside a base cabinet. (This gets back to why it’s important to have your appliances picked out in the beginning!)
Similar to the dishwasher, a microwave is not an appliance that will add value & wow people to the extent that a fancy range or fridge will. We typically choose one that is well rated & cohesive with the other appliances in the kitchen, and save the splurging for the range & fridge.
DESIGN TIPS FOR INCORPORATING APPLIANCES INTO YOUR KITCHEn
1. SCALE OF APPLIANCES
Whenever possible, we like to use full-sized appliances in the homes we renovate, meaning a 30” range, 24” dishwasher, and 30”+ fridge. In super small spaces, though, it might be necessary to go with smaller appliances. This doesn’t have to be a bad thing — in fact, we’ve seen lots of tiny spaces that are beautiful & have small appliances. The trick is that if you’re going to go with one small appliance, scale down the others, too. This will make your kitchen design feel cohesive & well planned instead of awkward.
2. LOCATION OF APPLIANCES
We chatted above about the work triangle & how important it is to have good flow between the fridge, range and sink. The location of each appliance within that triangle can further impact the flow, depending on how accessible each one should be.
The fridge, for example, should be off to the side in a location that’s easily accessible by both the cook + everyone else in the house. If your kids need to grab a snack, or your guests grab a drink, you want them to be able to access the fridge without having to walk past you cooking at the range or doing dishes at the sink. We like to have a clear pathway in front of the fridge, and avoid putting it behind an island or in a corner for this reason.
Ranges and cooktops, on the other hand, can be least accessible. Ranges are typically only used by one or two people at a time (the person or people who are actually doing the cooking), and don’t need to be accessed by anyone else in the house… unless someone’s trying to sneak samples of a meal before it’s ready!
Last, whenever possible, stagger the dishwasher and range locations so that they don’t swing open into one another. This is mostly applicable to small spaces where there’s not a ton of room between cabinet walls & appliances.
4. depth
Depth is mostly relevant to the fridge & microwave (dishwashers and ranges tend to all be roughly the same).
Standard depth fridges tend to be around 34-36” deep, which is a good 10-12” beyond where your countertops & cabinets stop. Counter depth fridges, on the other hand, are normally closer to 30” and tend to be more seamless, especially in a smaller kitchen. Choosing the right fridge depends on your space. If the fridge is up against a deep wall or chimney, going with a full depth fridge may be just what you need. But if it’s flanked by cabinets, a counter depth fridge may be a better fit. Counter depth fridges are more pricey than standard depth fridges, but they can definitely be worth the extra cost for the functionality and aesthetics they can add to your space.
Microwaves come in many different sizes. If you plan to incorporate a microwave into a base cabinet, you have 24″ of space to work with. If you’re incorporating it into an upper cabinet appliance garage, you may only have 12-15″ of space to work with. You can find measurements for these appliances in the Specifications section of each appliance listing. Make sure to take note of the depth (as well as the length and height) of each appliance before finalizing your cabinetry to make sure they’ll fit properly.
5. remember to add FILLERs
One of the most frequently missed details in kitchen planning is allowing the proper spacing between cabinetry, appliances and walls. If a fridge sits against a wall, don’t forget to allow for space for the fridge doors to fully open without hitting the wall. We usually allow a minimum of 6”, or add a tall pantry cabinet between the wall and the fridge for extra swing space.
Similarly, if you’re installing a dishwasher by a window, remember that the dishwasher has to open fully & needs room to clear the window sill when it’s opened and closed.
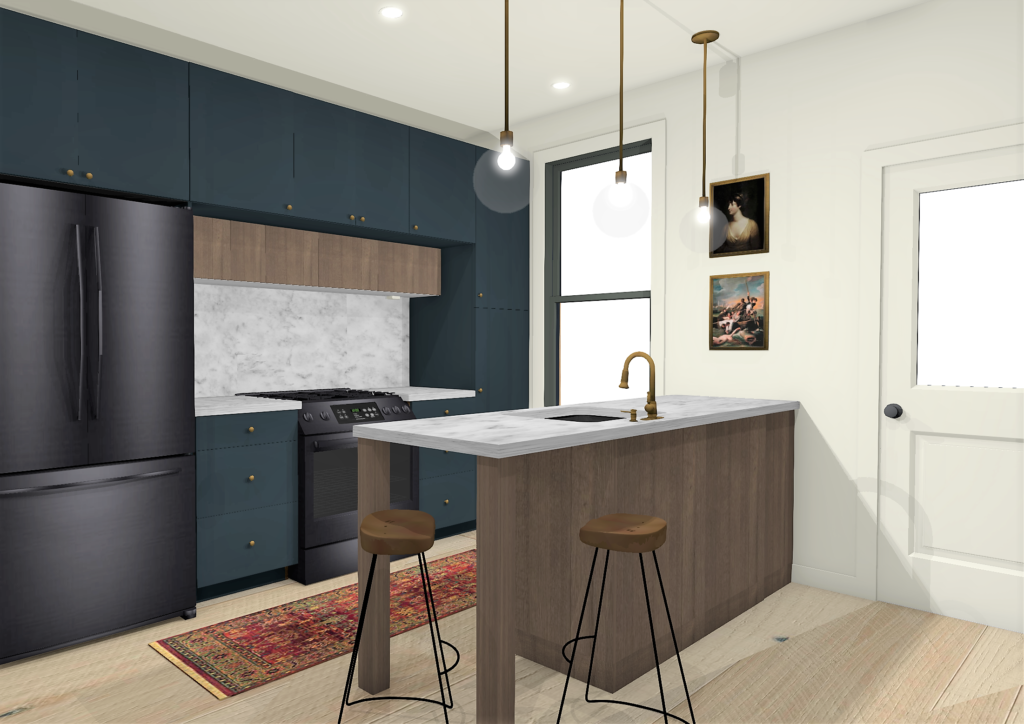
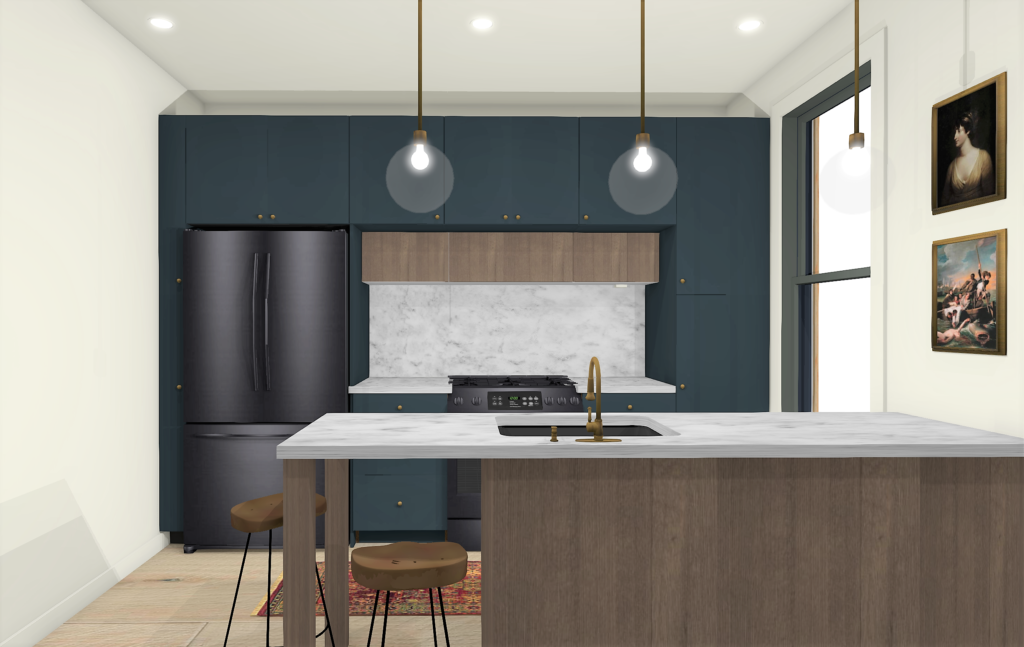
OUR PLAN FOR THE PEARL KITCHEN
Are you curious what we chose to do in the Pearl kitchen? Here she is!
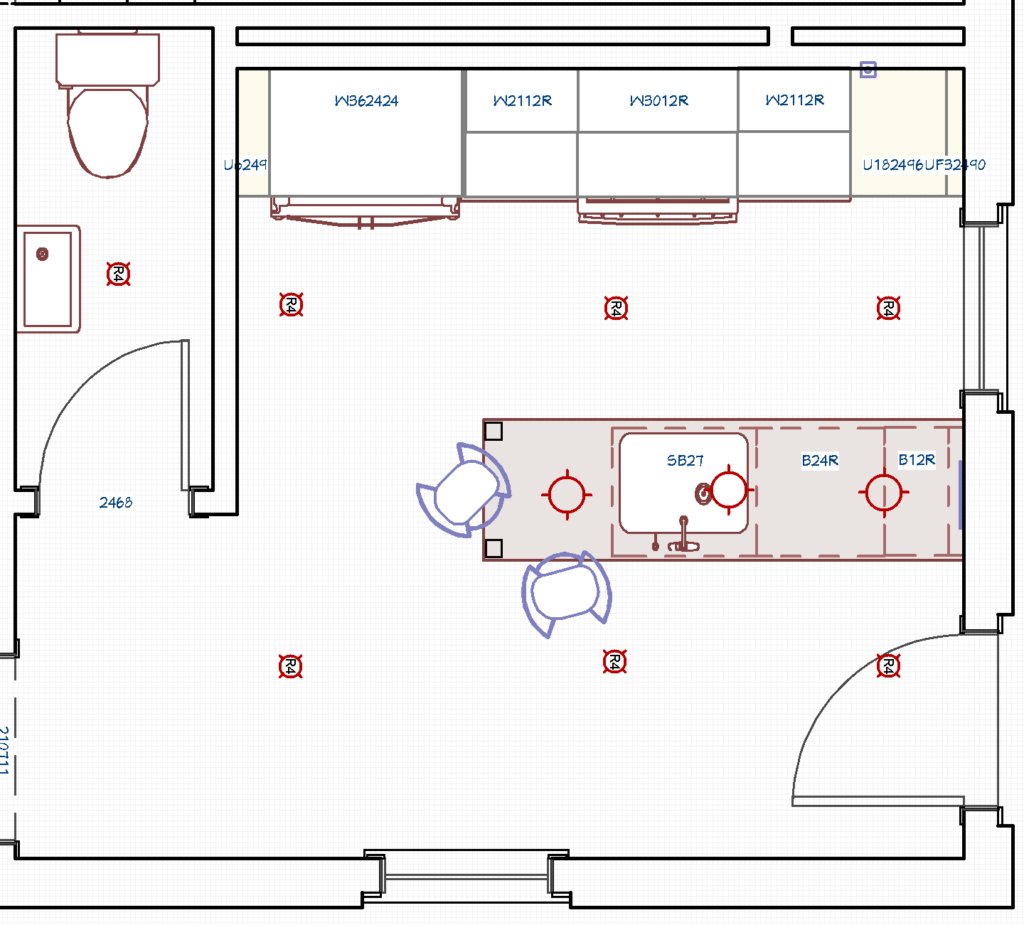
The kitchen space we’re working with is about 12’ wide x 12’ long (the powder room isn’t included in that), but about ⅓ of that space is taken up by the walkway between the back door and the dining room. We decided on a galley layout, with the fridge and range on the back wall, and sink and dishwasher in the peninsula. The peninsula is long and thin, so we can utilize the length of the room we have without blocking the back door walkway, and still have a small seating area. The distance between the two points will be between about 36″.
We considered 1927462 different layout options and configurations, and this one felt the best all things considered. When working through all of them to make a decision, we kept a few things in mind. We knew we didn’t want to move or adjust the two windows, exterior door and staircase, so we had to work around those. We also knew we wanted to make room for a small powder room in the space, because there’s no other bathrooms on the first floor. Last, we thought about how the kitchen would be used. We announced in our intro post that this home will be part of our Village Host vacation rental company (aka, an Airbnb), so we had short-stay guests in mind. We knew it wouldn’t have to be a huge kitchen to accommodate a small group staying for a a few days or weeks, but we did want it to be beautiful, open, and functional.
In addition to finalizing our layout, we finalized our appliances! We chose a counter-depth french door fridge, a slide-in gas range and a sleek dishwasher to incorporate into the space – all in Samsung’s black stainless finish, which we’re super excited to try for the first time. The reviews are great which makes us feel good about minimizing unwanted maintenance issues down the line.
-
- Samsung Black Stainless Slide-In Range
-
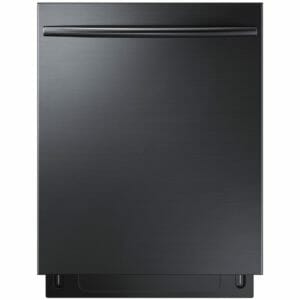
- Samsung Black Stainless Dishwasher
-
- Samsung 36″ Black Stainless French Door Fridge
Soon, this…
… will look more like this…
… and WE. CAN’T. WAIT. We’ll be back next time with all the details about the next phase of the design process: finishes! We’ll share everything we’re selecting, from cabinets to floors to paint colors, and some tips for creating a cohesive aesthetic in your kitchen. In the meantime, follow us on Instagram @beginninginthemiddle for behind-the-scenes on our progress!


Such great tips and such a pretty design – I can’t wait to see it come together!
Thanks Ashley!!
This post is fantastic! So informative! Thank you! I’m wondering, have you considered adding a bit of extra depth to the peninsula? Not an overhang, of course, because that would crowd the door, but in our house, we have the same peninsula situation and I added a 6″ deep “filler” behind the cabinets so that the overall depth of the peninsula would be 30″ and the faucet wouldn’t feel like it was teetering on the edge of the counter. I think it helps the whole thing feel more intentional (and it would allow the bulk of the peninsula to be centered between the window and the door, which would look lovely as you enter the room). LOVE this plan! Can’t wait to watch it come to life!
Thanks Kelly! That sounds like a really great idea that I didn’t consider… I’ll have to check our measurements to see if we could expand it a bit, even if it’s a few more inches. 🙂
Amazing post! I love how you describe everything with so much detail.
Fantastic post! Tons of info in one place with great visuals. How’s the project coming along?
I want you to design my kitchen!!!!!
🙂 You can always contact us at mixdesigncollective.com/contact!
You’ve got some great kitchen planning tips here. I like how you said that we need to decide on the layout we want before doing anything else. That’s good because my wife has some appliances in mind, so we’ll see if those fit in the layout we want!
I liked how each of your diagrams included a triangle to show how effective the layout would be for the set up of the kitchen. My husband and I have been trying to figure out how it would work out with the layout that we have or if we could change it. I think that having these examples will really help us to find one that we like that will also have a great flow to it.
I read through the entire post, then looked at all the photos on Instagram. Very nice innovatve ideas and creative use of space. Your use of high end lighting fixtures add greatly to overall appeal.
I have a very tiny villa with common walls on either side. I get natural light only in front, where the bedroom is, and in back, where the living/dining room is. The kitchen is in between. I have been wanting to redo it since I moved here 5 years ago, but wonder if the best interior arrangement is to swap the rooms around. I know that is easier said than done, especially as there is bathroom location to consider as well as changing location of washer/dryer, which currently is only accessible from a door on the carport outside. Where does one start with fully switching rooms around? I understand all the factors involved: electric, plumbing, etc.
we always start space planning by taking measurements and getting them into our software (there’s also free versions out there, like roomle and floorplanner). from there, we take a look at everything and play around with configuration until we get to the most functional layout.
What a great article about your remodeled kitchen. I absolutely love the different design layouts that can be done to kitchens, especially the information given about U shaped kitchens and how they utilize the wall space. I see from the pictures of your kitchen that you used a backsplash, I believe it is the easiest thing to clean in the kitchen. Thank you for sharing your wonderful remodeled kitchen.
[…] How to Plan a Kitchen Layout + Tips for Selecting Appliances That Fit […]
Hello! Great post! Would you mind sharing which software you use to design your layouts & 3d renderings?
Chief Architect
Thanks for your tips on how to plan a kitchen layout. We’re thinking of getting kitchen design services for a makeover. We’re feeling something a bit cozy.
I like what you said about finding appliances work with the work triangle so that it’s convenient to cook in the available space. My husband and I are hoping to rip out pretty much all of our existing cabinetry and appliances when we remodel our kitchen. We’ll have to get a dumpster for all of the junk we’re throwing out, but it will be worth it!
Thanks Mindy, I appreciate your comment. You may be able to donate your cabinets & appliances if they’re in good shape!
I’ve always wanted to renovate my kitchen and change its appliances. Thank you for sharing that freestanding ranges stove are the most common and it’s a perfect choice if a buyer is on a budget. I hope I’ll be able to find a custom kitchen cabinetry service that can match the appliances that I am planning to buy.
You’re welcome!
Wow! What a great article about your remodeled kitchen. You have provided some tips on how to make kitchen appliances look good. It has been very beneficial for me. These are the kind of tips everyone needs to change their kitchen.
Thank you so much for your tips and visuals on how to layout a kitchen to give optimal space, such as having an island or a u-shape to create that appliance triangle you talk about. My mother is thinking of remodeling her kitchen as all of her appliances are pretty dated, and she would love to be able to host parties. I wonder if when she gets new appliances, she should look for assistance in installing them so she doesn’t damage something.
I liked that you mentioned you need to consider your budget and lifestyle to choose the right cooking appliances. My husband and I are thinking about remodeling our kitchen, and we are looking for advice about what to do. I will let her know about your recommendations to choose the right appliances for our project.
thank you, ellie!
This is awesome and useful post. Floor plan is amazing and also space saving plan. Thank you for the post.
Wonderful ideas.. Amazing concept and decor tips. This is truly a great read for me!! Once again, thanks for the quality articles you post on your blog!! That is very interesting & awesome post. I am always searching for informative stuff like this! I will check here often for more cool stuff
Great tips to plan a kitchen layout! This post will be a great help for people planning to renovate their kitchen!
you describe in a great way, with structure. Thanks.
Your plan and tips are really helpful. Thank you so much for sharing. It really cool plan for me.
Wonderful ideas you have share with us .Thanks a bunch.
Anytime!
i like this helpful about How To Plan a Kitchen Layout & Tips for Selecting Appliances that Fit, thanks for sharing this useful info
I am just planning a wonderful design for my Kitchen, your instructions help me a lot. Thanks for sharing.
LOVE this. Great information! This was very helpful!