

A big thank you to Lowe’s Home Improvement for sponsoring this post and supporting Beginning in the Middle. As always, all thoughts & opinions are our own.
Over the past few weeks, we’ve teamed up with Lowe’s to share a series of how-to posts all about kitchen design. If you missed our prior posts, you can catch up here:
- How To Plan a Kitchen Layout & Tips for Selecting Appliances that Fit
- How to Select Finishes to Create a Cohesive Kitchen Design
This week, we’re back to chat all about lighting in the kitchen. Because kitchens are so multi-functional and get such heavy use, it’s worth investing time to think through a solid lighting plan. We’re excited to share our process for creating a lighting plan and a few tips & tricks to help you tackle it yourself. We’re also sharing what our lighting plan looks like for our Pearl Airbnb kitchen project that Lowe’s is sponsoring at the very end of the post so keep scrolling!
GETTING STARTED
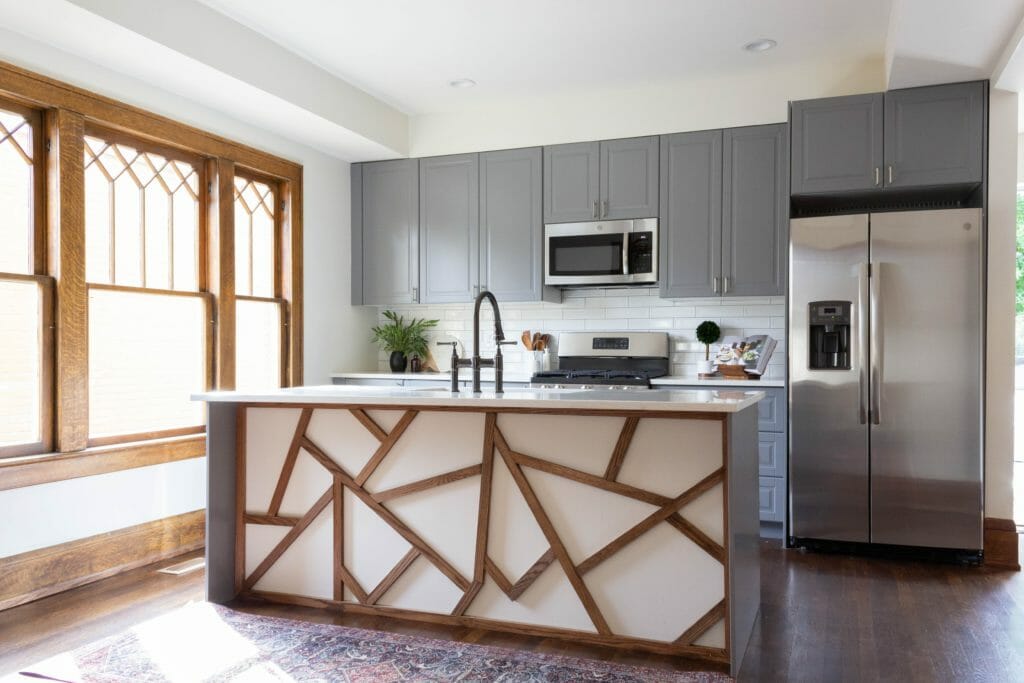
In order to determine which types of lighting work best for your kitchen, you’ll want to have a very (very very) good idea of how the space will be used. Will you have a prep station in a corner? Incorporate open shelving anywhere? Will there be a breakfast nook or coffee bar? An island? Before getting too deep into lighting, we first suggest finalizing your layout — especially cabinet and appliance placement. We did this a few times before we understood the importance of planning… trust us, it never works out well. DON’T DO IT! psst: If you need help planning your kitchen layout, click here to read our how-to post.
There are three basic types of lighting that can be incorporated into any room, including kitchens:
1. ambient lighting (the main source of light for overall illumination),
2. accent lighting (usually decorative fixtures, aka the fun part) and
3. task lighting (lighting that provide focused lighting for a specific task).
The more layers of lighting incorporated into a space, the more functional and aesthetically pleasing it tends to be. Let’s dive deeper into how each type is used.
lighting type #1: Ambient Lighting
Ambient lighting provides overall illumination in a room and is super important when it comes to kitchen design. It provides the most light in your kitchen and is generally what turns on when someone walks in & flips the switch. Ambient lighting most commonly includes flush & semi-flush mount fixtures and recessed lighting, but can also include pendants and track lighting if they’re designed to emit lots of light. Recessed lighting tends to be most popular pick in kitchens because it’s functional, inexpensive, and blends seamlessly into the ceiling.
Within the recessed lighting category, there are several different kinds on the market for different applications. Our favorites are LED wafer recessed lights, which are very shallow and don’t need as much space behind ceiling drywall as standard recessed lights do. Your electrician can install them from below the ceiling (which is great for remodels), and we like that the light is flush with the trim instead of set back. If you have lots of space behind your drywall (no insulation, ducts, etc.) and your ceiling is open, then standard housing usually does the trick. Here’s an example of what the wafer version looks like (L) vs the standard (R).
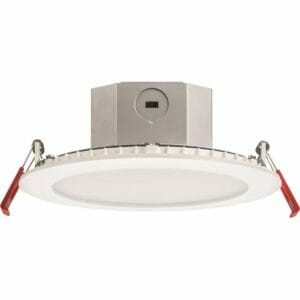
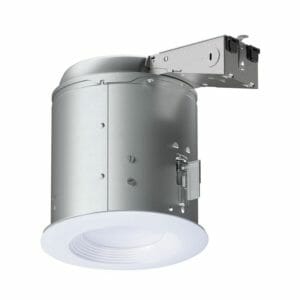
1 – Juno White LED Recessed Light Kit || 2 – Halo LT White LED Recessed Light Kit
When planning recessed lighting layouts and deciding how many to add into a space, we take it on a case by case basis. A few tips:
- If you’re working with a square or rectangular space, having a grid of recessed lights typically does the trick. For smaller kitchens, we typically start with 4 cans and work our way up from there depending on the size.
2. We try to align recessed lights with windows and doors when possible. It’s certainly not necessary, but having a light in line with the center of a window or door creates a clean look, especially when there’s a prominent focal point in the room.
3. If the room has a focal point, like a unique range hood, we’ll adjust the recessed lighting to frame that object (sometimes this means that they won’t be in a perfectly spaced grid, and that’s okay). If there’s a separate coffee bar or prep area or breakfast nook, we’ll add in additional lights to illuminate those areas, too.
4. We typically go with 6″ cans in kitchens, but in a very small space, 4″ can work too.
5. We suggest LED lights because they’re so low-maintenance. They’re a bit more expensive than non-LEDs but they also last an average of 35,000 hours. Not having to change a bulb for 20+ years is well worth the extra cost in our book!
Tip: when planning a recessed lighting placement, consider your unique space. A perfectly spaced grid doesn’t always make sense with every layout.
lighting type #2: Task Lighting
Task lighting provides focused illumination for work spaces, counter tops and islands. Task lighting supplements ambient lighting by providing a boost in areas where certain tasks are performed. A few of the most popular types of task lighting in the kitchens are under cabinet lighting and pendants over the island.
Tip: think through how you’ll be using each area of your kitchen, like food prep on the counter or doing homework at the island, and plan task lighting around these functions.
Pendants above an island illuminate the island to create a more functional work space. They also come in handy for homework sessions and other alternate uses to cooking and prep. Under cabinet lighting is typically hardwired, but we’ve found a few products that are wireless or plugin, too. Here are a few well-rated options:
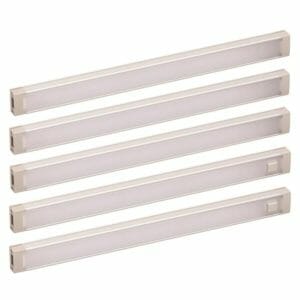
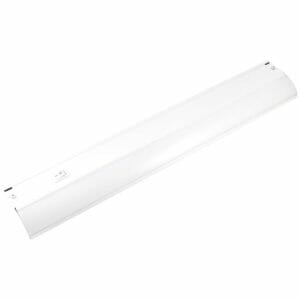
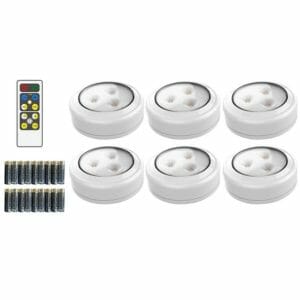
1 – Plug-in: Black & Decker Under Cabinet LED Light Bar || 2 – Hardwired: Utilitech Under cabinet LED light bar || 3 – Battery: Brilliant Evolution Puck Light
Lighting type #3: Accent Lighting
Accent lighting draws attention to architectural details and other points of interest in the kitchen, such as shelves, artwork, and objects. We tend to think of accent lighting as functional jewelry — it ties together a design visually, but also serves a purpose. It’s nice to be able to turn accent lighting on to create a moodier, more relaxed atmosphere in a space, especially during the darker hours of the day. Sconces and pendants are two of our favorite ways to add accent lighting (we’re using #6 below in our Pearl Airbnb kitchen!).

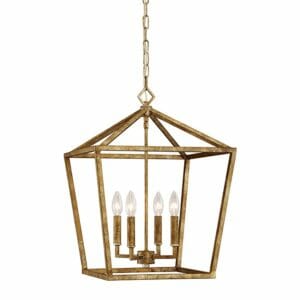
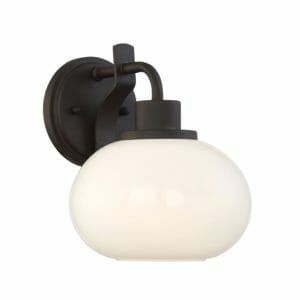
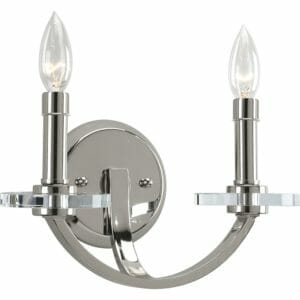
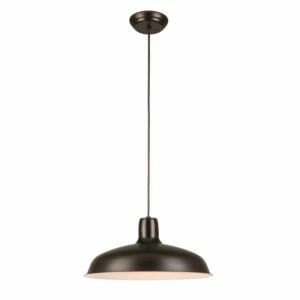
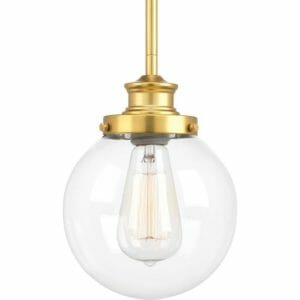
1 – Kichler Rumer Pendant/Sconce || 2 – Millennium Lighting Vintage Cage Pendant || 3 – Quoizel Tribeca Old Bronze Sconce || 4 – Progress Lighting Nisse Sconce || 5 – Progress Lighting Warehouse Pendant || 6 – Progress Lighting Penn Pendant
Track lights, puck lights, and LED strip lights can also work well to highlight certain textured walls or pieces of art, toe kicks, etc. Also, adding lighting to the inside of a cabinet creates a really elegant look. Puck lights and LED strips are great for achieving this.
Tip: Think of accent lighting as your opportunity to highlight features you love in your kitchen.

Switches & Outlets
Switch & outlet placement in a kitchen can sometimes make even more of an impact than the lights themselves! A few rules of thumb we try to stick to on every project:
1 – Put ALL lights on dimmer switches. Period.
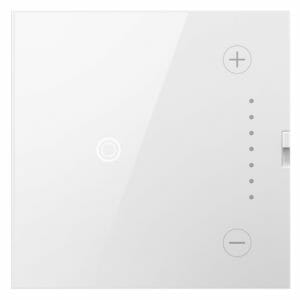
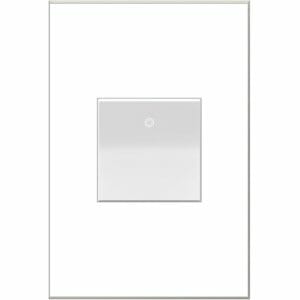
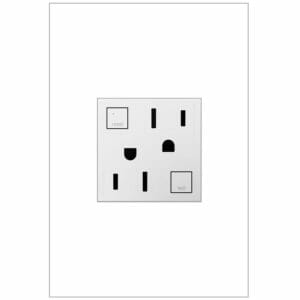
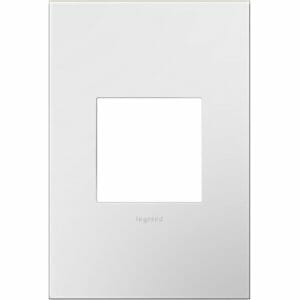
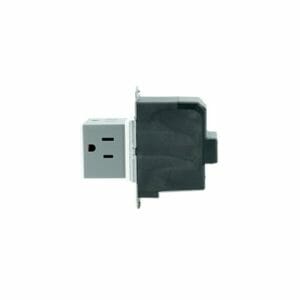
2 – Consider decorative switches and outlet covers. We’re using Legrand Adorne pop-out outlets and dimmer switches in our Pearl Airbnb kitchen remodel and are very excited about them! Legrand has displays at Lowe’s in the lighting aisle that you can go check out and play with if you’re interested. They’re very sleek.
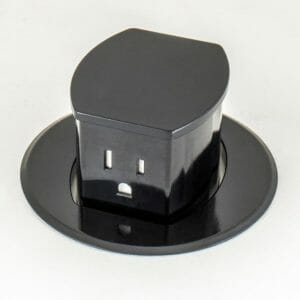
3 – Consider a recessed pop-up outlet for the kitchen island. They’re installed right into the counter and can be popped up for use.
Tip: Put every light in your kitchen on a dimmer switch!
Choosing the Right Bulbs
Ever walk into a space that feels too blue or too orange? It’s all in the Kelvins. The Kelvin scale measures color temperature ranging from orange to blue. Orange light is at the bottom of the scale and has the lowest Kelvins. Blue light is at the top of the scale and has the highest Kelvins.

Bulbs typically come in shades such as daylight & cool white (4100-5000 Kelvins), soft white (2700-3000 Kelvins), and warm white (2400 Kelvins). In kitchens, we tend to stick to soft white bulbs (2700-3000 Kelvins) because they look the most natural. We rarely go above 3000 Kelvins in any project because they feel too cold and fluorescent. For certain accent lighting, we’ll go with a warm white bulb or Edison bulb, but not much lower than that.
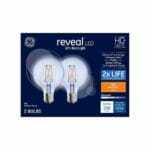
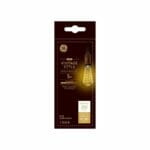
1 – GE Reveal 40-Watt Clear Dimmable Bulbs || 2 – GE Vintage 5-Watt Warm Candle Light Dimmable Bulb || 3 – GE Reveal 60-Watt Frosted Dimmable Bulbs
Two other factors in bulbs are wattage and lumens. Wattage is the amount of energy that the bulb uses. Each light fixture has a max wattage listed on it, which you can use as a guide when choosing bulbs. Lumens is the amount of light that the bulb emits. LED bulbs tend to provide the highest lumens with the lowest wattage, making them the most efficient type.
Tip: In kitchens, stick to soft white bulbs that are 2700-3000 kelvins.
Lowe’s has a really great light bulb buying guide that we’d suggest checking out for more info!
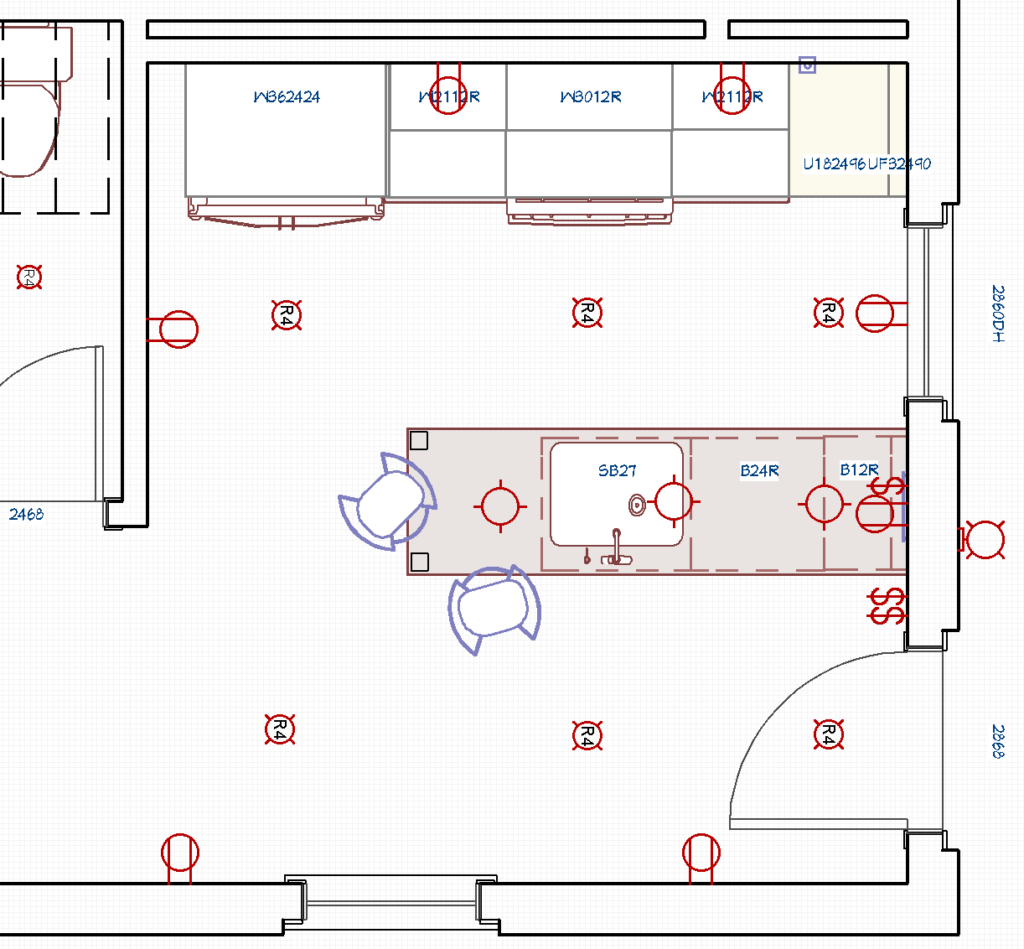
THE PEARL KITCHEN lighting PLAN
Here’s what our lighting plan looks like for our Pearl Airbnb kitchen. We’re adding 6 recessed lights (they will be more or less evenly spaced & lined up with the fridge and range) and 3 accent pendants above the island. We also planned for outlets (the circle symbols with the 2 lines), and mapped out our switch locations (the dollar sign symbols). We are still debating whether or not to do under cabinet lighting (it’s a small space!) so we’ll keep you posted on what we decide.
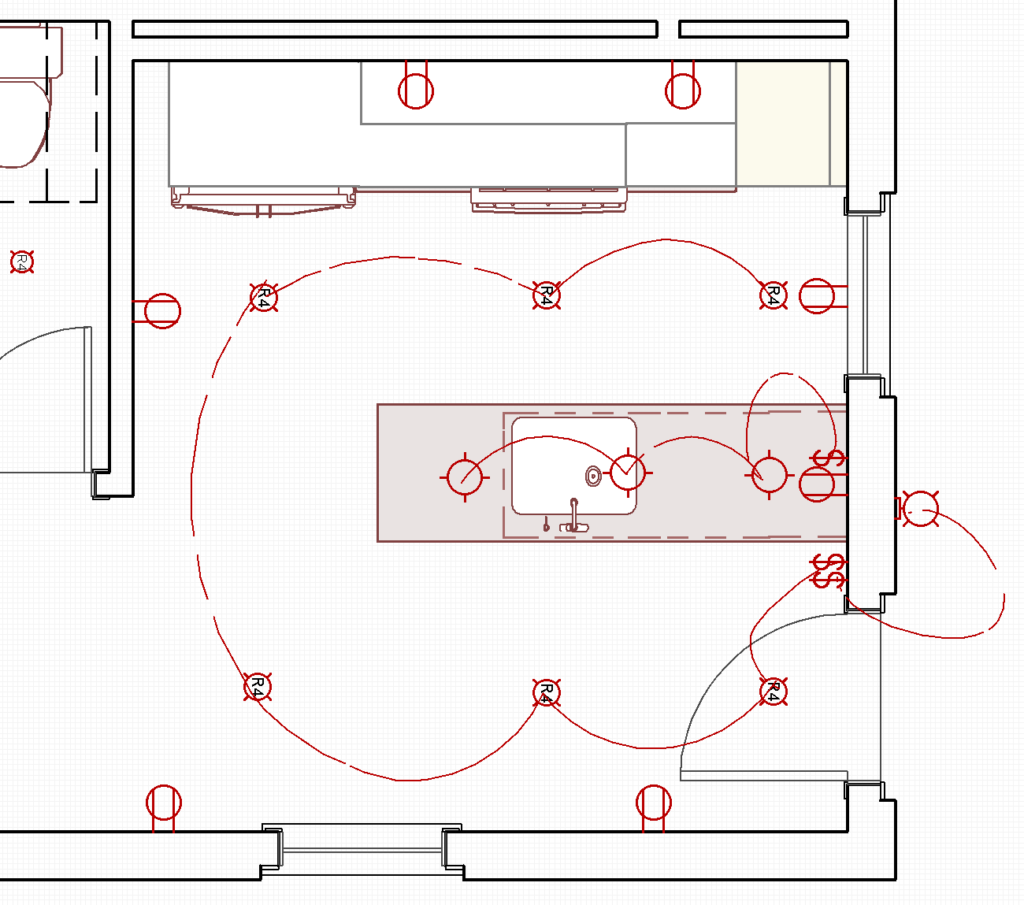
After we have our lighting in place, we connect each switch to the lights it’ll control so that the electrician doing the work knows which switch controls which lights. All of the cans will be on one switch, so they’re all connected. All of the pendants will be on another, so they’re connected. And the back outdoor light is on a third switch. It’s really a bunch of squiggly lines and it looks something like this:
That’s all for now, folks. We hope this helped you understand how different types of lighting play different roles in kitchen design, and hope that it encourages you to tackle your own kitchen lighting plan!
Questions, comments? Leave em below!


The link for the Legrand light switches is not working, it takes you to Lowe’s website but not the product.
Thank you for this post, it is extremely helpful!!!
Thank you so much for letting us know! Just fixed the link. If you click on the photo of each switch/outlet, that will take you to the exact product. Hope this helps!
Love this Catherine! Thanks for sharing such great tips!
Thanks Kennesha!
Take my cordial loves CATHERINE. Your tips are really impressive. It’s really important to enlighting our kitchen properly because the most important task (Cooking) we do here. So if any shortage or lighting we can’t cook properly.
Very useful tips, as usual! We’re spending so much time in the kitchen and make some wonderful family memories there, so it’s only natural to have this part of our home lovely and inviting, and lighting plays such a huge role in the process. Accent lighting is especially something that’s very dear to me because I love highlighting textured surfaces and favorite furniture pieces. Thank you for sharing this valuable post!
Hi
So amazing post about kitchen shining, I like it and appreciated your works.
Thanx for your kind info.
This is some really good information about recessed lighting. It is good to know that it would be smart to add some dimmer switches. That does seem like it could help you control the lighting in your home a lot better. Also, something you should probably have an electrician handle.
[…] How to Create a Lighting Plan That Will Make your Kitchen Shine […]
I have installed several recessed lights over my kitchen and it looks neat. I am also planning to place some cabinet lighting but this is optional since I have a very little closed cabinet over my kitchen. The only problem is not the one I will be placing over my center island.
I have these designs in my kitchen and it really looks stunning, clean and elegant. I’m also planning to add White LED Recessed Light Kit because I find beautiful too. Thanks for your tips and ideas!
your design looks great. and this is really helpful for my project as well so i hope you to add some more in future also. thanks for sharing…..
Thank you!
Thank you for the info. We had a house fire. This will be very helpful for the rebuild. I really live all the detailed input. Thanks so much. It’s very overwhelming to rebuild a whole house.
Not totally the best information re recessed lights. Most kitcen and lighting designers say to put your recessed lights OVER the front edge of the counter so when standing at the counter working you are not putting the work surface in your shadow. Becomes a bit tricky when you have some cabinstes that go to the ceiling. But worth checking a bit more on this.
Thanks for your reply, Deborah! I know many designers like to stick to this rule, especially if there are not secondary and tertiary light sources. Whenever we look at designing a lighting plan, we start with evaluating factors like ceiling height/pitch, natural light sources, room size, cabinet/shelf placement, as well as the lifestyles of the people who will be using the kitchen. We have had clients request lots of recessed lighting in their kitchens, and others who have requested we eliminate them completely because they have a harsh “spotlight” effect, even when dimmed. We can relate to that personally, as we rarely turn ours on unless we want the entire room lit up. We find that task lighting is most effective at illuminating a work surface.
thanks for info.