

Hello there! Join us on Instagram to keep up with our latest project updates, news, and to see more photos that haven’t made their way onto the blog yet. We’ve been tracking our progress on this renovation with hashtag #thepearlstproject, so it’s easy to see all the good stuff in one spot.
Lately, we’ve been spending most of our time on The Pearl St. Project. It’s a 1900 duplex located just south of Downtown Columbus that needs some love. We’ve been tackling side #1 of the duplex first, one room at a time. So far, we’ve made lots of progress in the kitchen, and have started some DIY action in the living room to bring it back to life.
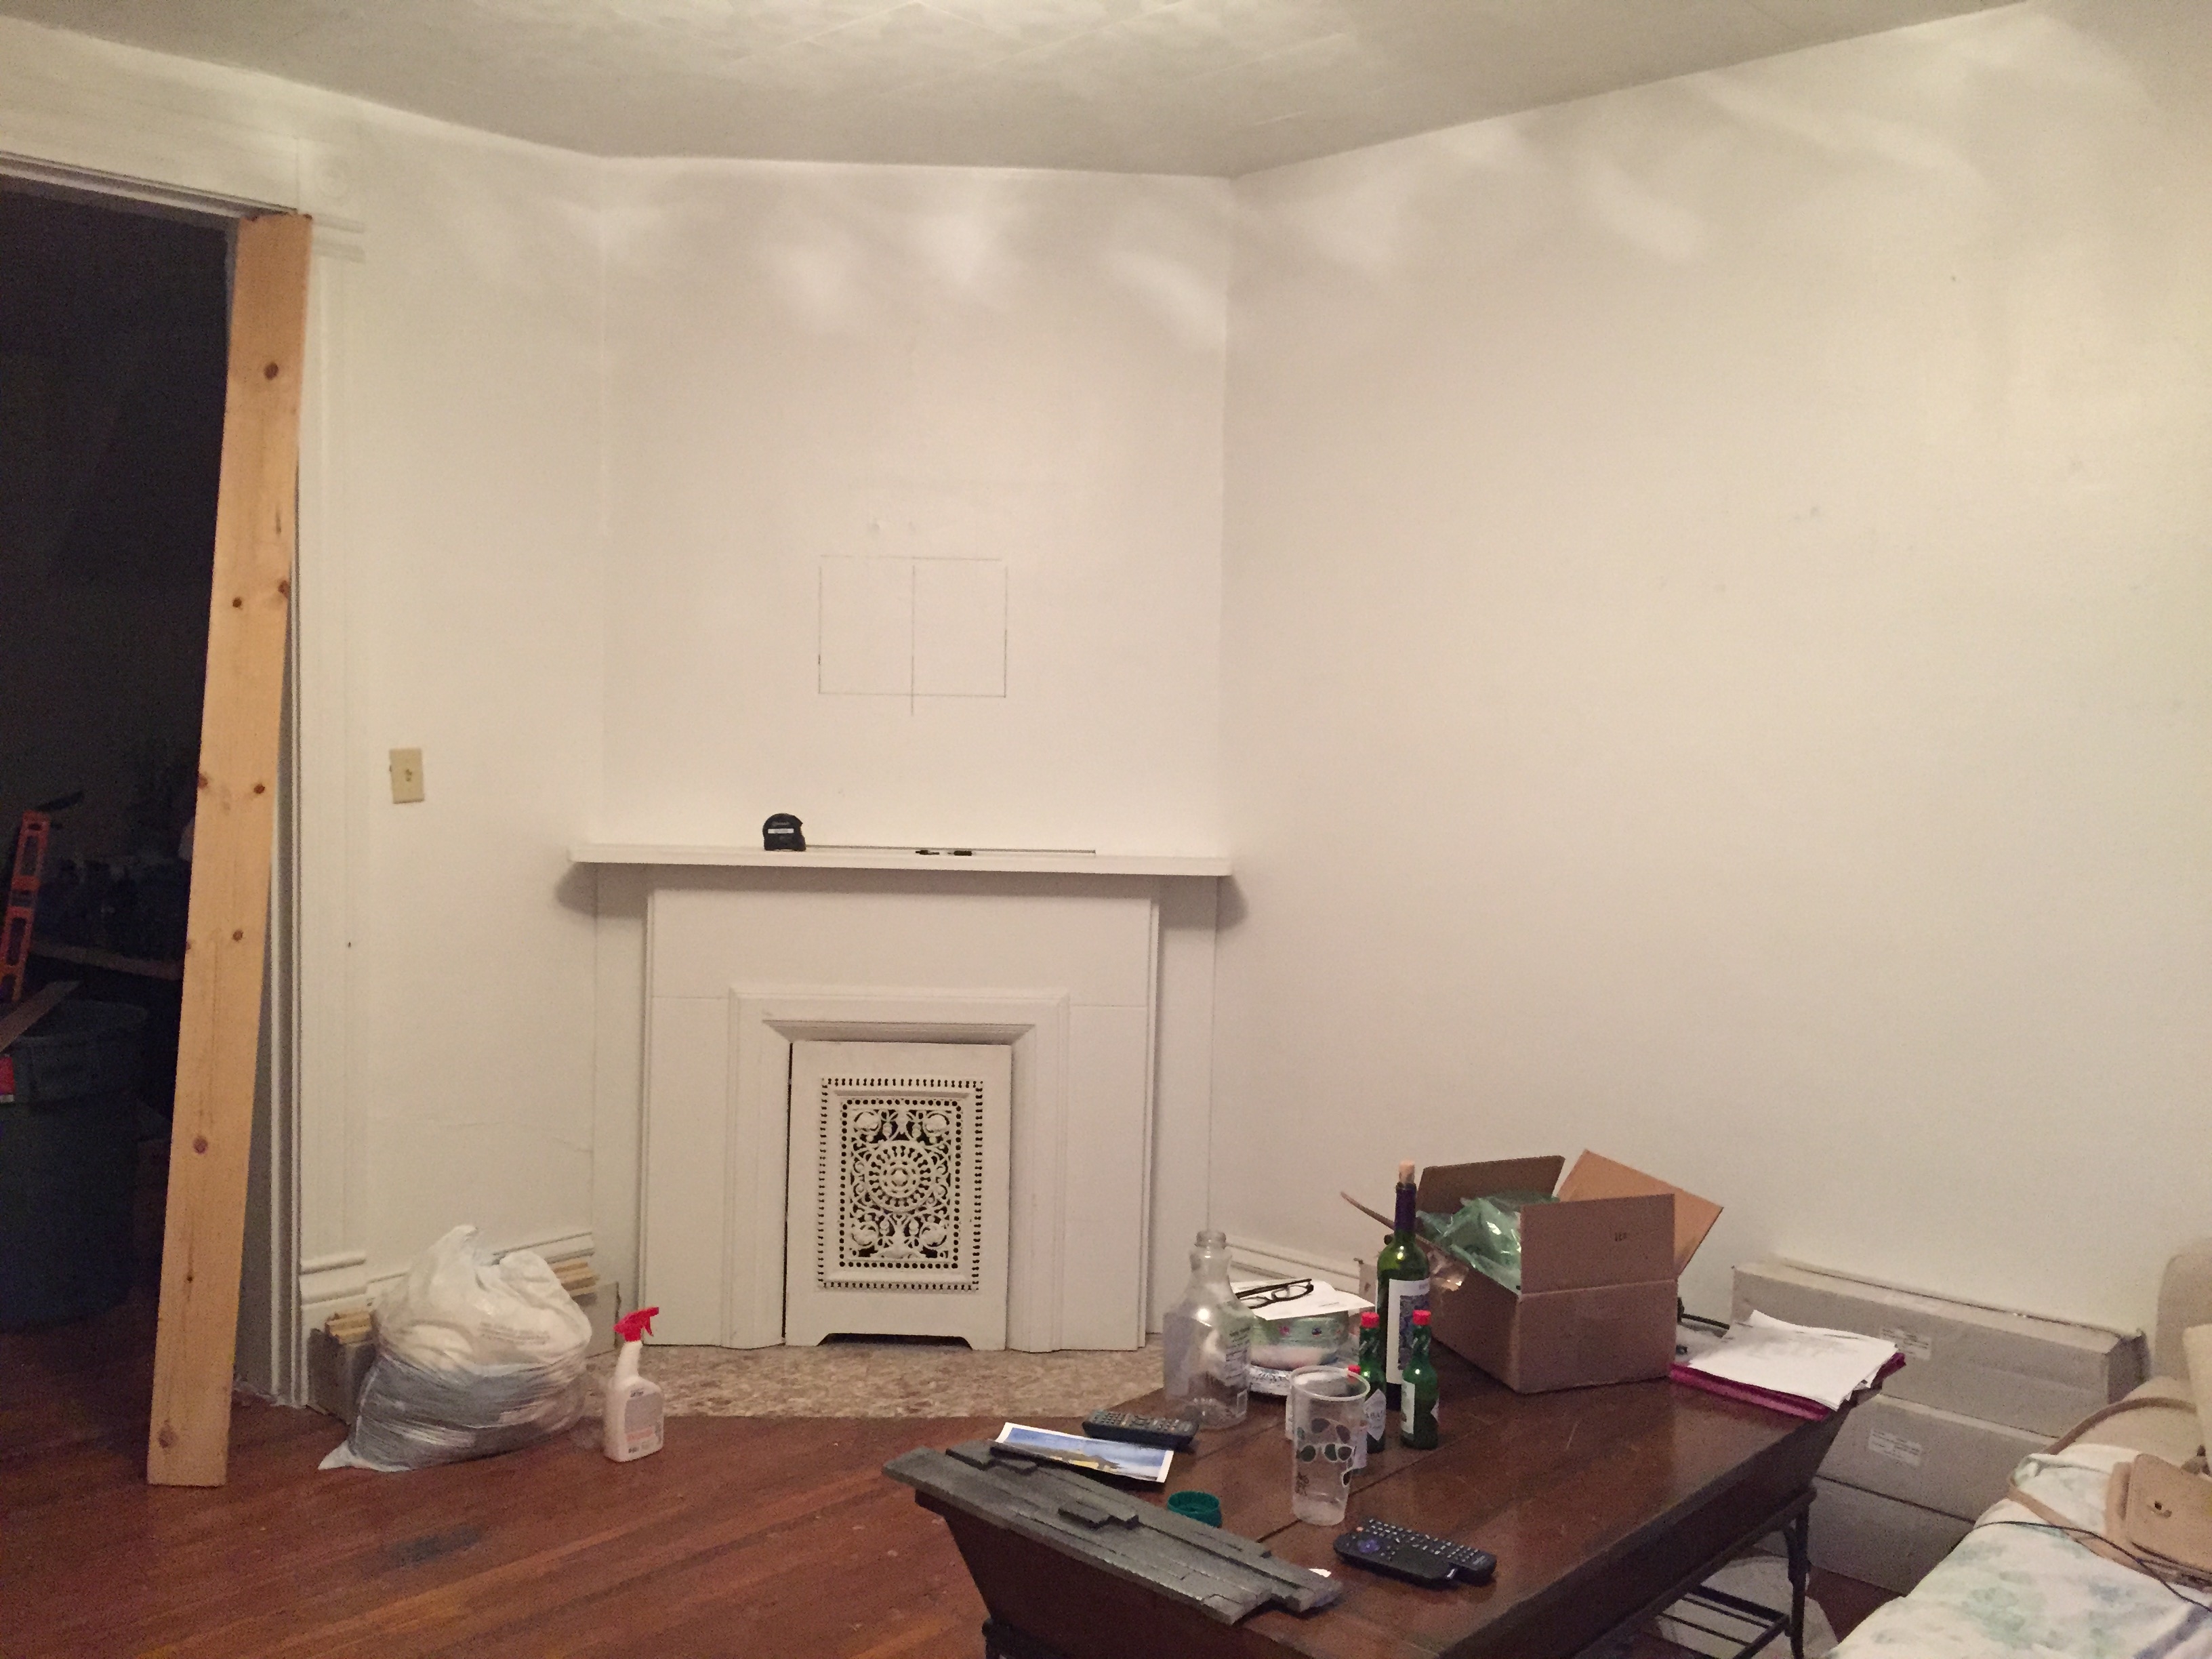
This is what the living room looked like when we purchased the house.
In our last post, we shared how we added fancy ledger stone to the corner chimney area (hint: spray paint was involved) and restored the original slate mantel for just $102.
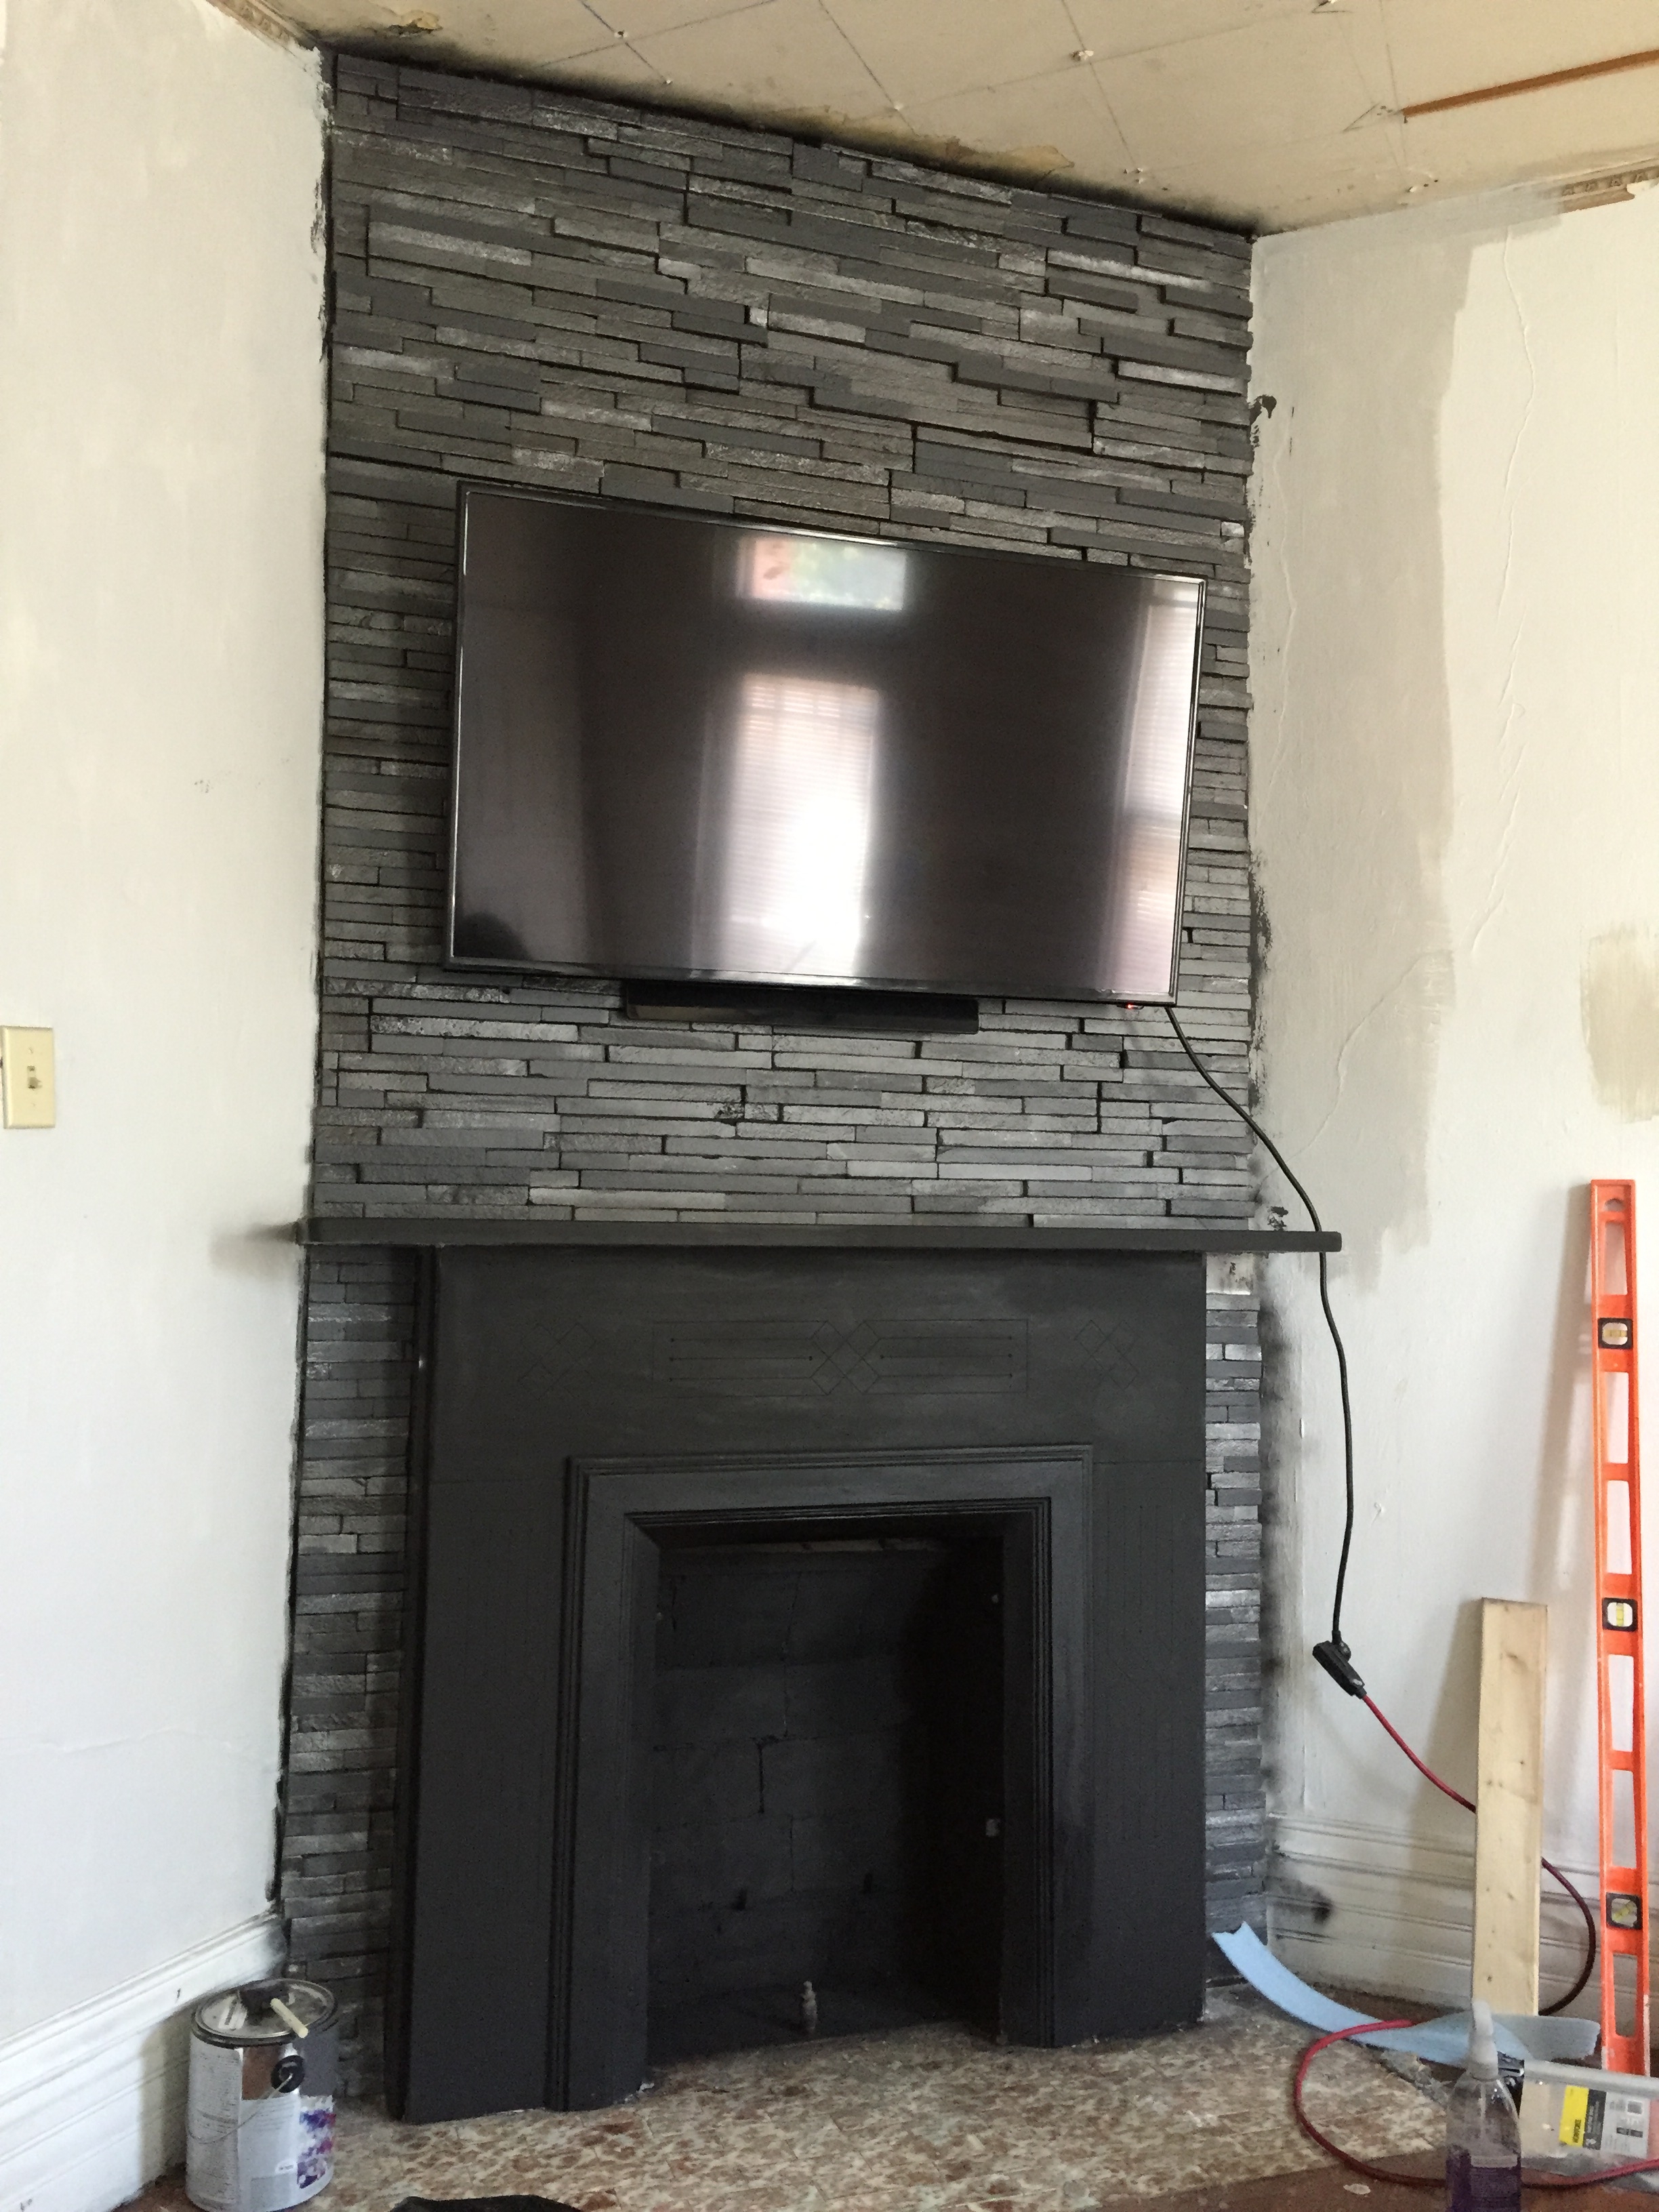
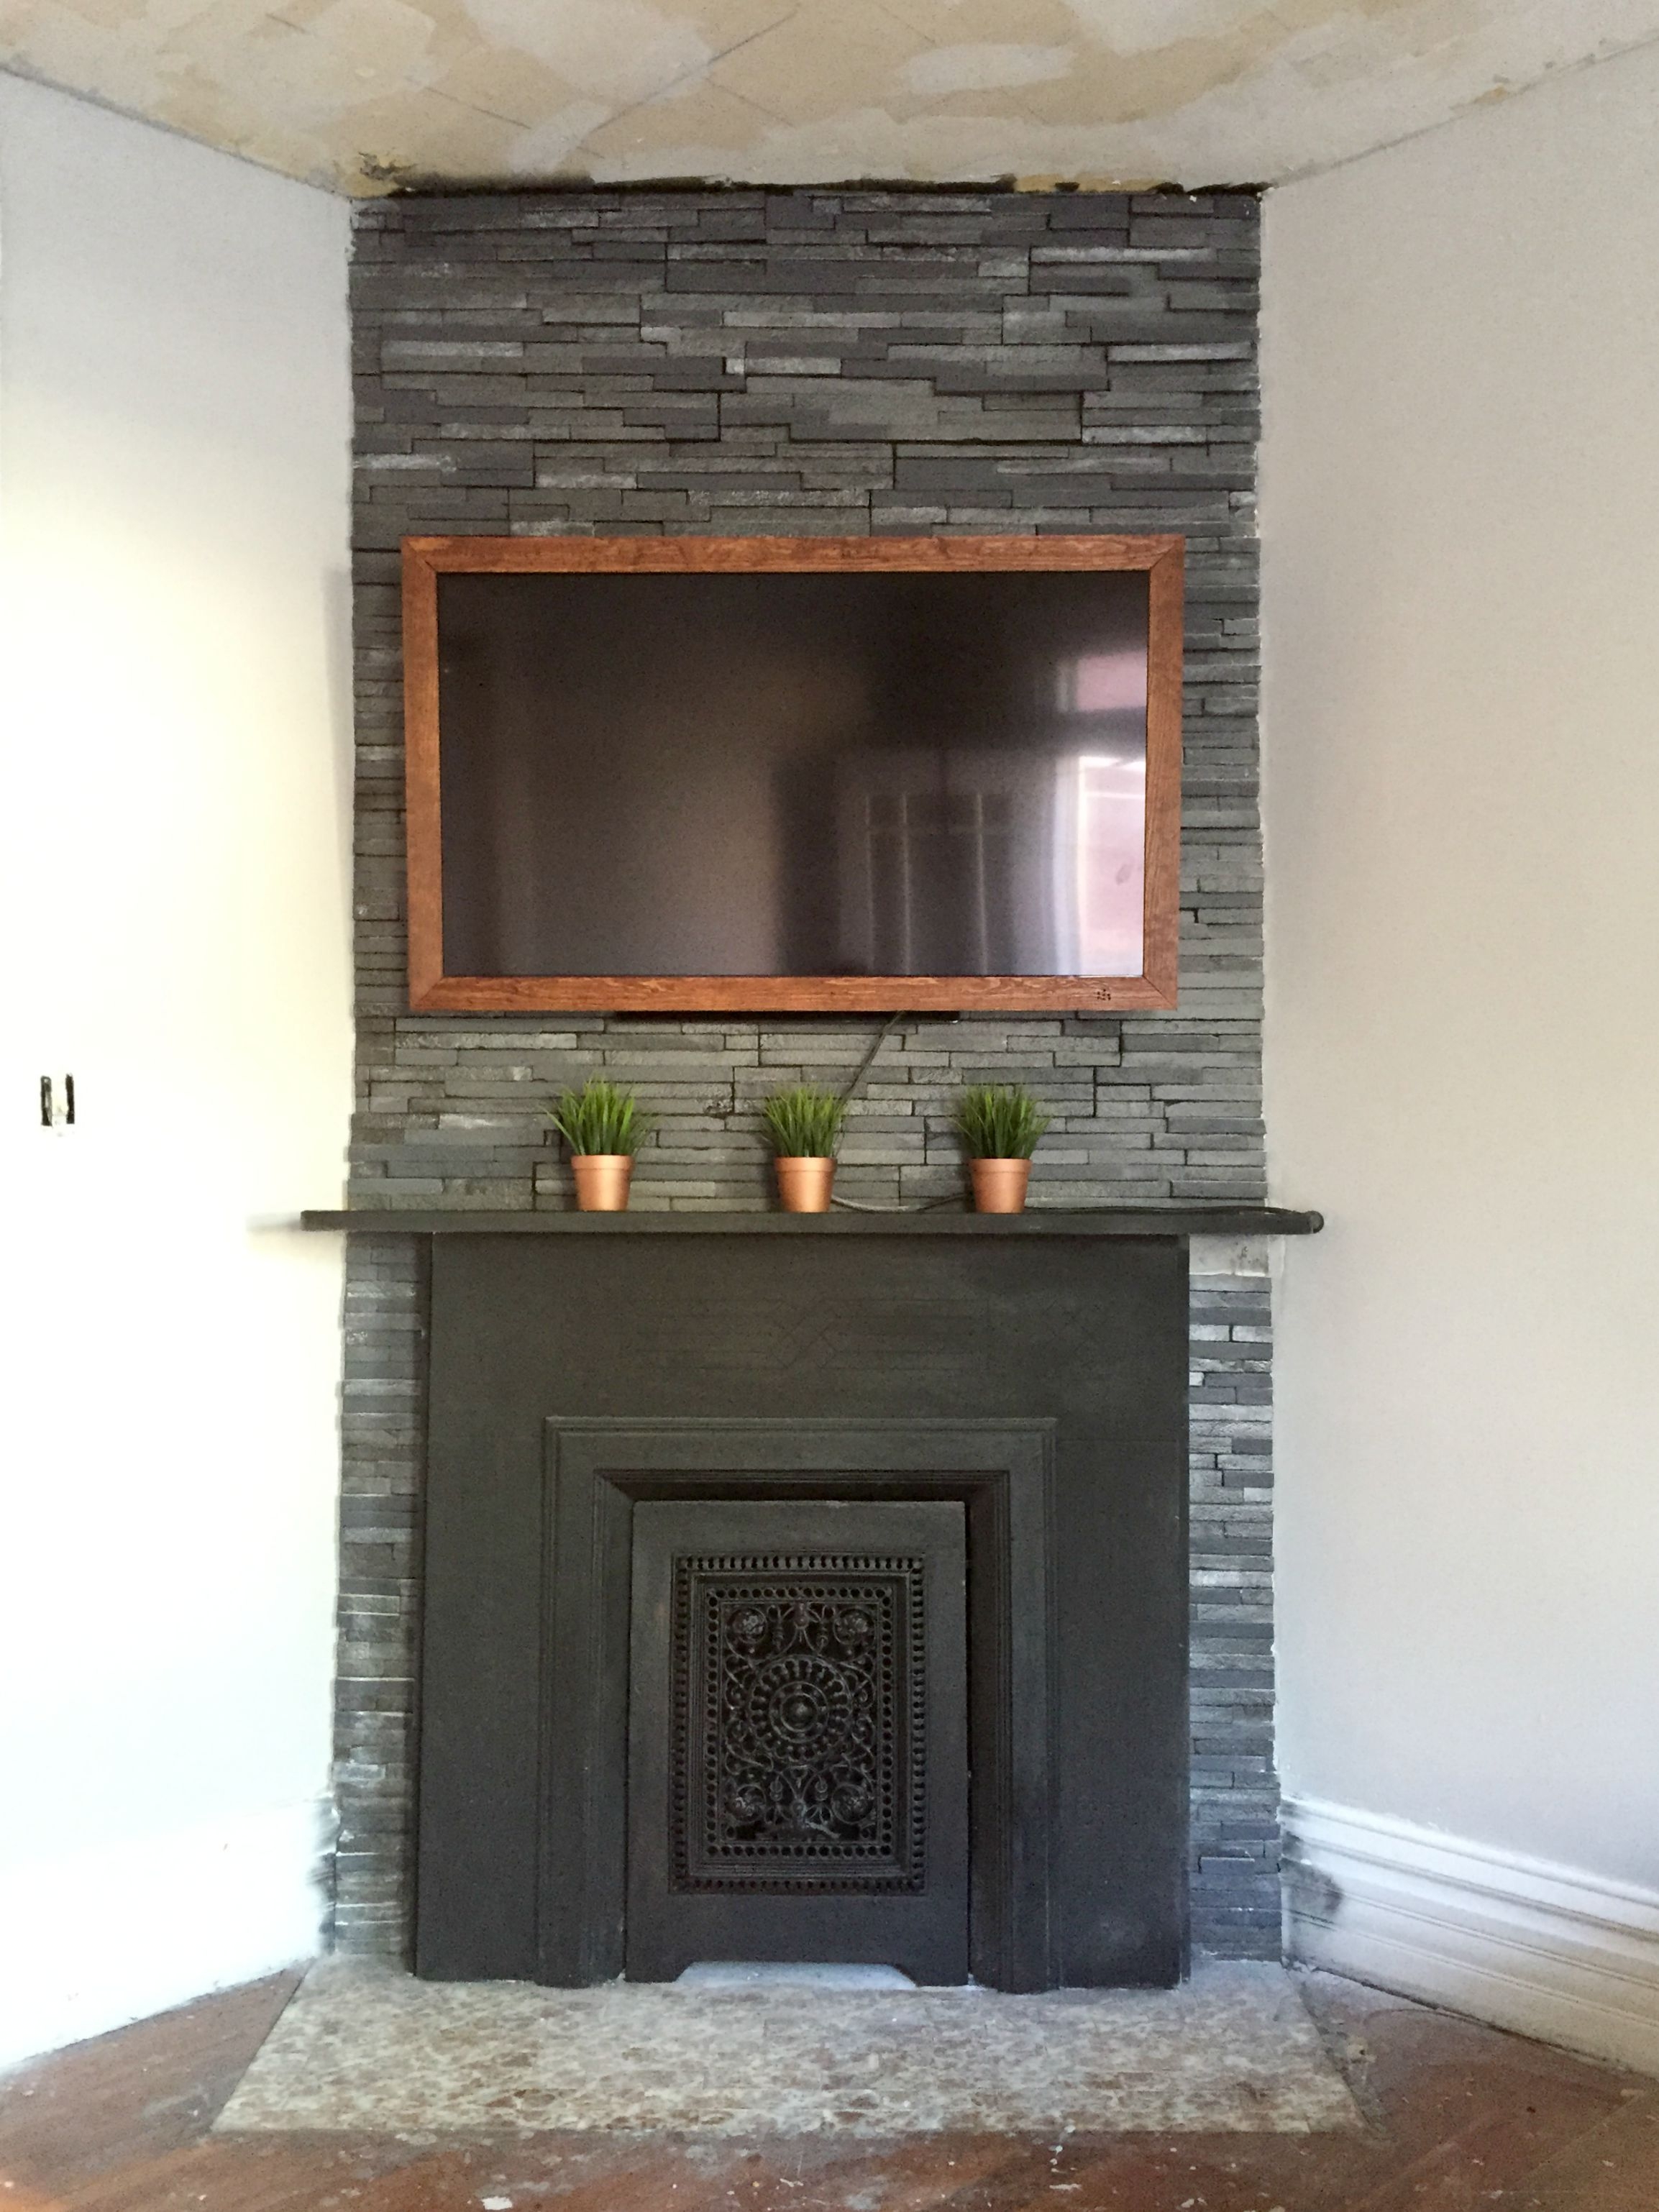
Here’s the problem. We didn’t love the way the TV looked against the new stone. It kind of overtook the whole thing. But, where else would we put it? This house is cozy – it’s just about 1100 sq.ft. and only has one living room/family room/den (this one). Putting it against one of the walls would take away from the precious seating space available in this room. So, we set out to find a way to keep it on the fireplace but make it look a little more classy.
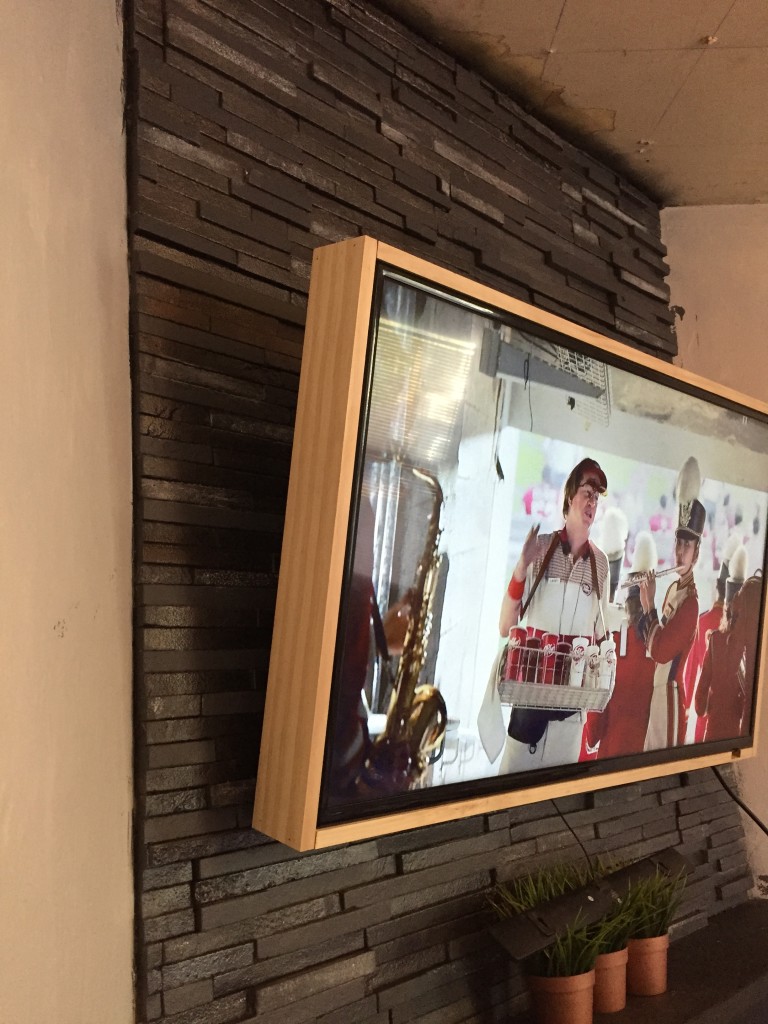
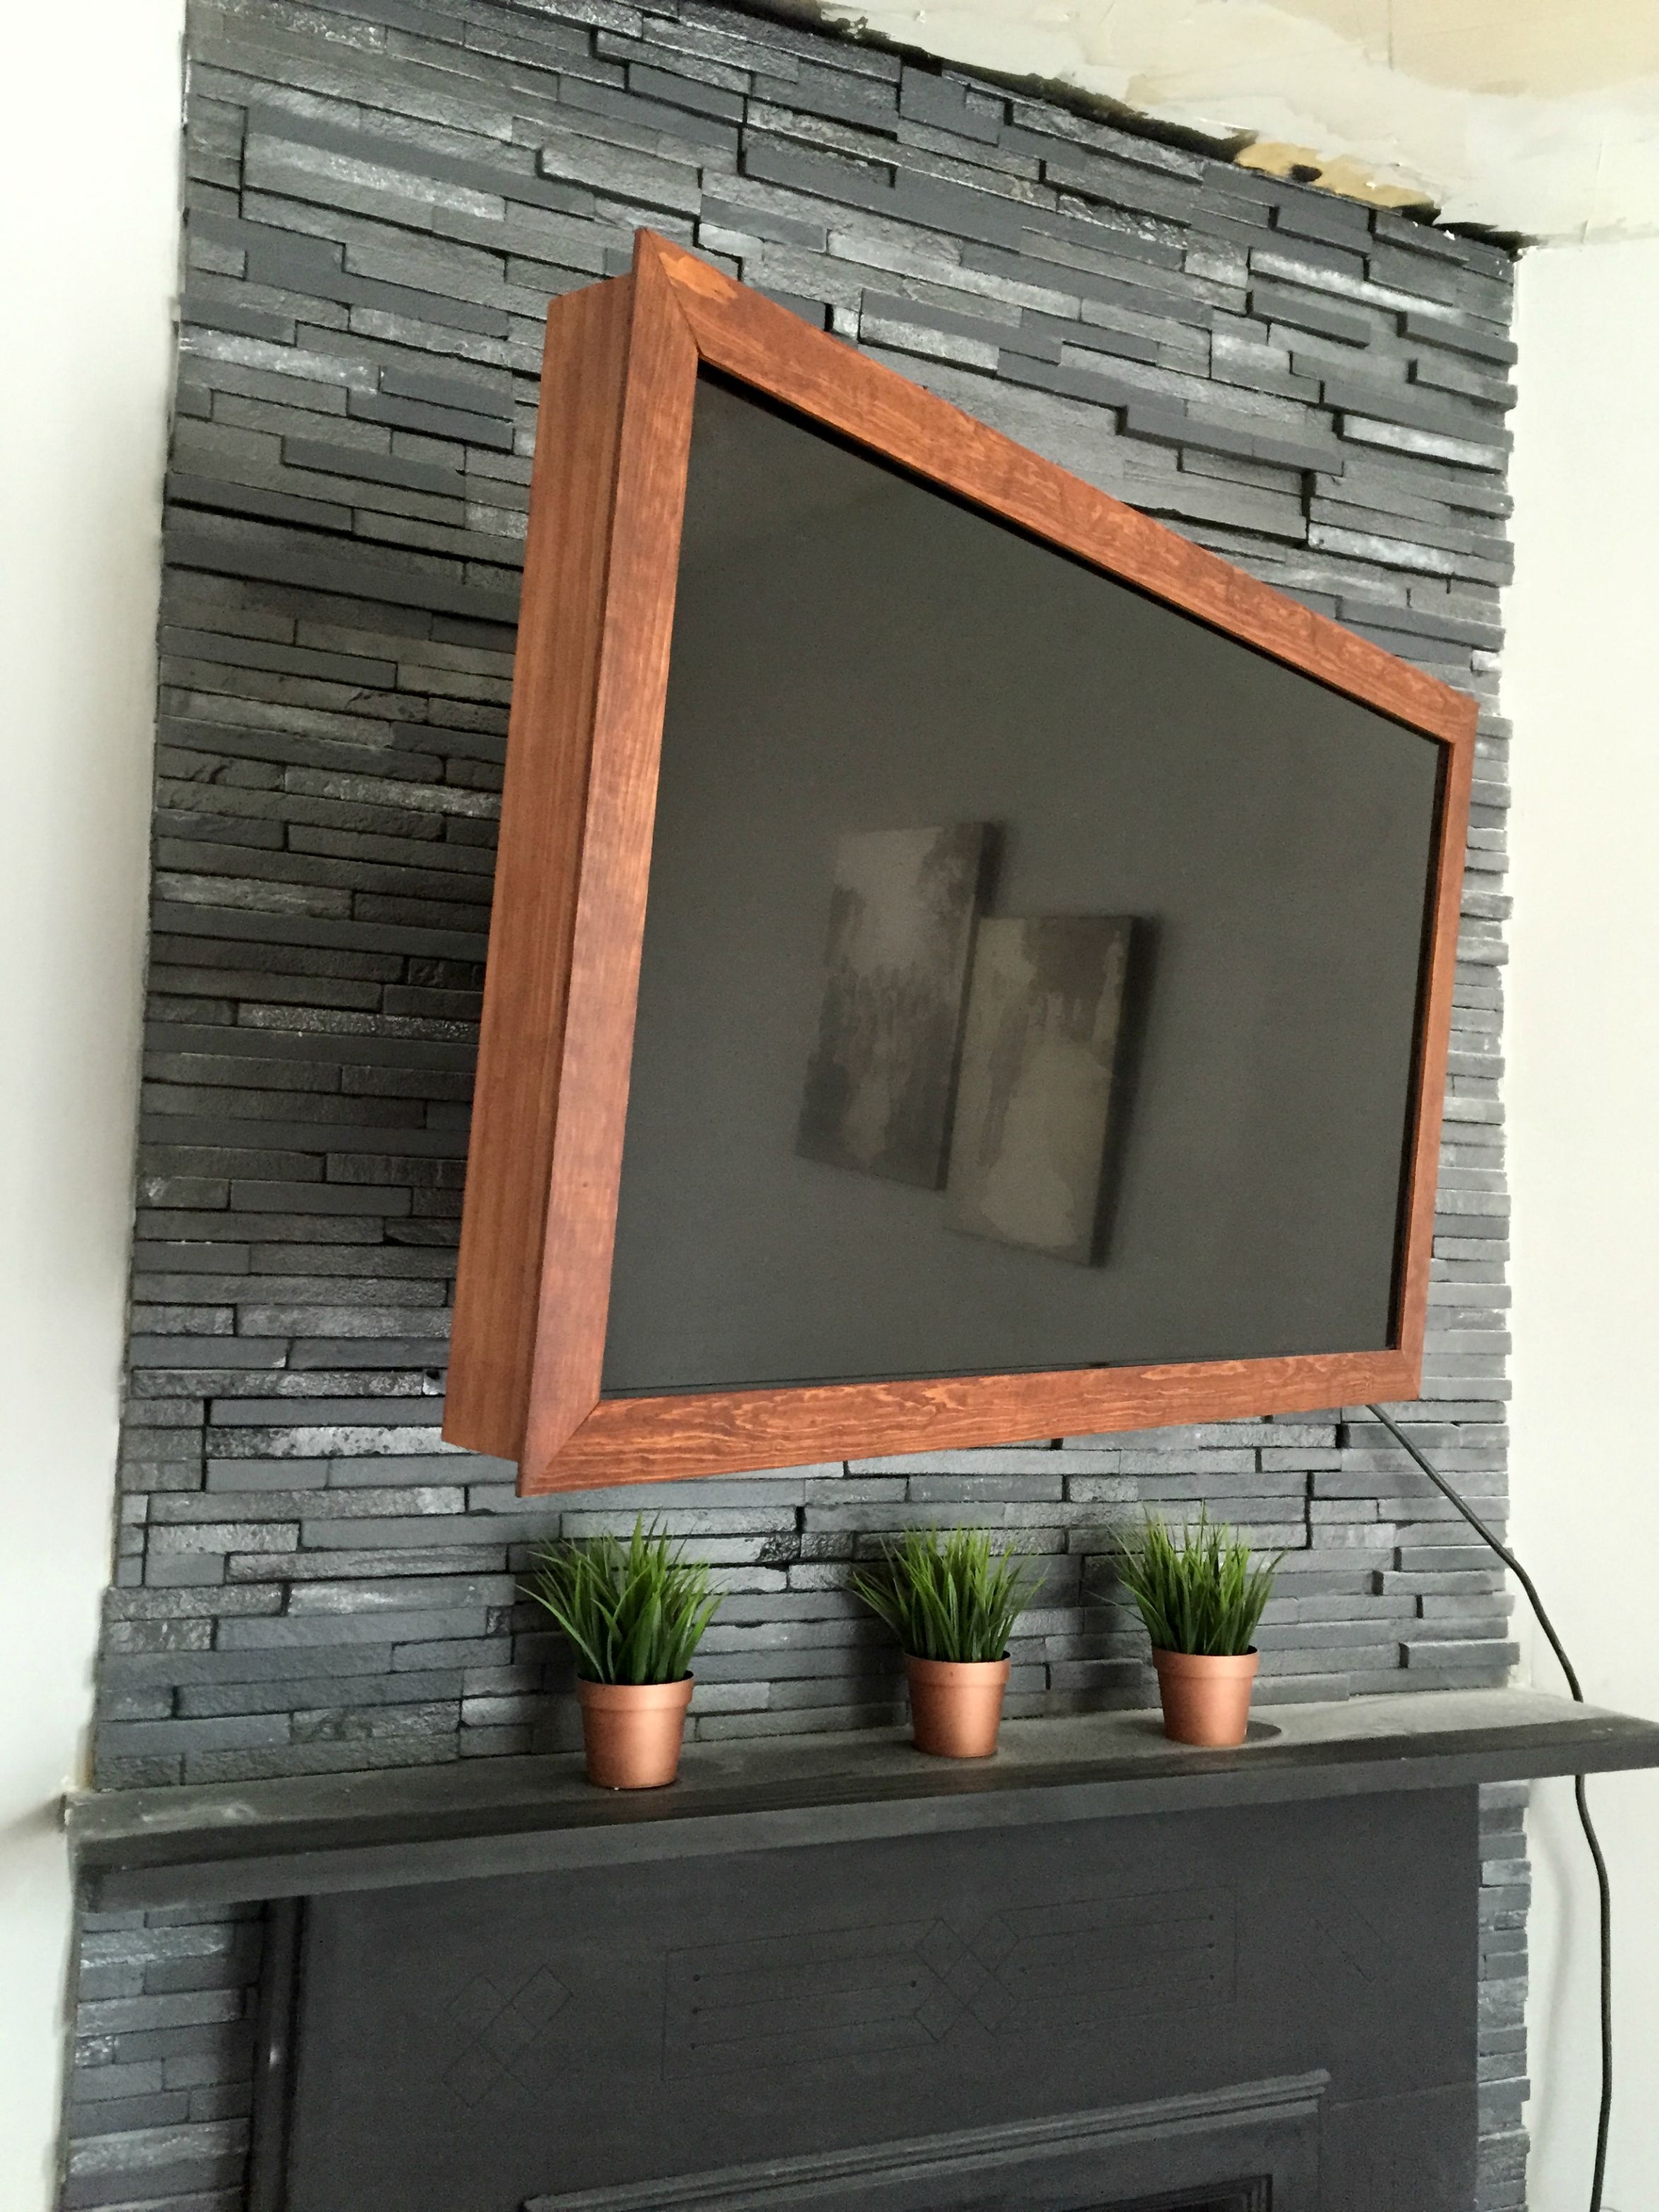
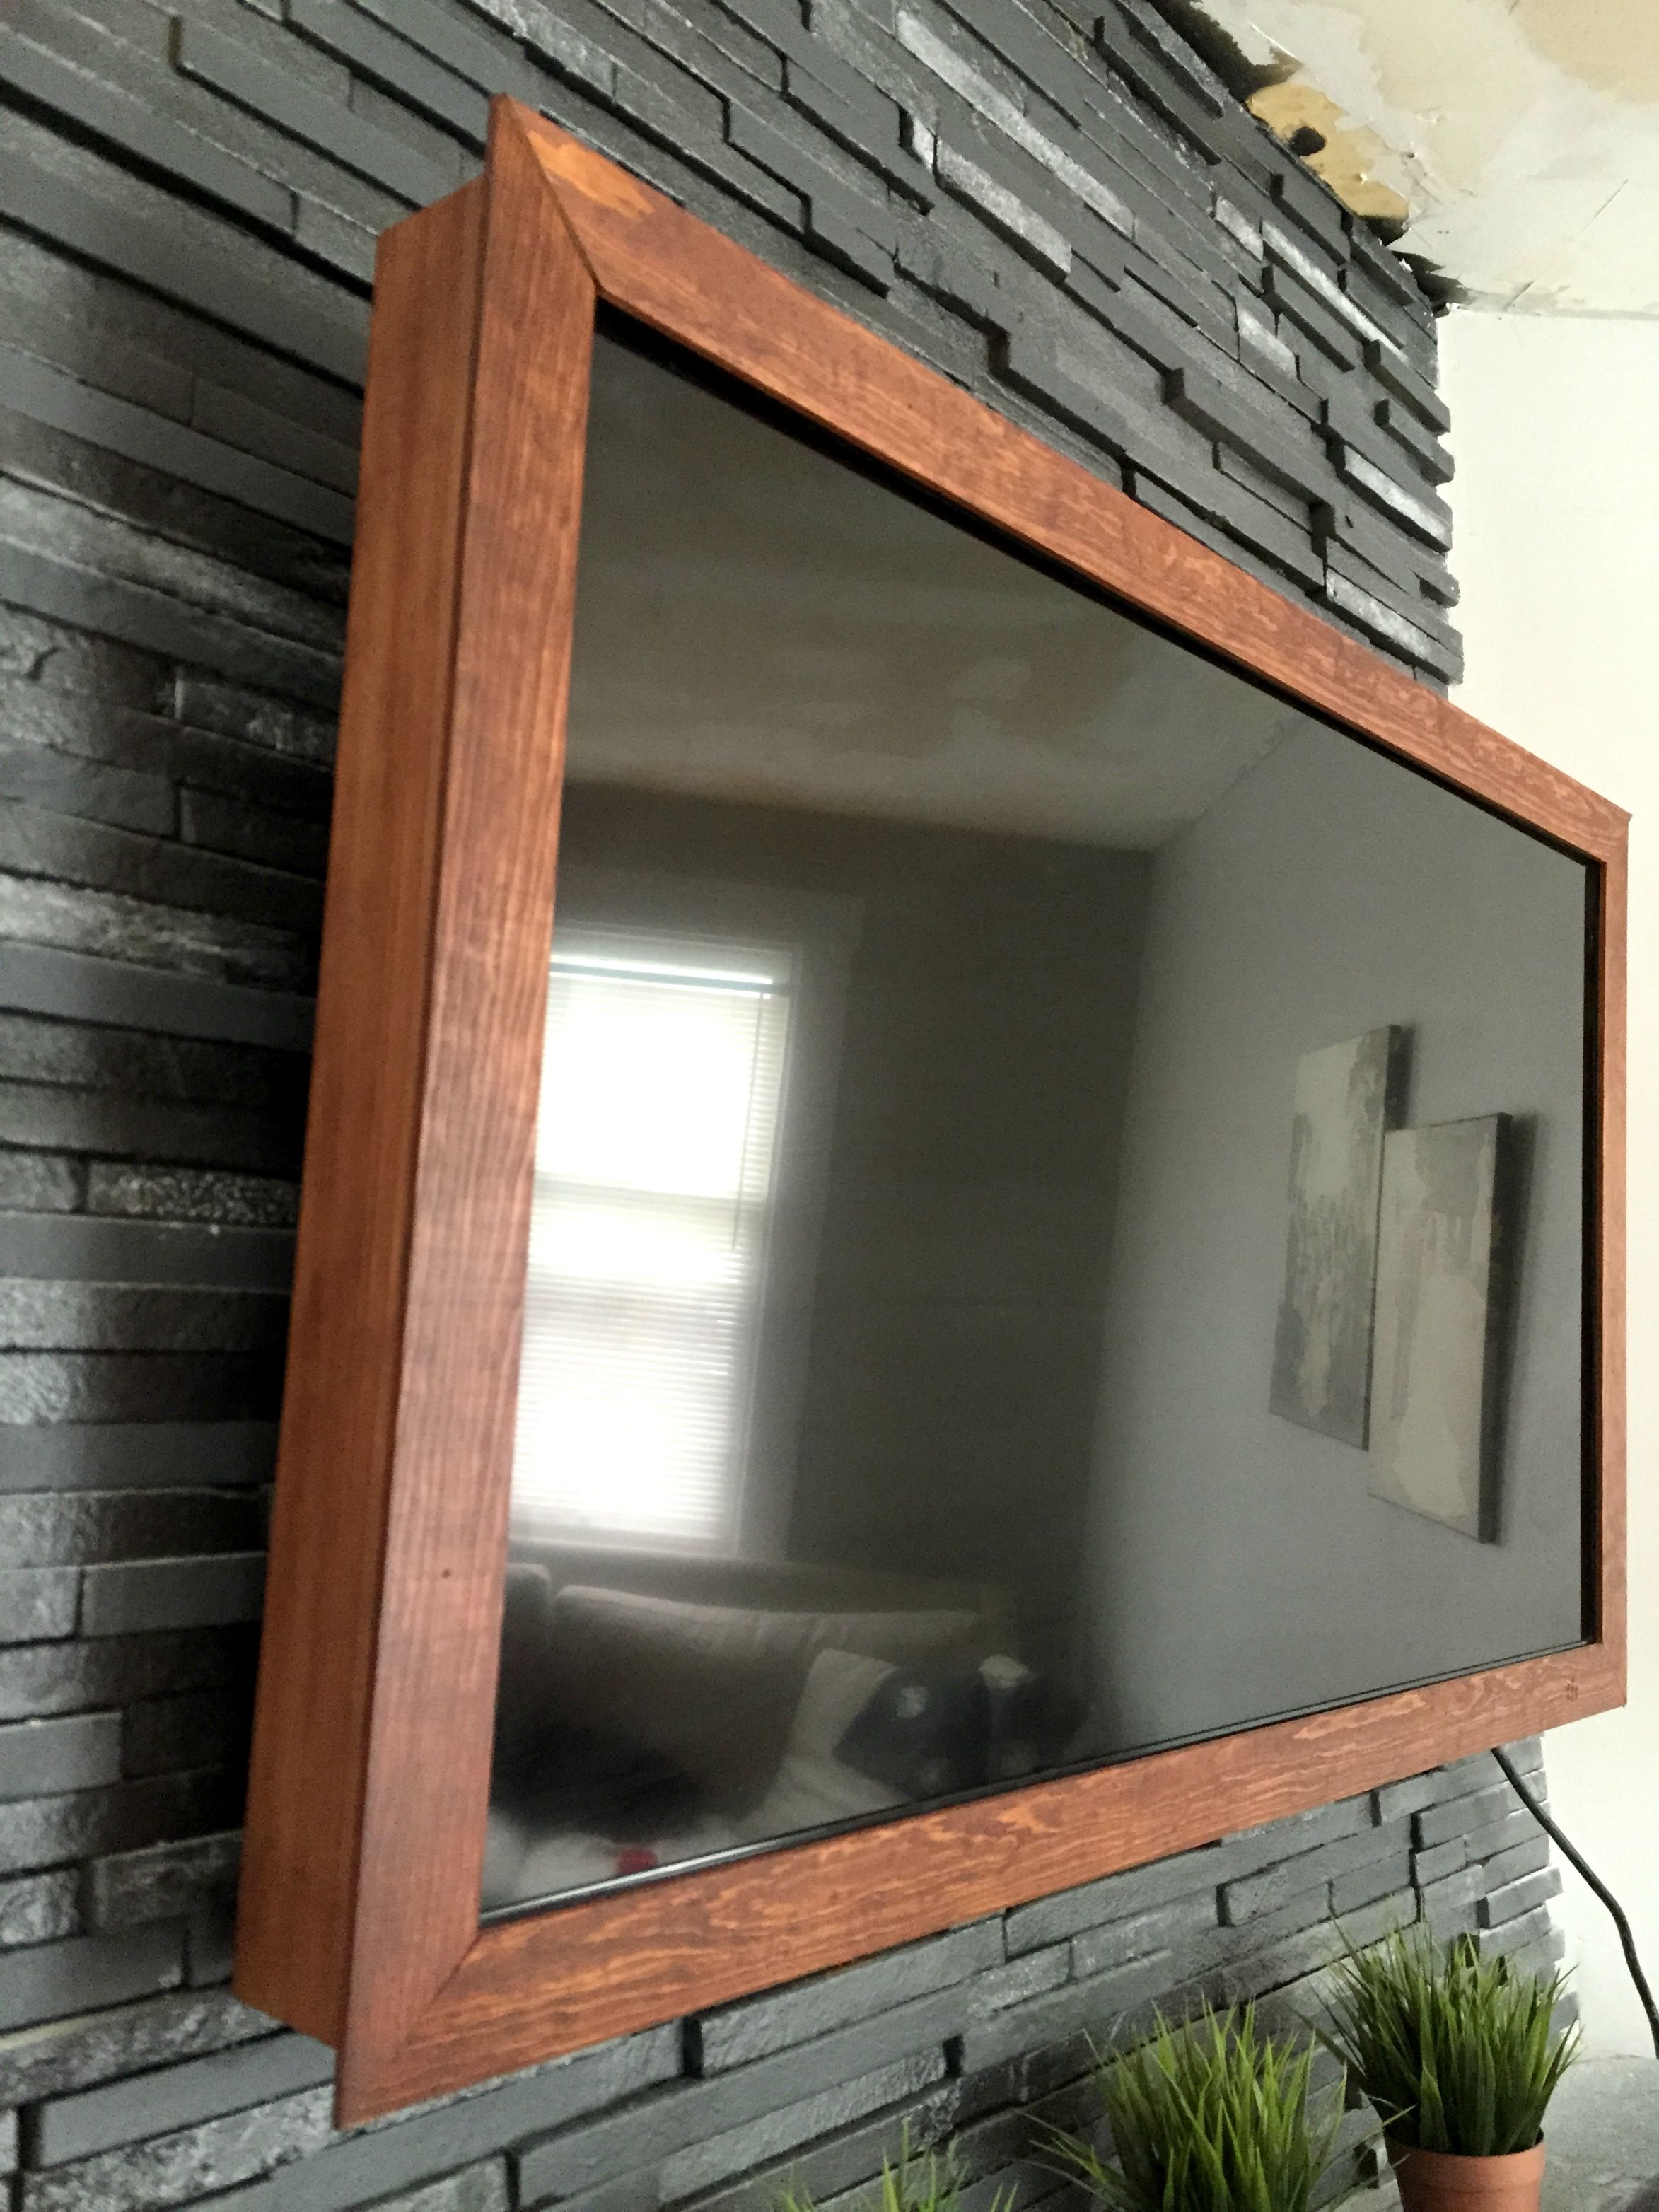
This was our solution.
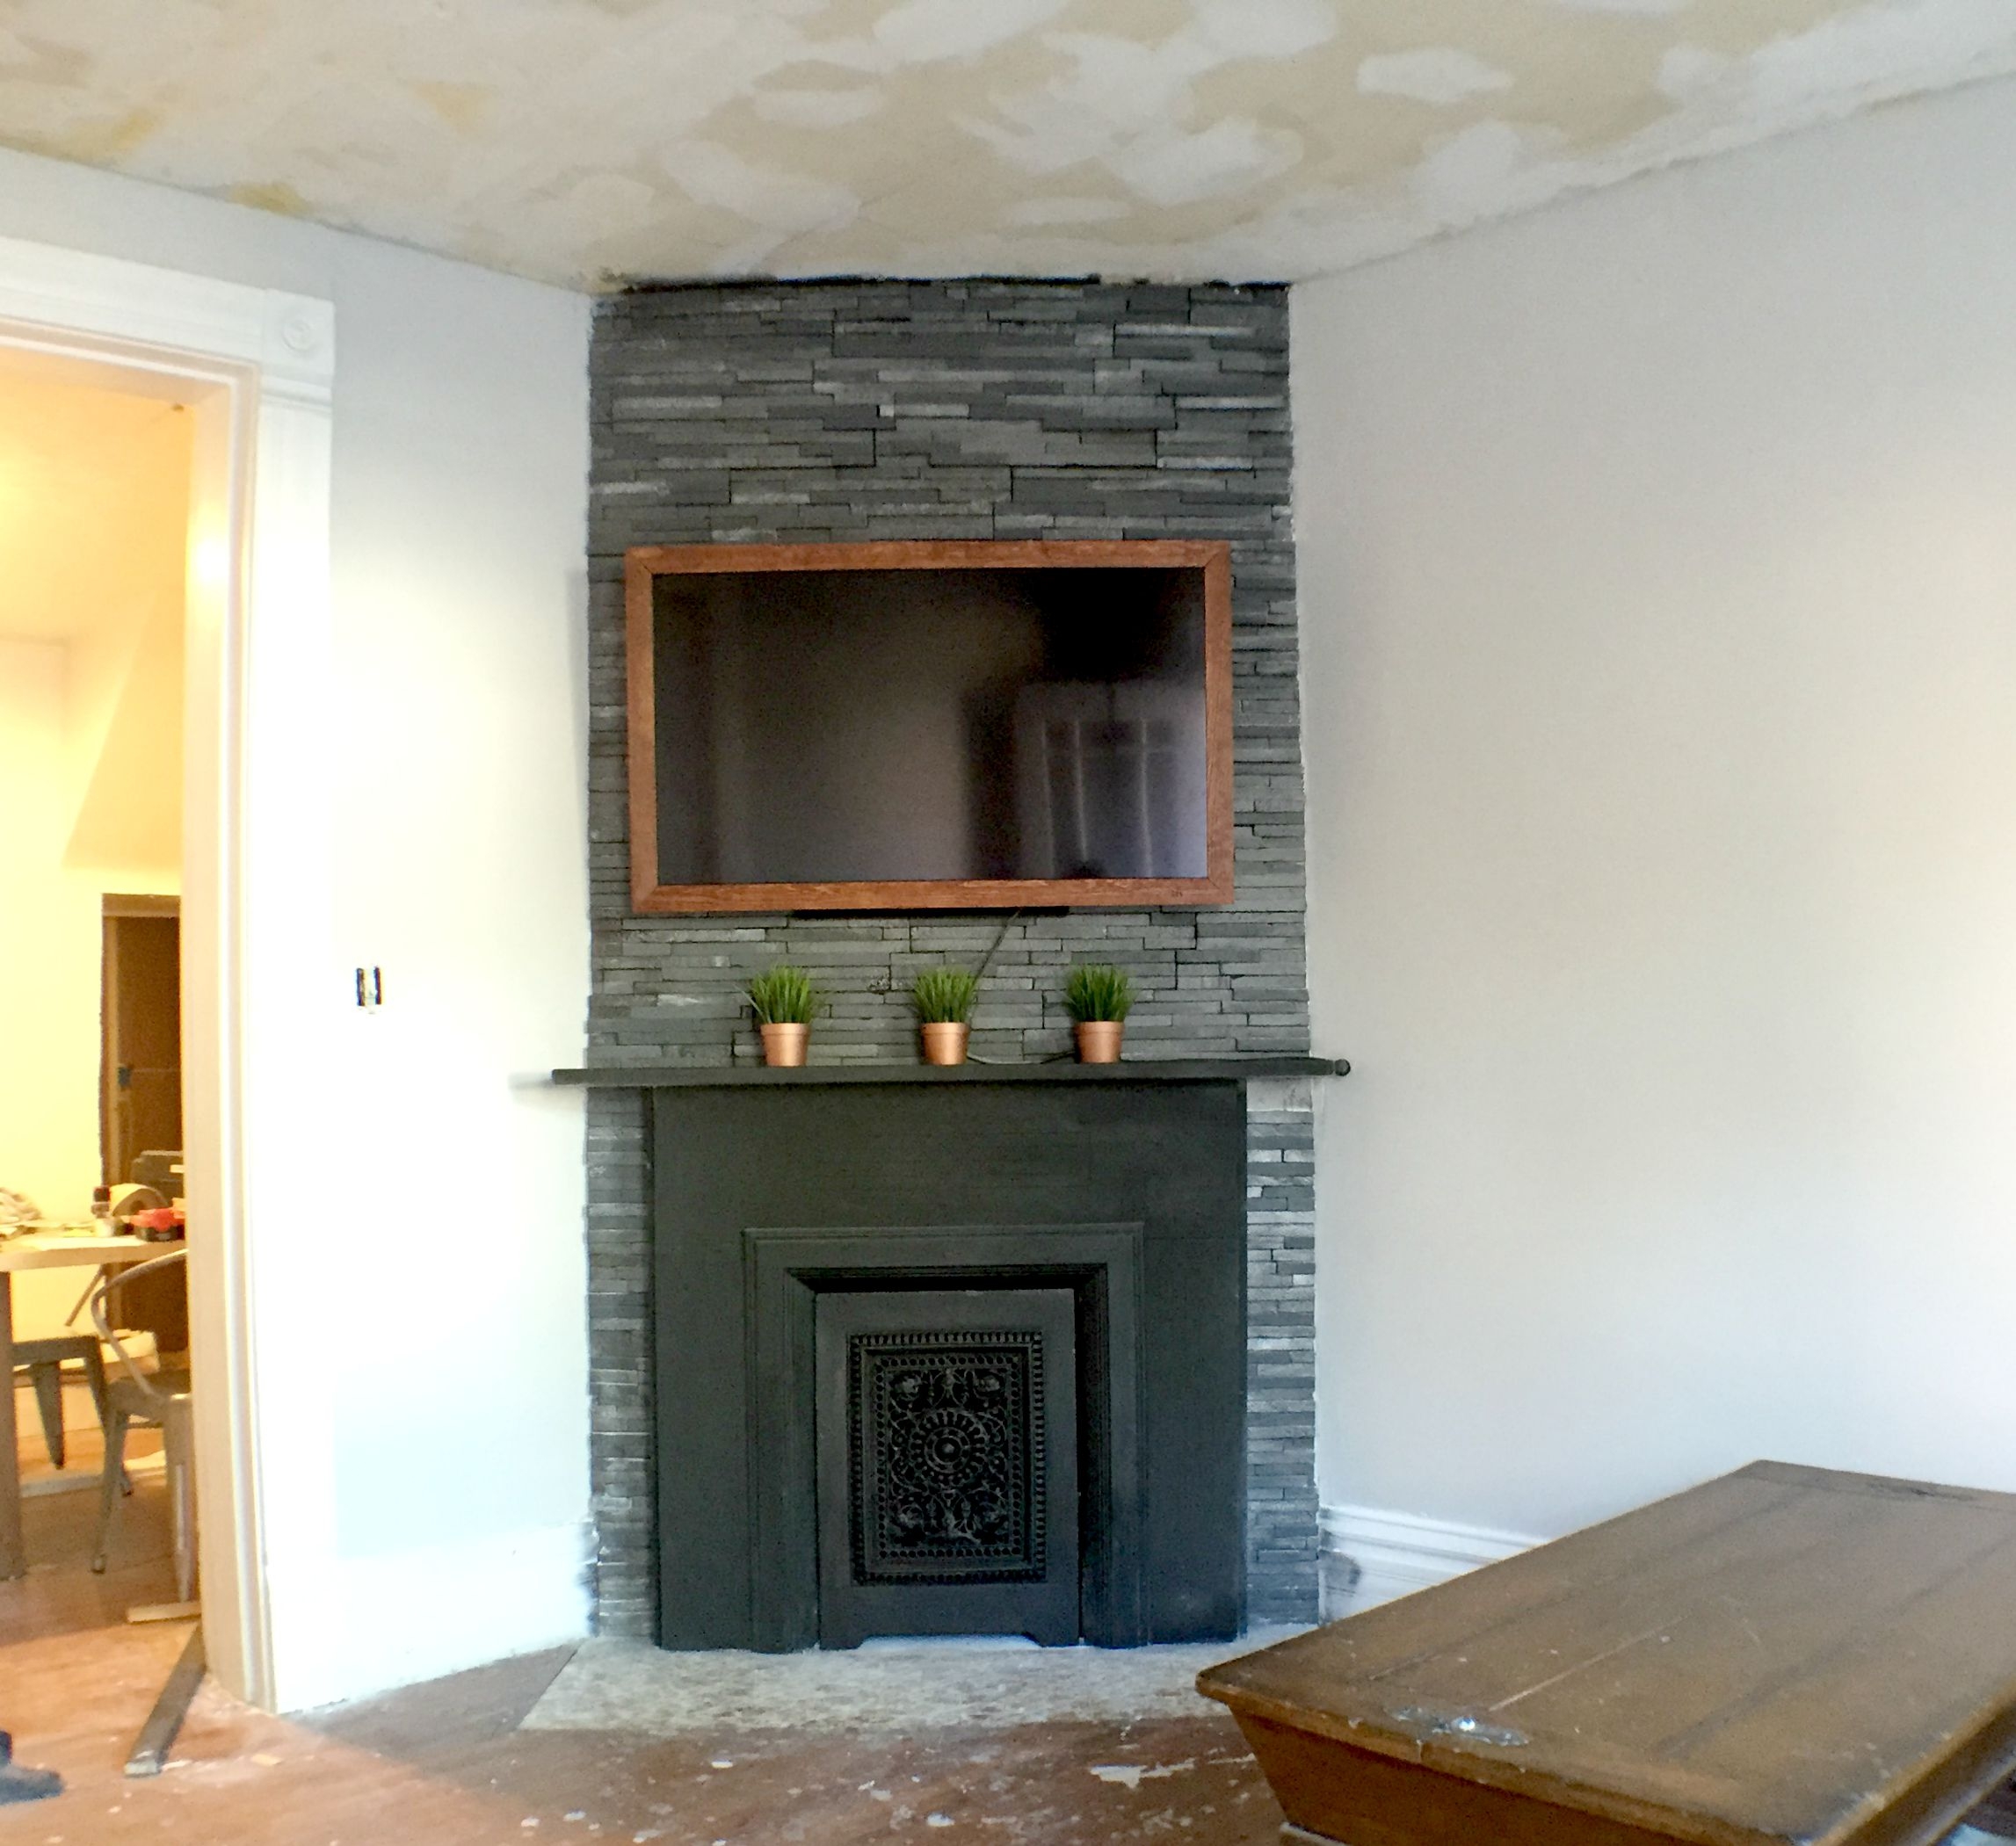
We love the way it turned out and the impact it has on the whole room! It makes the TV look less like a huge piece of electronics, and more like something that’s almost supposed to be there. The project only took a few hours to complete and cost about $40. Not bad, right?!
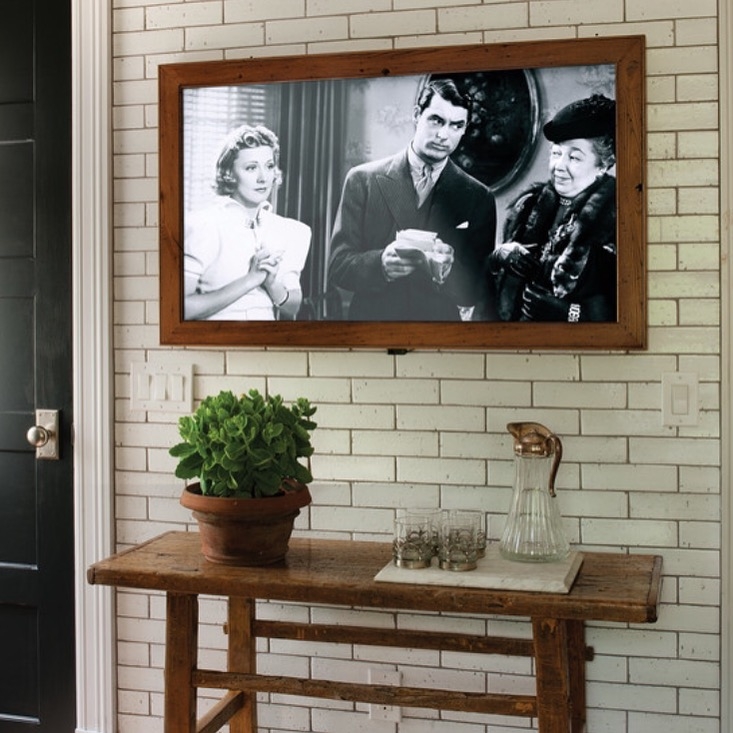
We were inspired by this photo on Houzz.
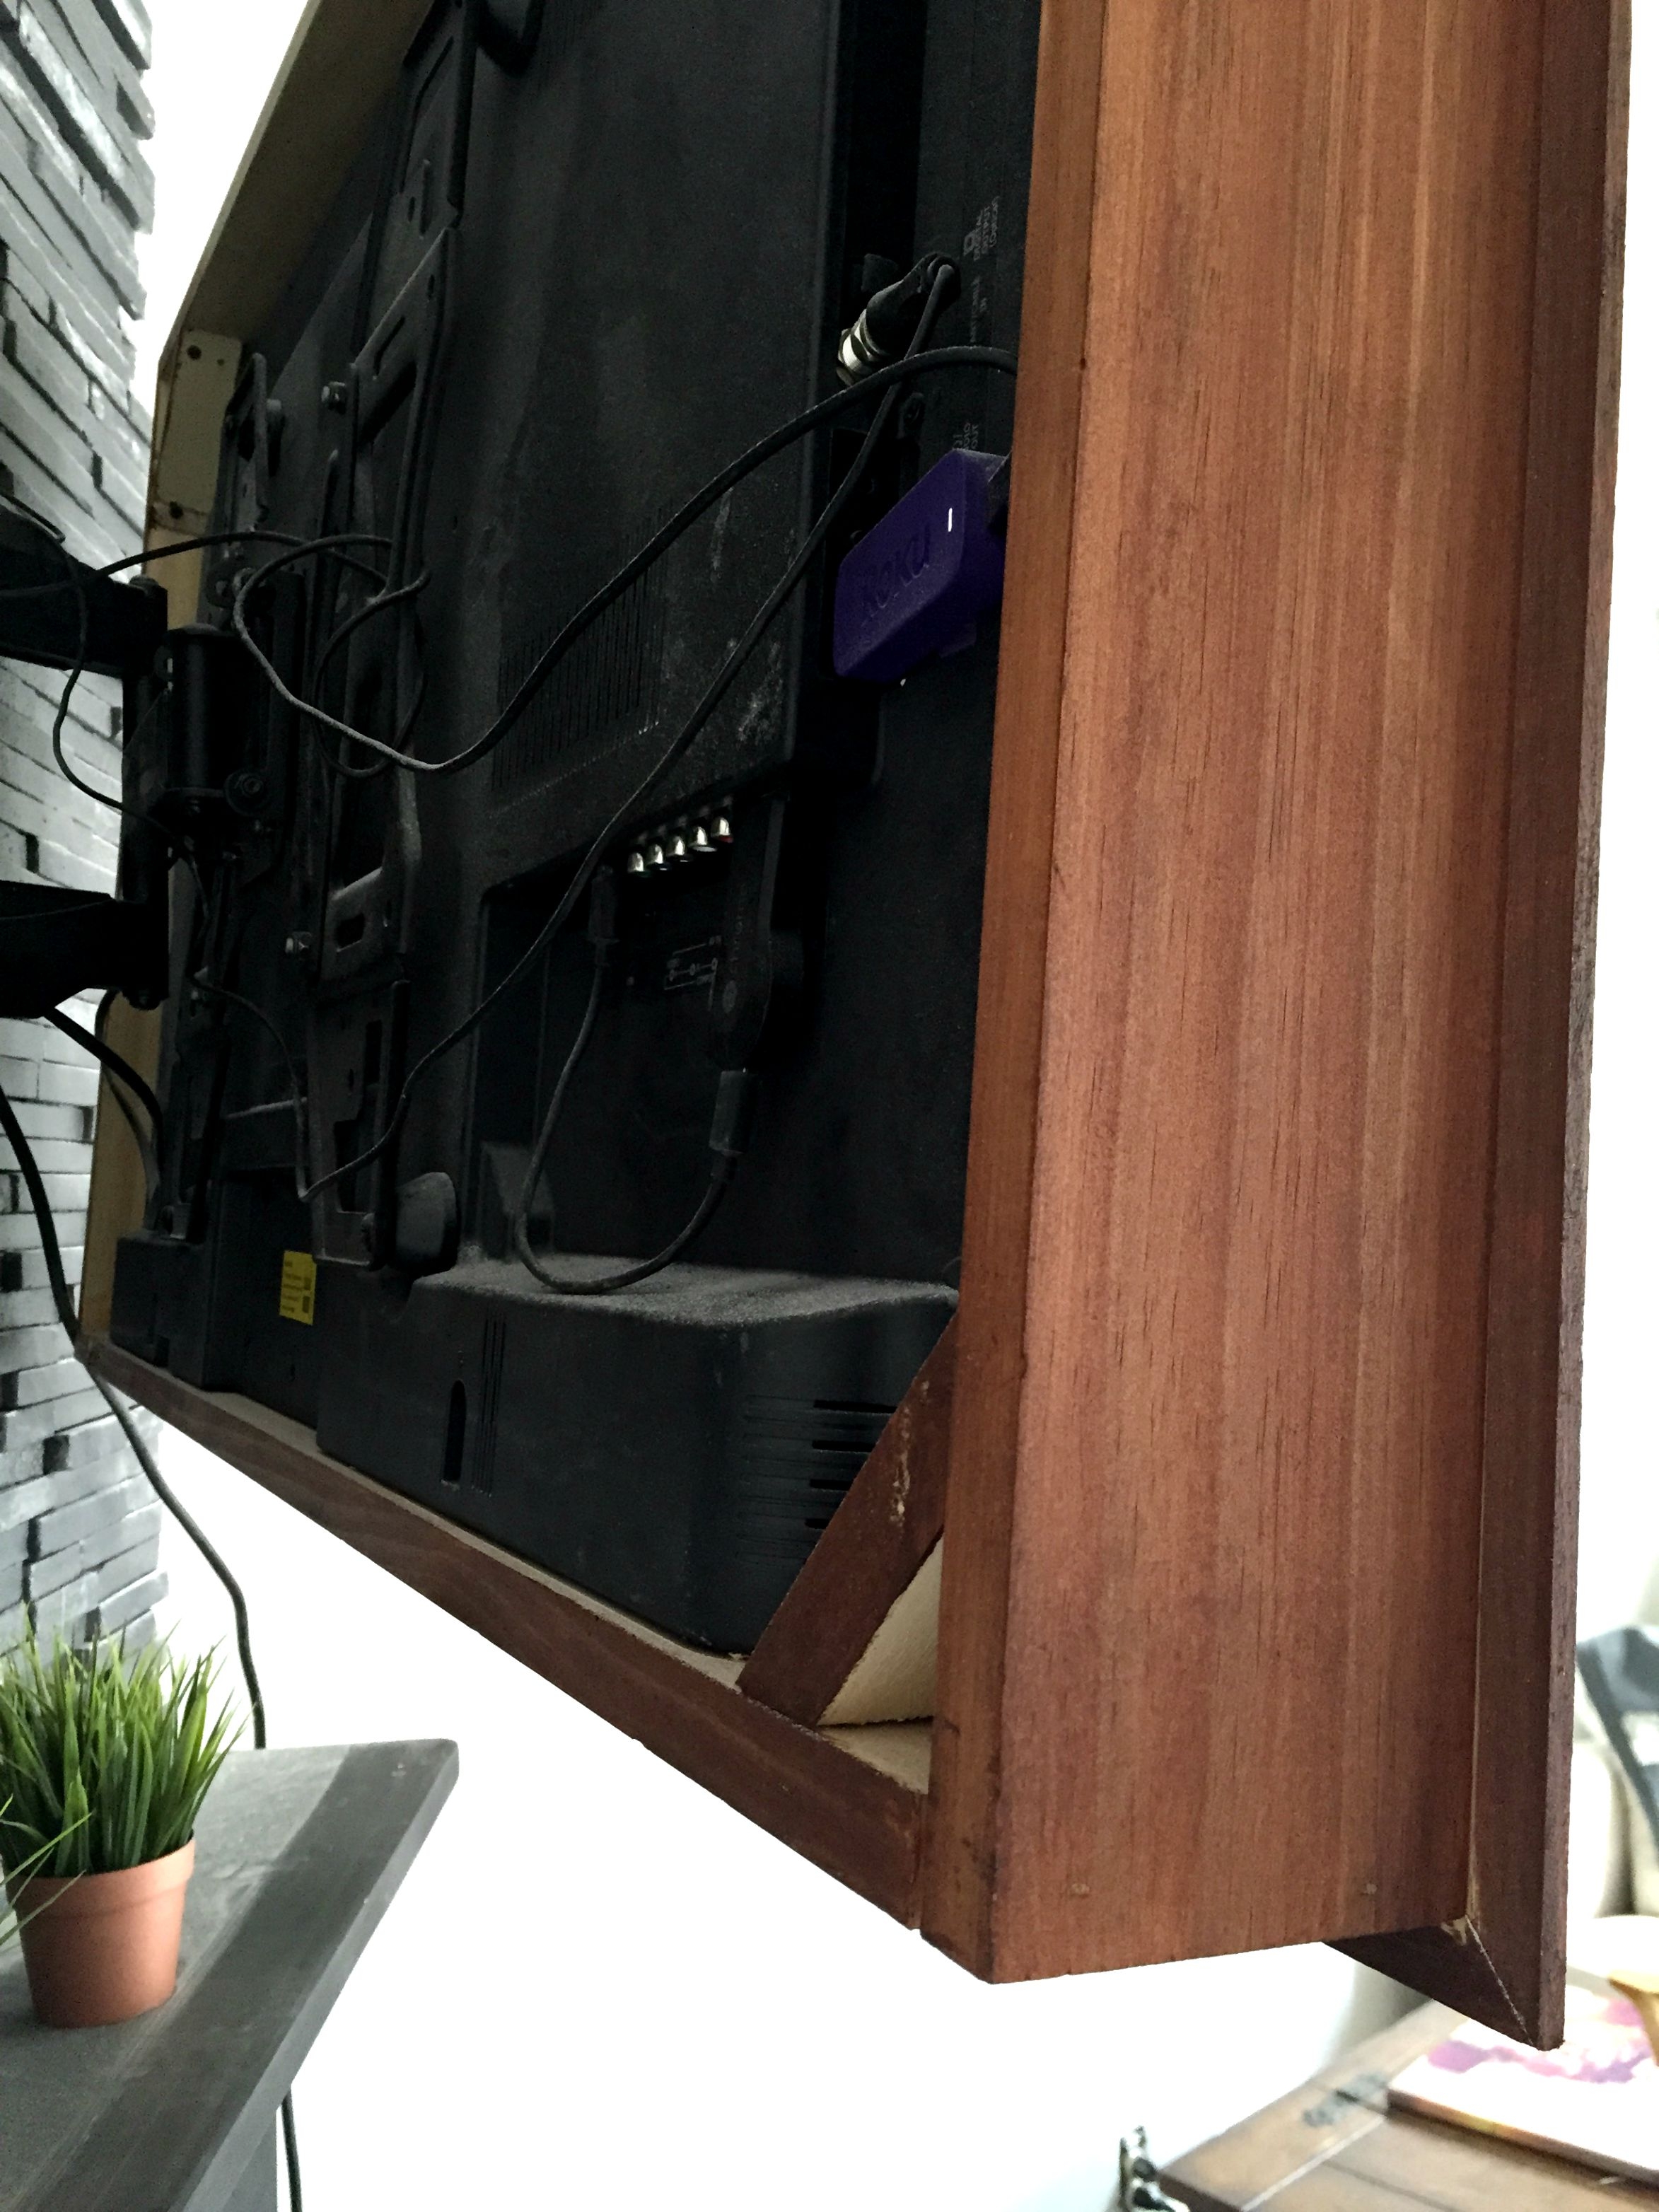
Since we couldn’t find any tutorials that worked for us, we created our own. The great thing about ours is that instead of the frame being secured to the wall, it floats around the TV, which allows the TV to swivel and tilt!

Here’s what you need to do the project. As you read through the shopping list and the steps, just keep in mind that quantities and measurements will vary depending on your specific TV, so use this only as a guide! For reference, the TV in the photos is a 48″ Insignia.
Shopping list (Measure before you shop!)
- Two 8′ – 1×4 pine boards to build the box around the TV
- 12′ of 1/4 x 2.5 sanded pine boards for the face of the frame (molding can also work great for this depending on what look you want)
- One 8′ – 2″ x 2″ pine board for the corner security “brackets.”
- Nail gun (or a good ol’ hammer) and finished nails
- Wood glue
- Miter saw (or ask the people at the home improvement store to make cuts for you)
“Maybe” Items:
- Router
Step 1: Build a box around the perimeter of the TV.
Measure the width and height of your TV, including both the screen and edge, and cut your 1x4s to size.
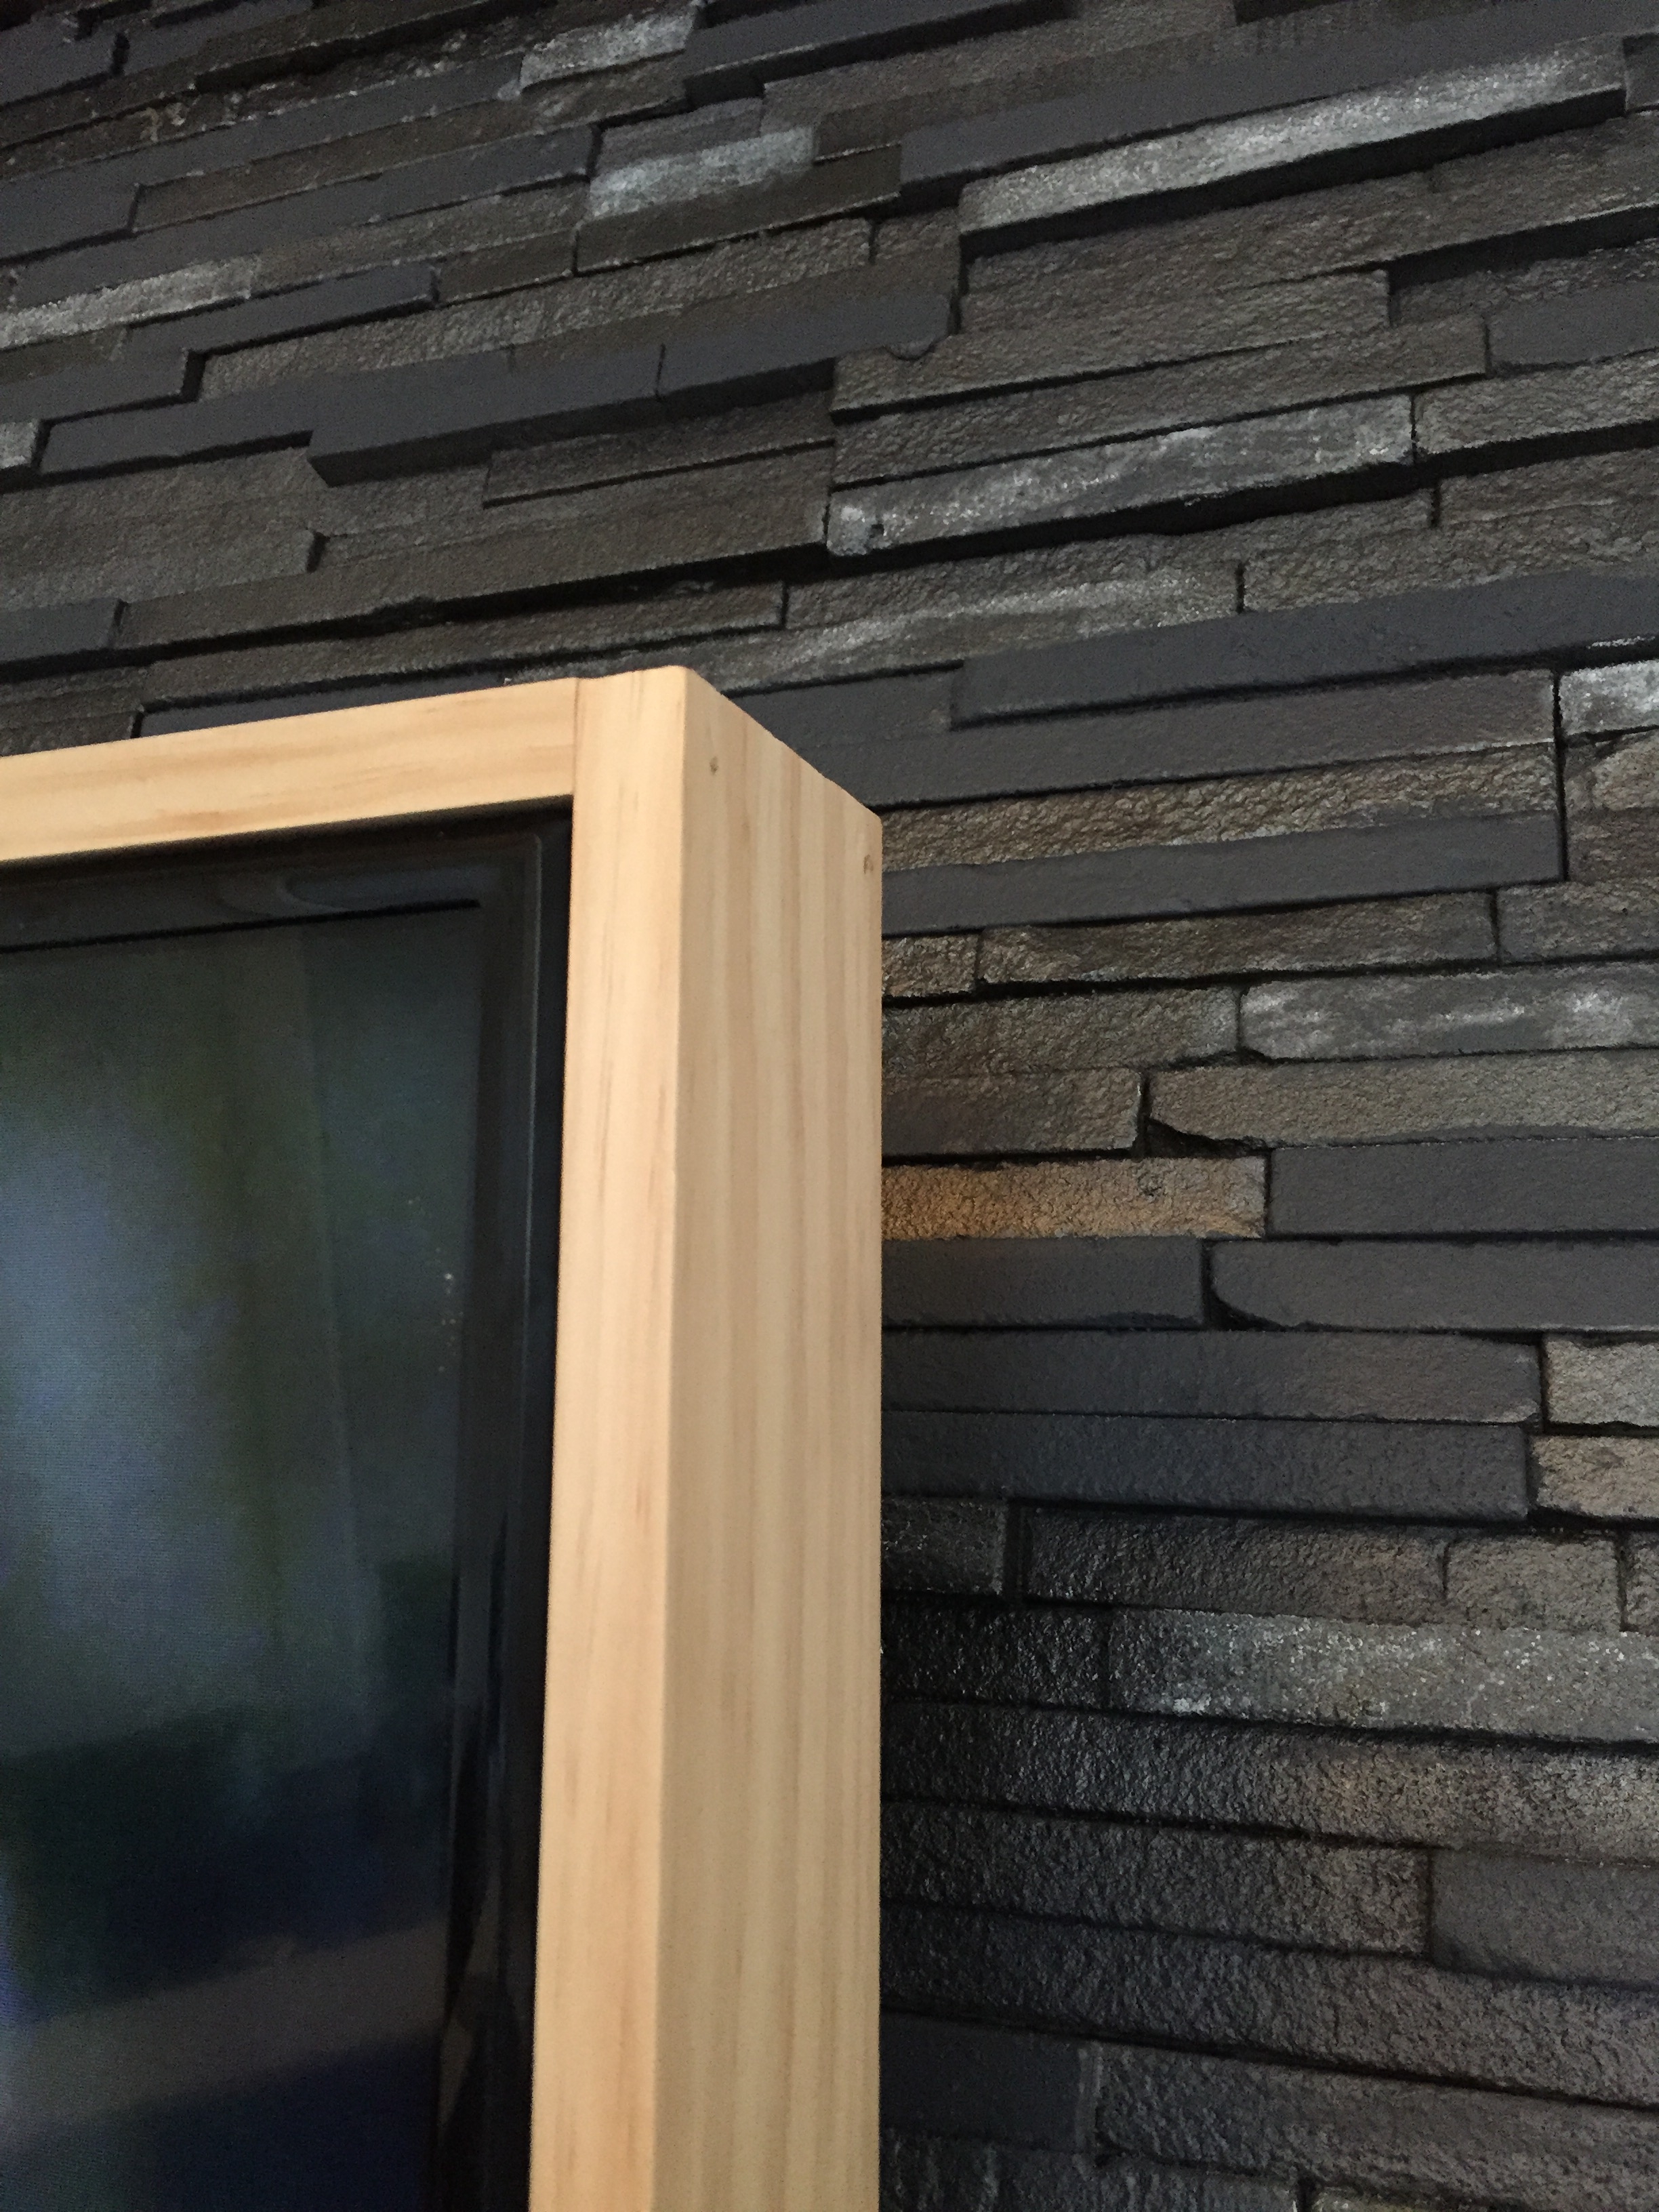
Tip: Make your vertical pieces long enough to cover the unfinished edges of your horizontal pieces, like this:
Use wood glue, a nail gun/hammer, and finished nails to connect the 1x4s together to make a rectangle.

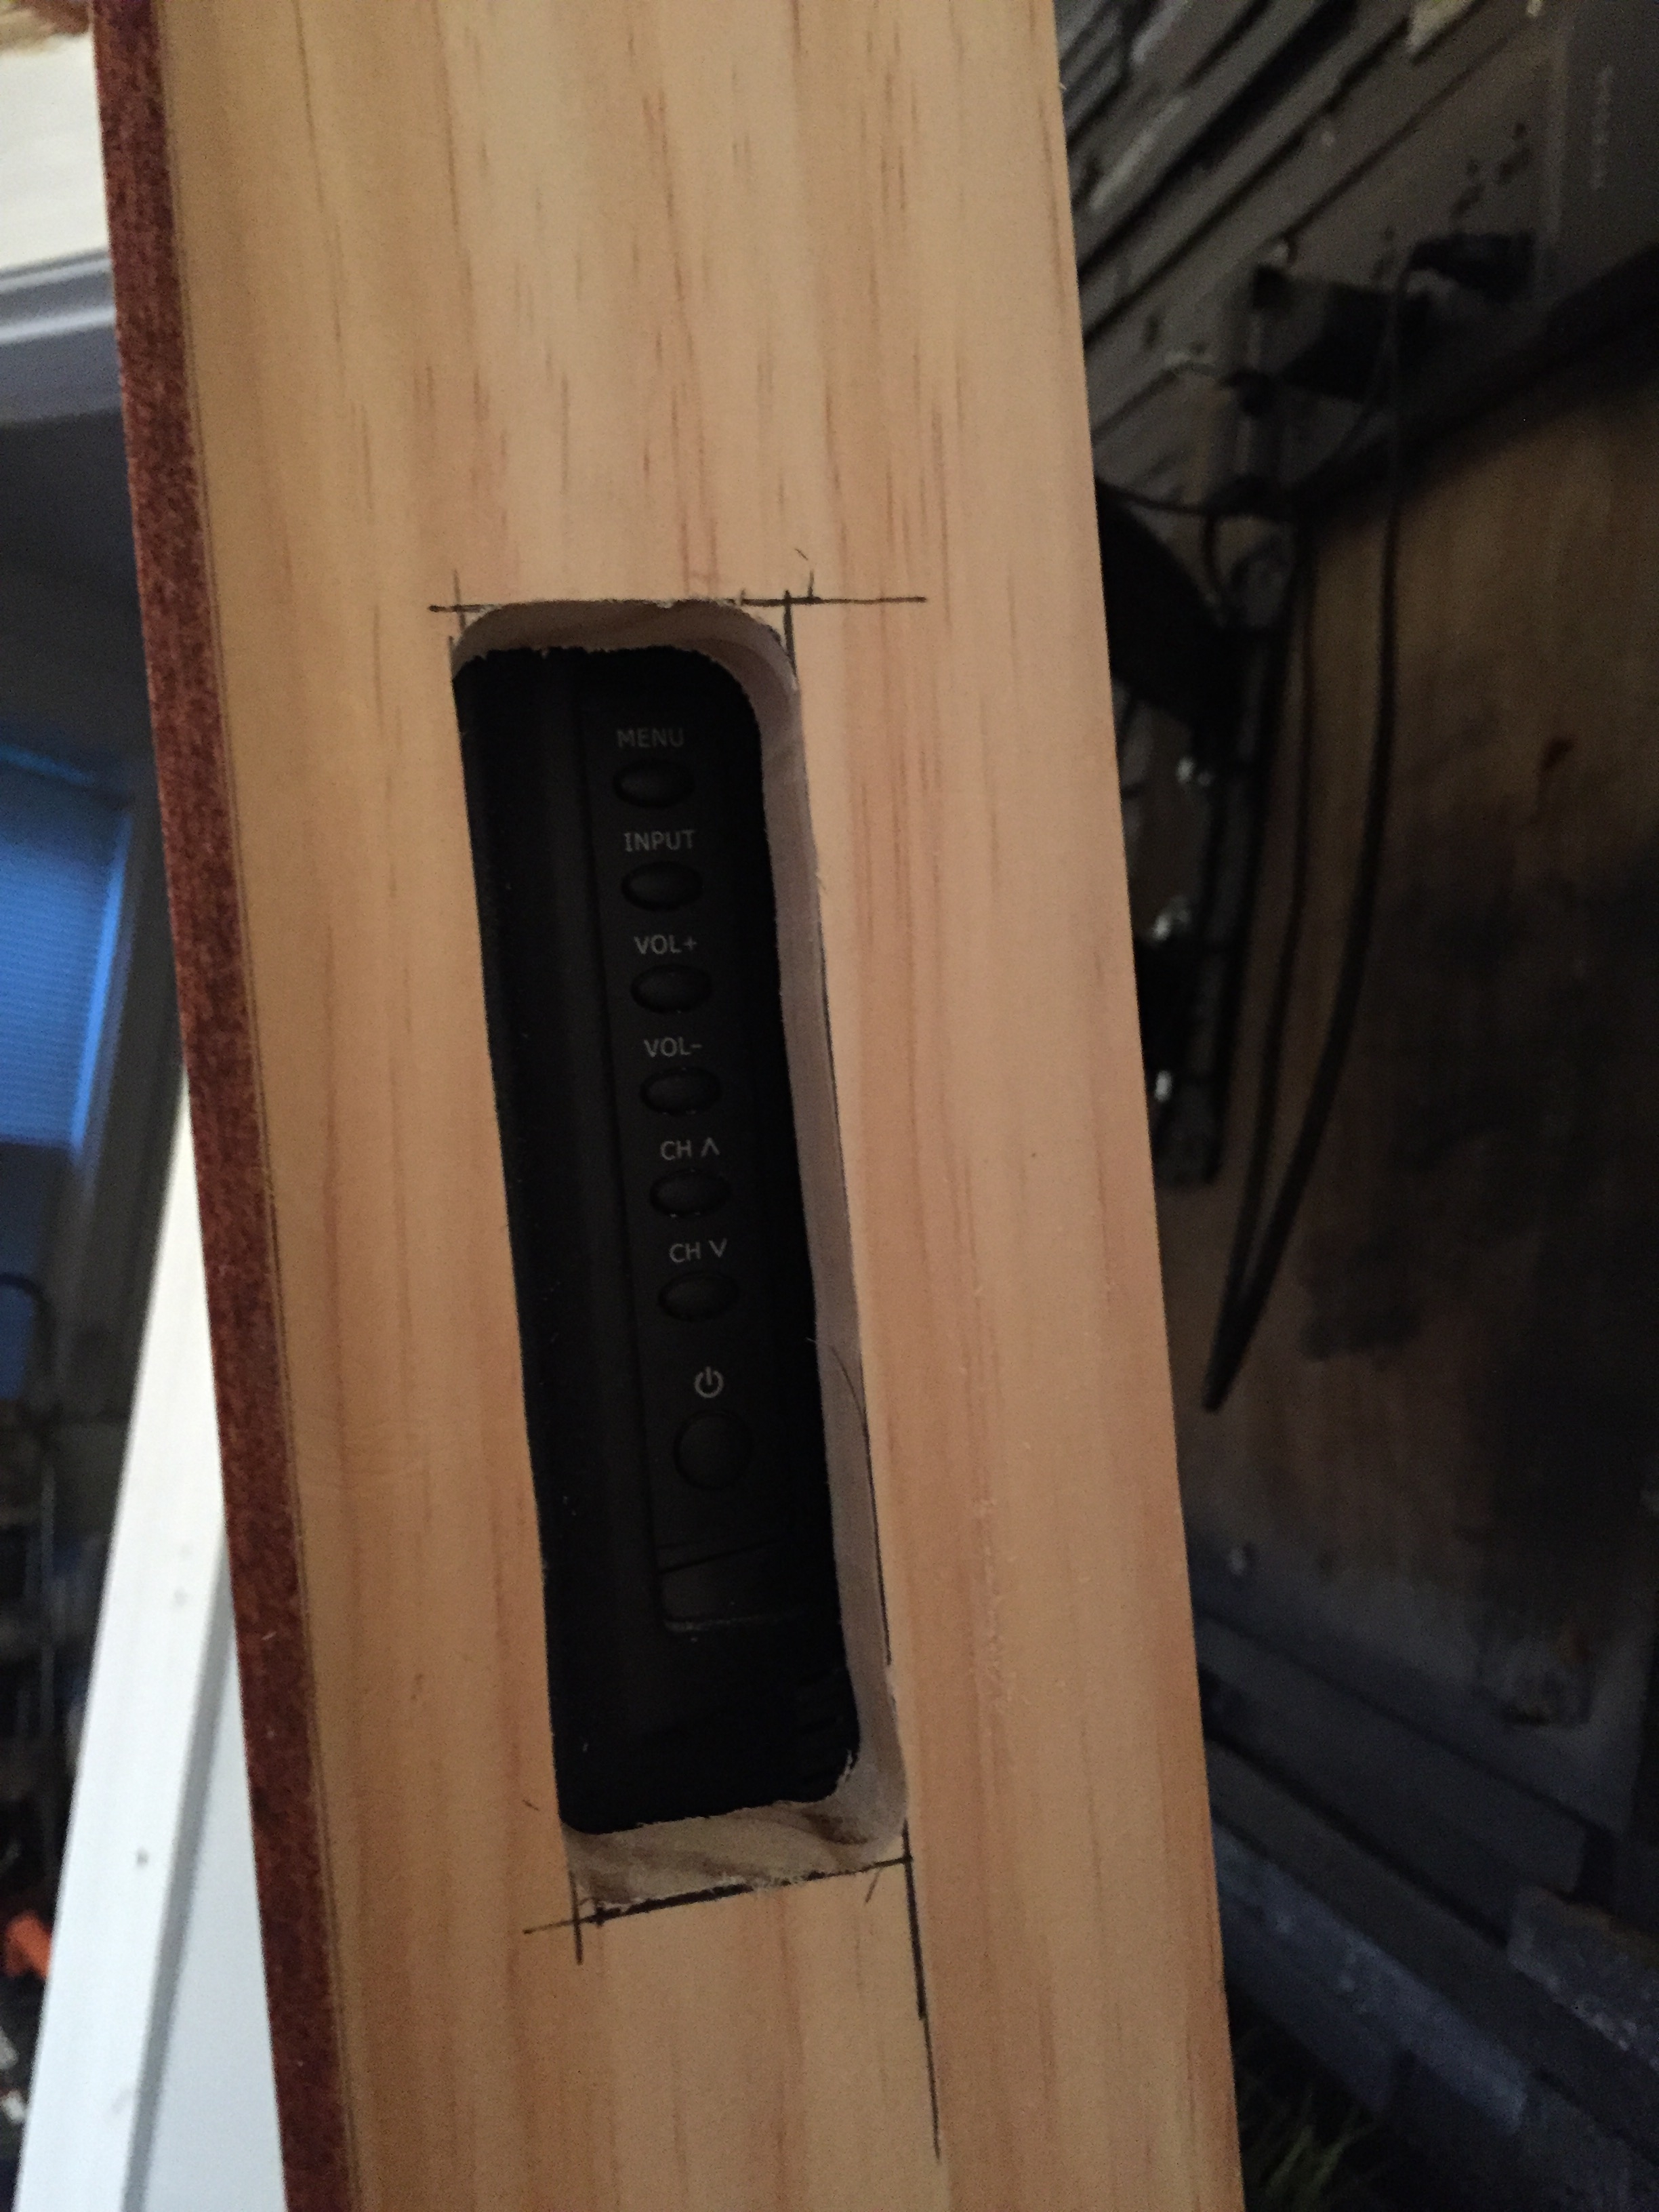
The box should fit snugly around your TV when you’re done, unless you need to make additional cuts for bump outs. We had to make a cut on the bottom right of the frame for a petruding remote sensor. This is where the router came into play.


Another thing you may need to account for is access to the controls on the side of the TV. Ours is on the side against the wall so we didn’t worry too much about how it looked. You could get creative and add a hinge or something to make it blend in if the controls are in a spot that’s visible.
Step 2: Cut and attach your wood of choice for the face of the frame
We chose sanded pine boards that were 1/4″ thick and 2.5″ wide for the face of the frame.
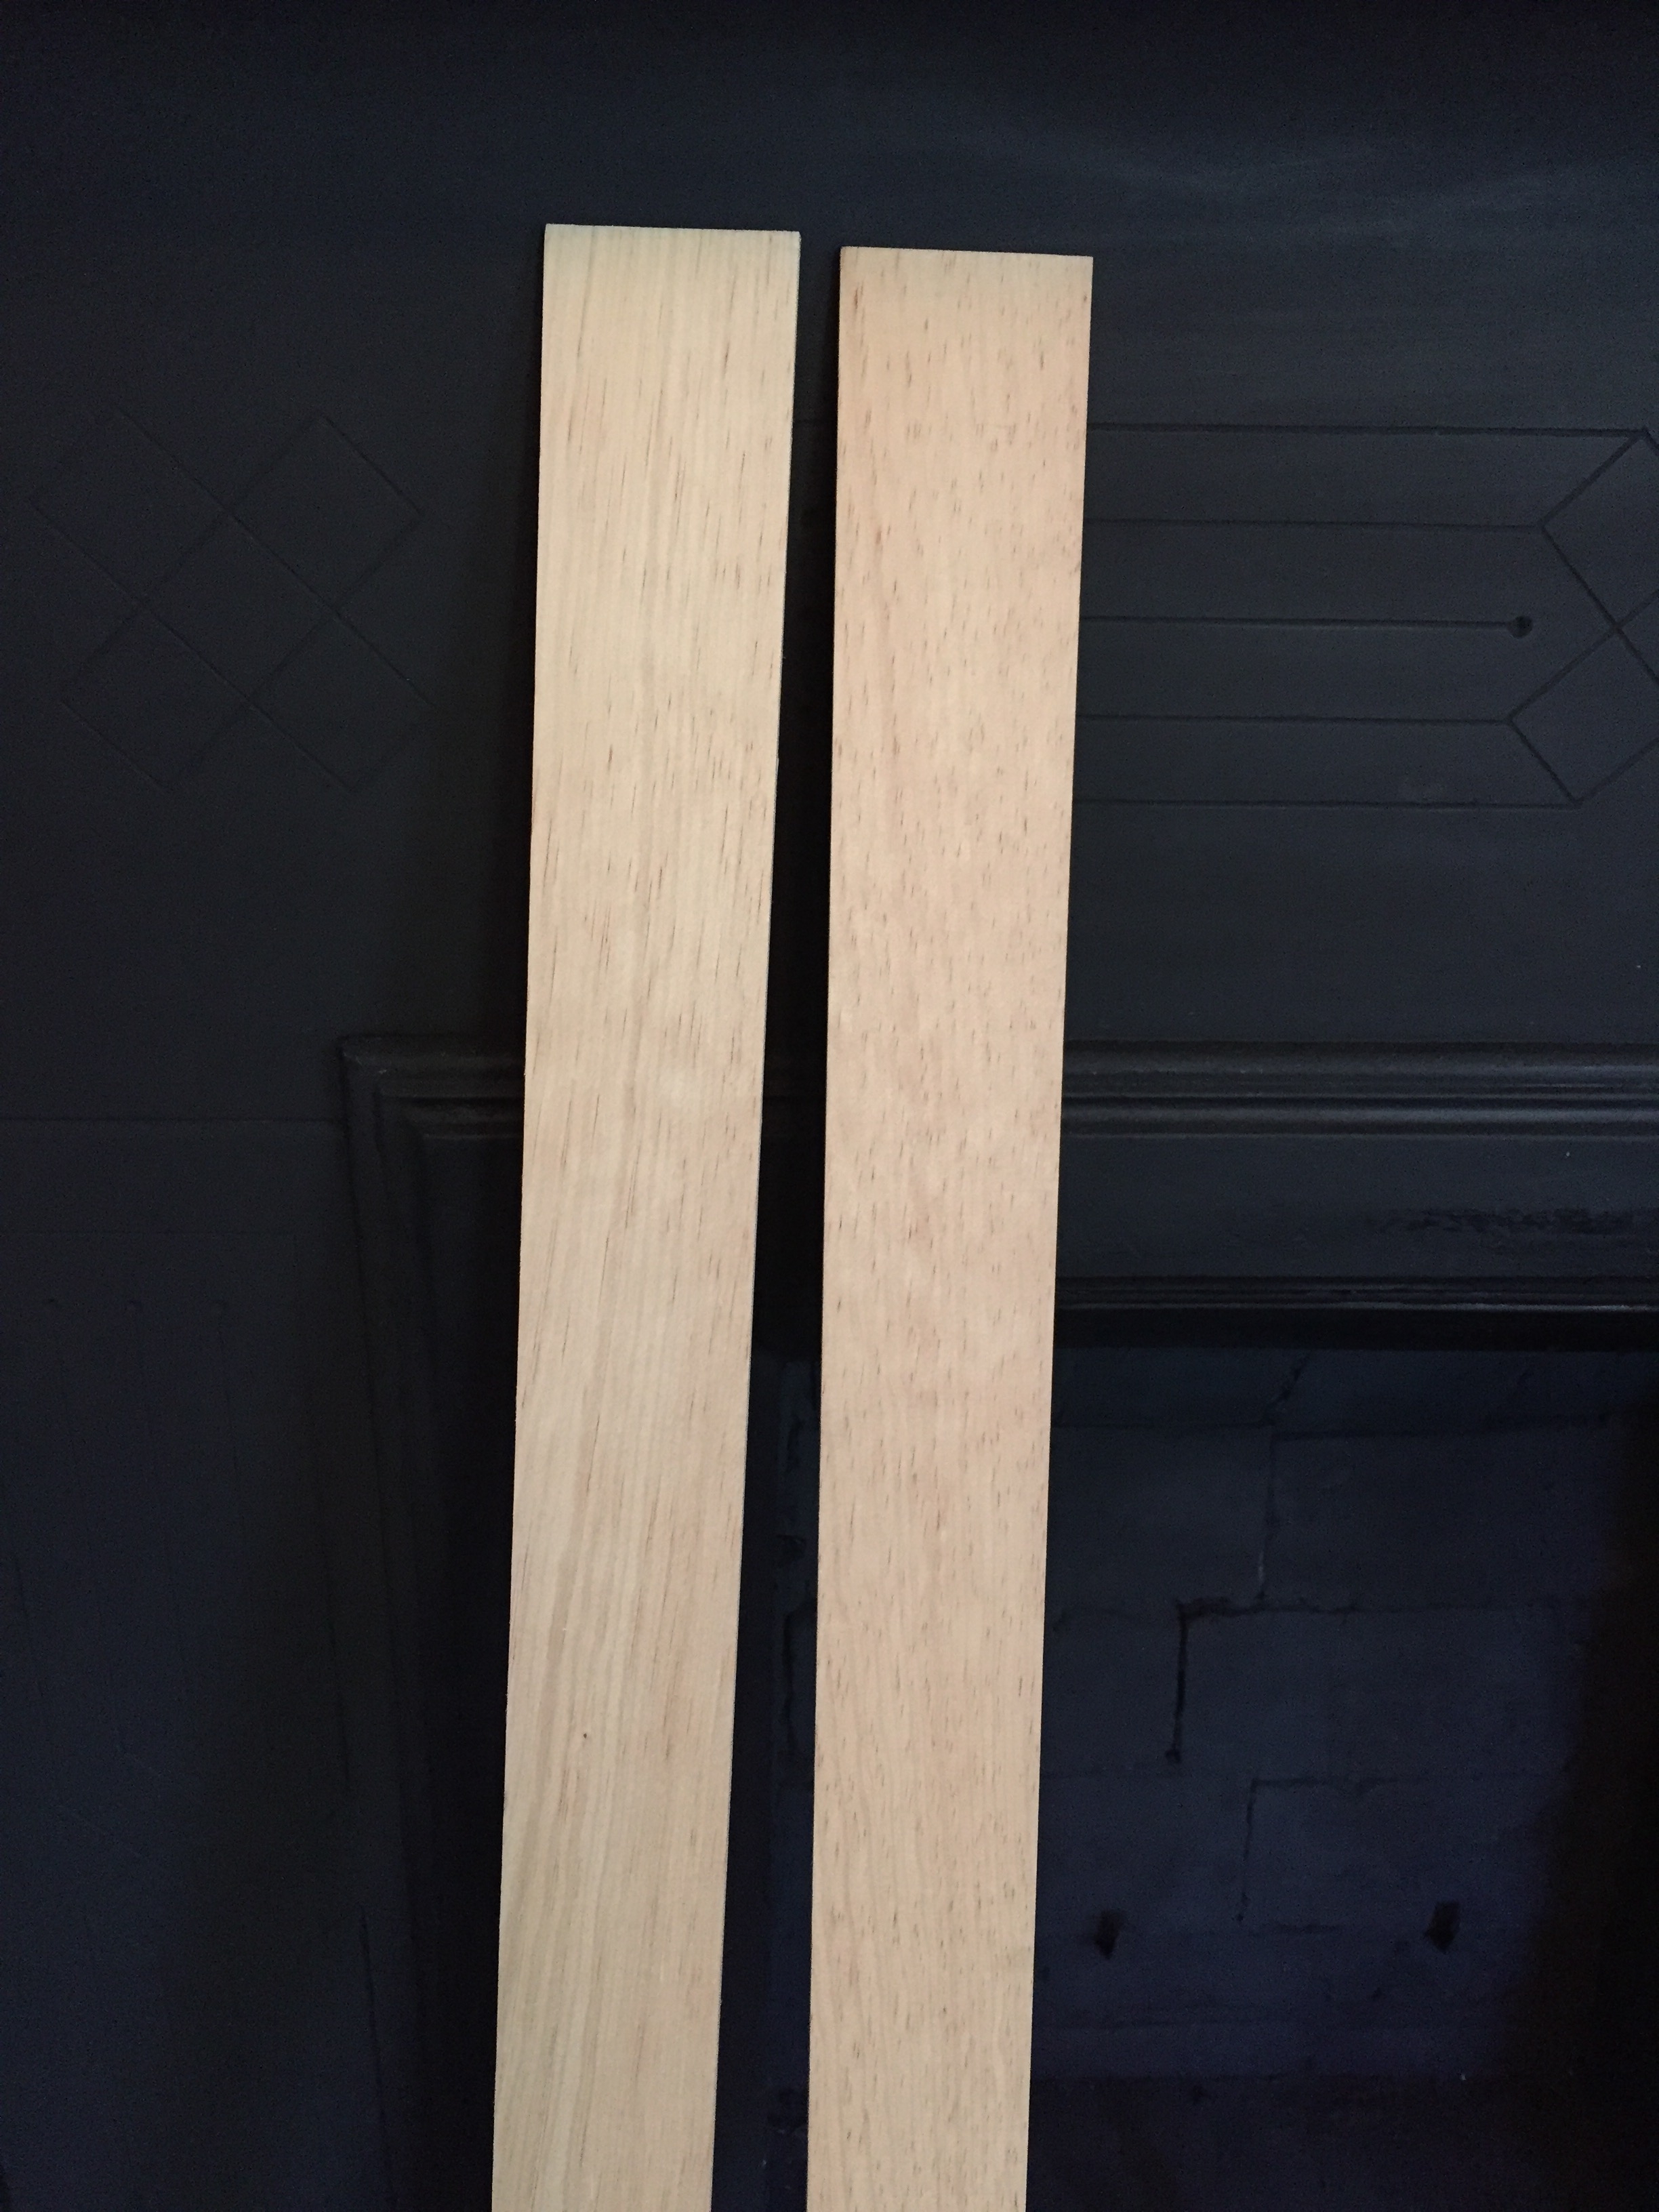
Tip: To measure how long to make your pieces, start by measuring your screen. You’ll want the inside of the 45 degree angle to line up with where your TV screen ends. Add the width of your wood to that number. For example, if the height of our TV screen is 15″, and you’re using 2.5″ wood for the face frame like we did, your vertical pieces should 17.5″ long. When you cut the 45s, the insides should be 15″ and match up with the screen.
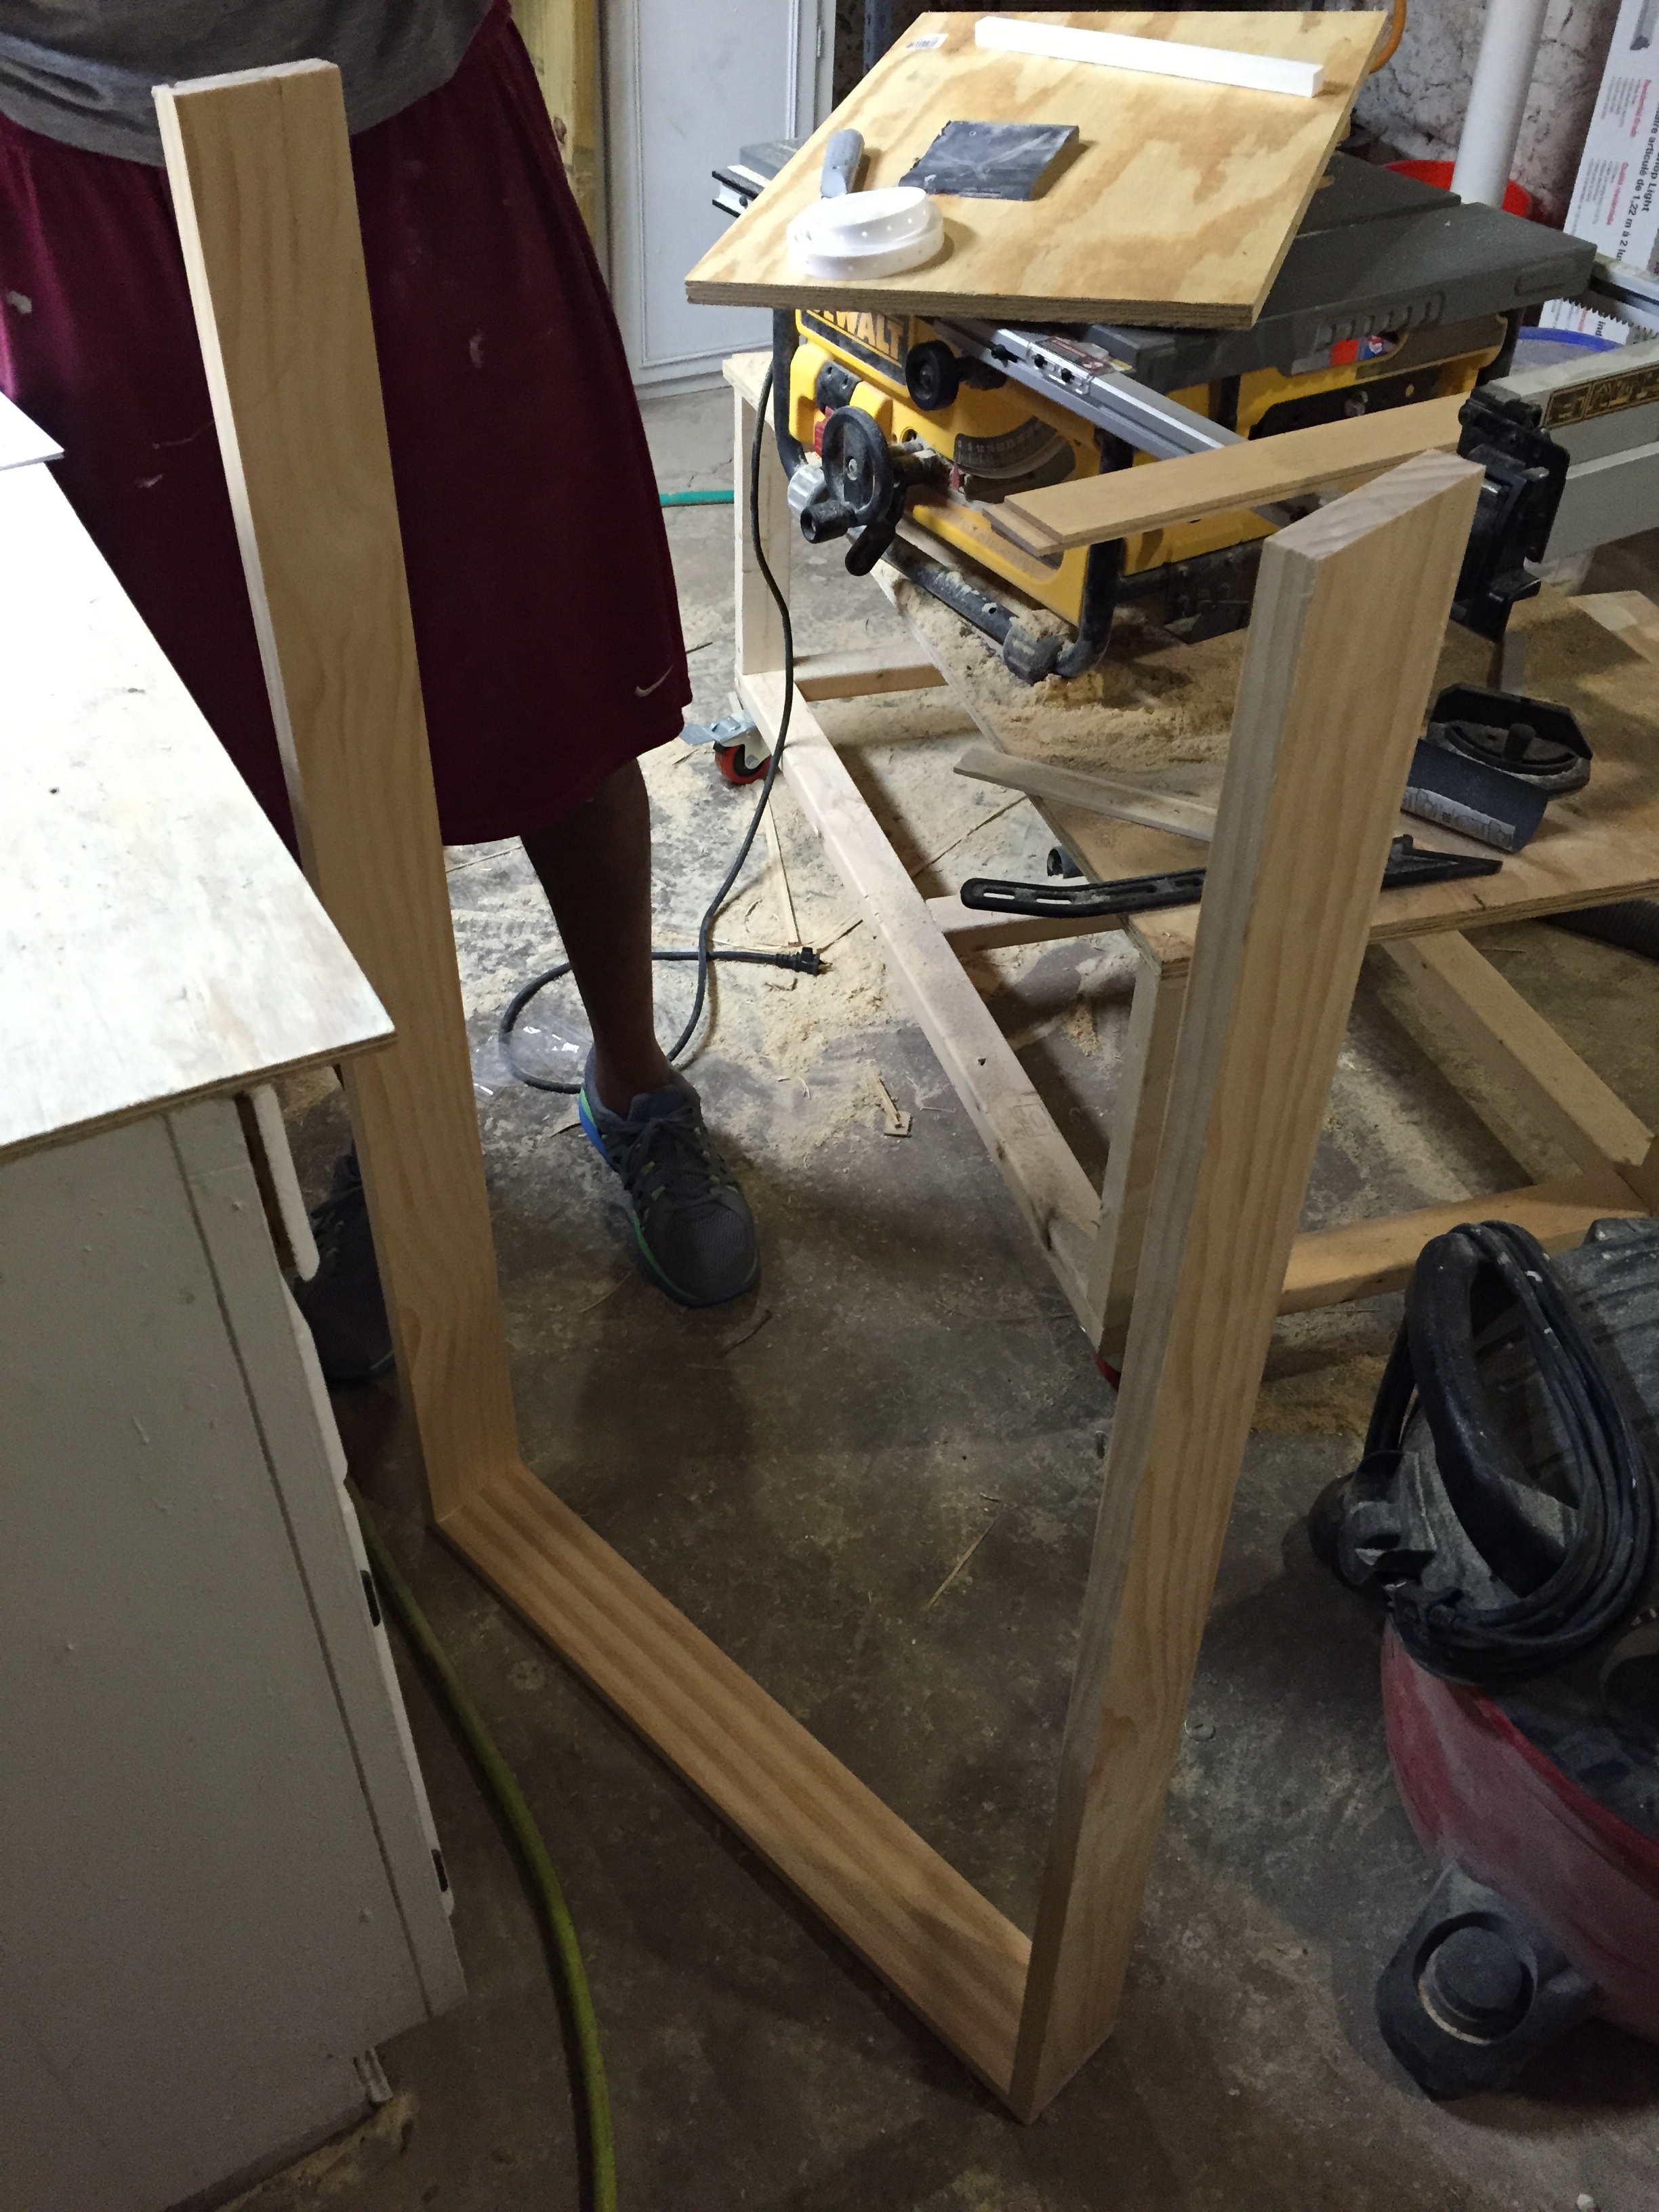
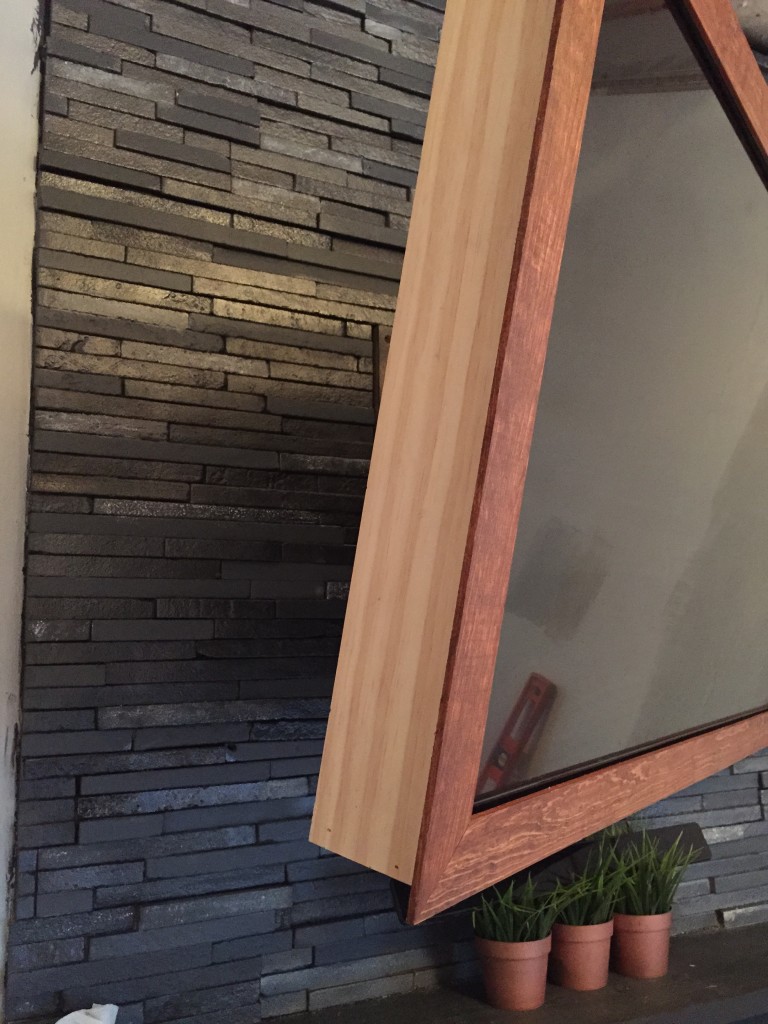
We tested the pieces on the floor to make sure they all fit, then attached them to the frame with more glue and our nail gun. Slide it onto your TV to double check that everything looks good.
We knew they would hang over the box frame a bit, and we were okay with that.
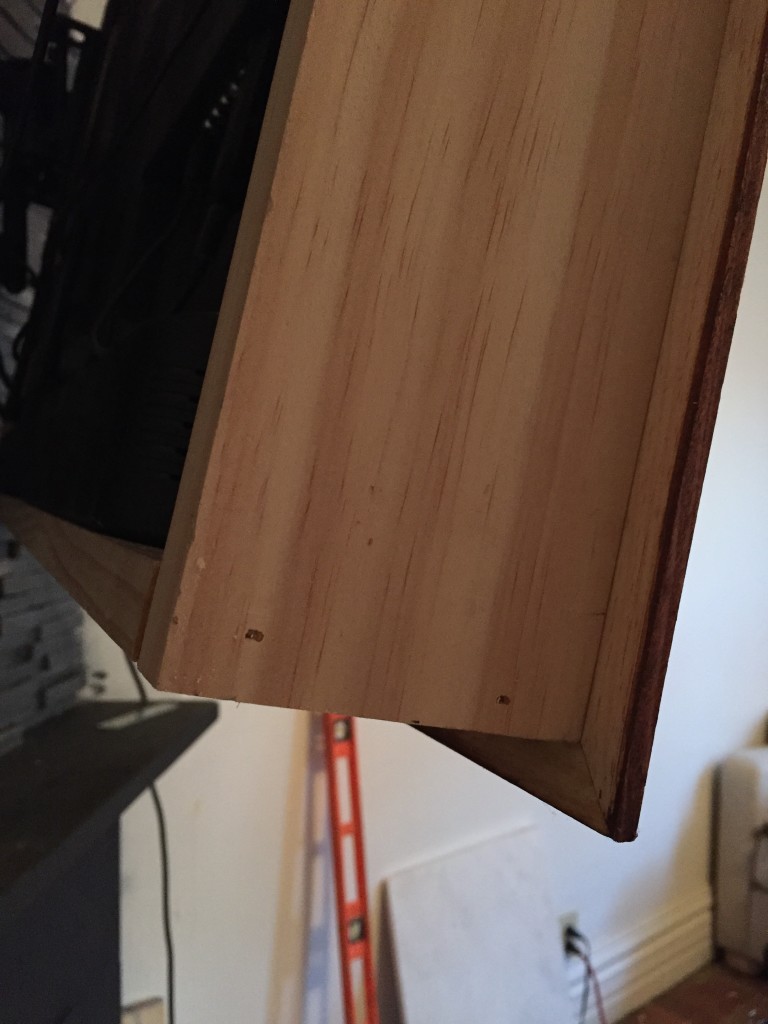
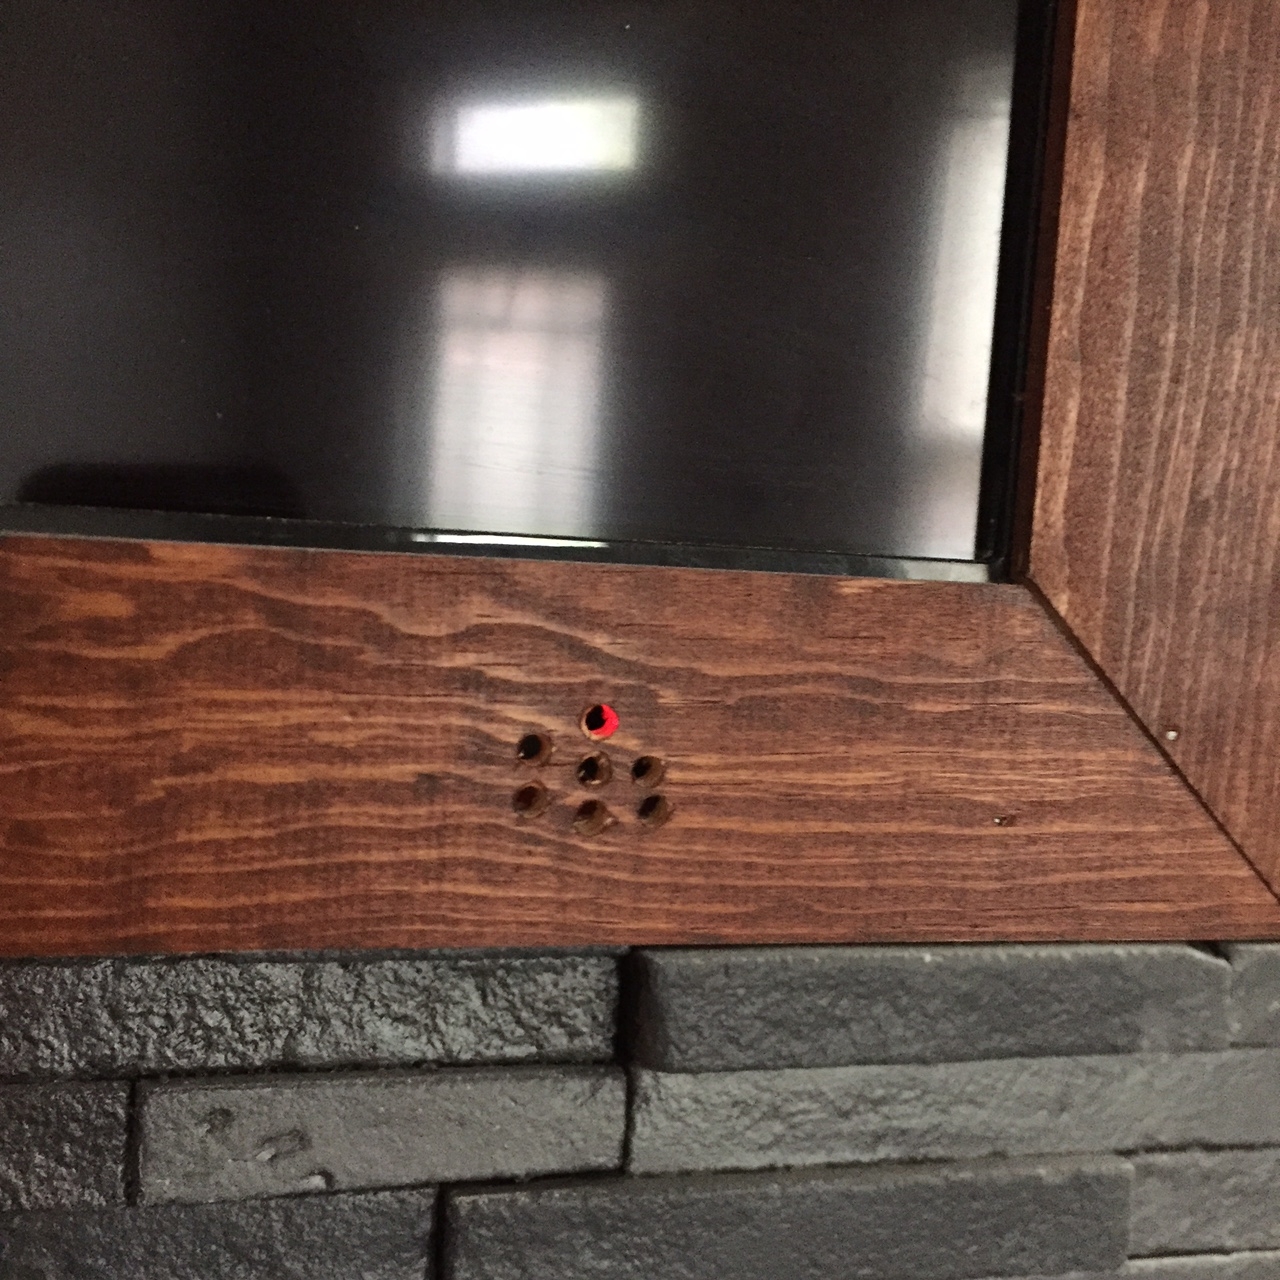
To allow access to the remove sensor, we drilled a few tiny holes into the front of the frame. Hint: do this before your frame is attached to the TV!
Step 3: Secure the frame to your TV.
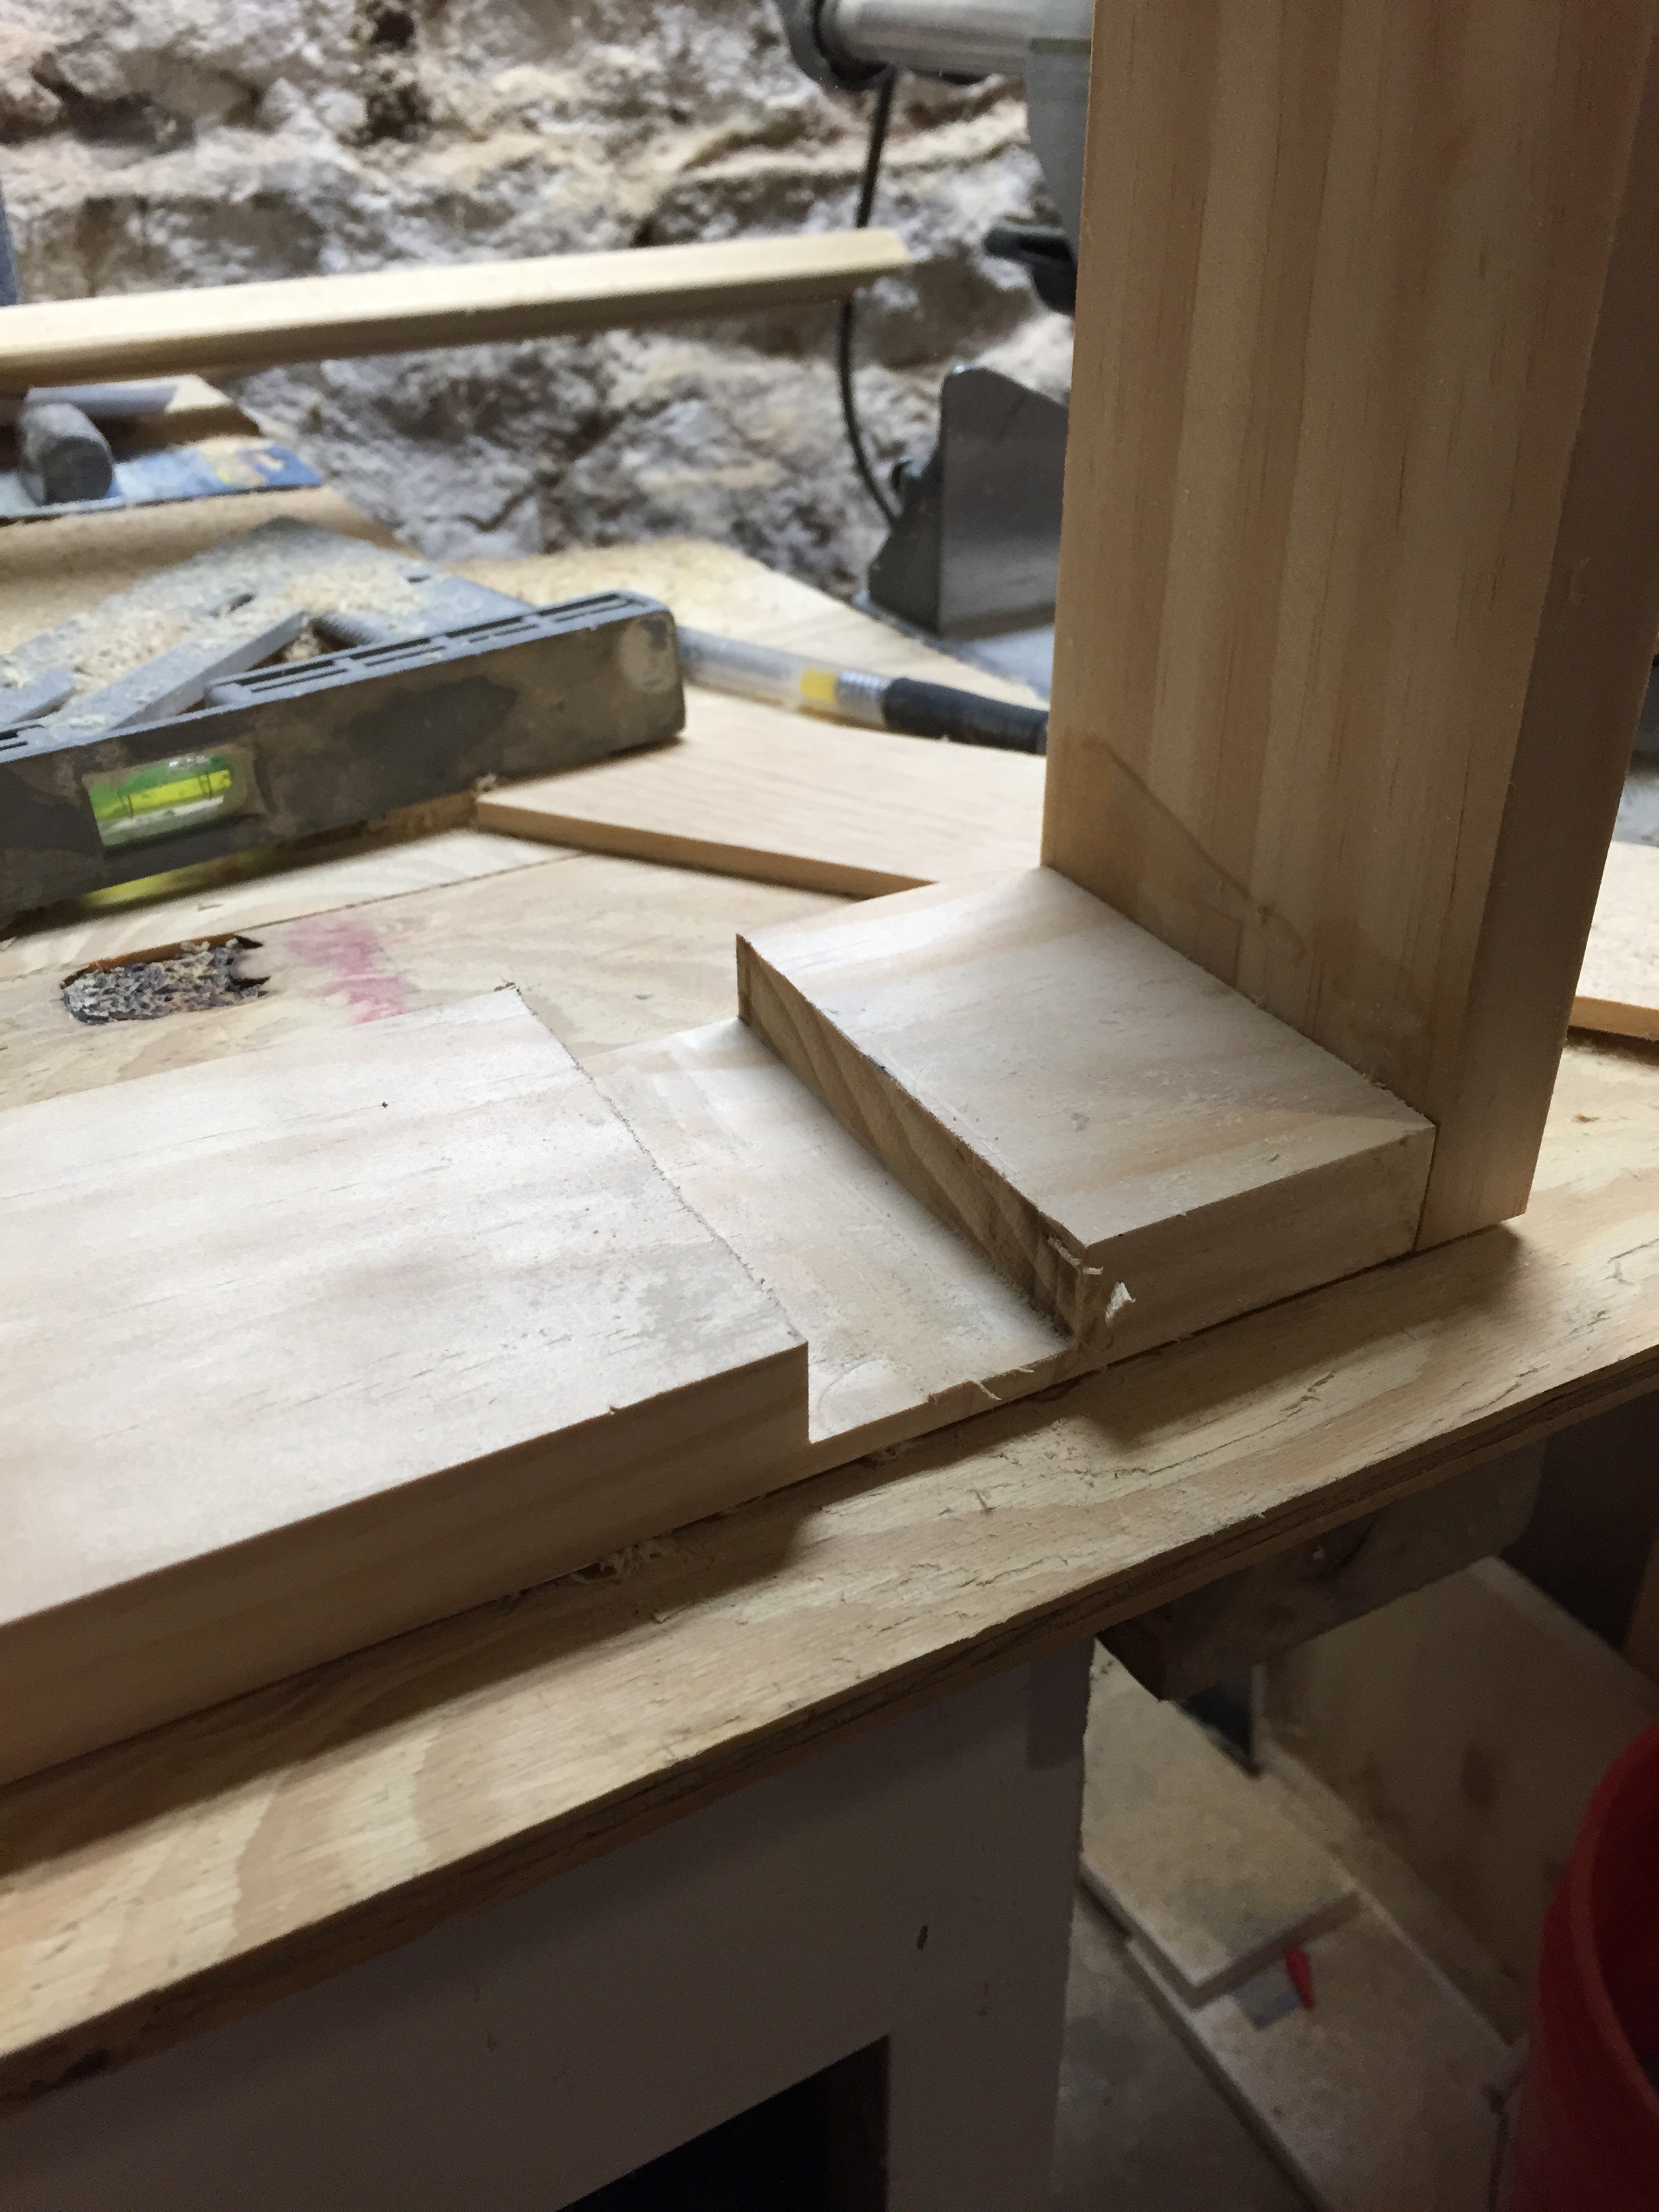
Once the base frame is set, you’ll want to secure it to the TV so it doesn’t move or slide off. This is where the 2×2 or scrap wood comes into play. Cut 4 pieces of 2×2 wood that are 4-5″ long each. Then cut 45 degree angles on both sides of all 4 pieces, so they look something like this.
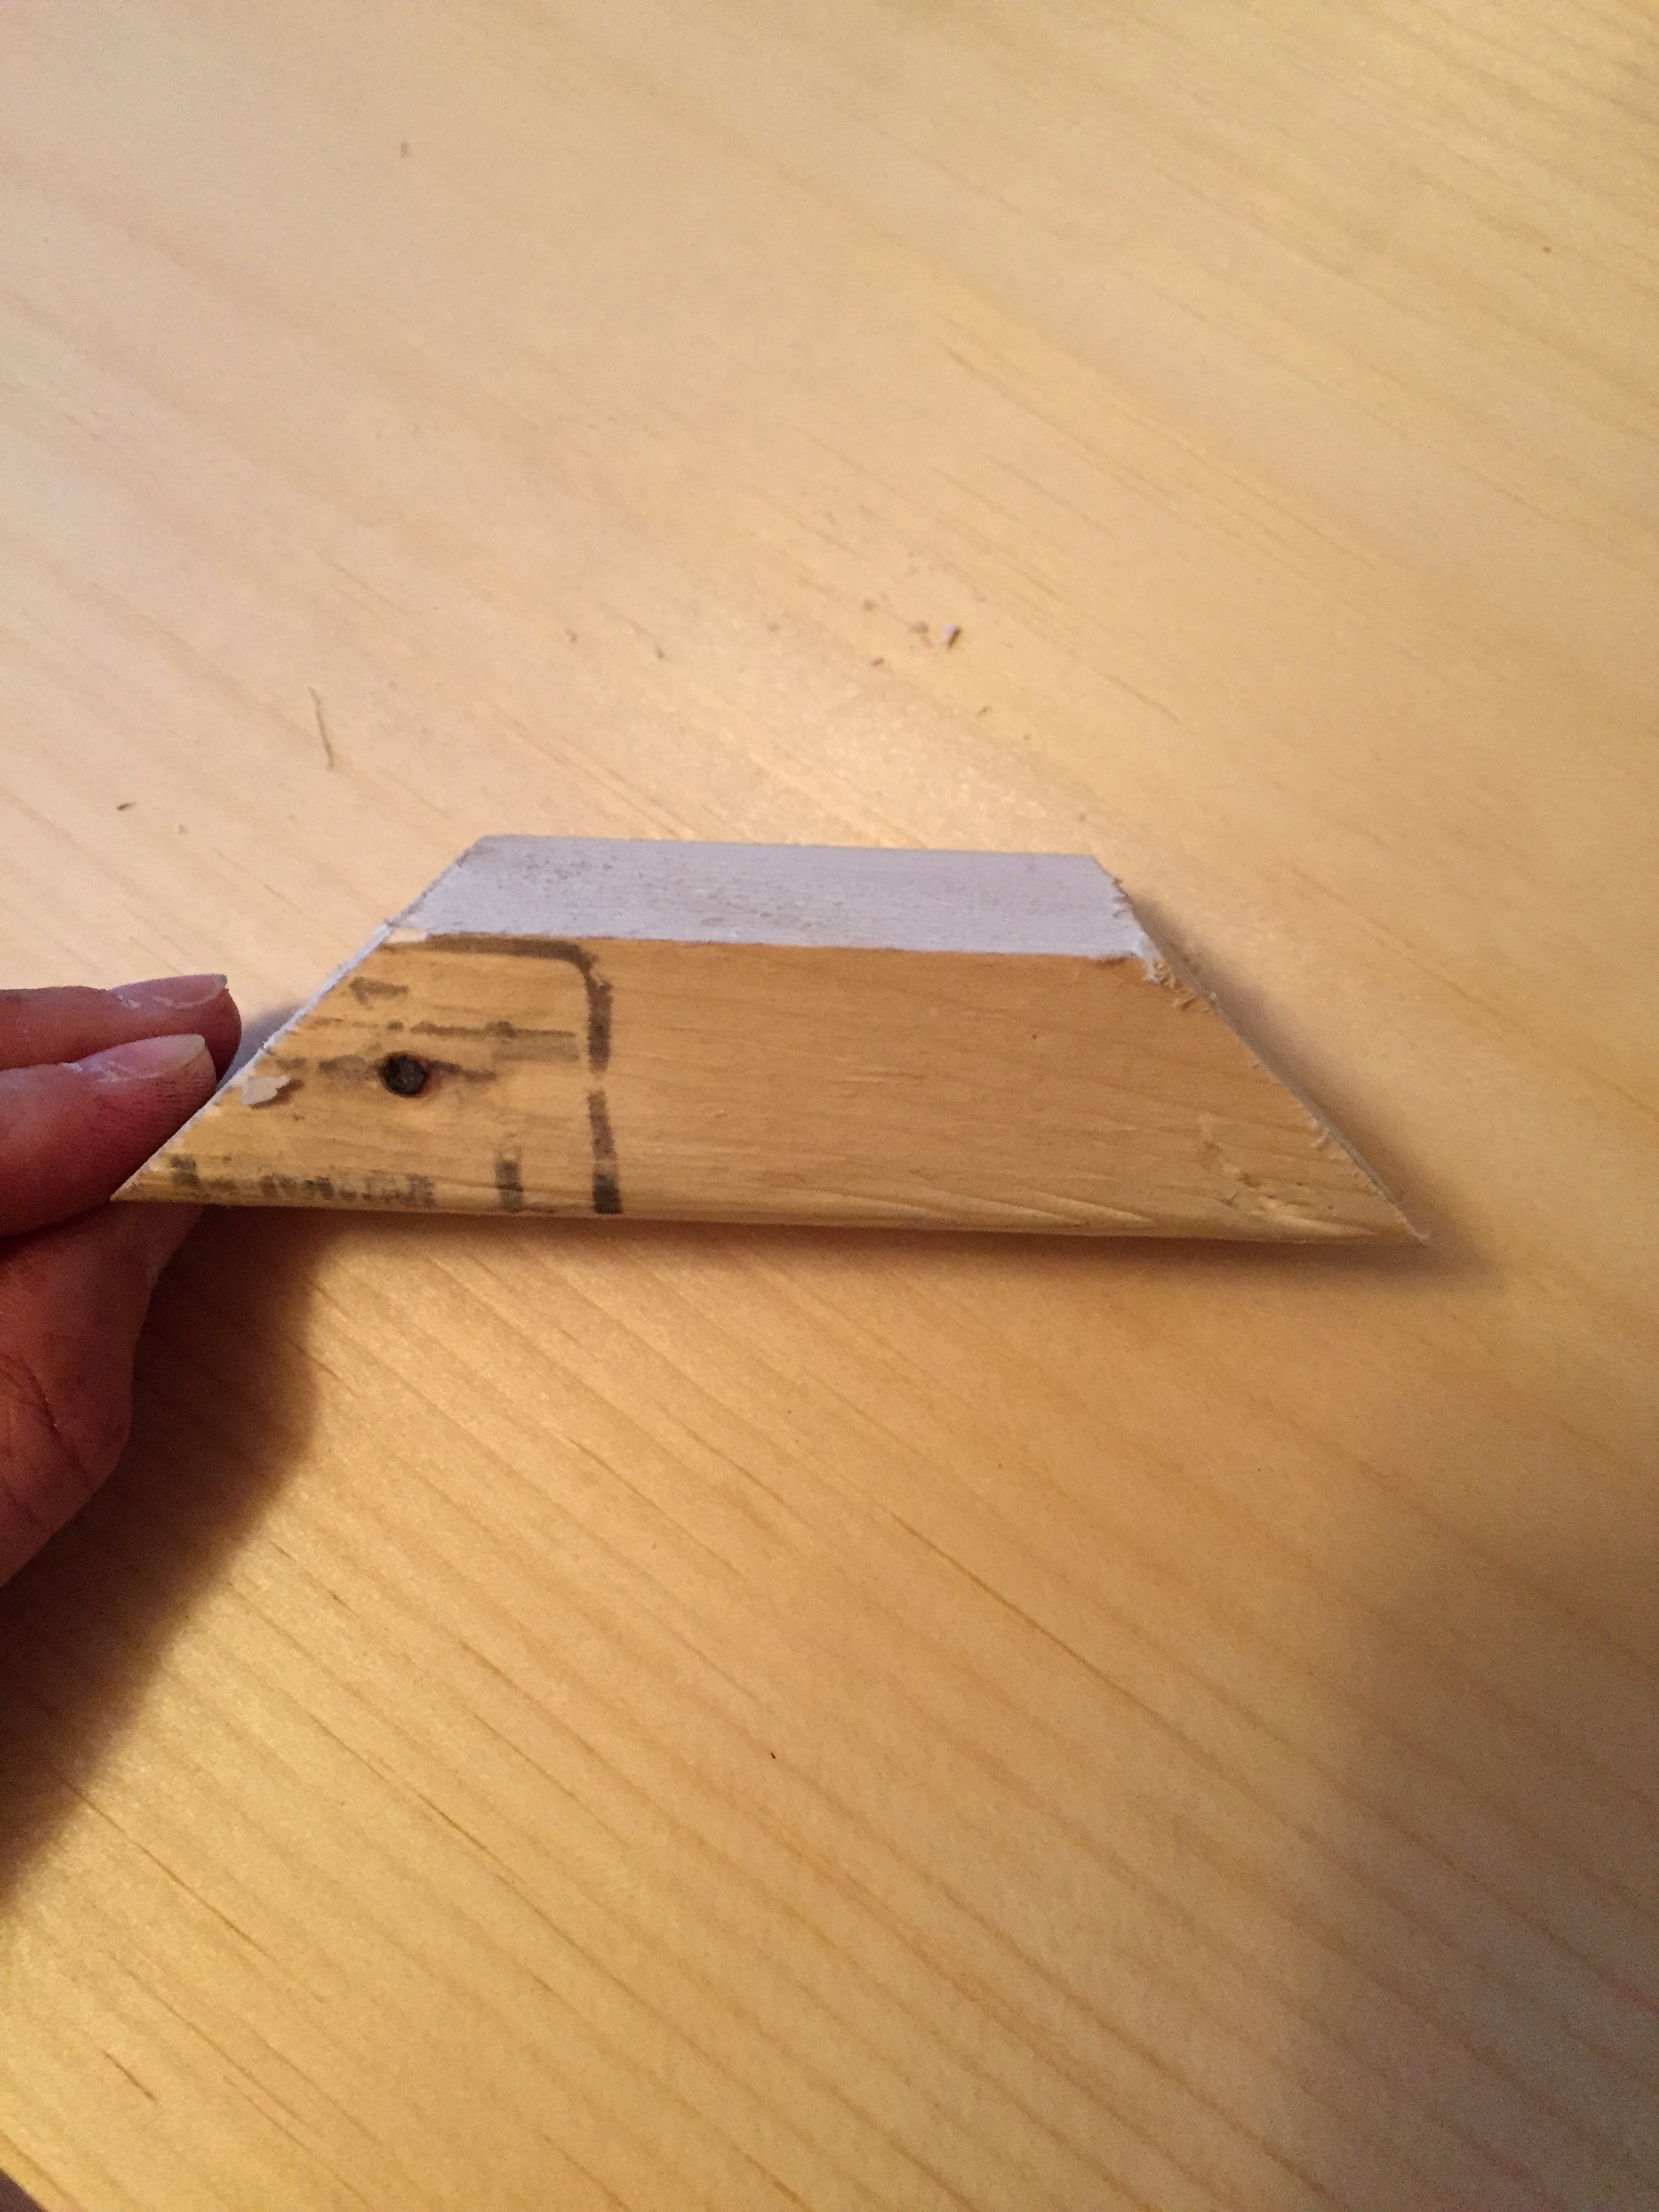
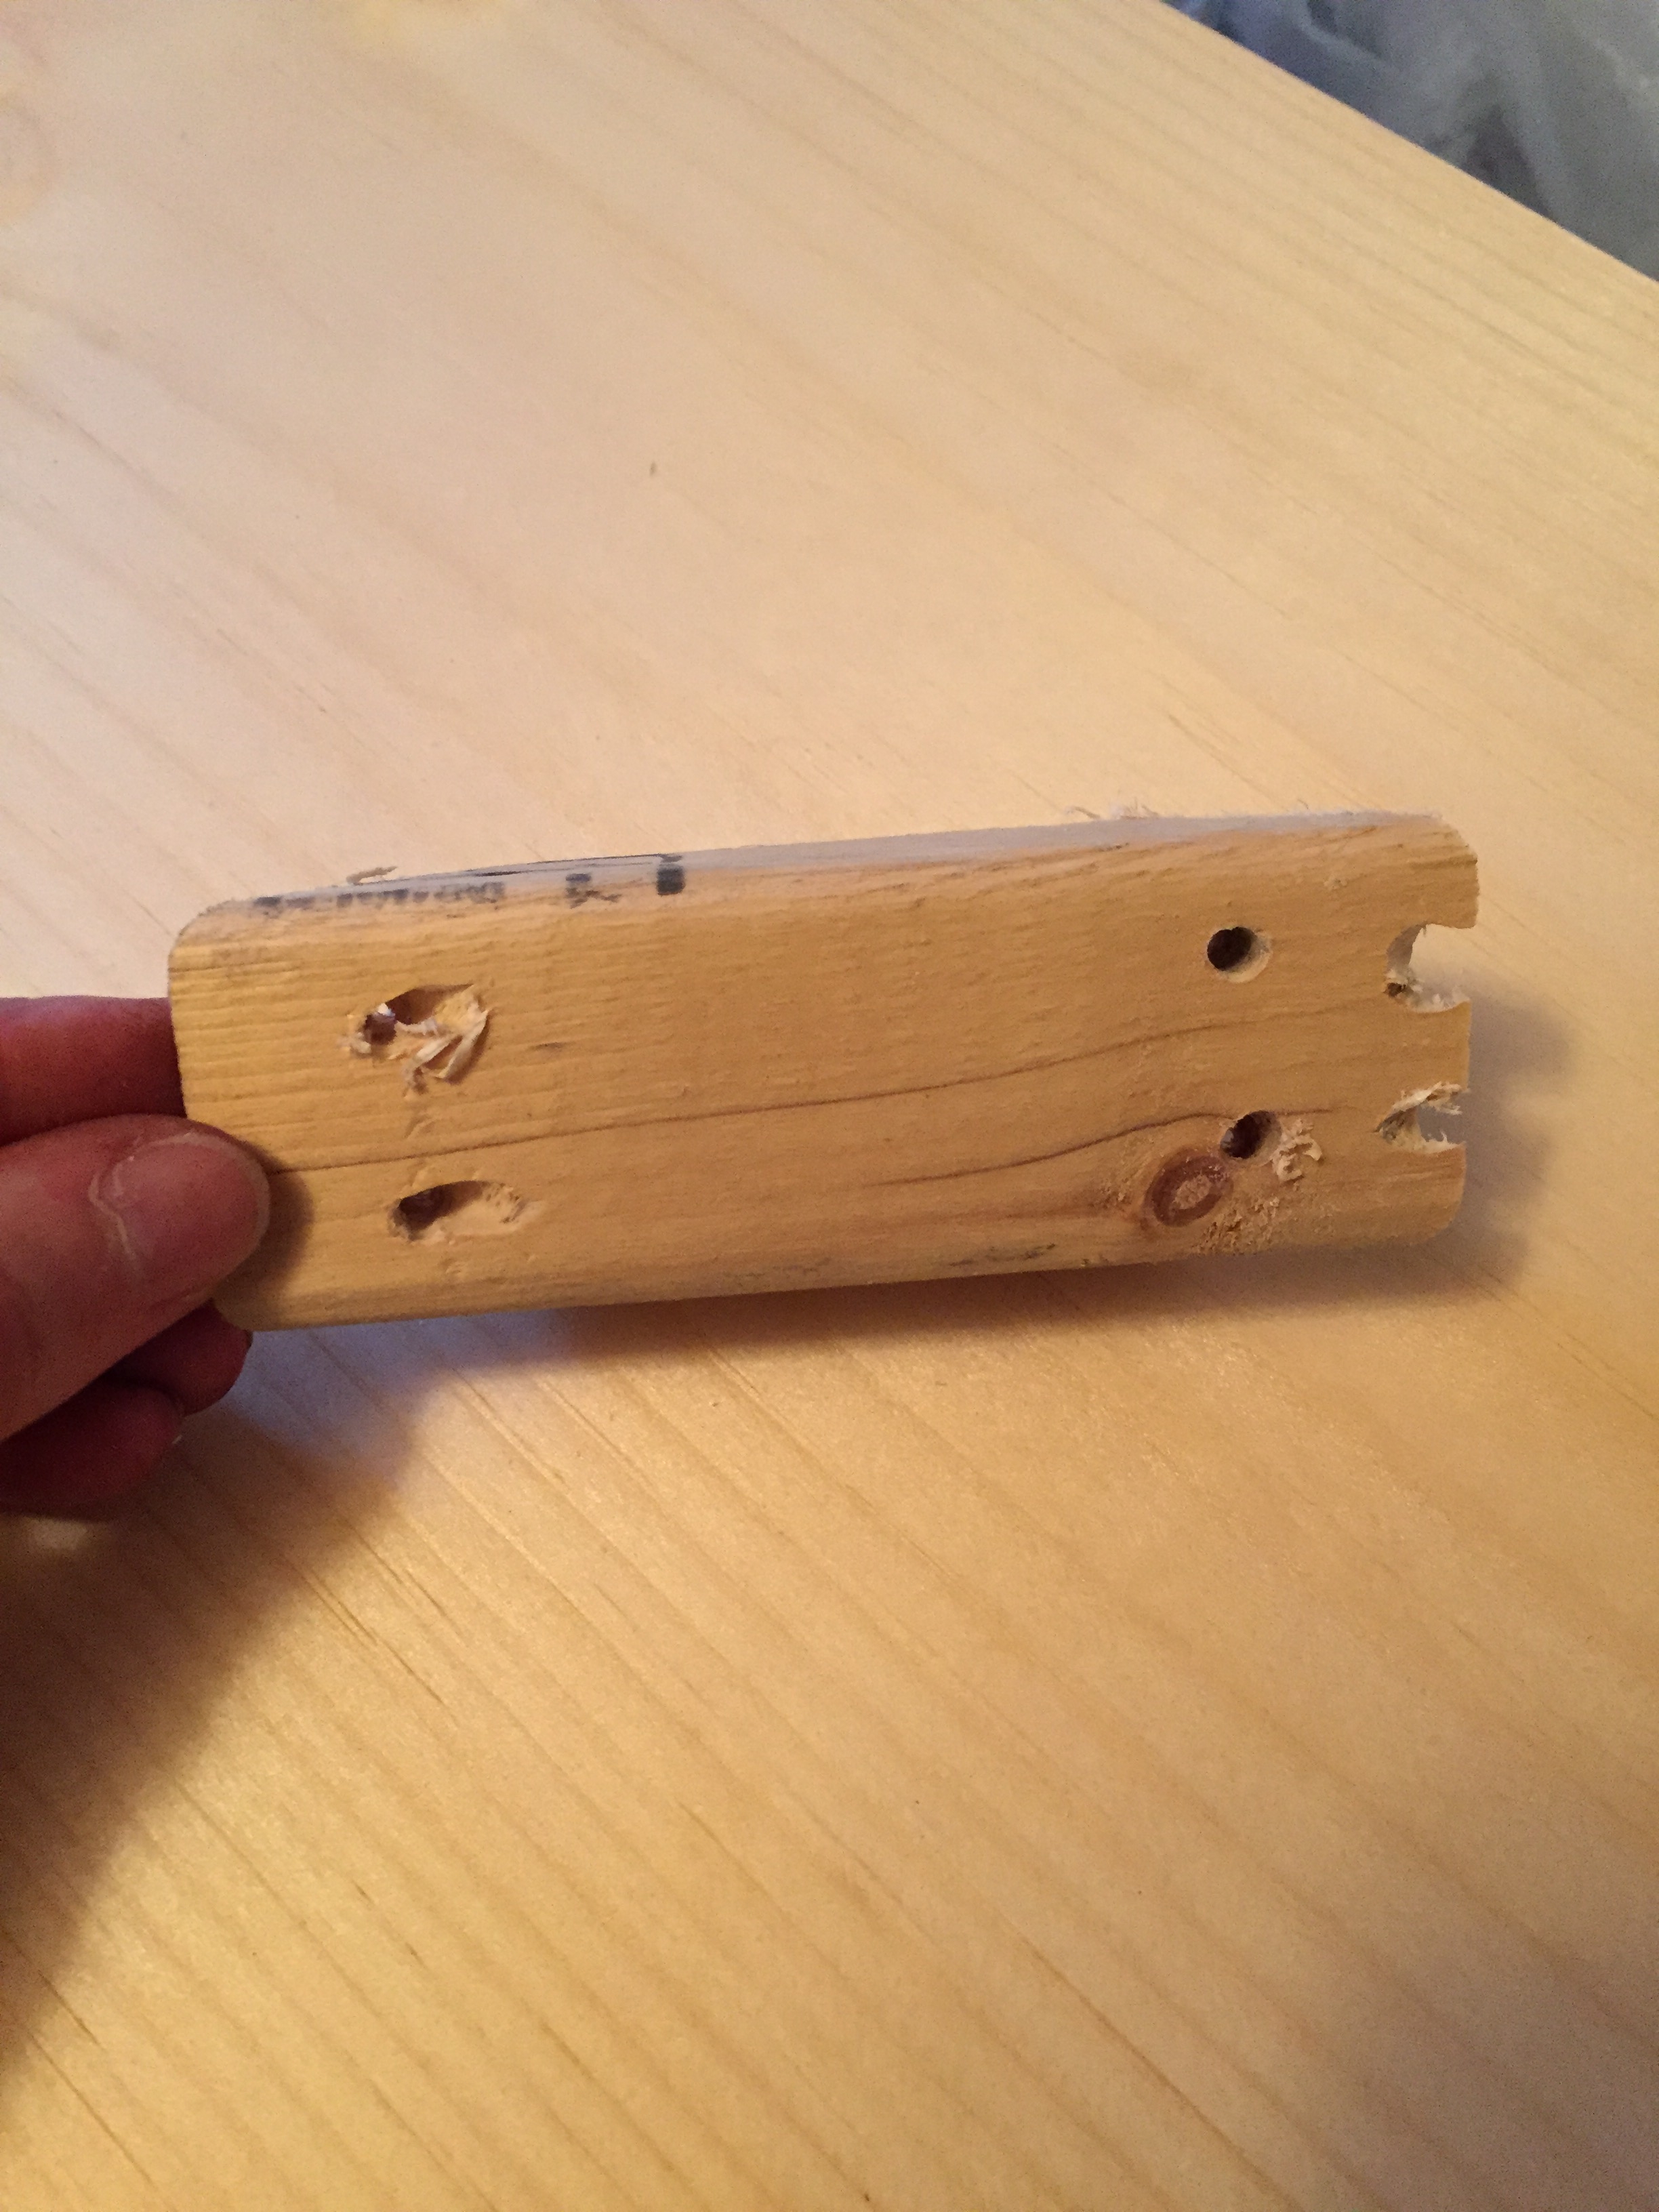
Once those are cut, screw them into their respective corners.
Tip: Make sure there’s no space between the frame and the front of the TV. This is what will keep it feeling like it’s part of the TV if you need to swivel/tilt it. Bryan did this by pulling the frame in with his fingers and pushing the diagonal piece out with his thumb to get the most snug position.


We finished it off with 2 coats of Minwax American Walnut stain.
And there you have it! One afternoon and $40 later…
Next up on the agenda for the living room is to tile the hearth, refinish the ceiling (and perhaps add some beams!), and redo the floors. But all of that might be put on hold as we tackle the second floor master suite. We found some super awesome stuff up there that we can’t wait to get to.
If you have any questions, drop a comment below or send us a note here. Hope to see you back again soon!


how does the remote work as it appears that you have covered the electronic sensor ???
Thanks for stopping by Laura. We drilled a few small holes in front of the sensor for access. I’ll add that detail to the tutorial – thanks for reminding me 🙂
This is great stuff. You guys look like you’re having fun which makes projects more fun for us too. Thanks for posting your projects.
Thanks so much Warren 🙂
[…] Living Room Paint – Benjamin Moore Simply White Curtains – IKEA Lenda Faux fiddle leaf fig tree – Amazon Couch – TOV Oxford Sectional (found discounted from Joss & Main – no longer available) Tables from Target Jute rug on sale from World Market The “Let’s Stay Home” print – PDF file from The Notable Type on Etsy Fireplace chimney – Behr Pencil Point Columbus wall art – Vernacular DIY wood TV frame (tutorial here) […]
[…] Living Room Paint – Benjamin Moore Simply White Curtains – IKEA Lenda Faux fiddle leaf fig tree – Amazon Couch – TOV Oxford Sectional (found discounted from Joss & Main – no longer available) Tables from Target Jute rug on sale from World Market The “Let’s Stay Home” print – PDF file from The Notable Type on Etsy Fireplace chimney – Behr Pencil Point Columbus wall art – Vernacular DIY wood TV frame (tutorial here) […]
[…] Living Room Paint – Benjamin Moore Simply White Curtains – IKEA Lenda Faux fiddle leaf fig tree – Amazon Couch – TOV Oxford Sectional (found discounted from Joss & Main – no longer available) Tables from Target Jute rug on sale from World Market The “Let’s Stay Home” print – PDF file from The Notable Type on Etsy Fireplace chimney – Behr Pencil Point Columbus wall art – Vernacular DIY wood TV frame (tutorial here) […]
What about the heat of the electronics? I had heard that you should place holes for air movement…have you had any problems? How long do you run your TV at a time?
We’ve never had a problem — perhaps because the back is open and the frame is just on the front and side. We’re going on 2 years of using it. It’s usually on for a few hours at a time (longer during football season & when there’s a great Netflix show out ????)
We left upper piece off to allow heat to escape. Hung onto wall on small brackets (easy on/off) since ours has no need for swivel.
Ours is made out of lightest wood possible and front is beautiful molding that we “coffee washed” to match our console. Have no issue using remotes. Also should have drilled hole into wall to hide/reroute your wires!
So great to hear Gloria! We couldn’t drill a hole as the fireplace is brick — no space for the wires to run behind the TV unless they go inside the chimney 🙂