

This post is sponsored by Lowe’s.
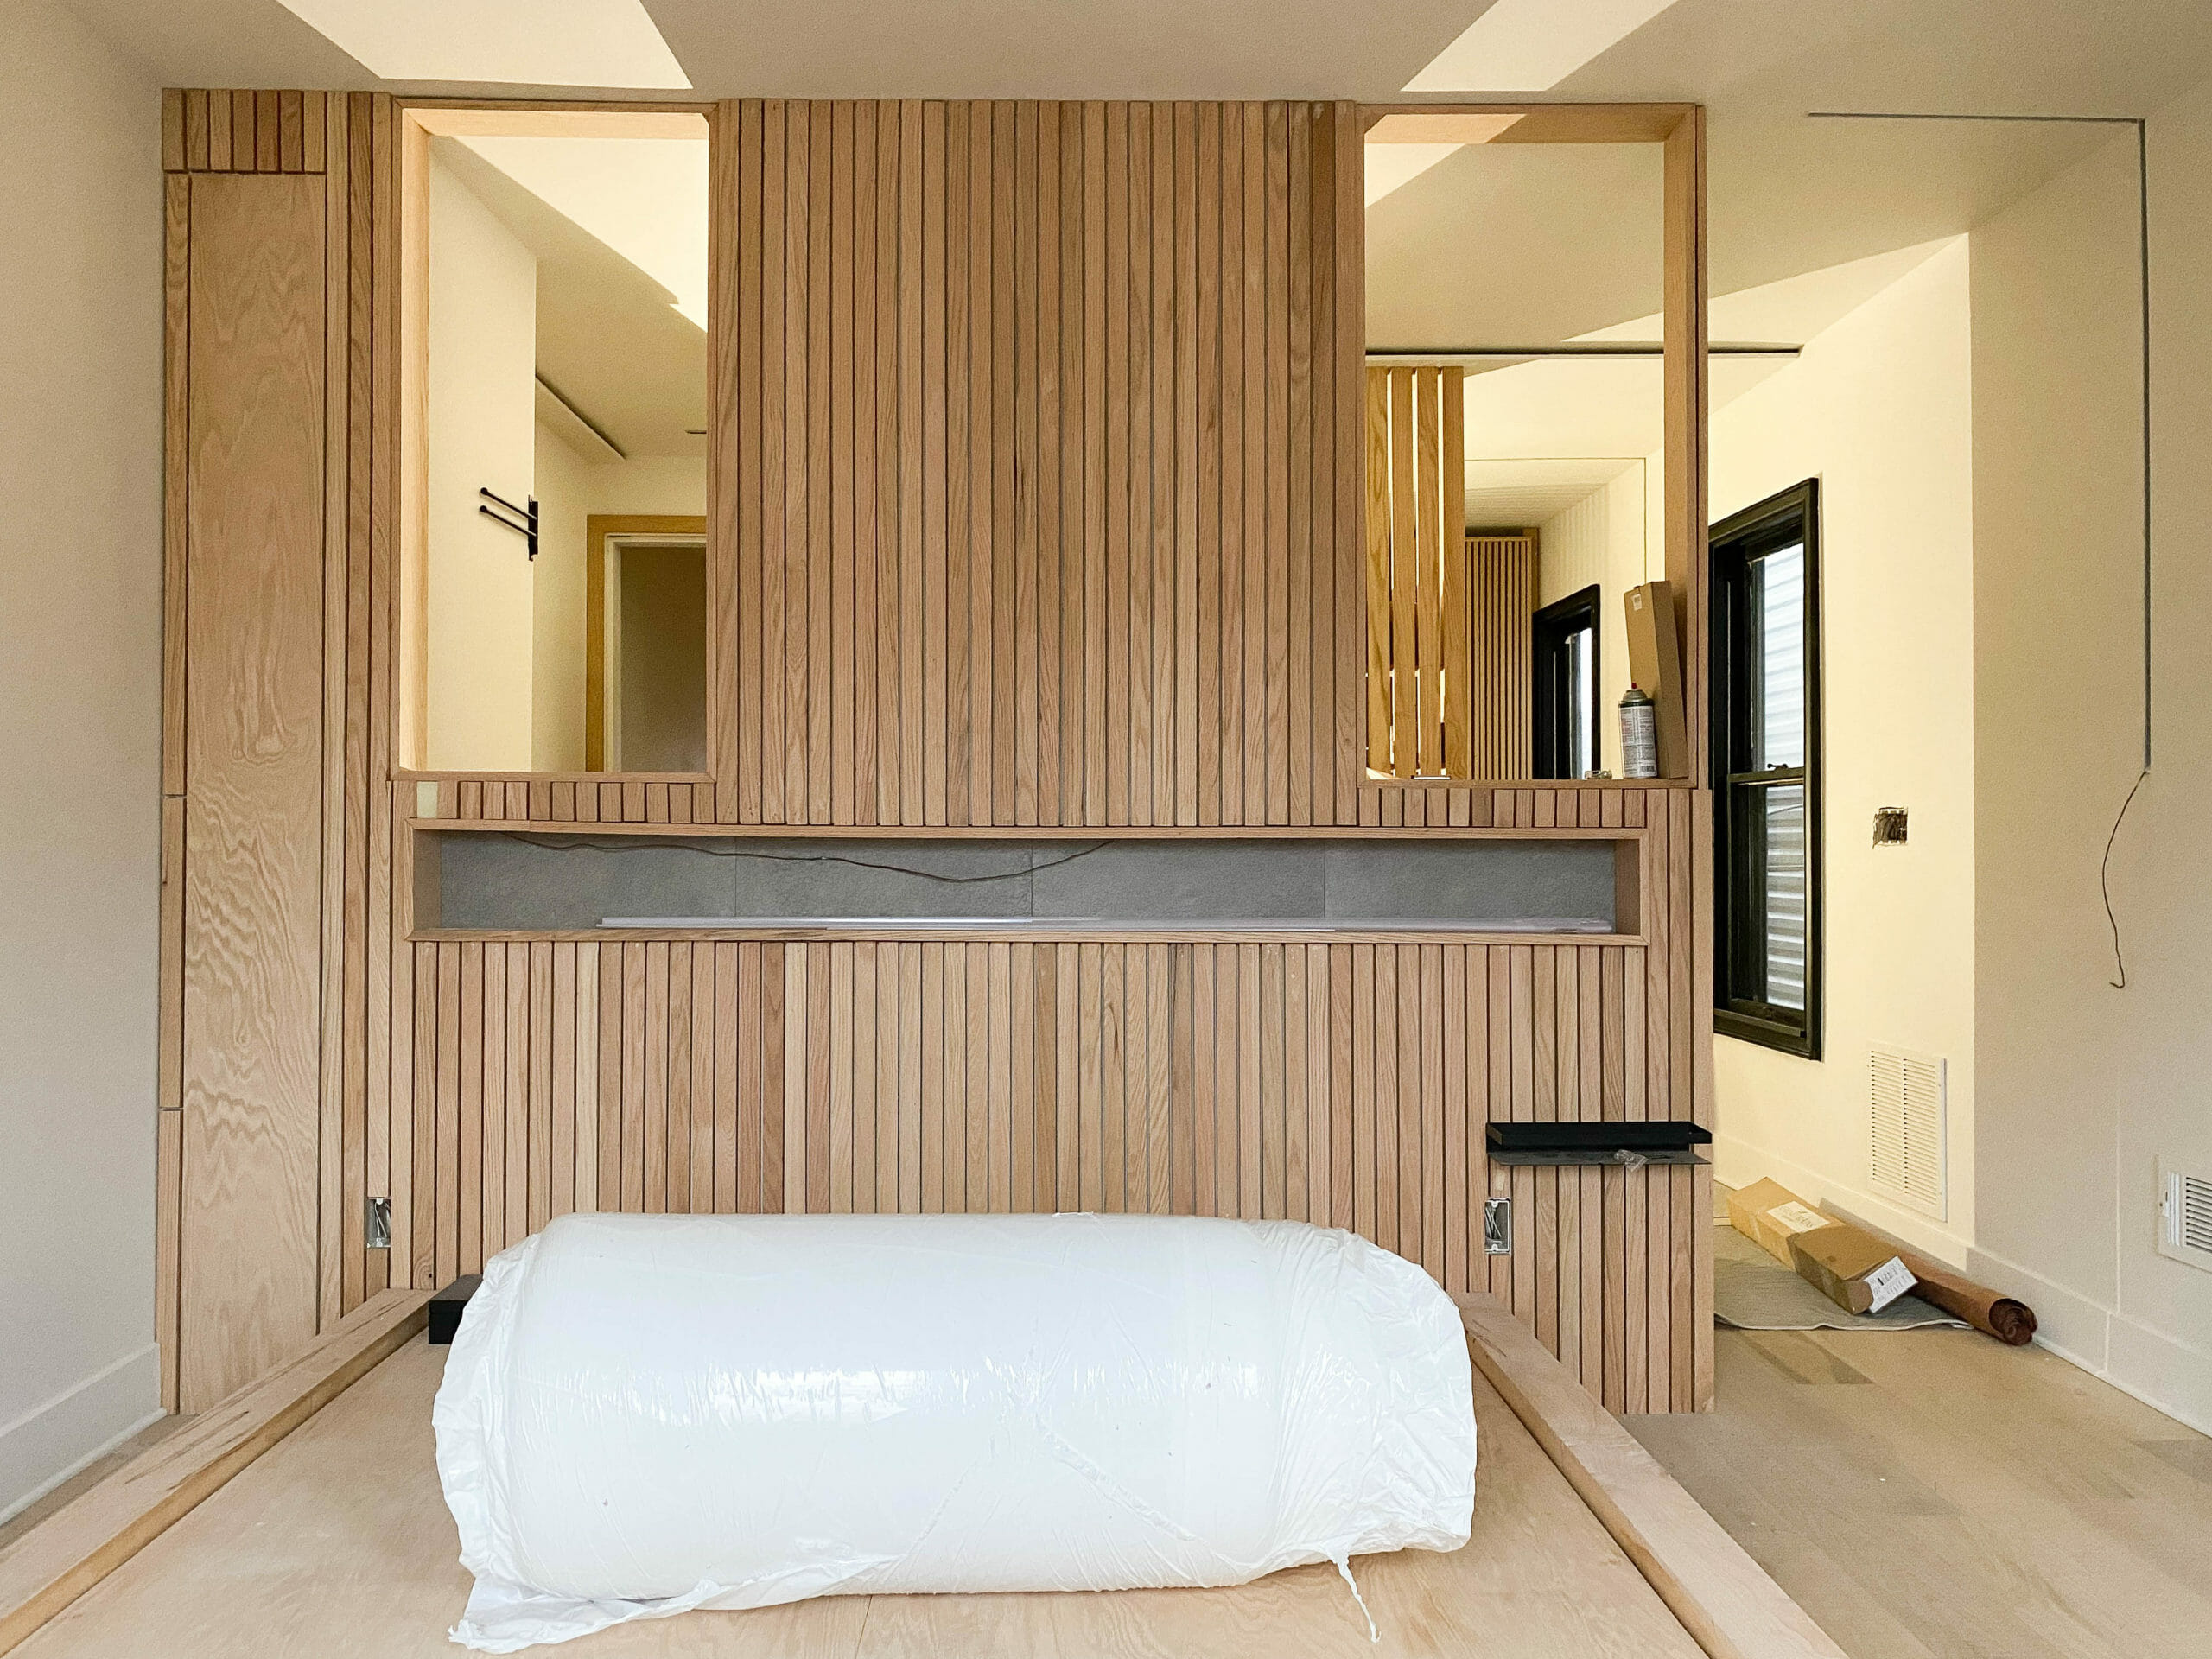
We are weeks away from finishing our new #pearlgoesmodern Airbnb and can. not. wait to start welcoming guests!! This week, Bryan & I built a channel tufted headboard + platform bed frame for the smaller bedroom in the house, which has a moody, earthy vibe.

We’ve shared a few sneak peeks on Instagram (you can catch up here) and received lots of requests for a tutorial. So friends, we’re breaking it alllll down for you on the blog today! Let’s dive in.
Getting Started: what you need
Everything we used for this project, down to the fabric and even our mattresses (more on that below), came from Lowe’s.
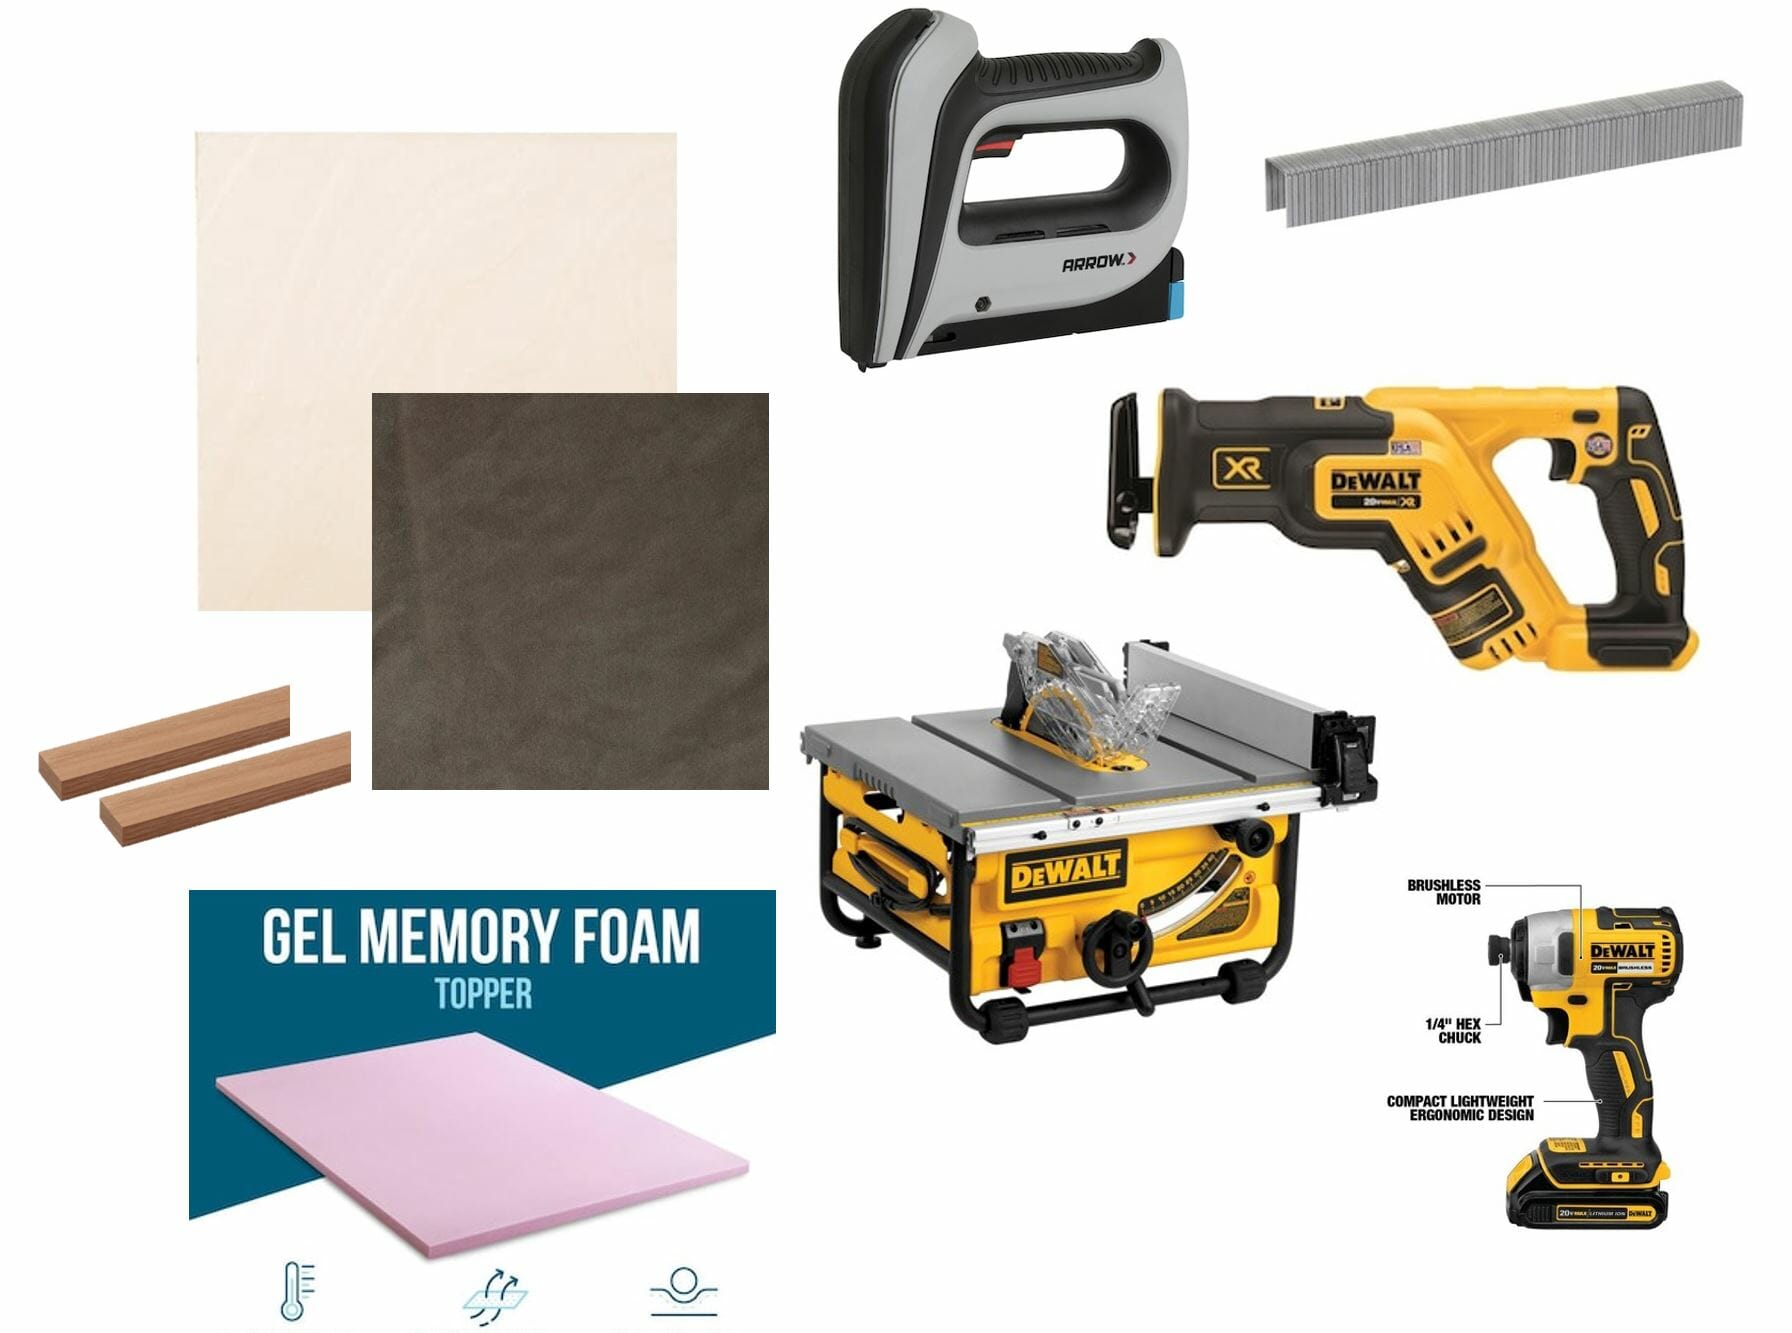
Tools:
- Staple gun (we used this cordless one for our project – LOVED it)
- Drill (this is Bryan’s favorite)
- Miter saw
- Table saw (we have this one)
- Sawzall or knife to cut foam strips
Supplies: Headboard + slats
- Foam. We used this 3″ memory foam topper.
- Fabric. We used these velvet curtains.
- Plywood. We used 1 sheet of this kind because had it on hand already.
- Oak slats (1″ x 2″). We used 6 total, 3 on each side of the headboard.
- Screws
- Picture hanging cleat
- Spray adhesive
Supplies: oak platform bed Frame
- Oak boards (we used 1 x 12s for head & foot, and 1x10s for the sides)
- Oak plywood – we needed 2 sheets to cover our Queen bed platform
- Pine 1x4s for inside supports
- Screws
the channel tufted headboard
We tackled the headboard first.
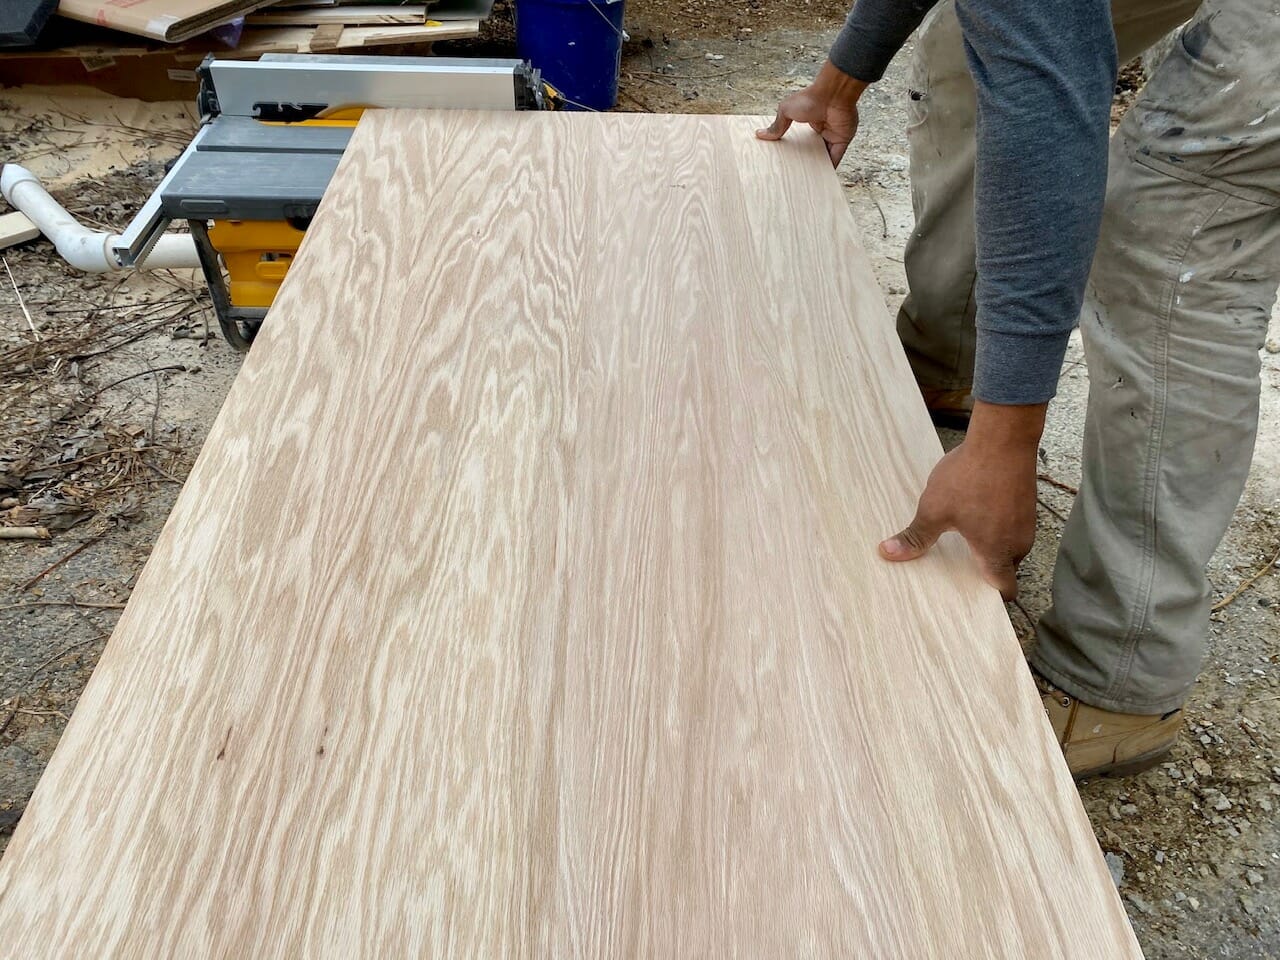
1. measure & Cut Plywood
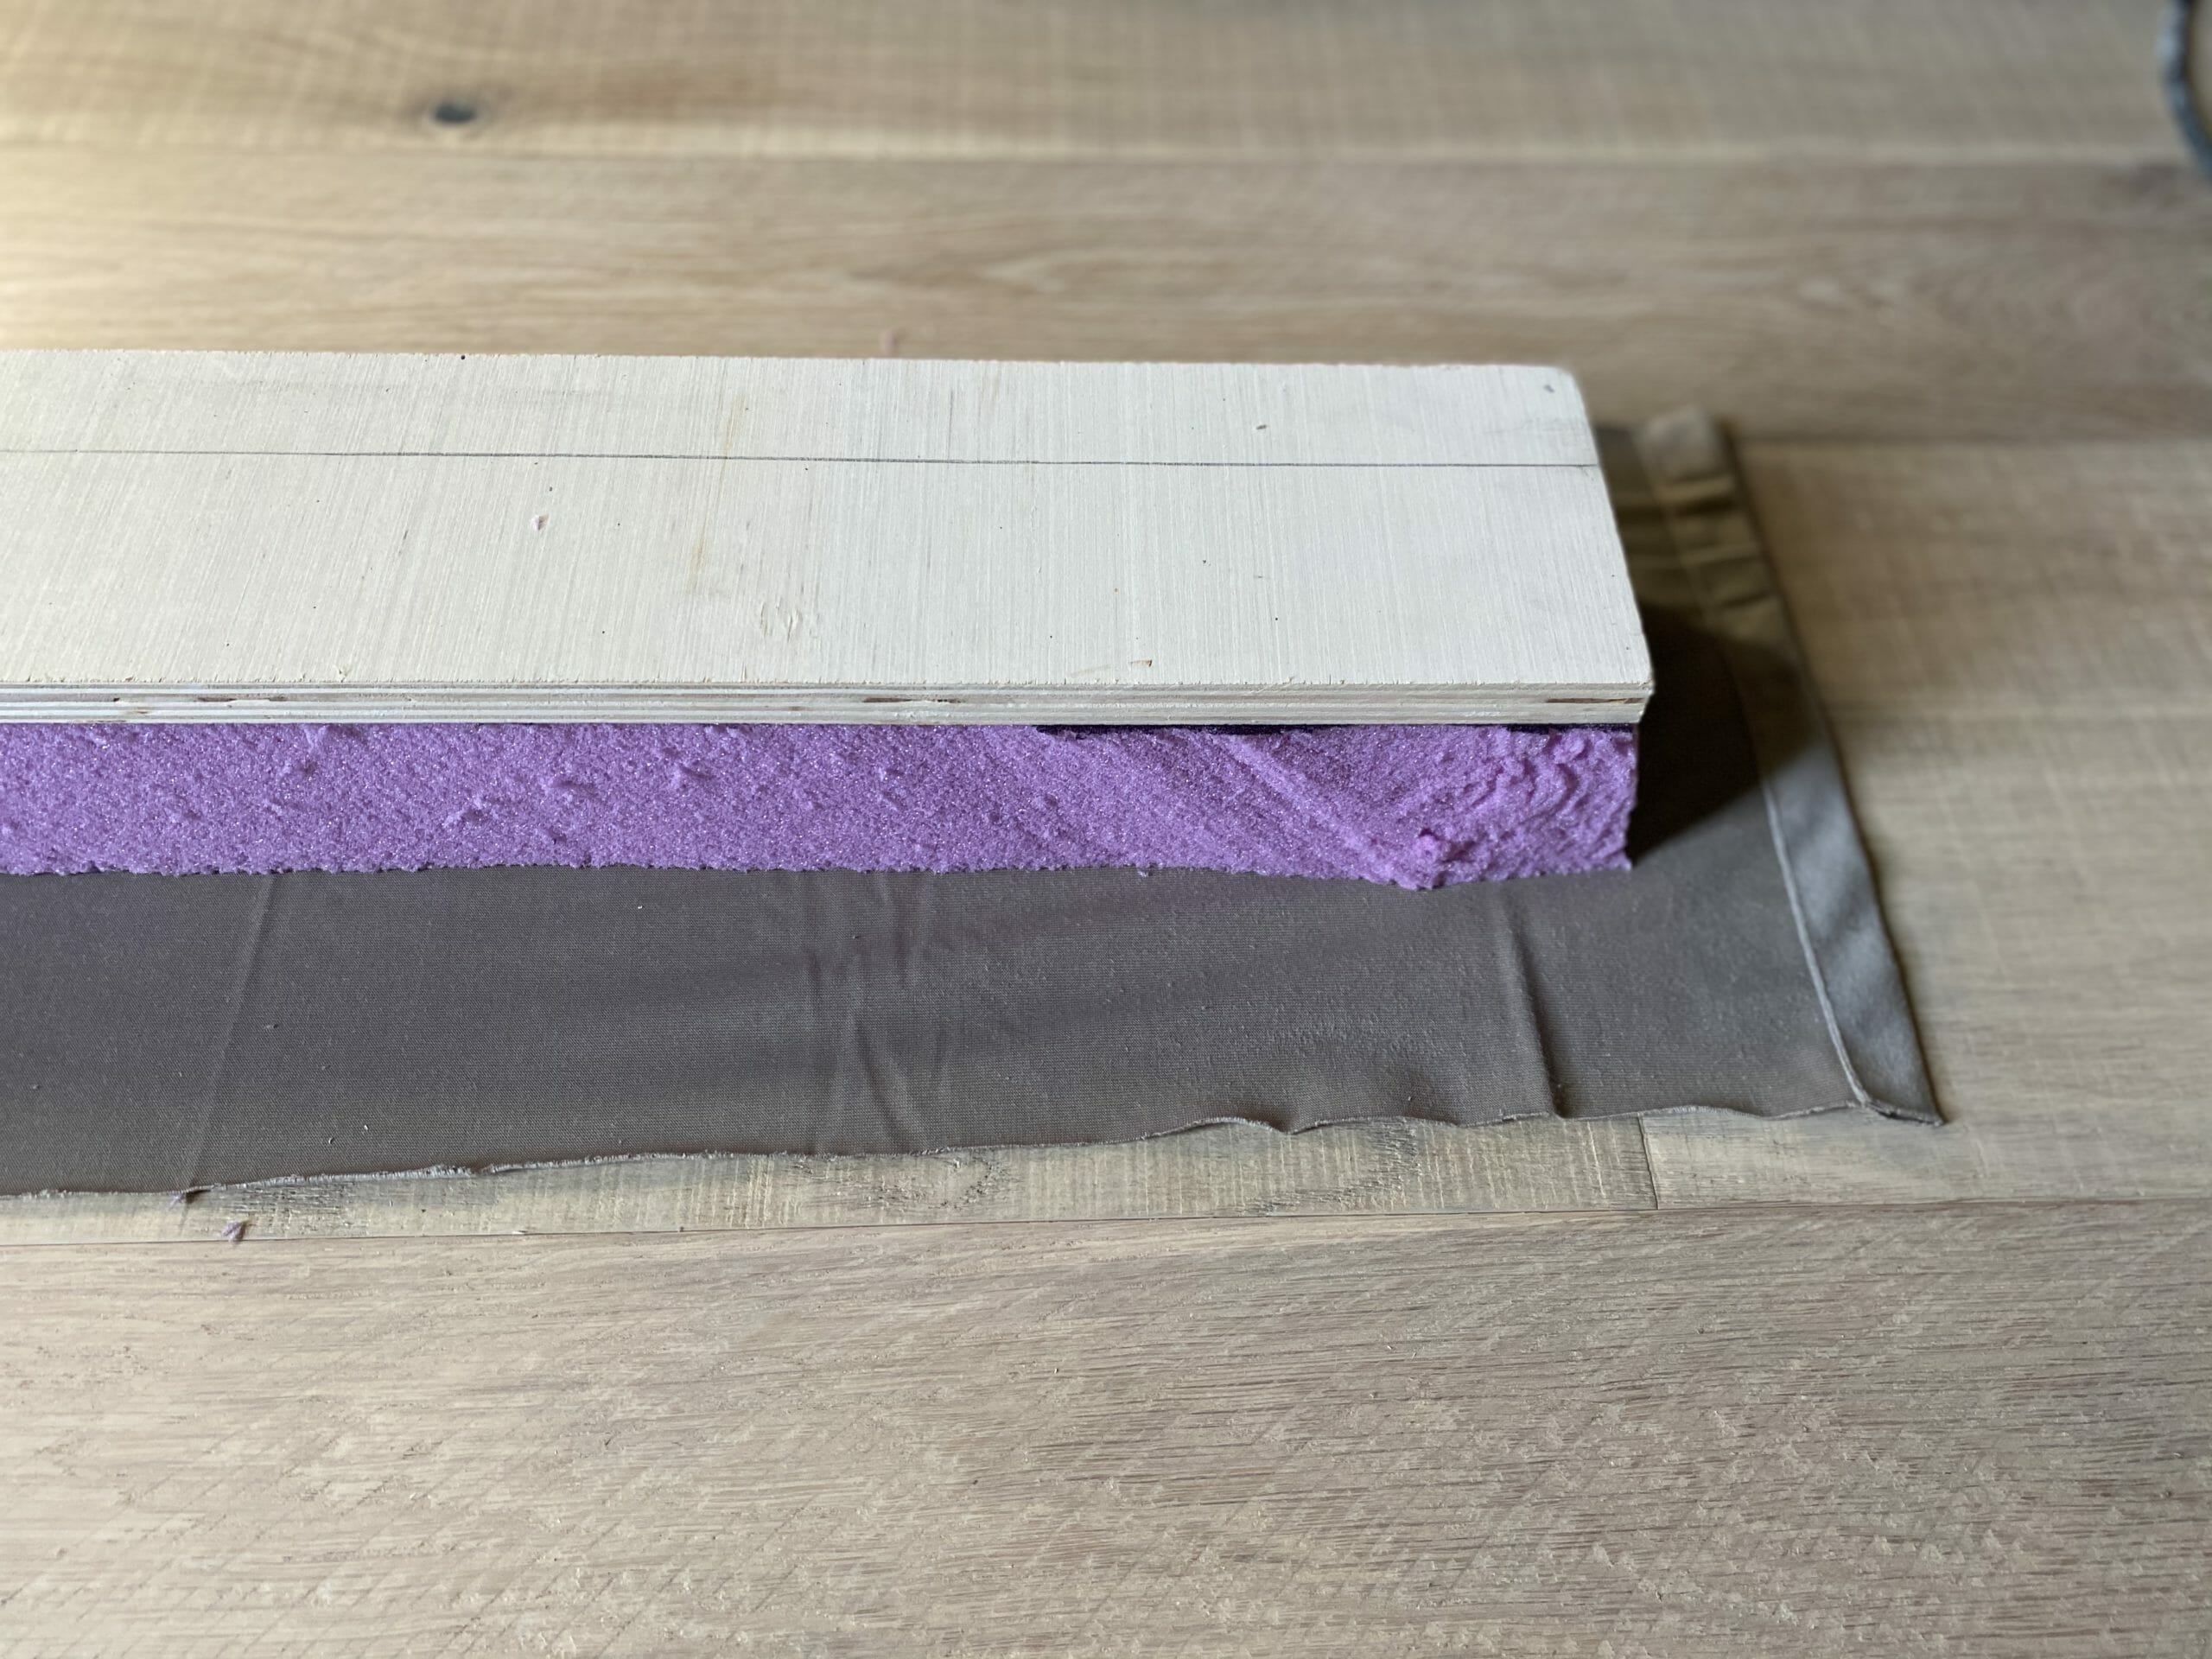
Plywood comes in 48″ x 96″ sheets. We decided to keep our headboard 48″ tall, and set our table saw to 5″. This gave us twelve 5″ strips, one for each tuft.
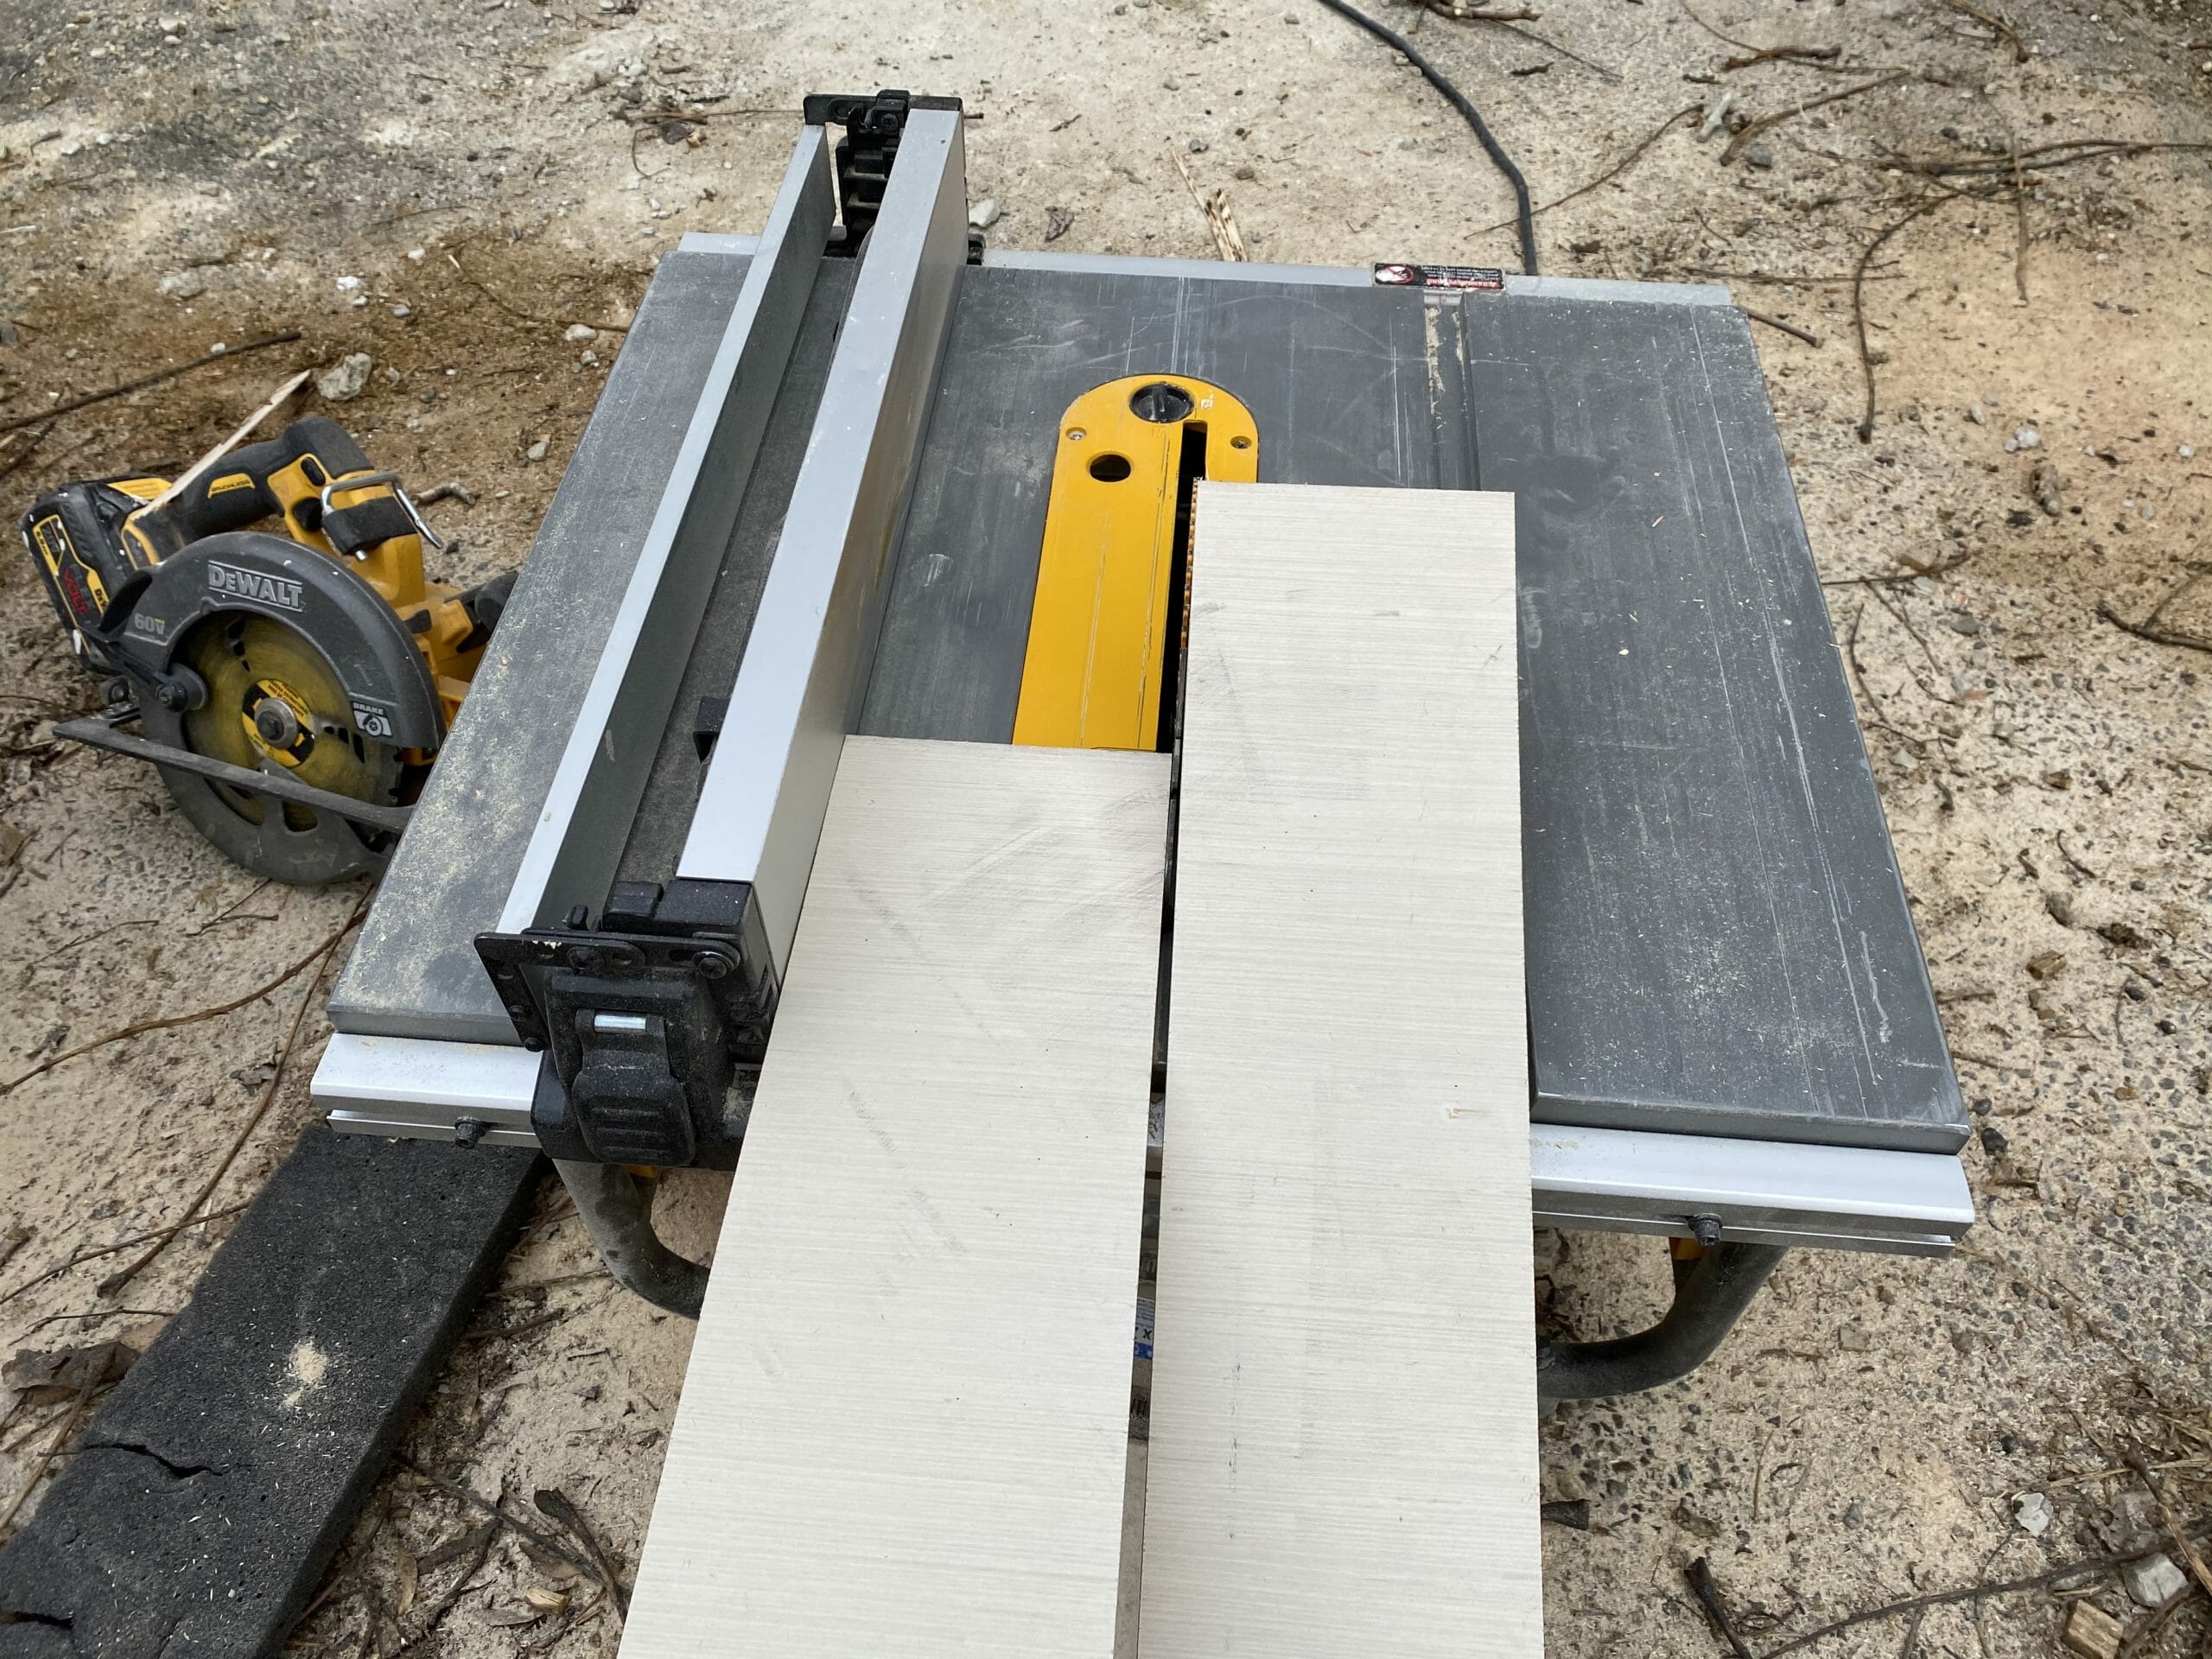
Tip: if you don’t have a table saw, you can have Lowe’s cut your plywood for you in the lumber department!
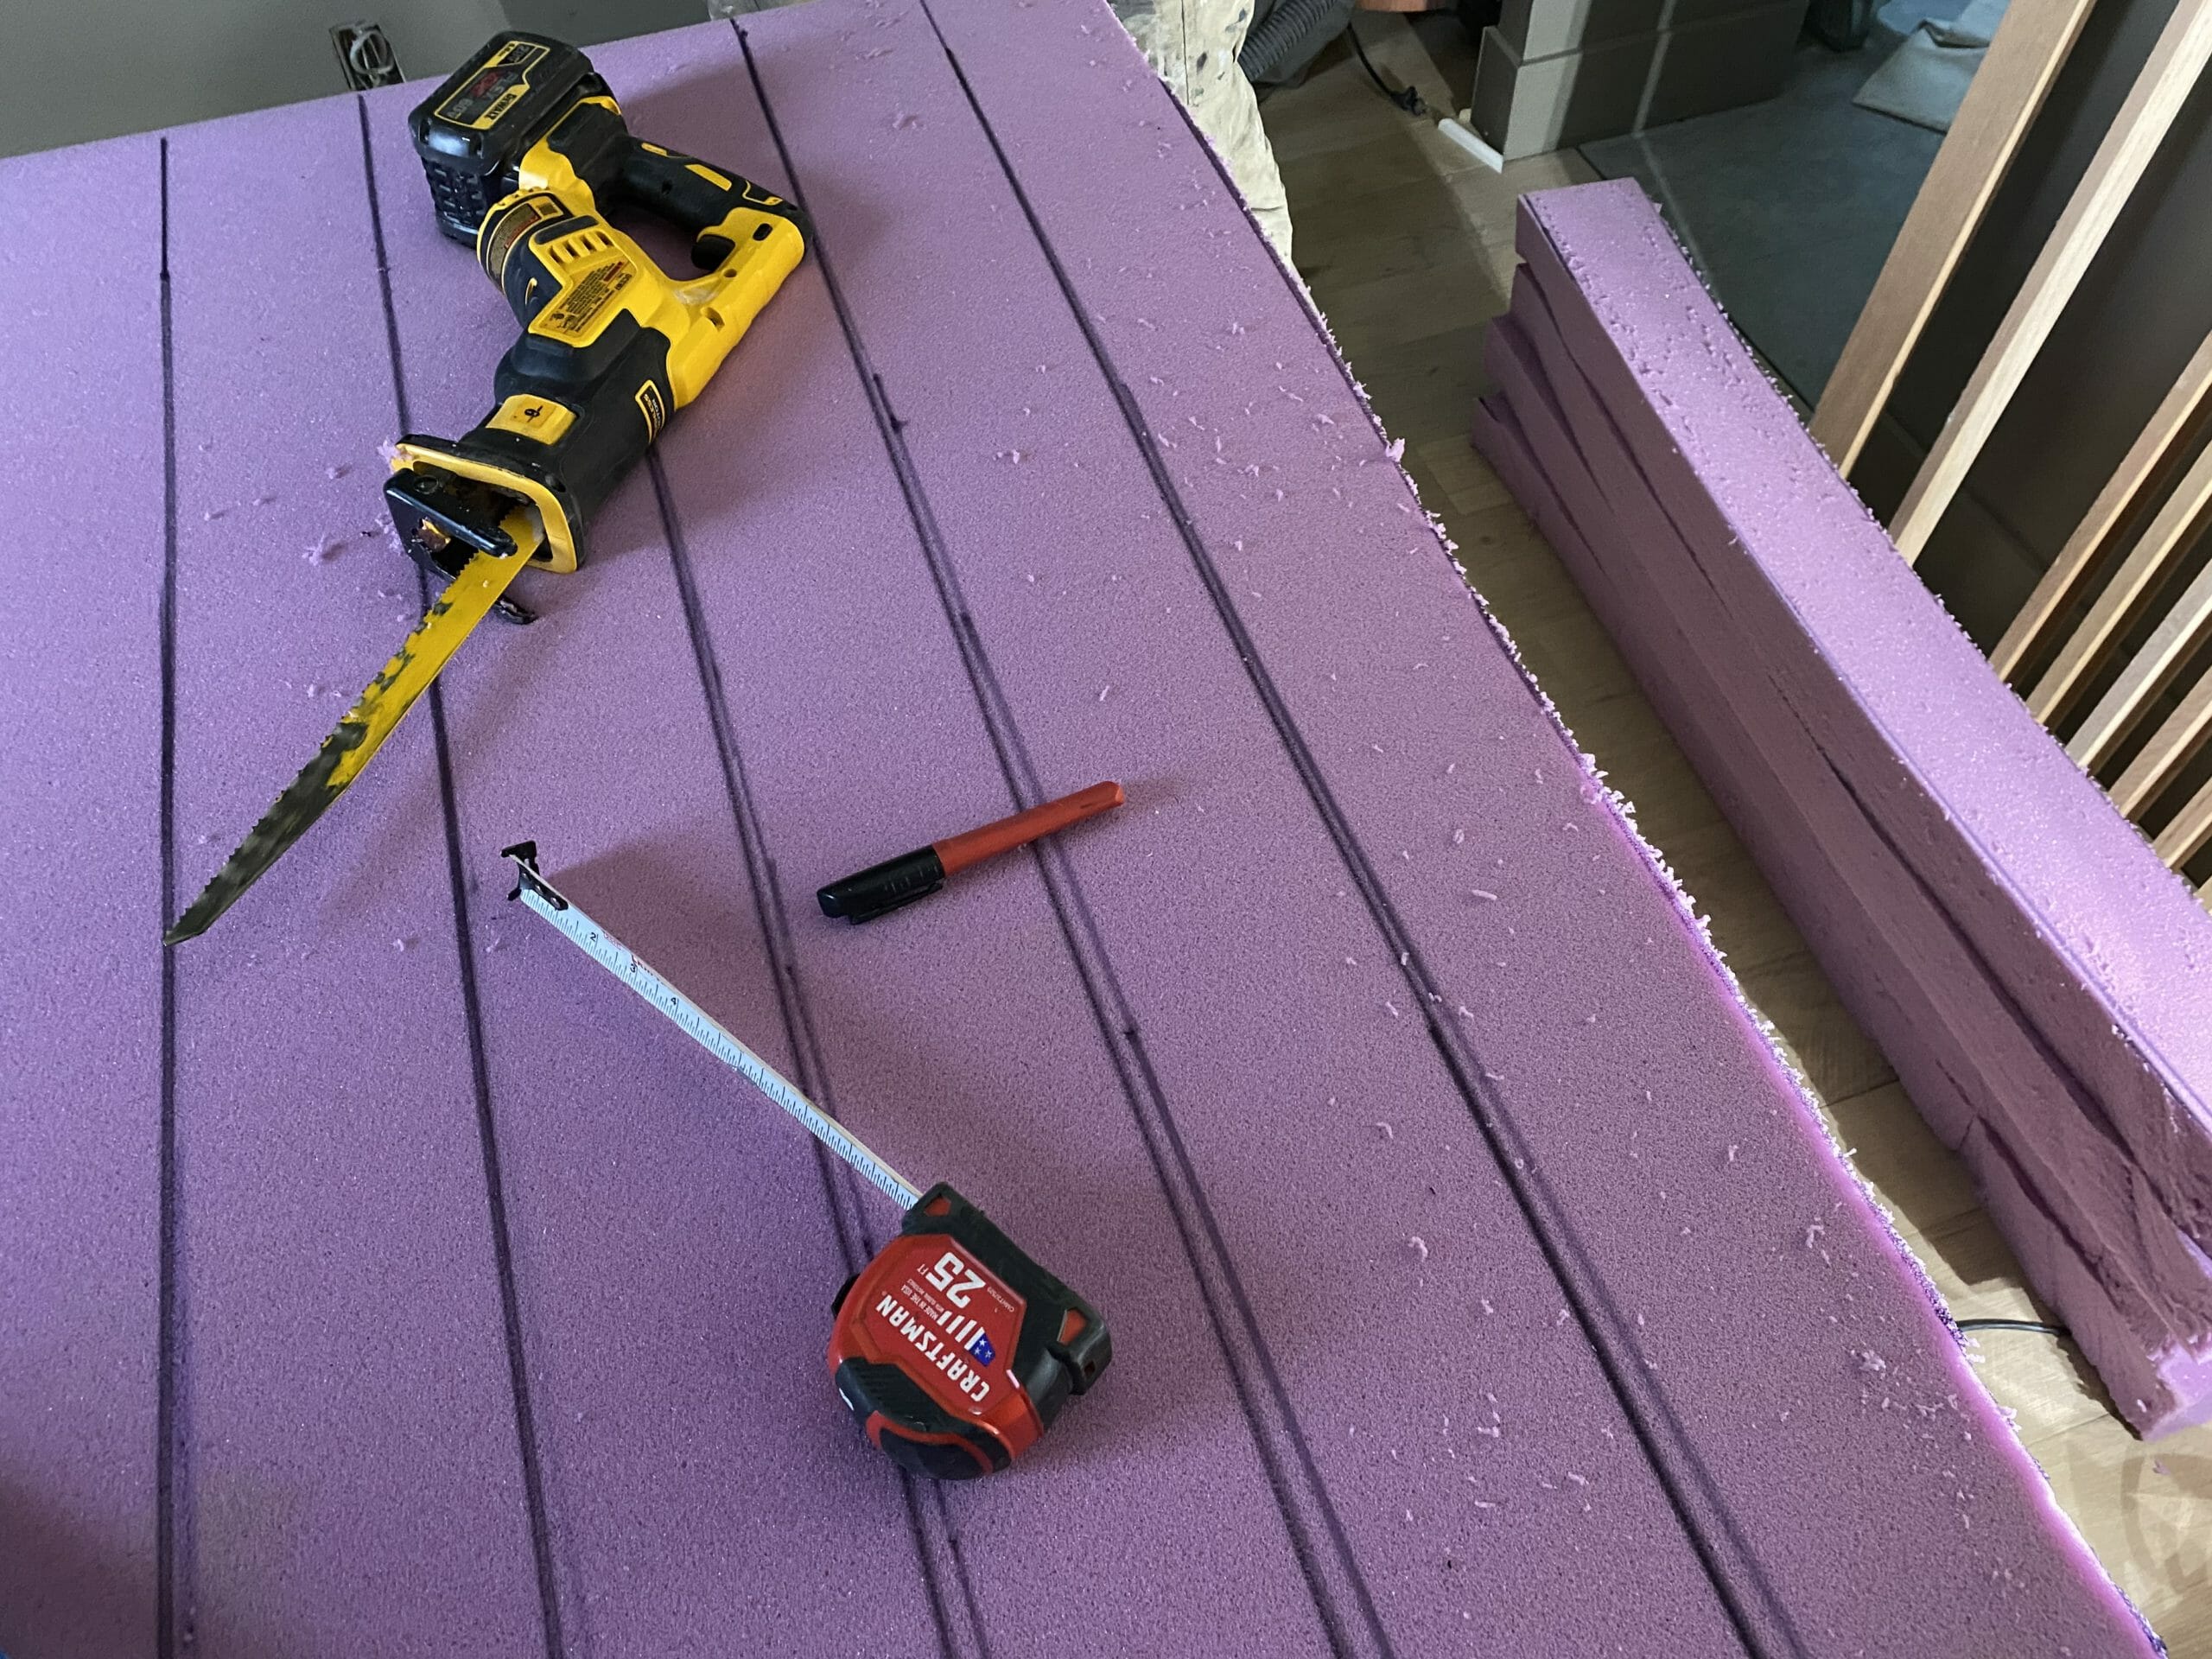
2. MEASURE AND CUT FOAM
We used a 3″ memory foam topper from Lowe’s for this project because it was more economical than buying foam from a fabric store. We measured & marked lines directly onto the topper with a straight edge + permanent marker…

And then cut each strip!
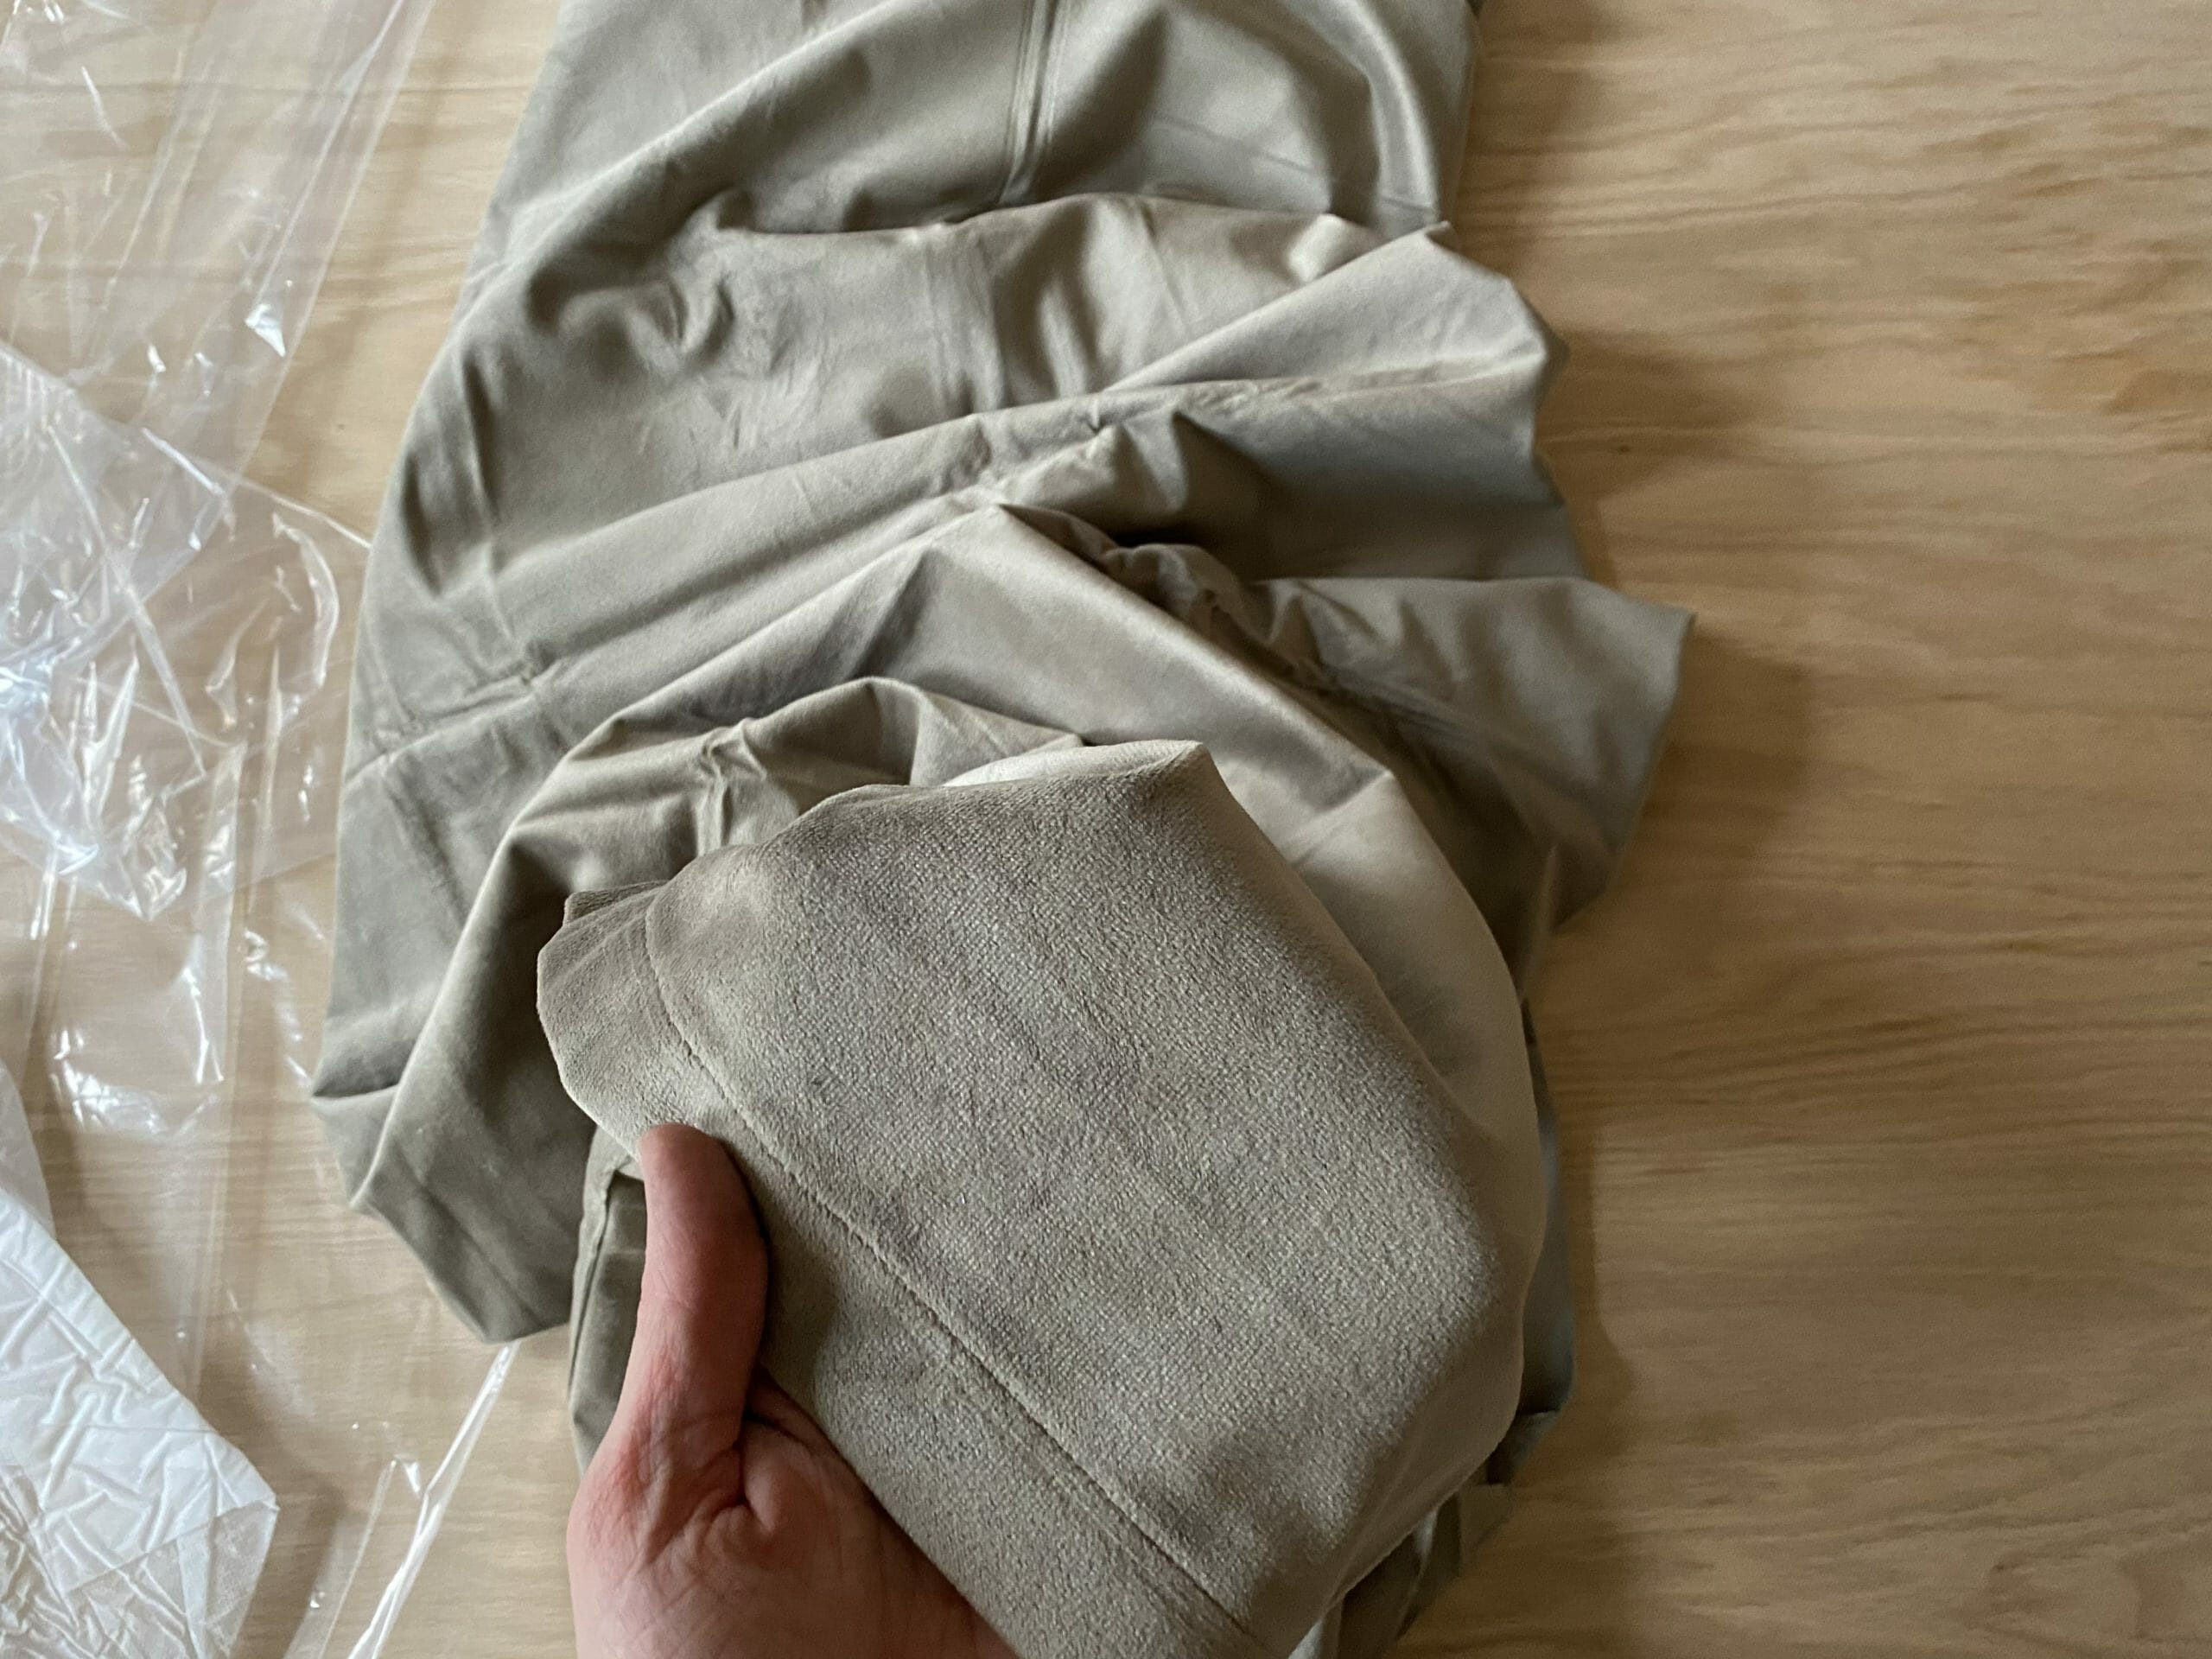
3. fabric
To make our Queen headboard, we used 2 of these Allen + Roth velvet curtain panels. Each curtain panel is 54″ x 95″. We were able to get about seven 55″ strips out of each panel, leaving some room for error (there was definitely some error – ha!).
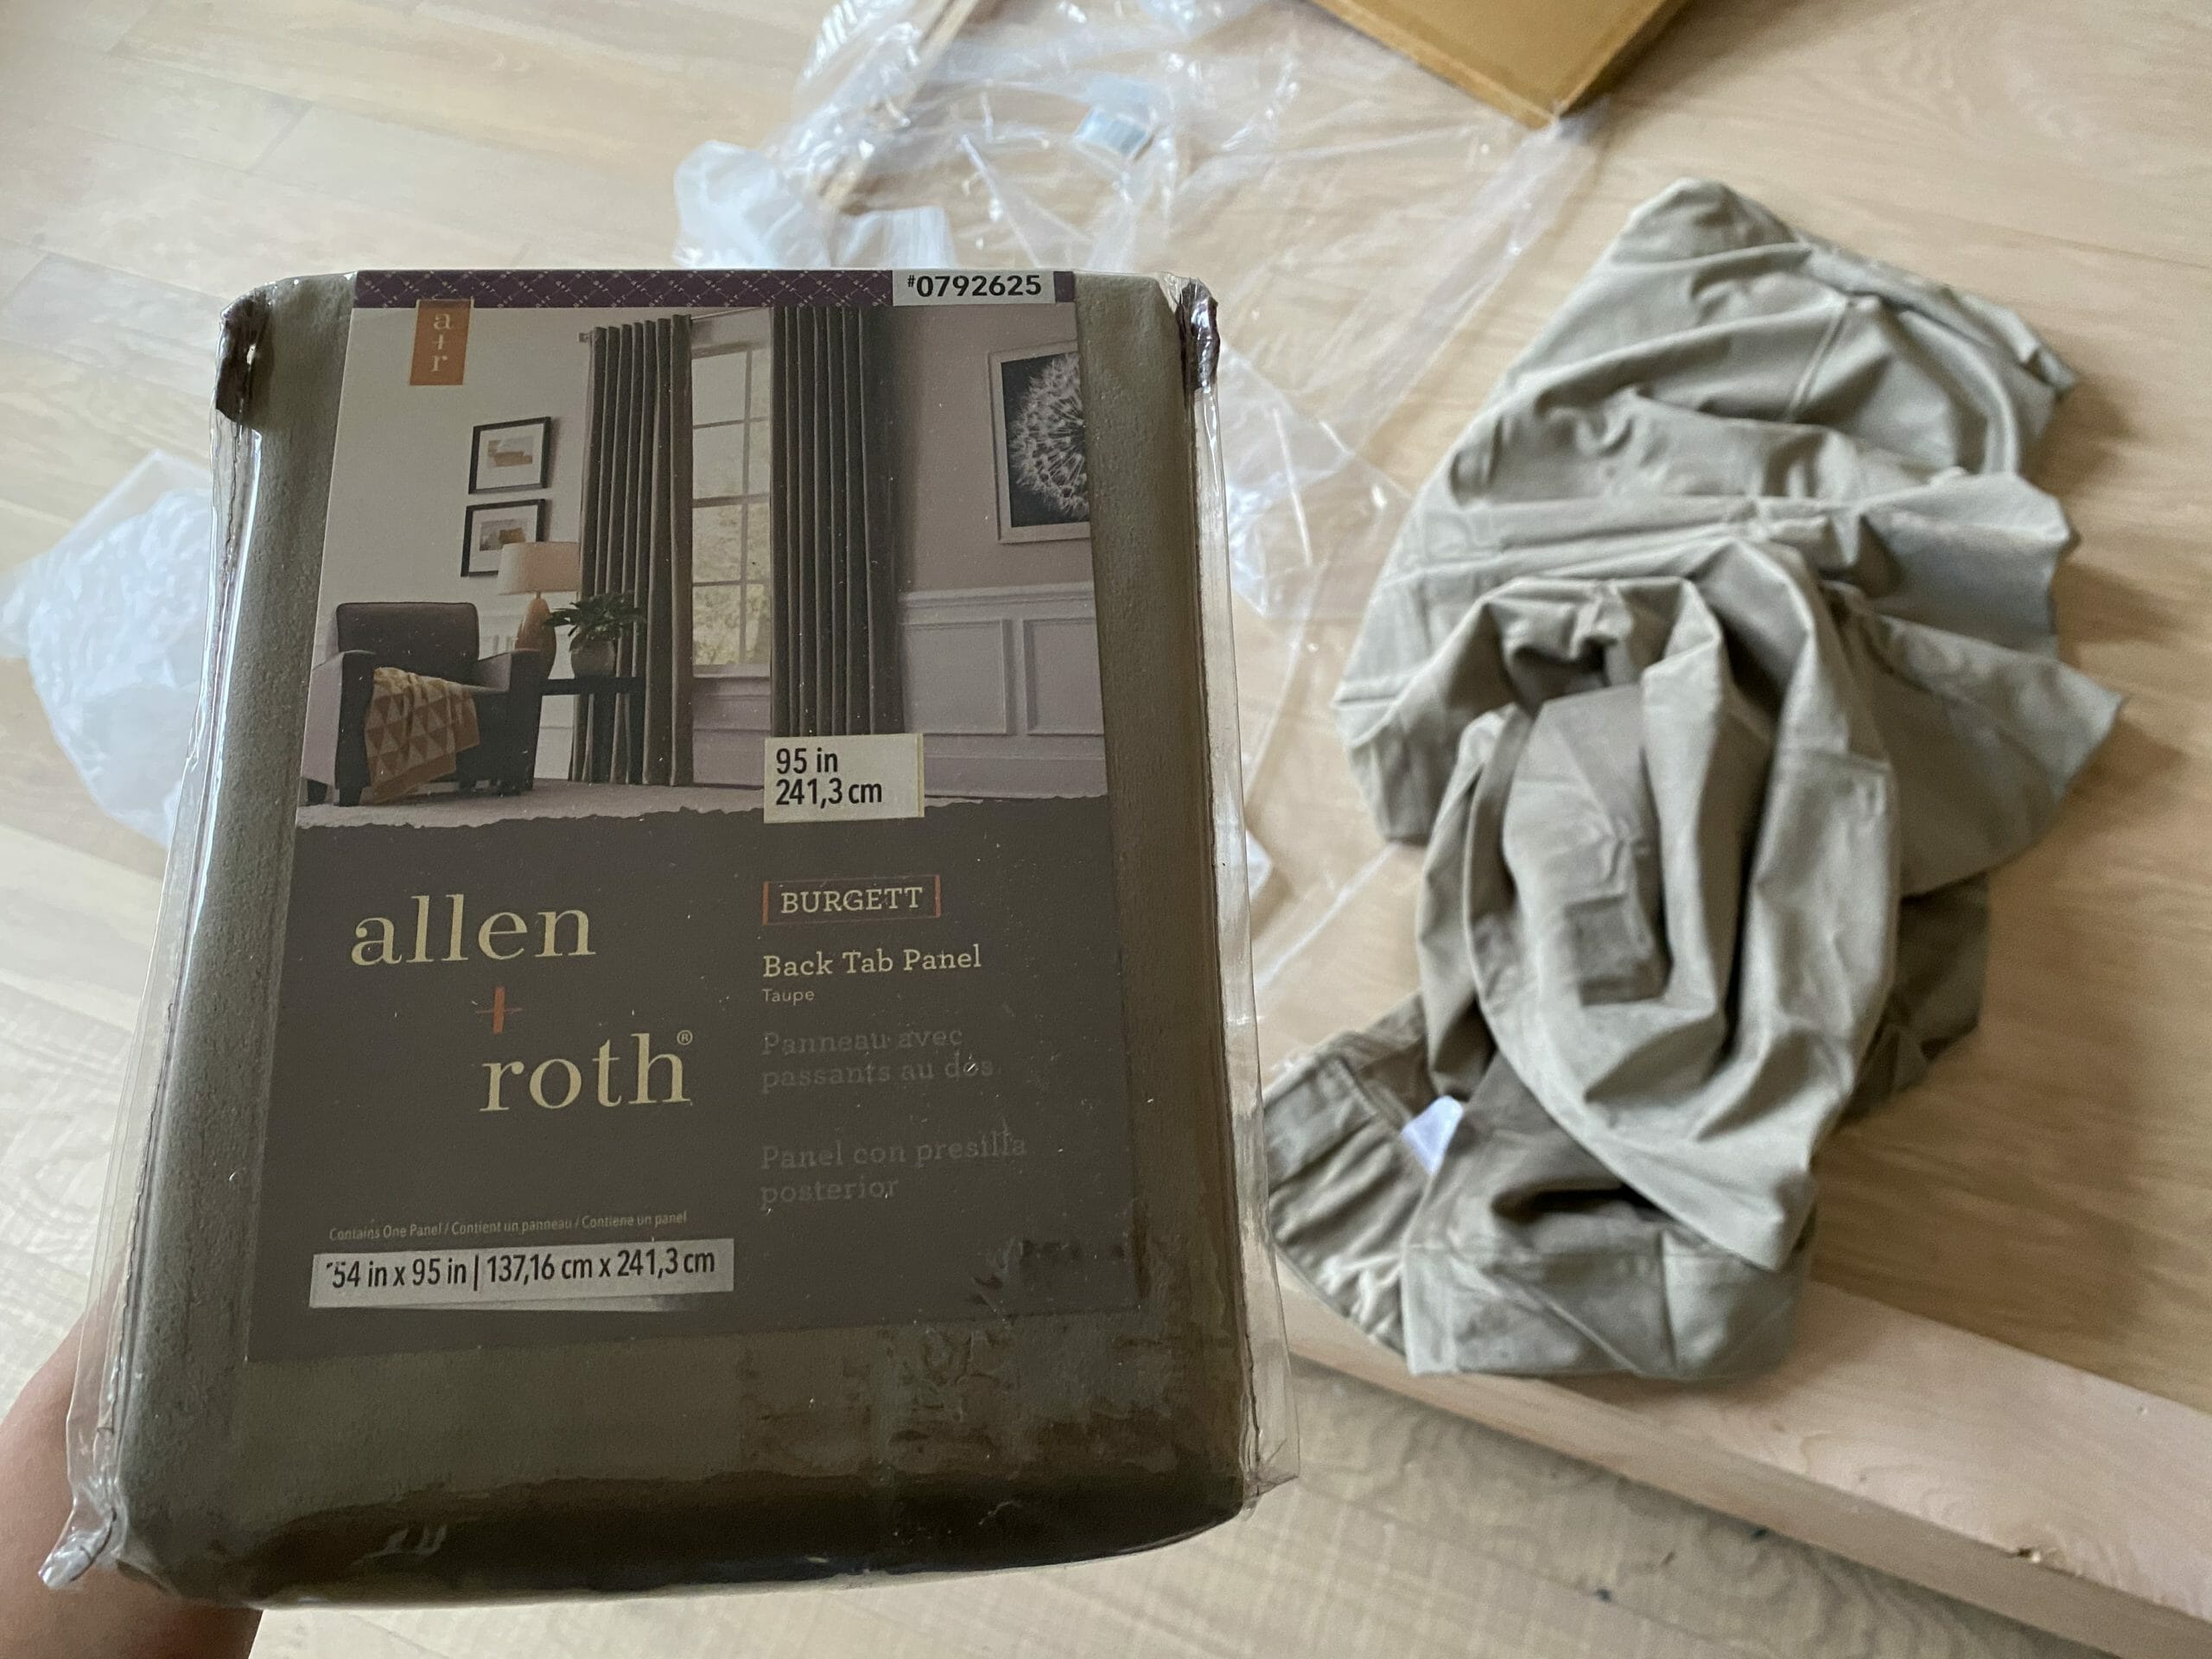
These looked way more brown online, so we were happy to find out that they were more of a true taupe in real life.
4. wrap plywood + foam in fabric
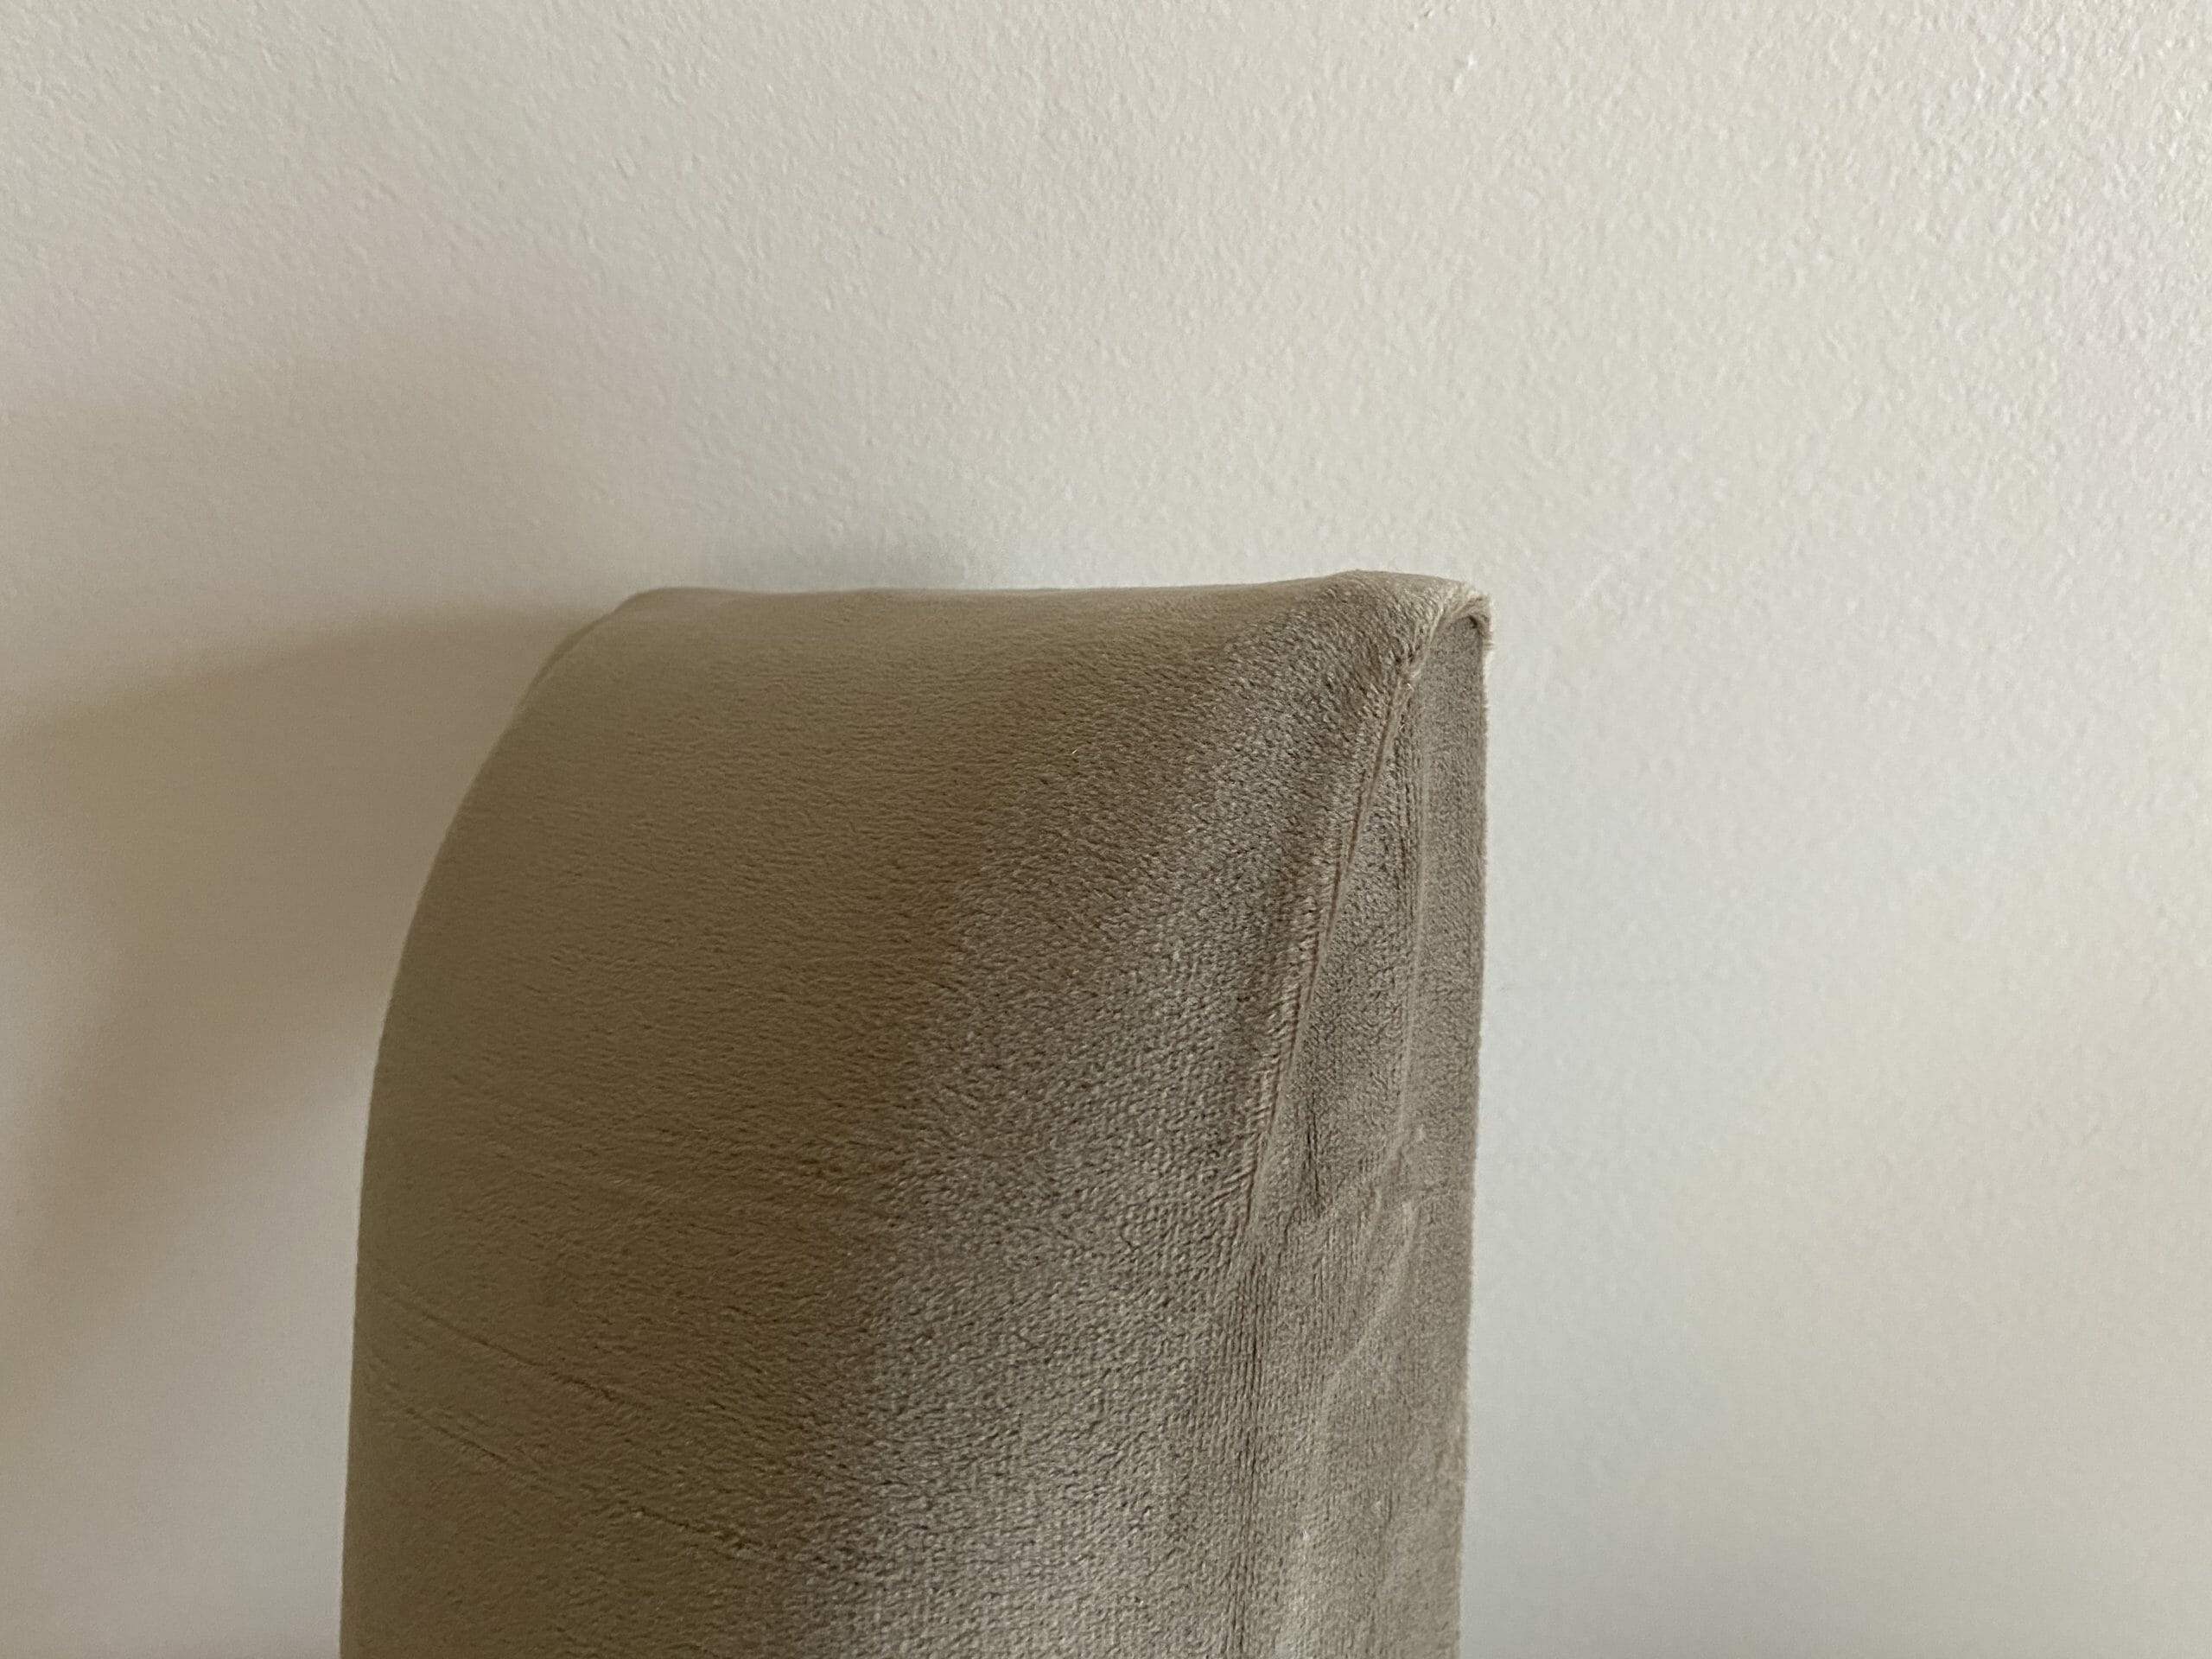
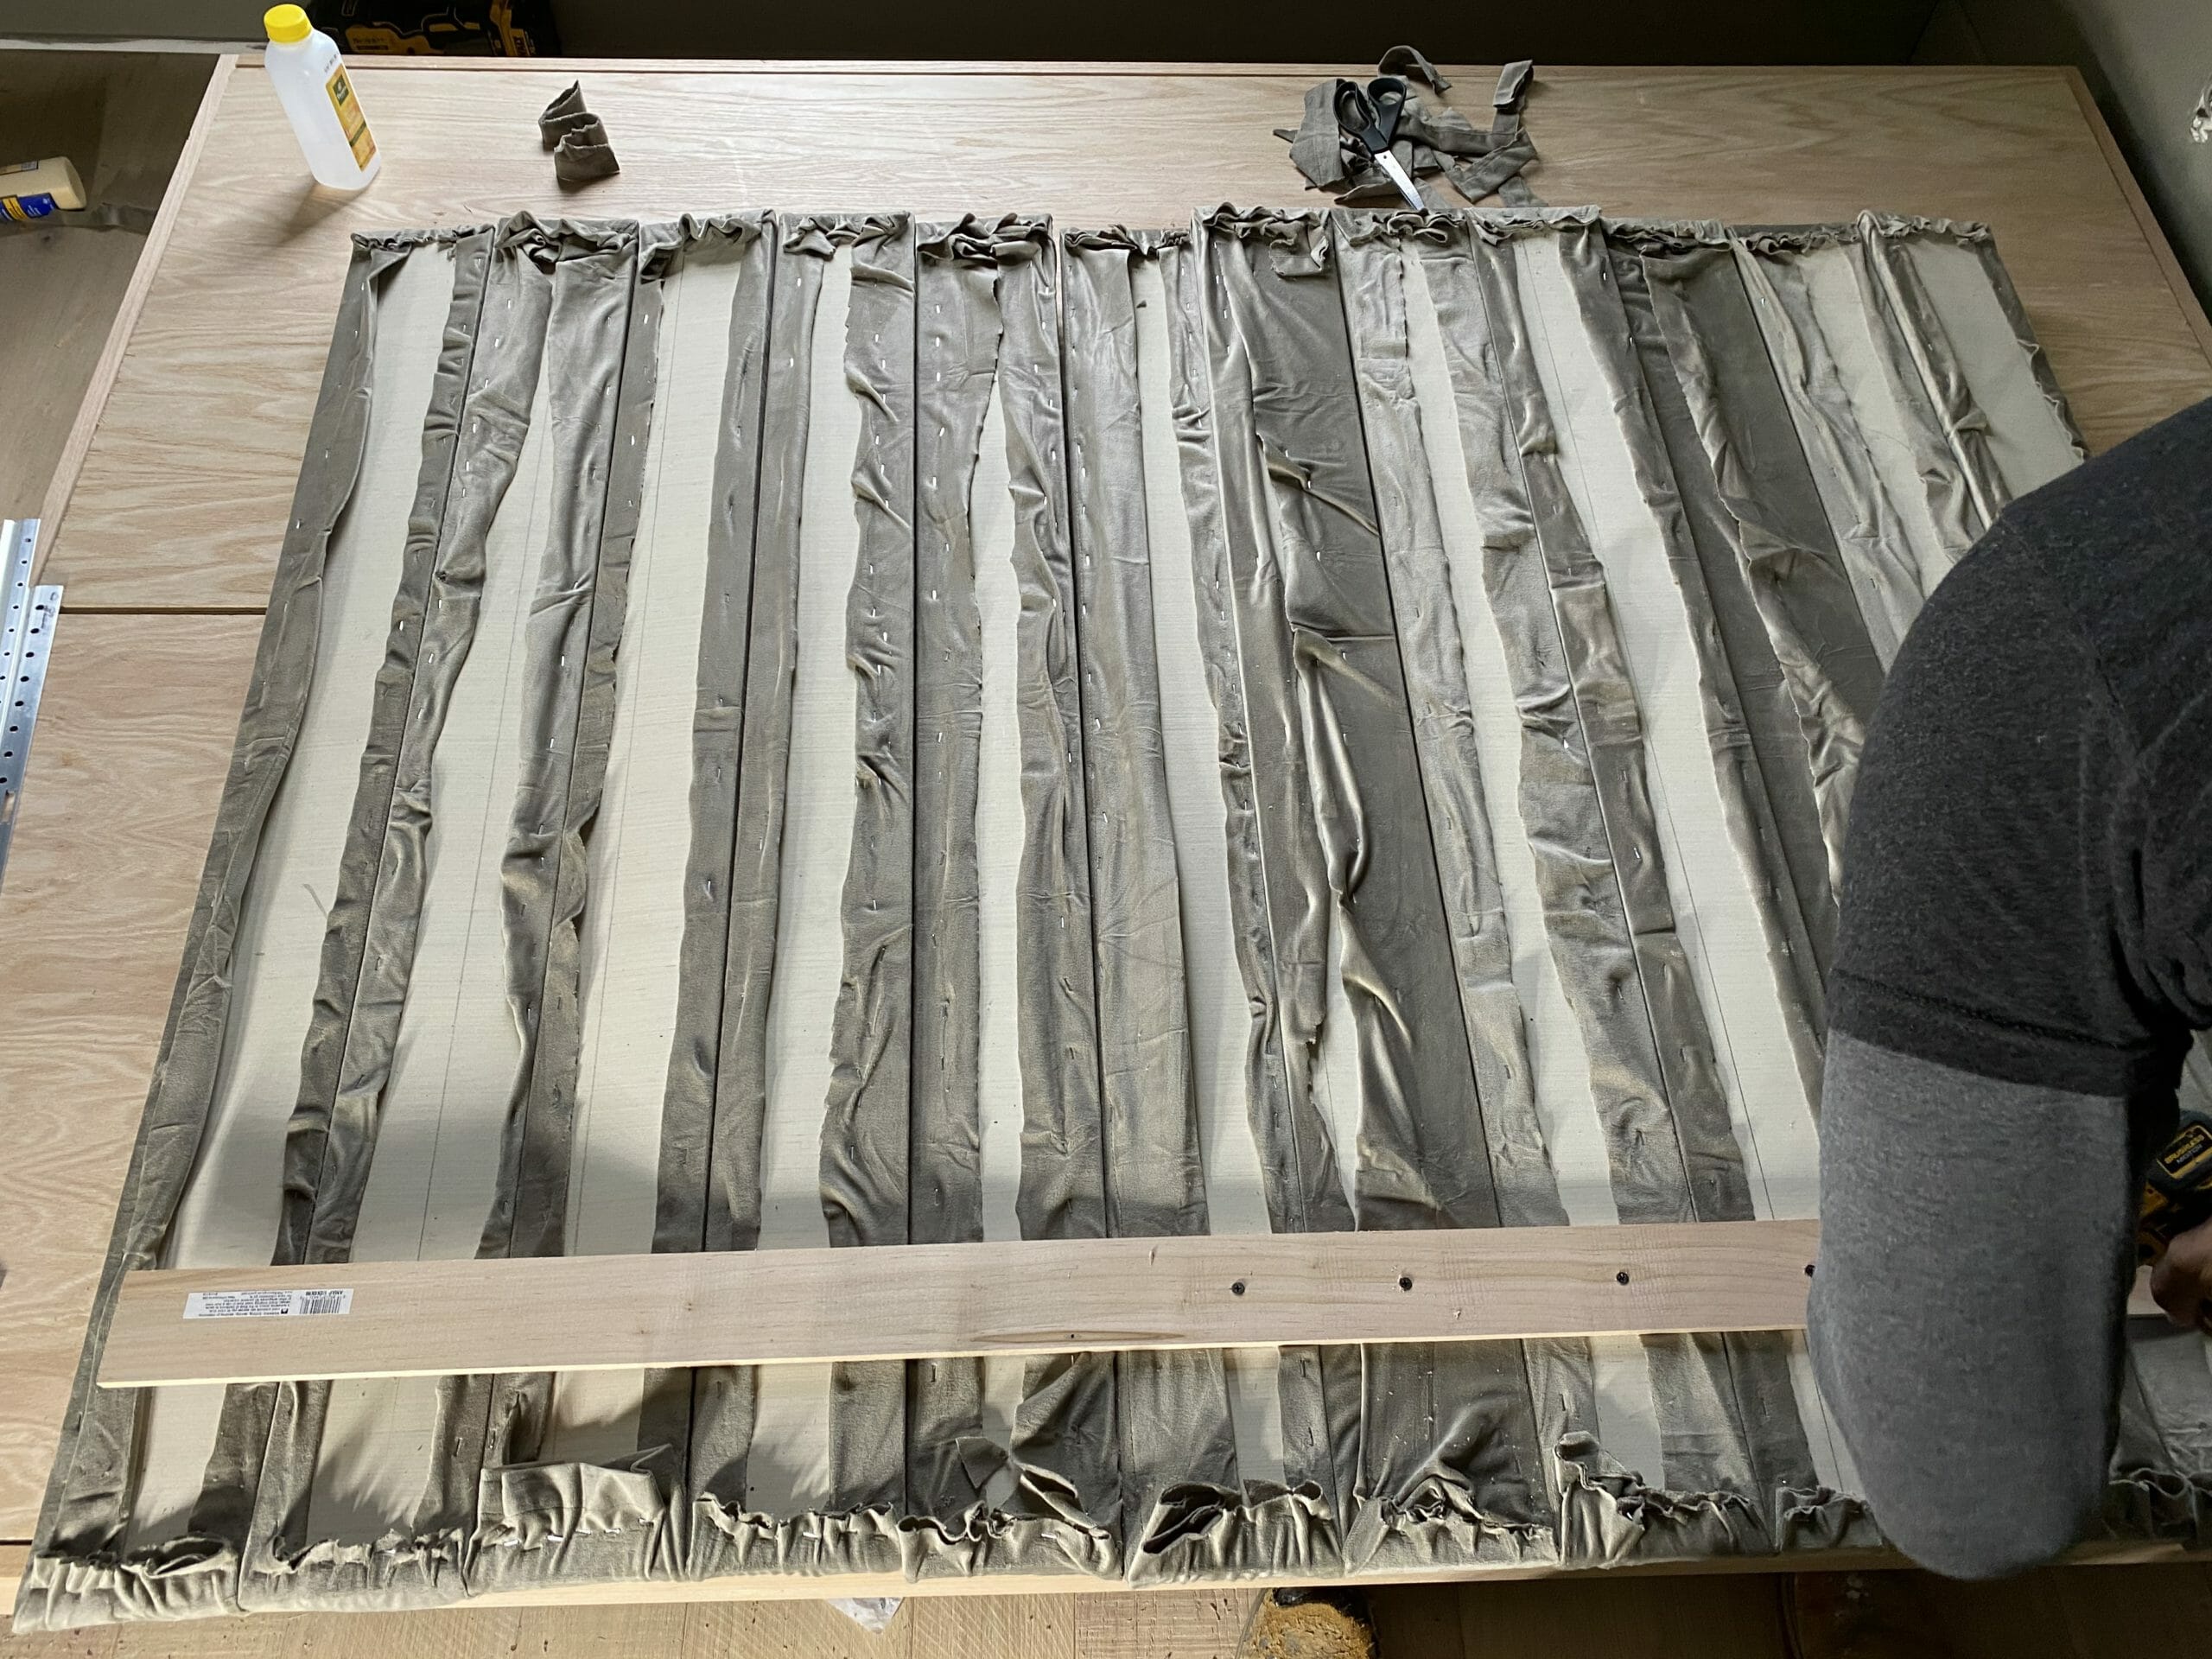
We sprayed this adhesive onto each strip of plywood and placed a piece of foam onto each. This helps the foam from shifting while you’re handling it. Once it dried (it was quick – a few minutes), we got started. We placed each strip of fabric upside down, then the plywood + foam over it.
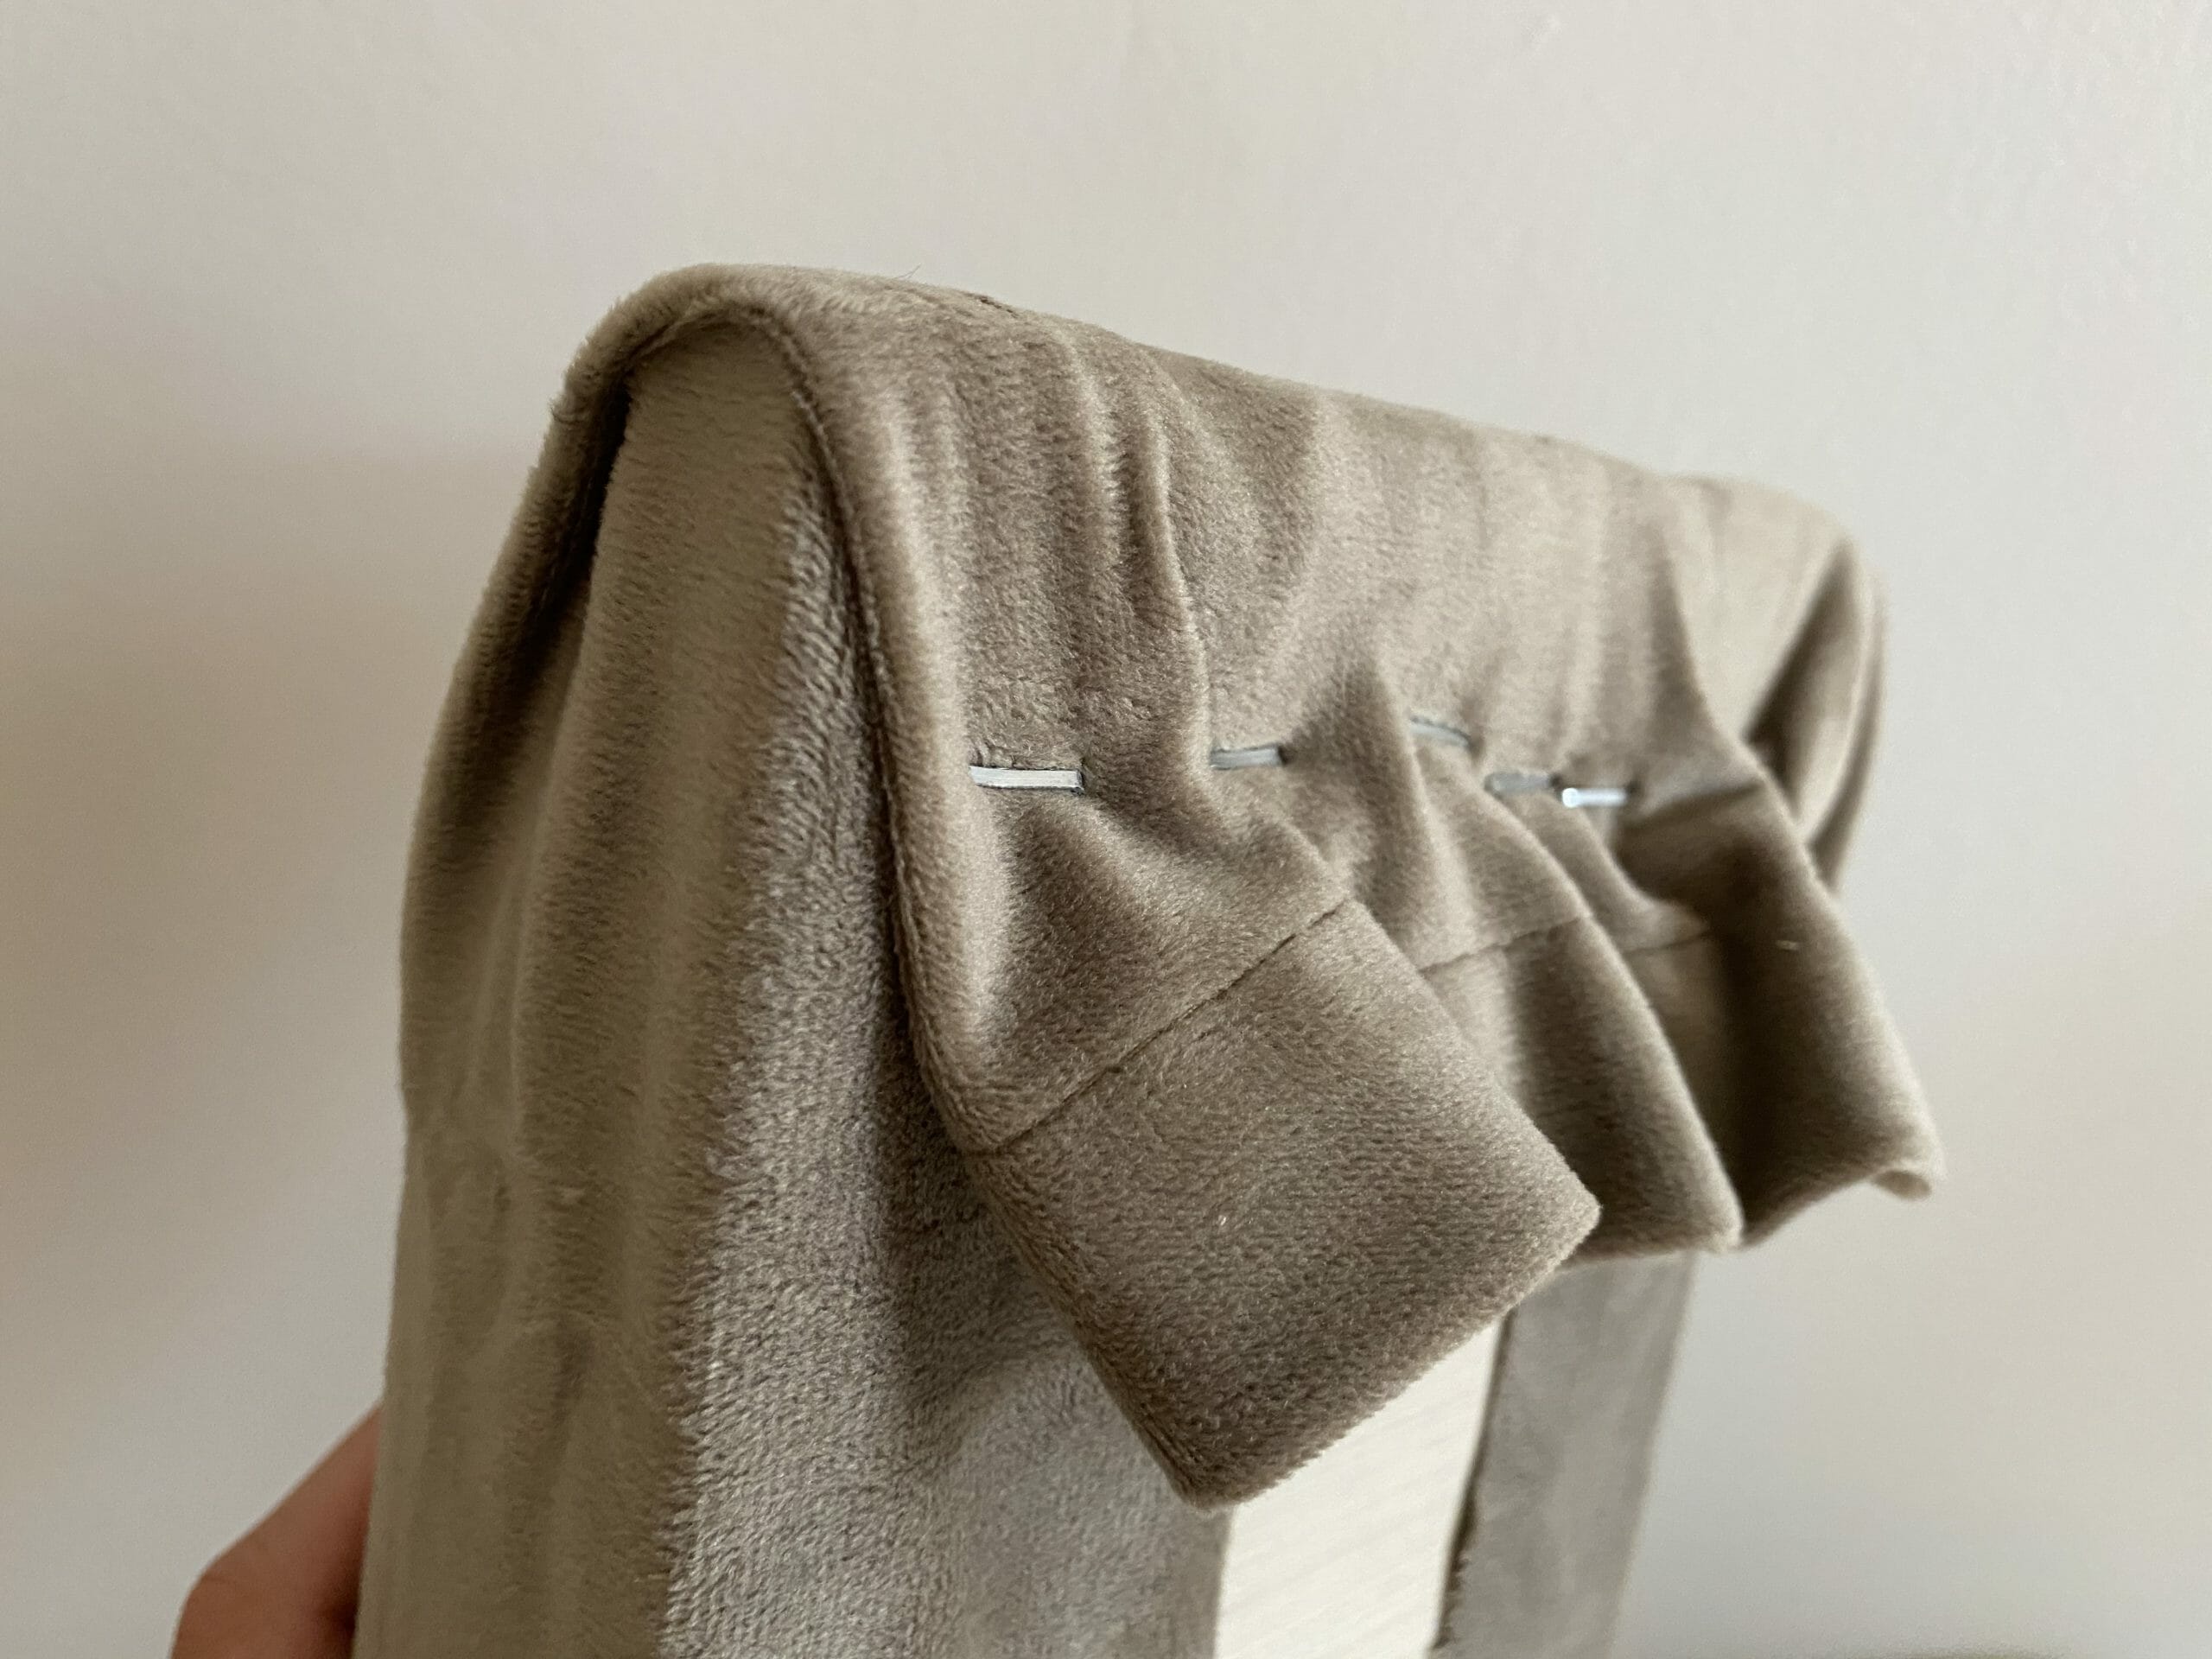
We wrapped the fabric onto the back of the plywood and used a staple gun to keep it in place. Tip: make sure you pull the fabric TIGHT, but keep your pulls consistent as you move down. Try to keep your staples in a straight line as you go, too (this is something we messed up!)
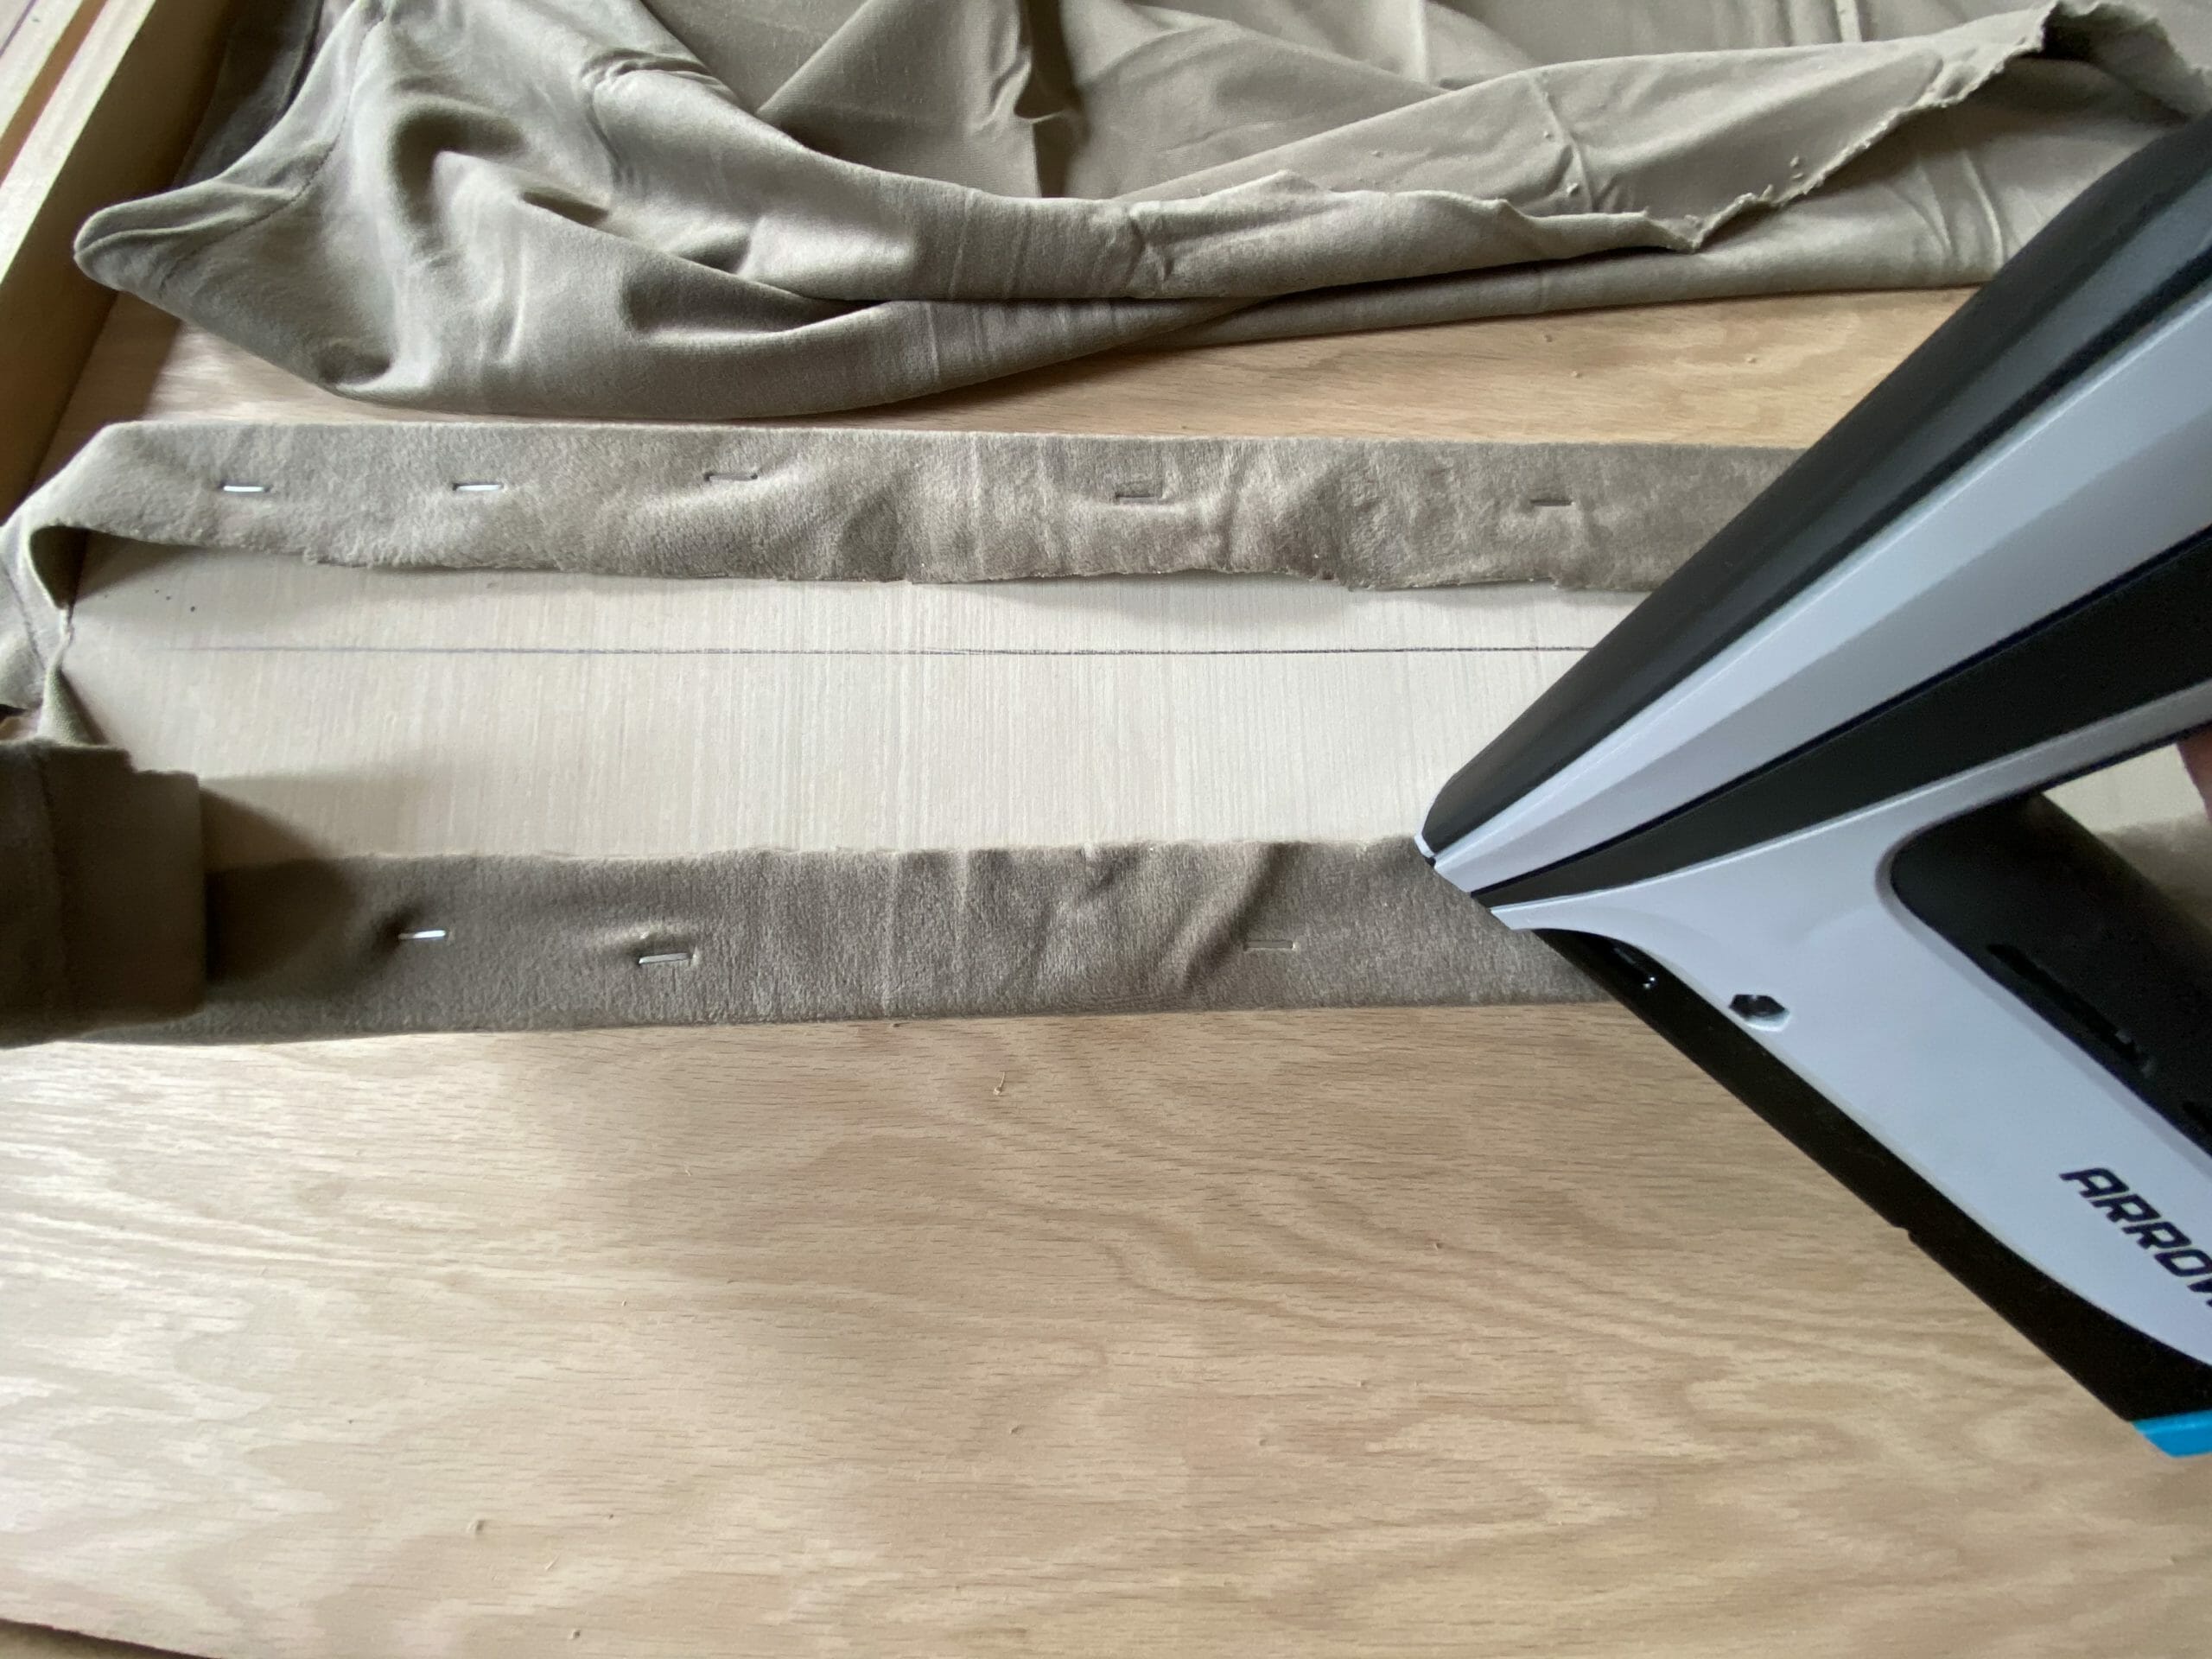
We flipped it over a few times as we moved down with the staple gun to make sure it was looking good, and adjusted as needed. Sometimes we needed to pull tighter, sometimes we needed to undo a staple that was too tight and redo it. On the top and bottom, we pulled the sides tight before the ends. The goal is to make sure each piece has a smooth surface with no loose fabric, creases or bunching.
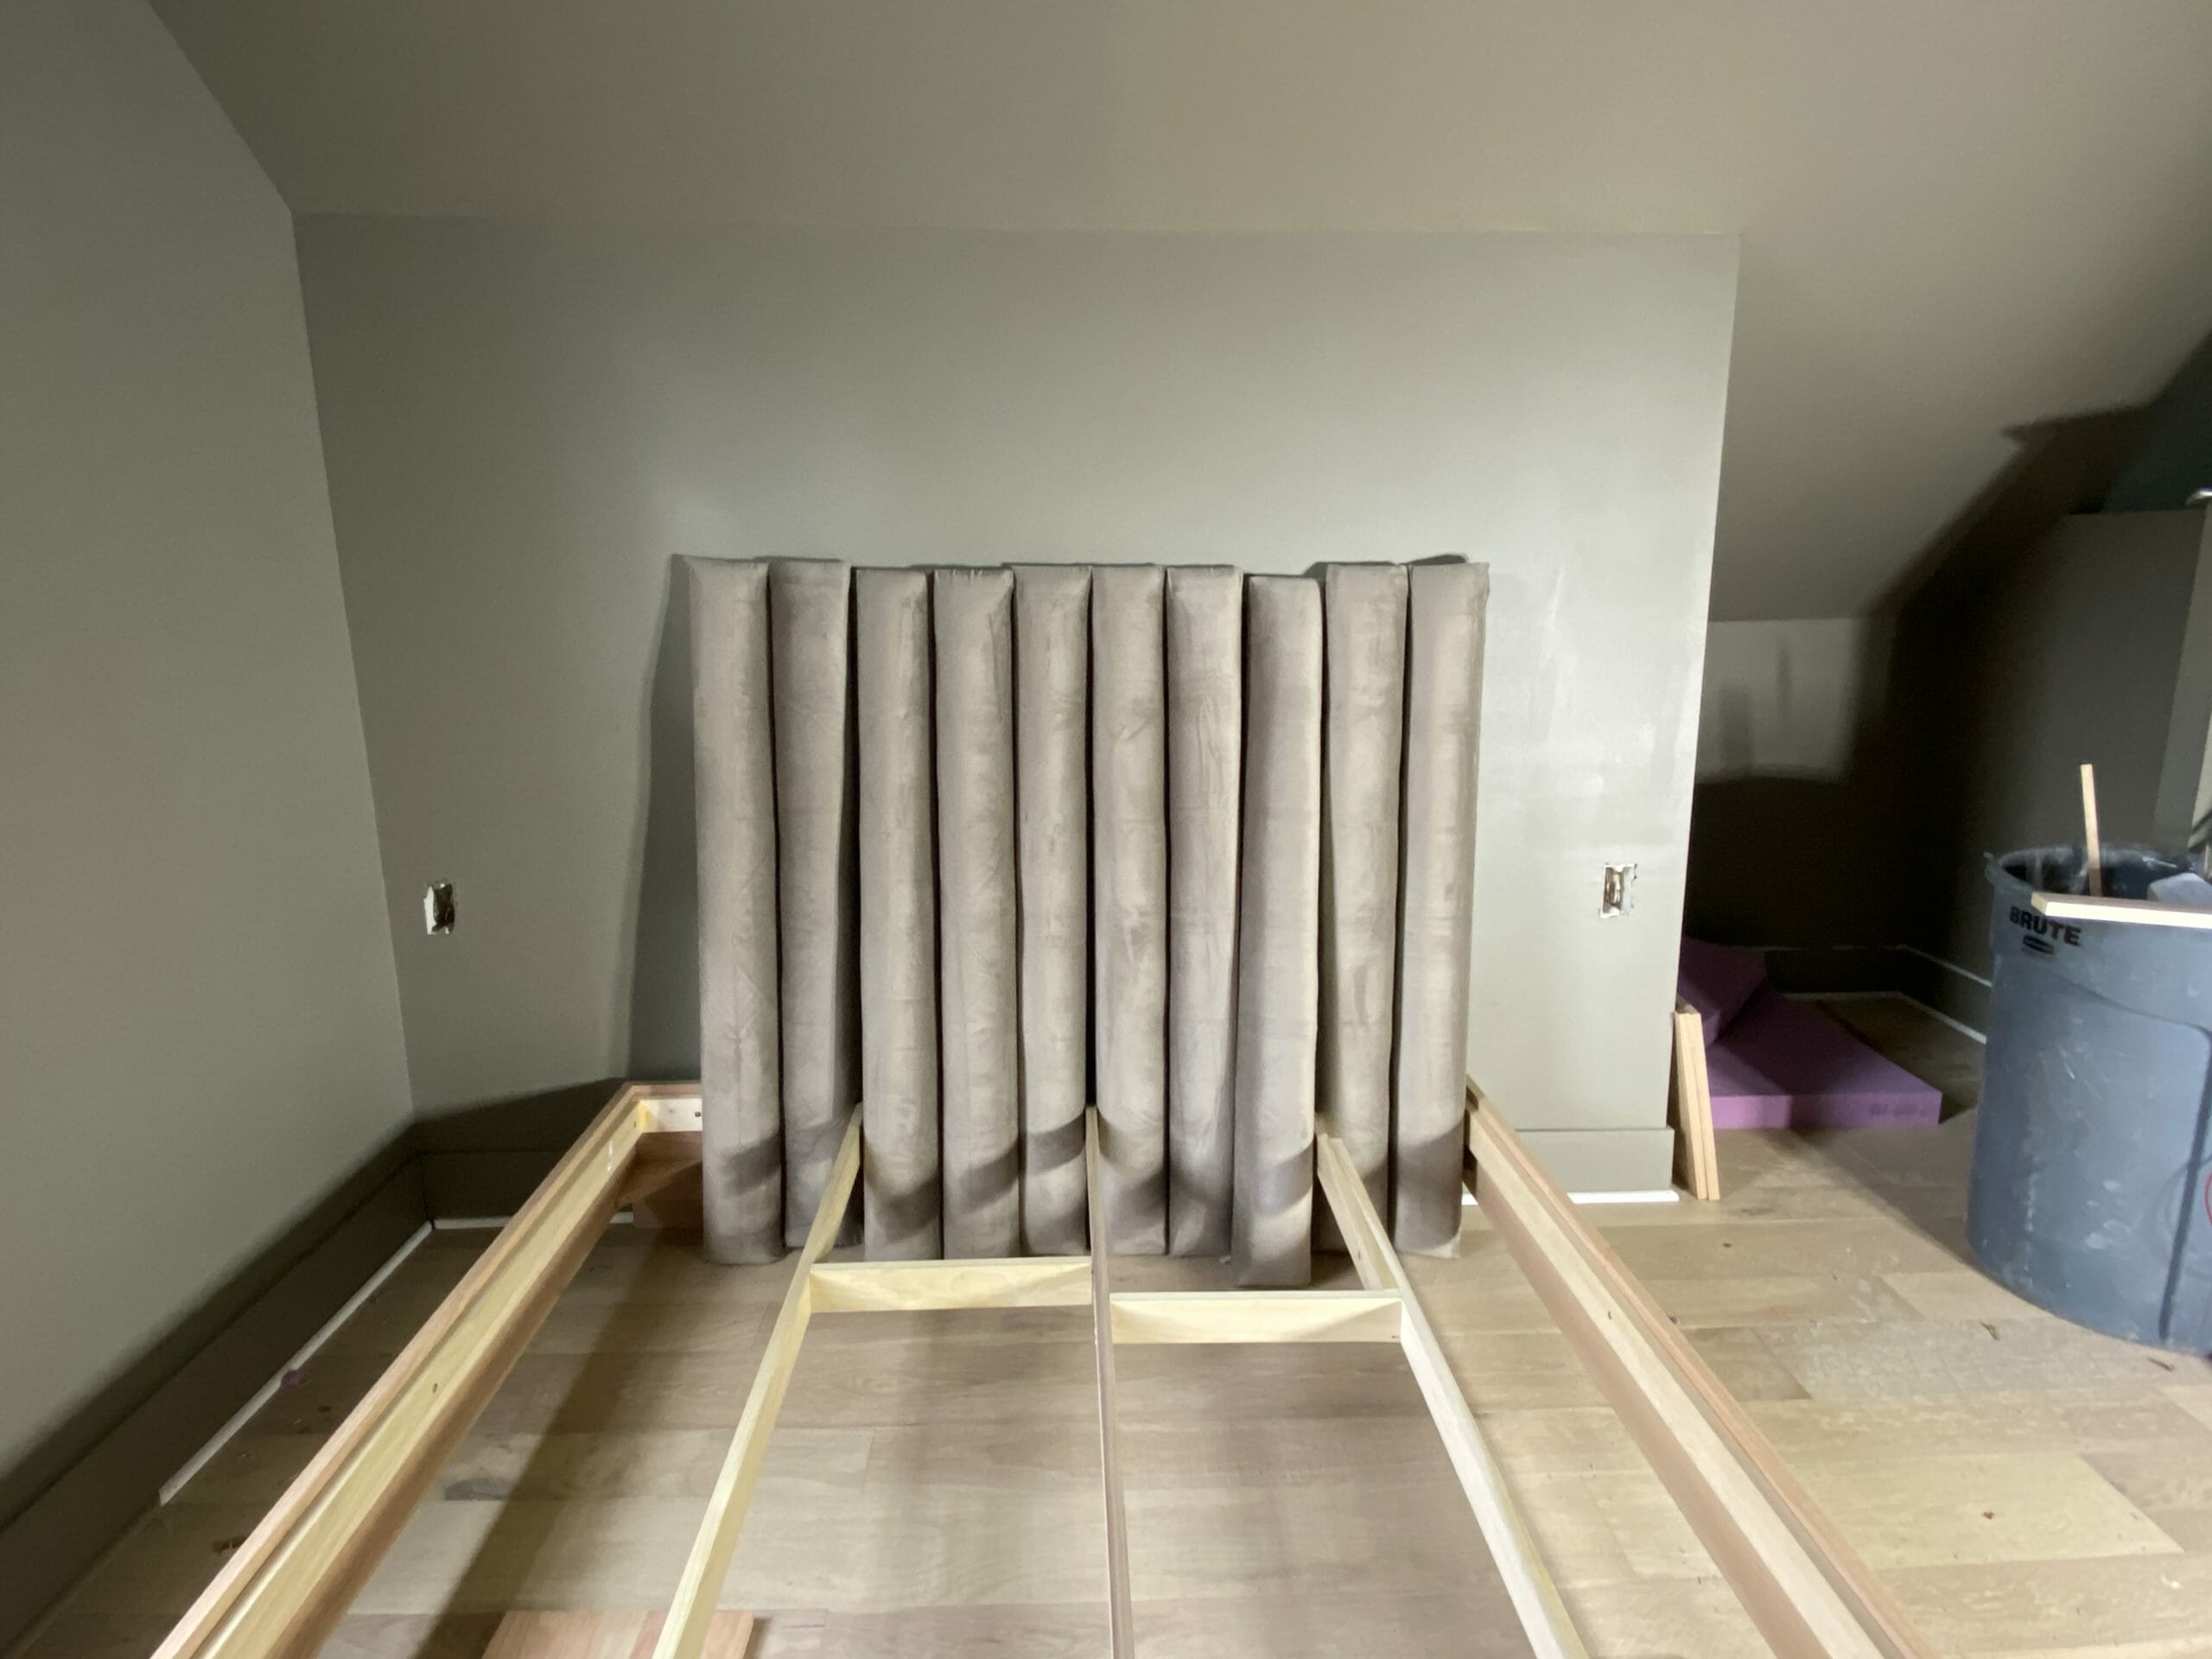
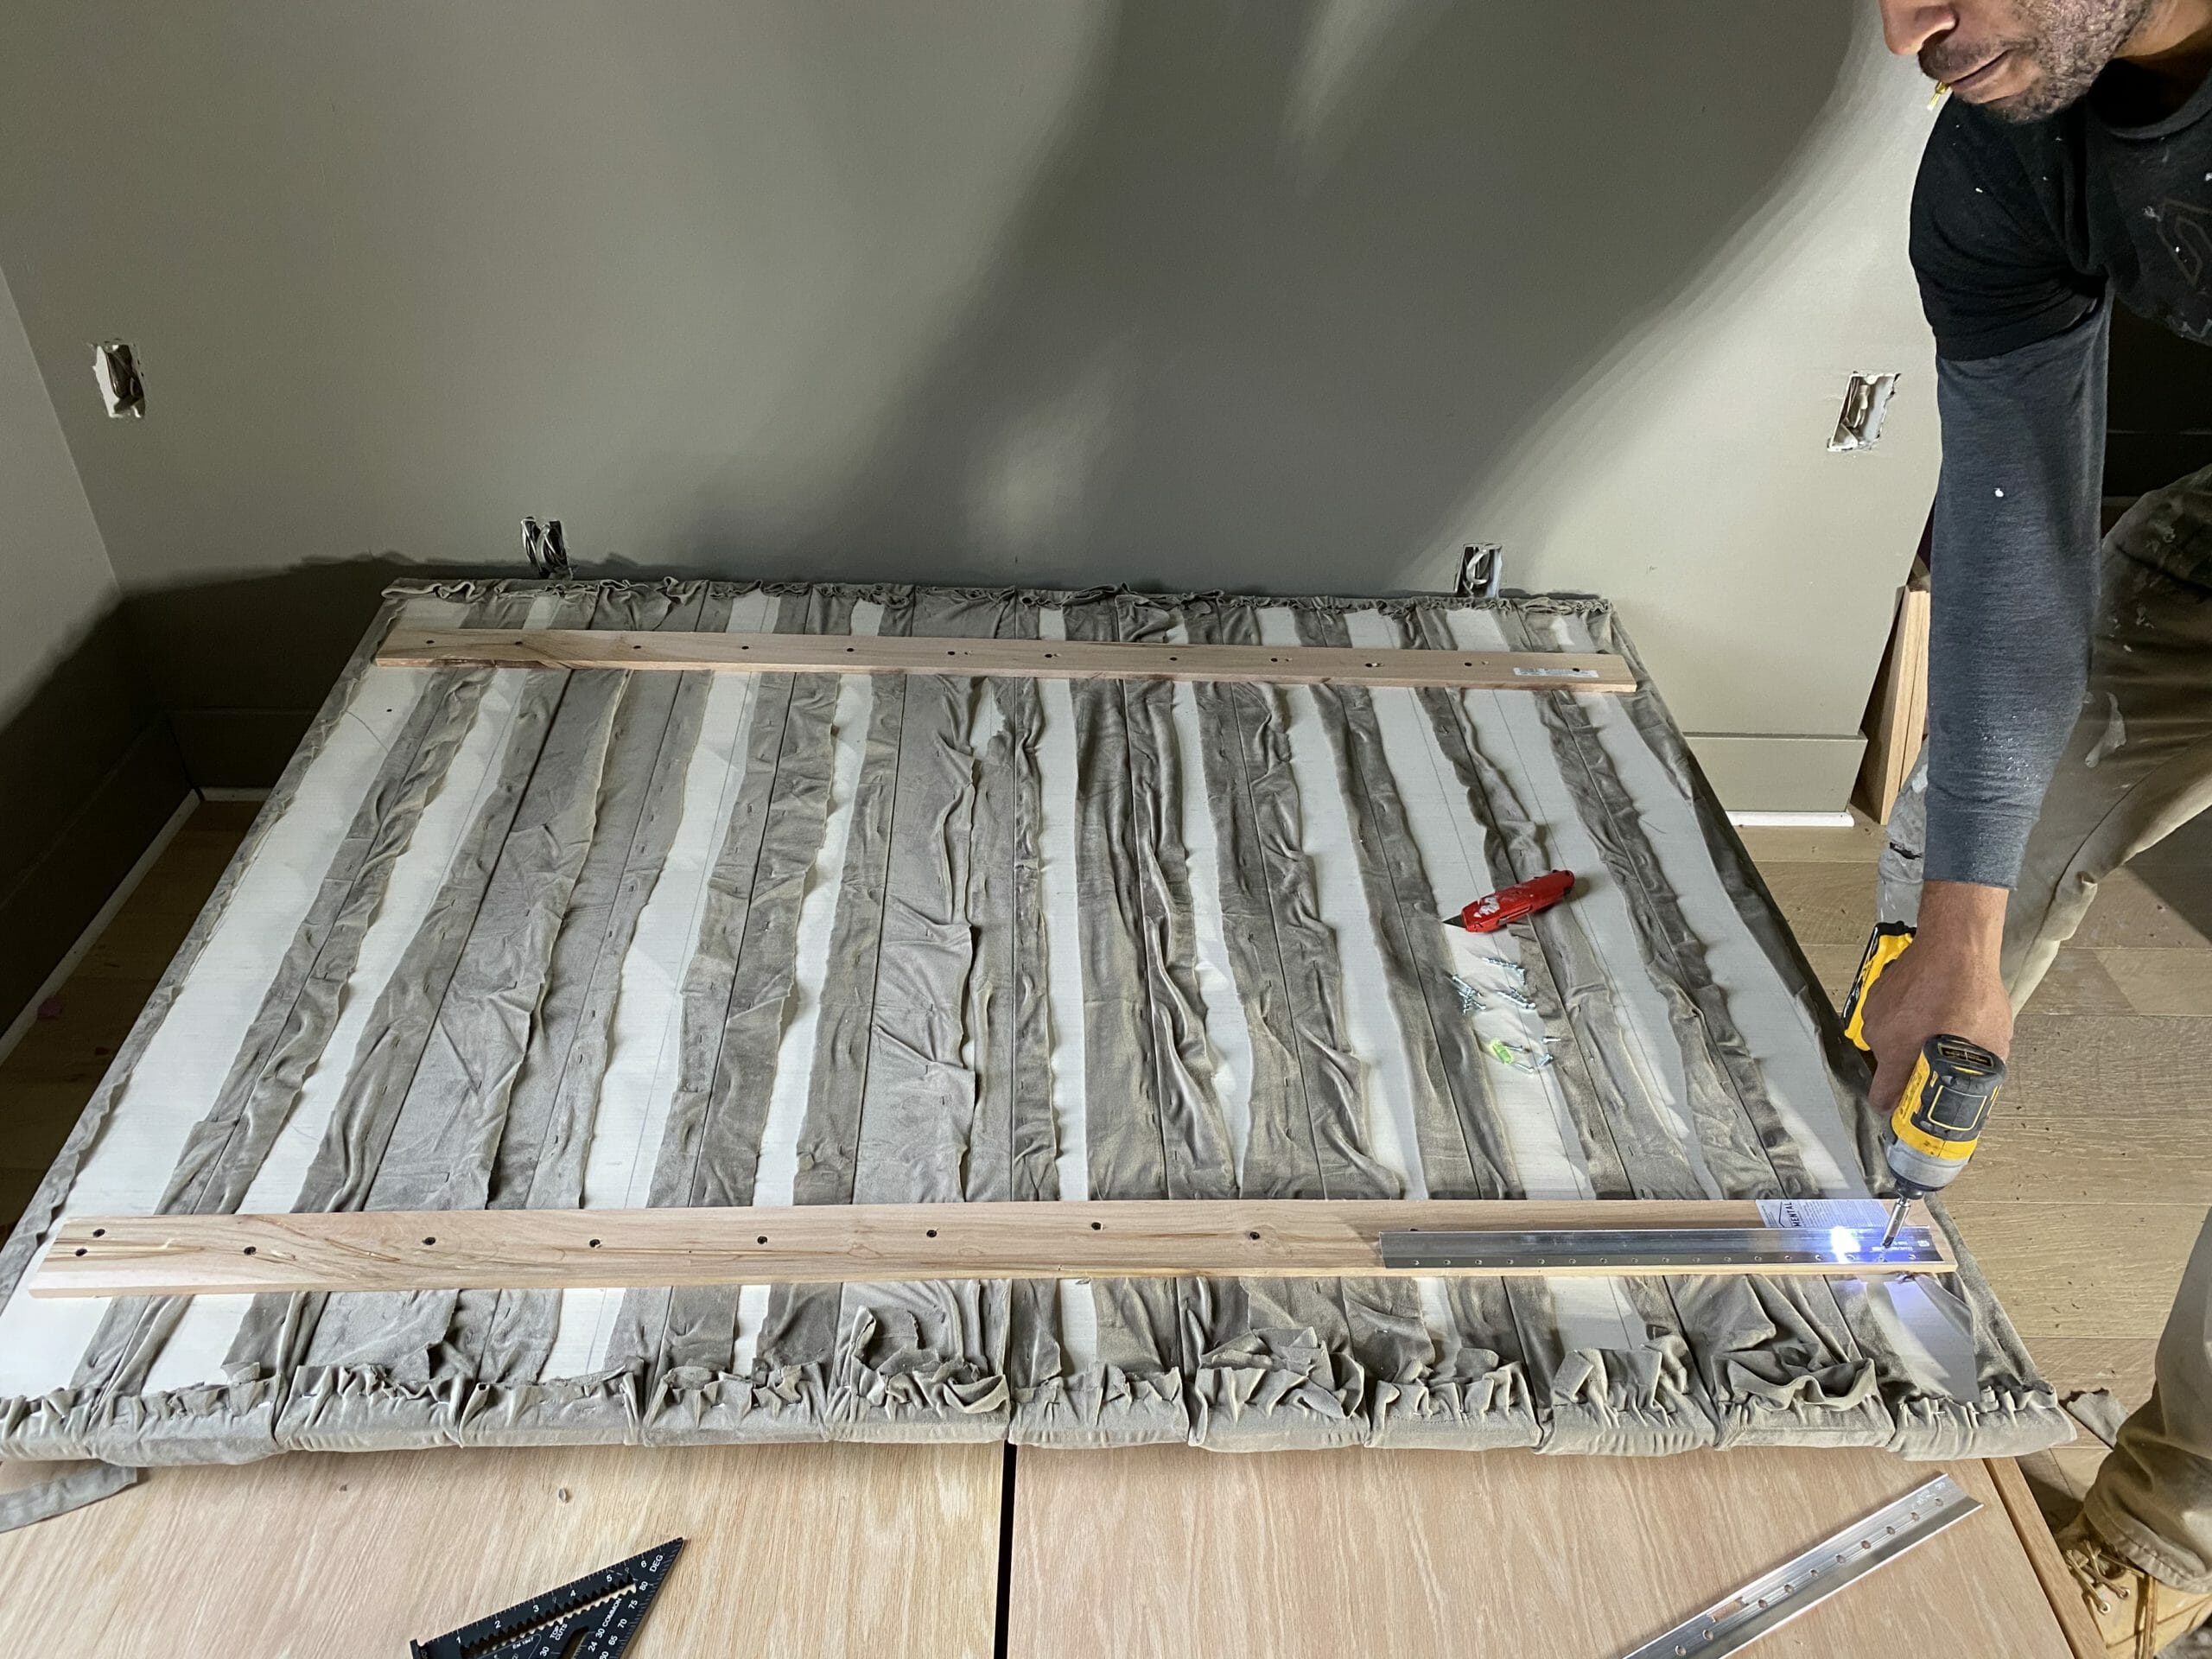
5. Connect everything + mount on the wall
Once we had all 12 strips done, we lined them up and attached two 3/8″ pieces of wood across them with screws.
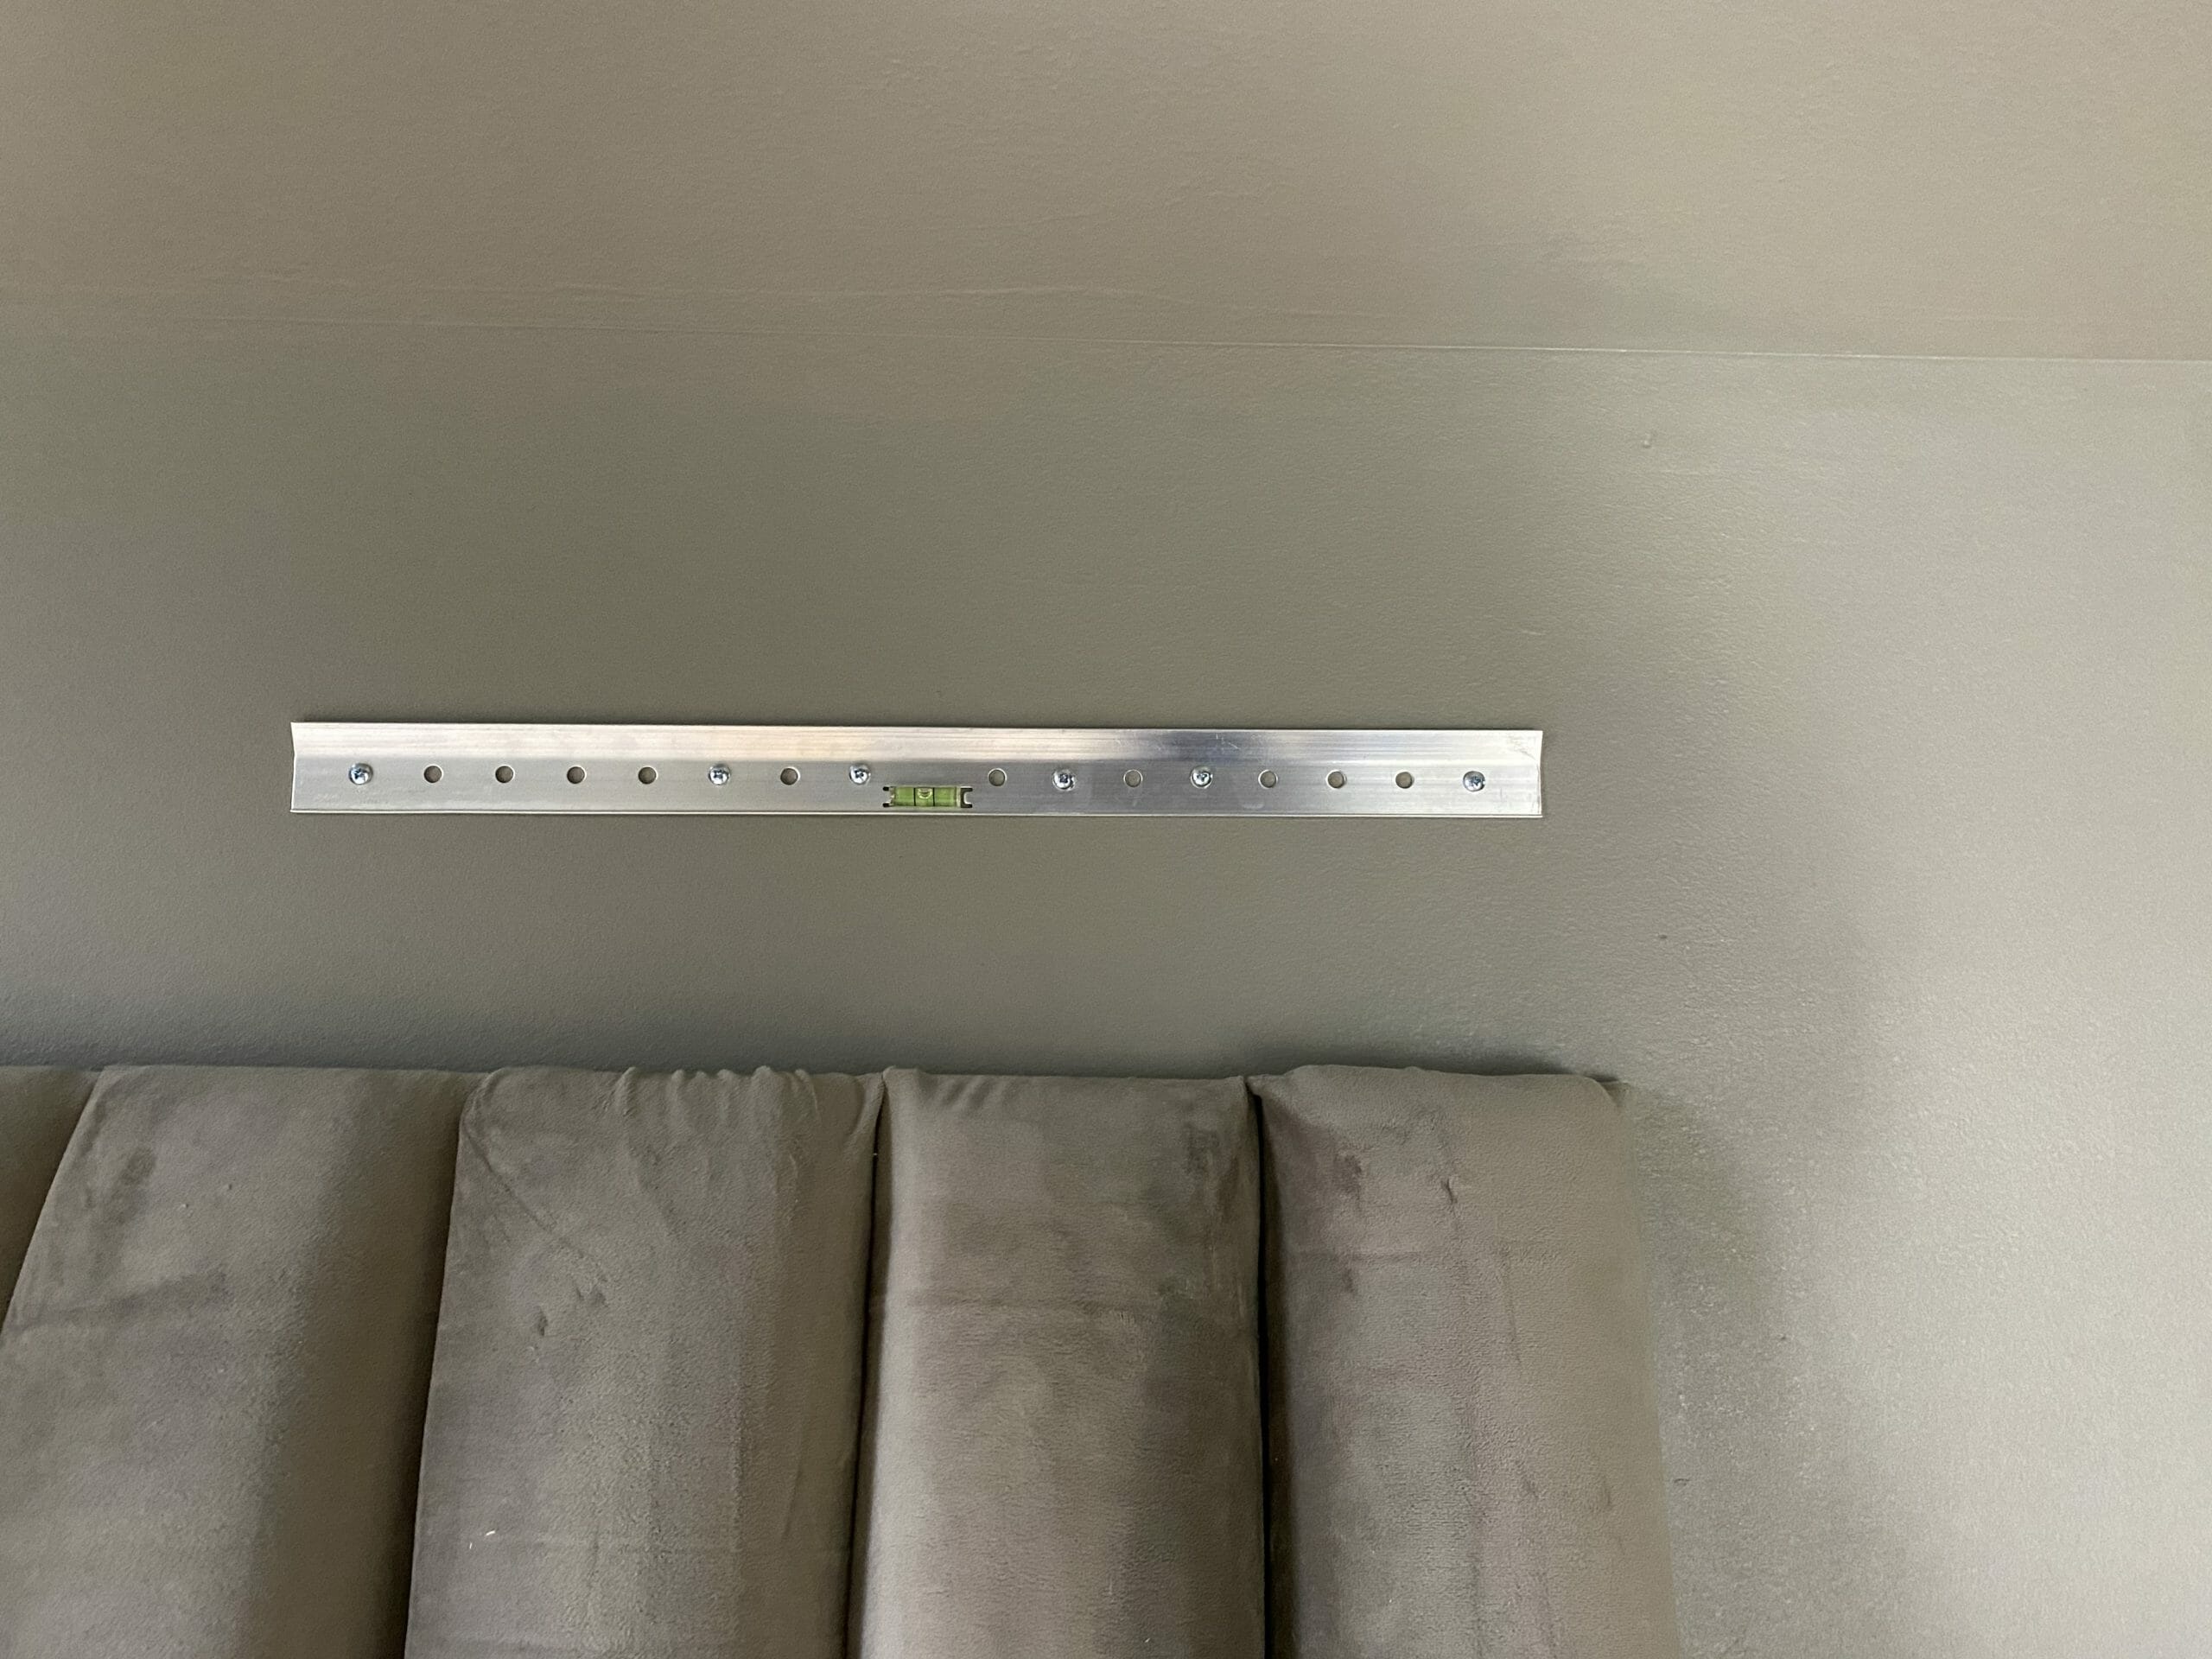
We then screwed this heavy duty picture cleat into the top strip before mounting it on the wall.
The picture hanger comes with two pieces — one that gets mounted on the wall (with a built-in level!) and one that you mount on the headboard.
Tip: Make sure your fabric is running the same direction across all tufts before connecting all of the pieces! It’s obvious when it comes to patterns, but it’s something we overlooked using this velvet. We had a few reversed, and it’s crazy how the light hit them differently. Luckily, we were able to just unscrew them and flip them around to solve the problem. Here’s what it looked like before we fixed it…
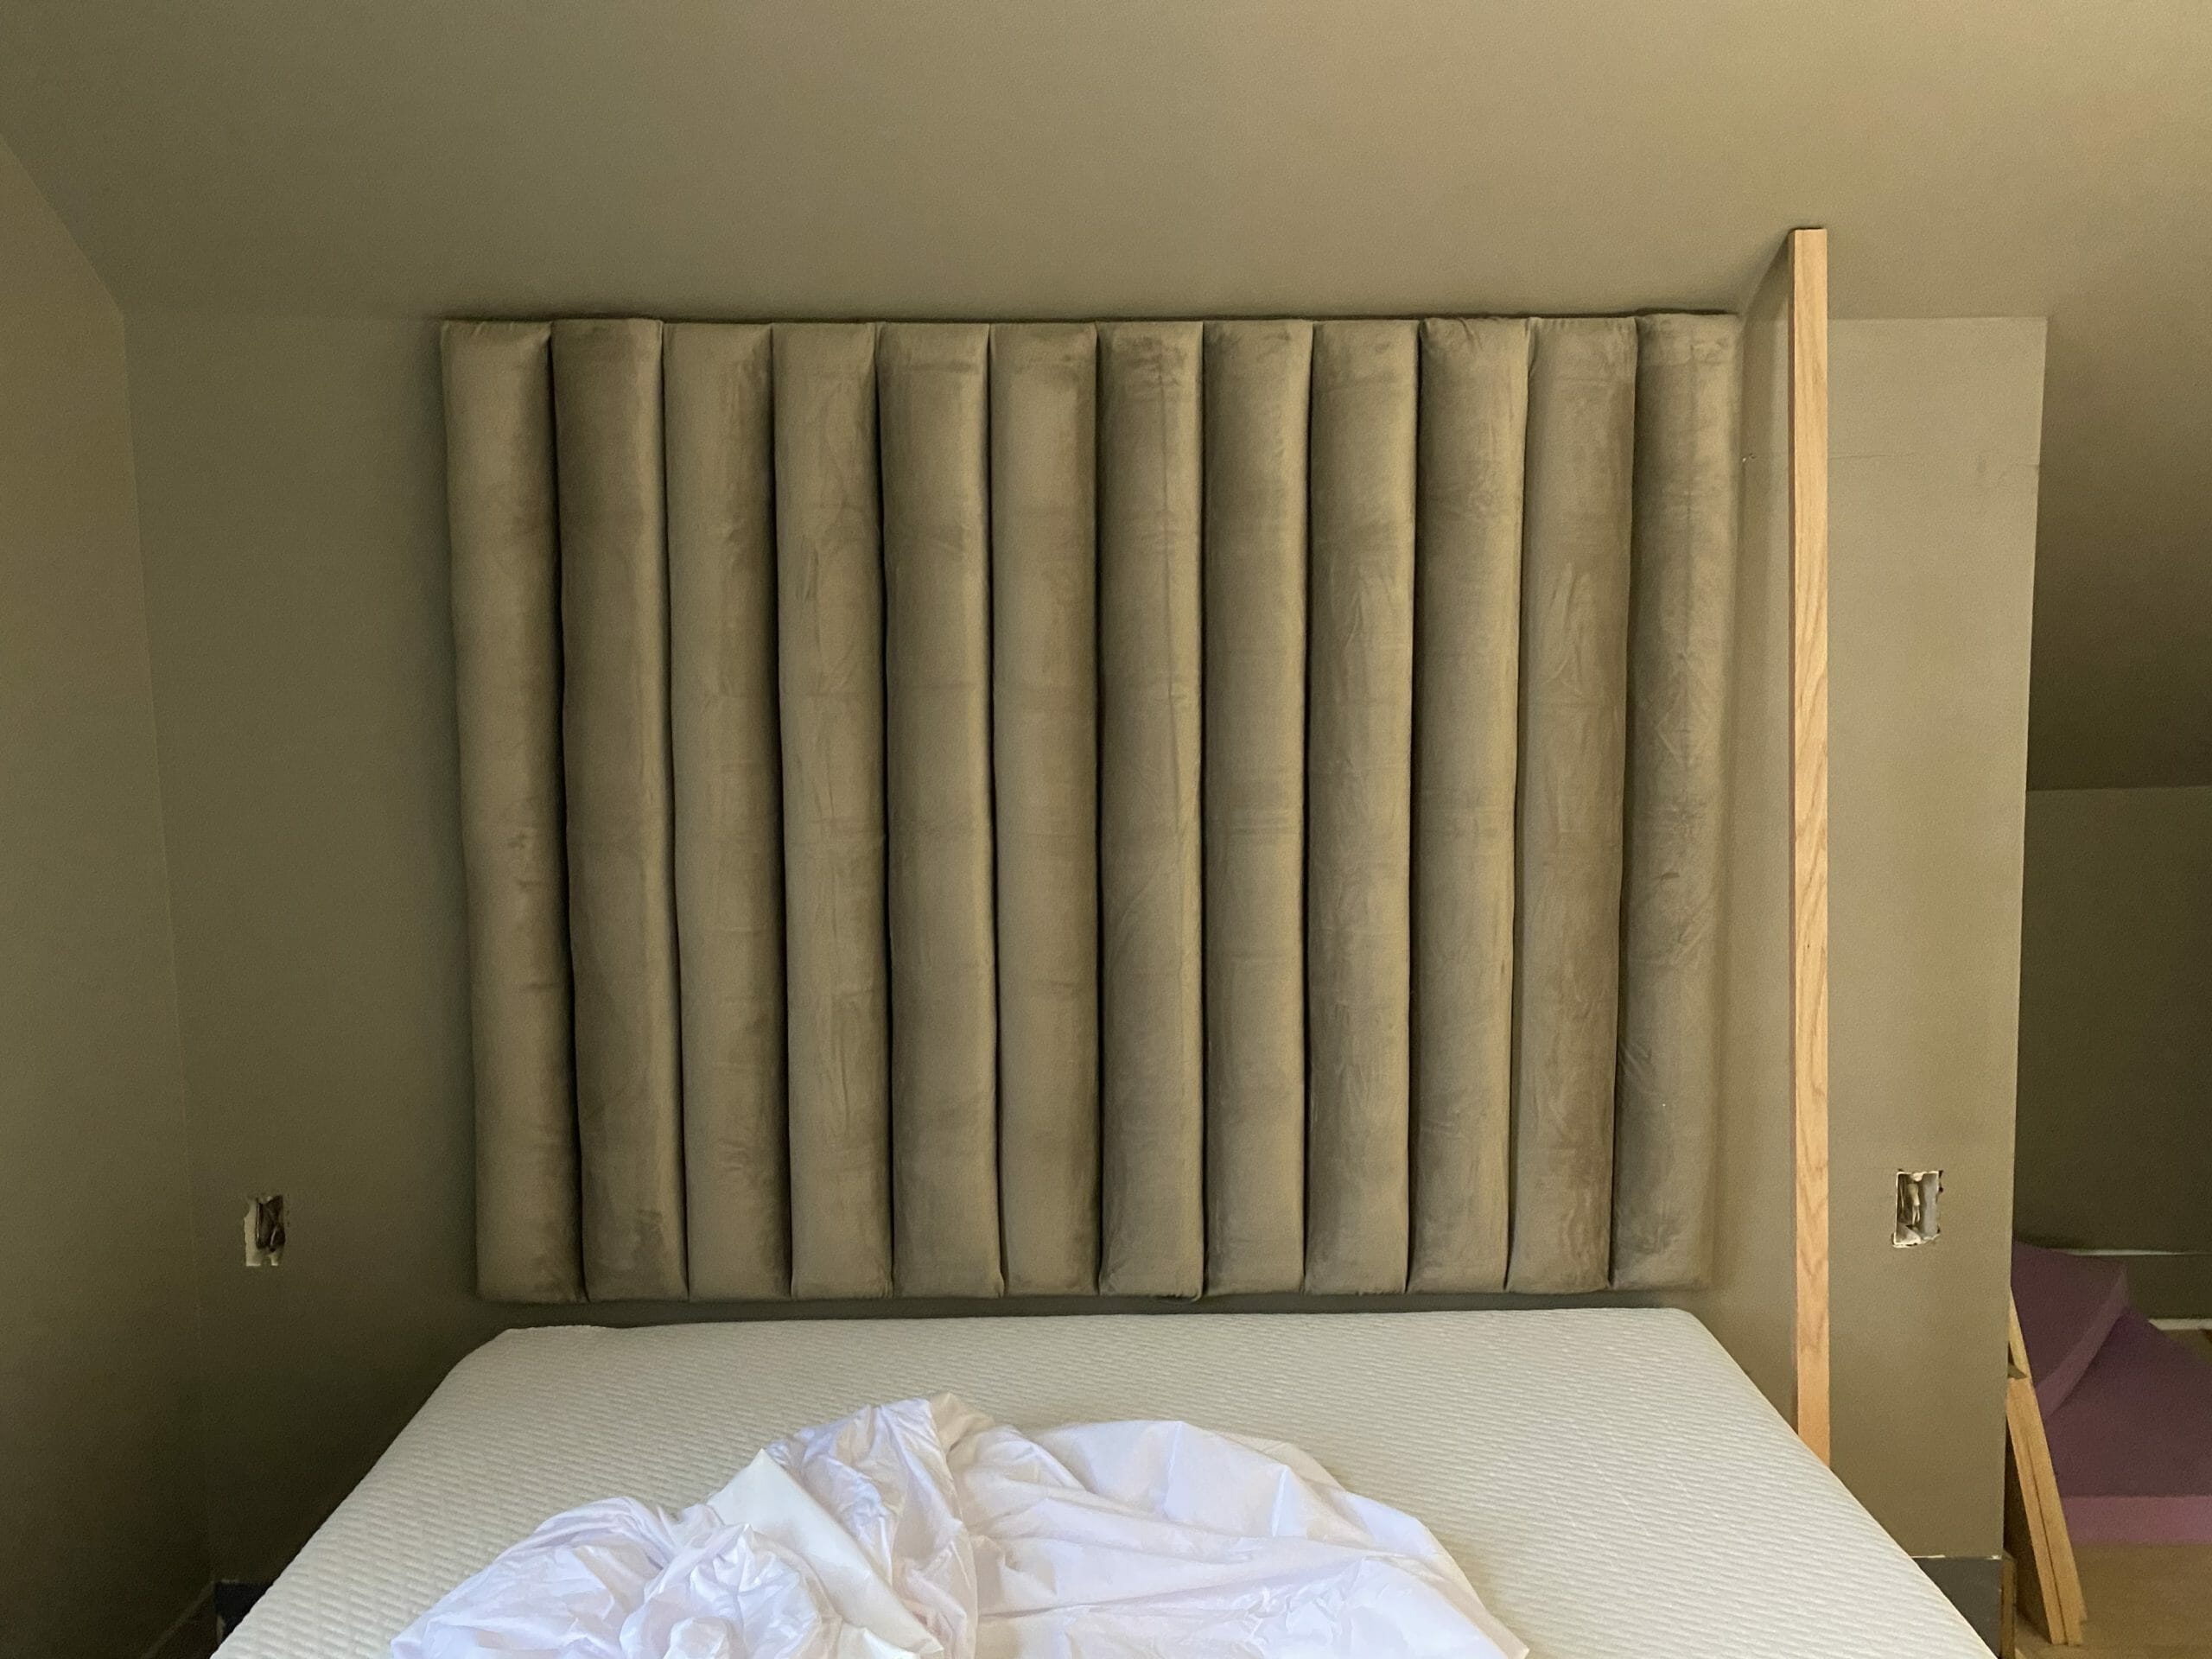
And after. Looks much more even, right?
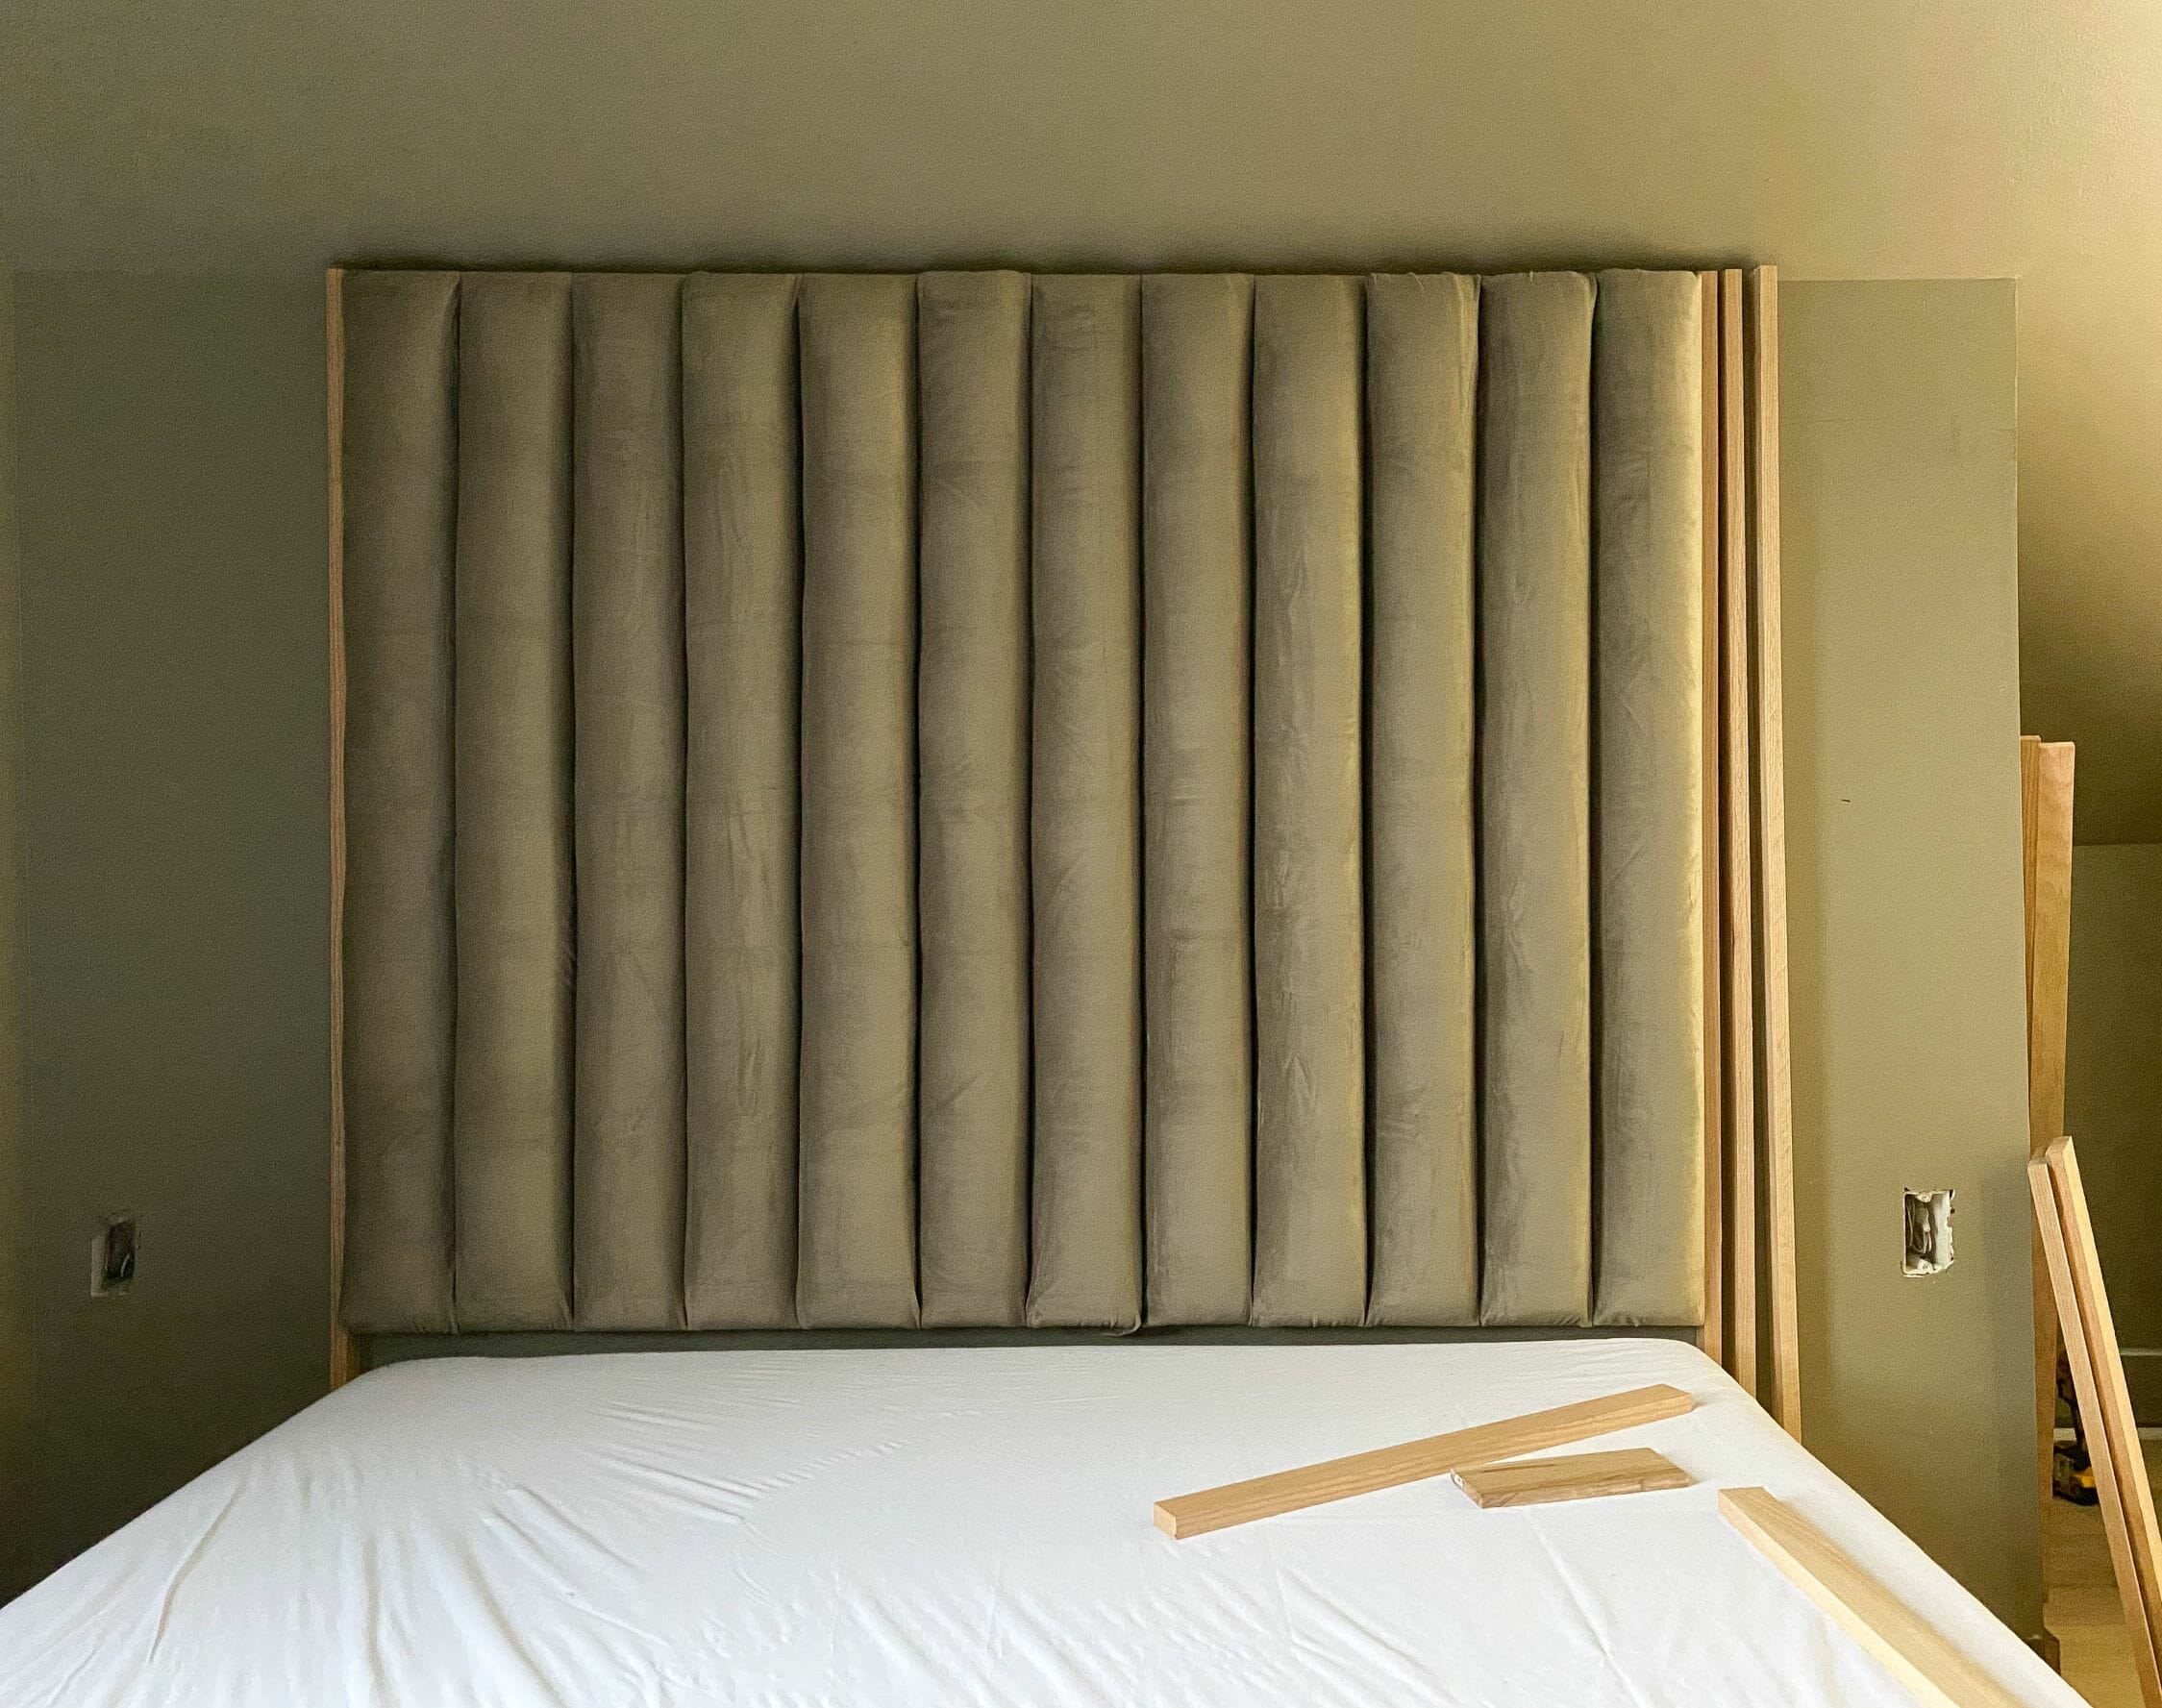
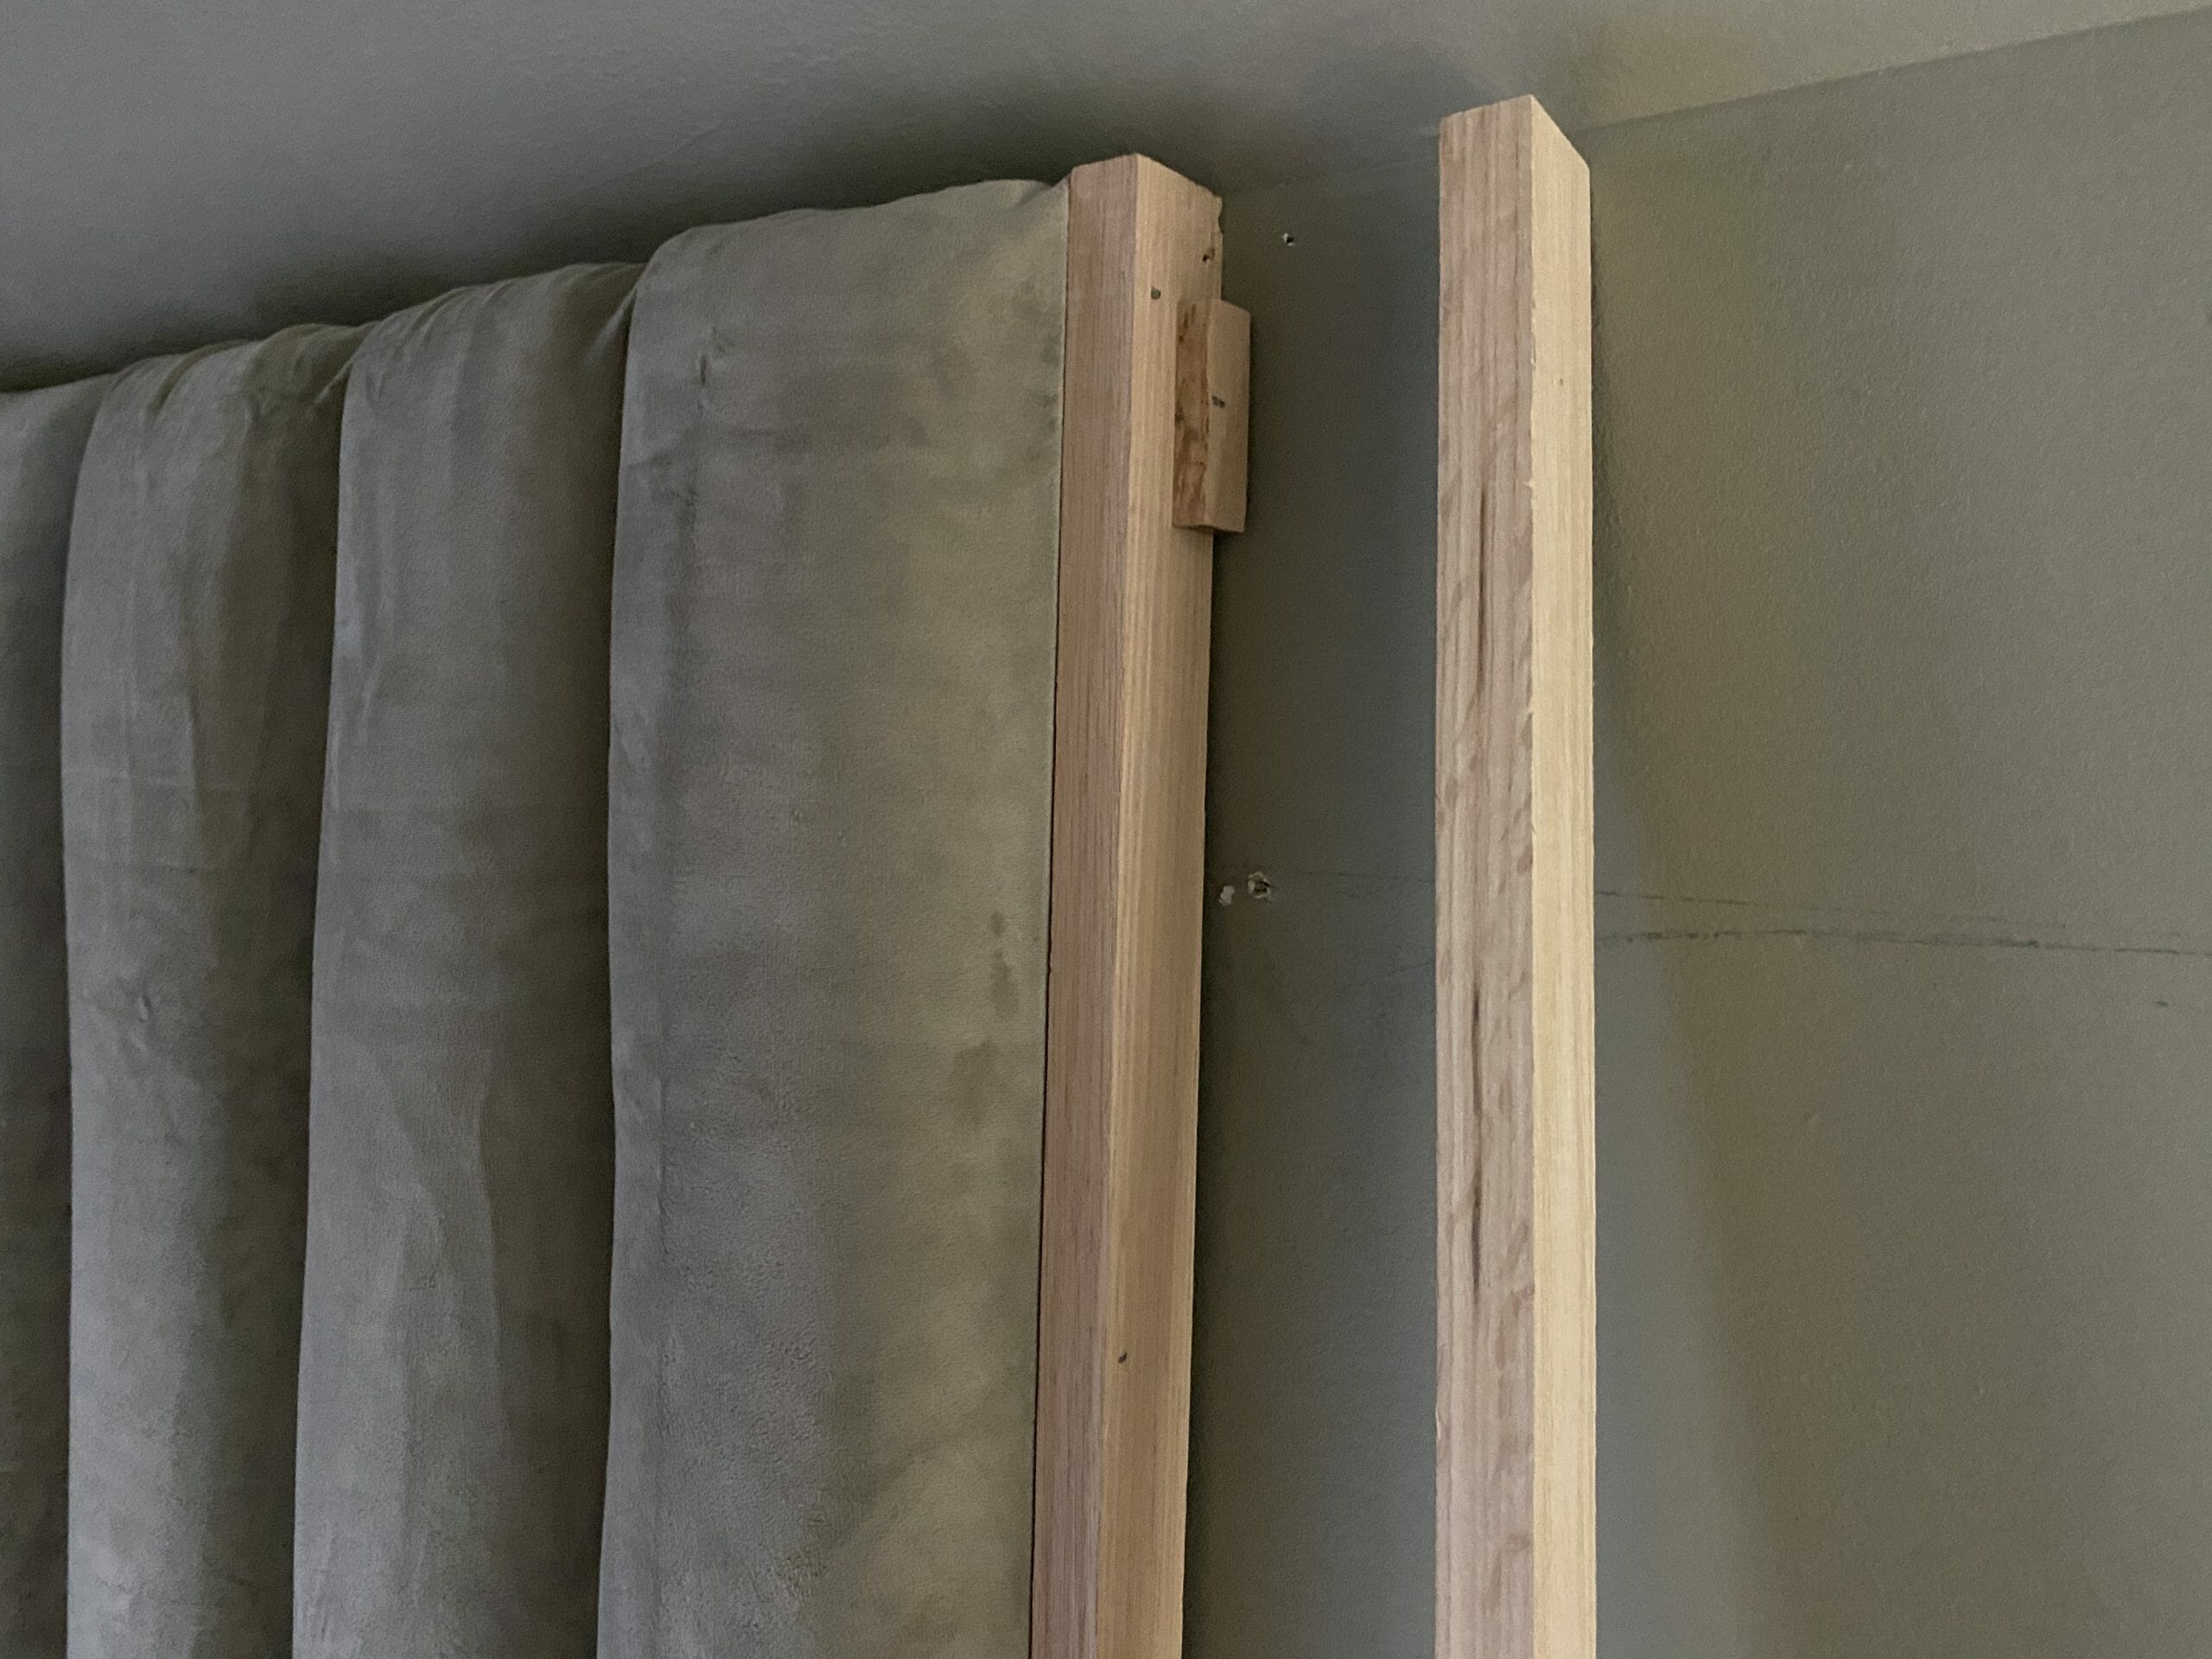
6. slats
We decided to add a few slats to each side of the headboard for some additional texture. These slats also helped close in the small gap on each side from the picture cleat. We didn’t have full length pieces of wood, so we used scrap wood as spacer blocks between each slat. We’ll go back after this is done and paint the spacers the same color as the wall so they blend right in.
I love that the slats make the headboard look custom!
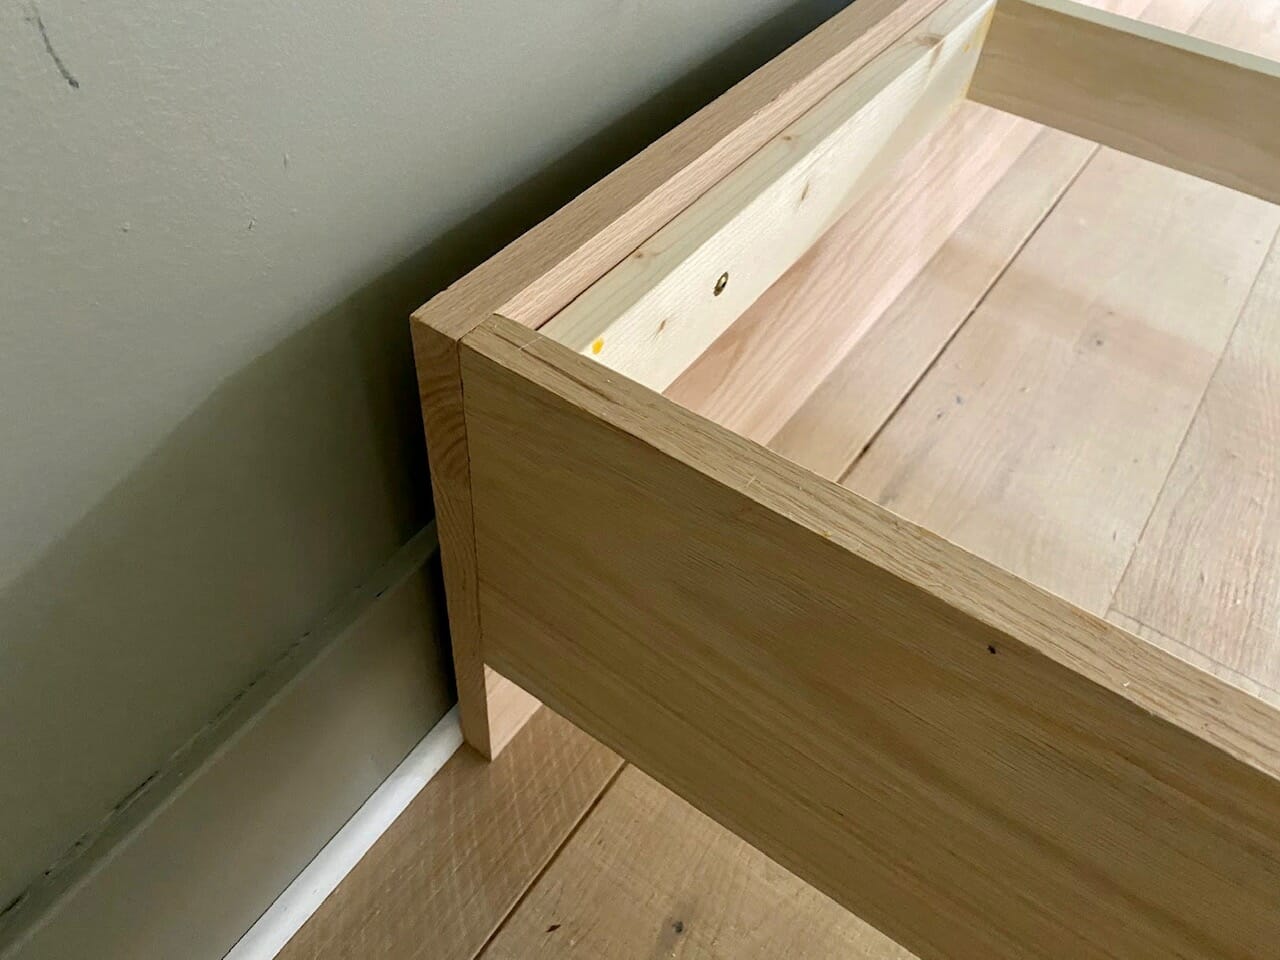
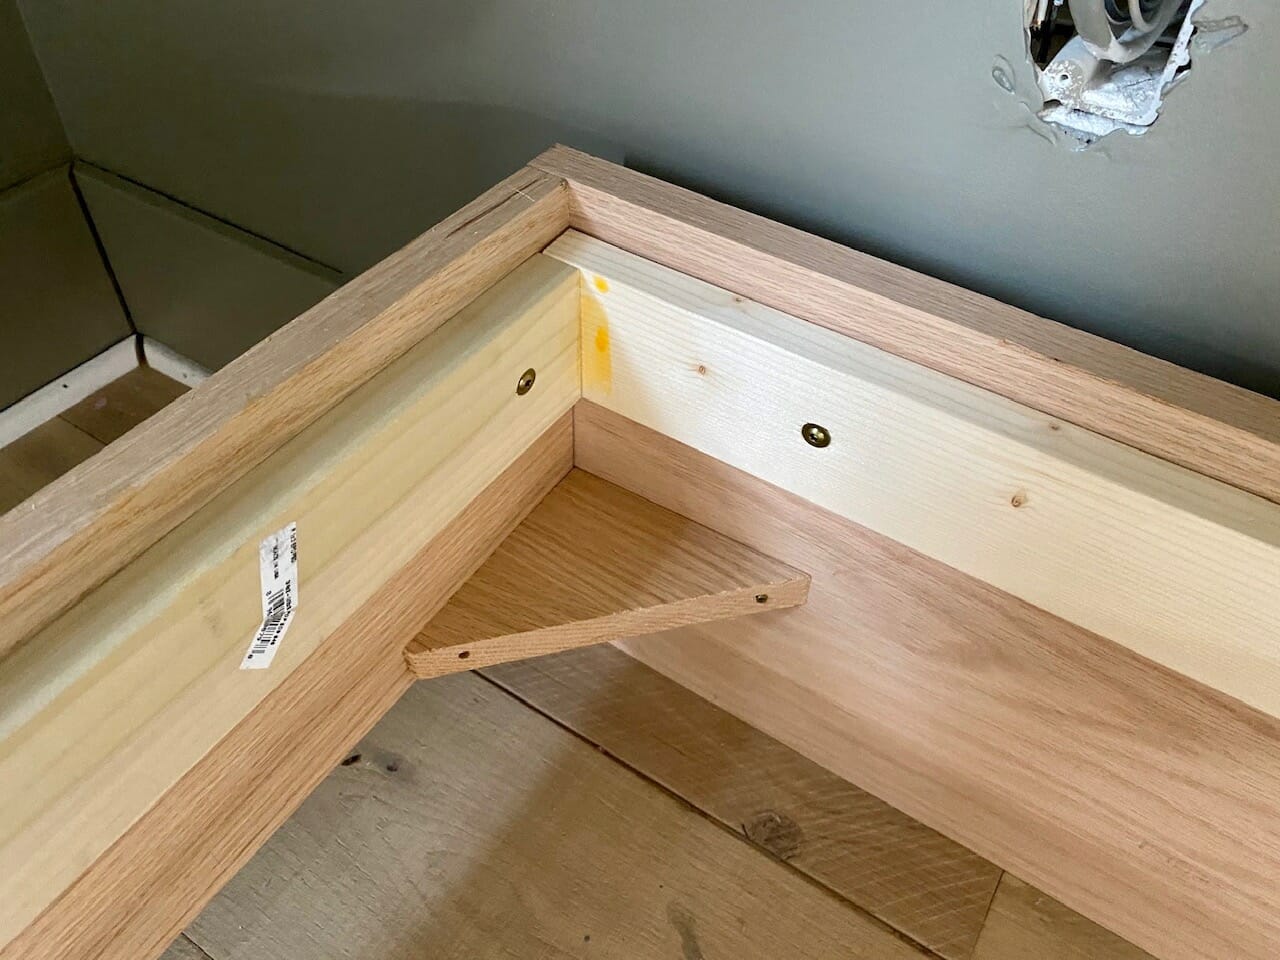
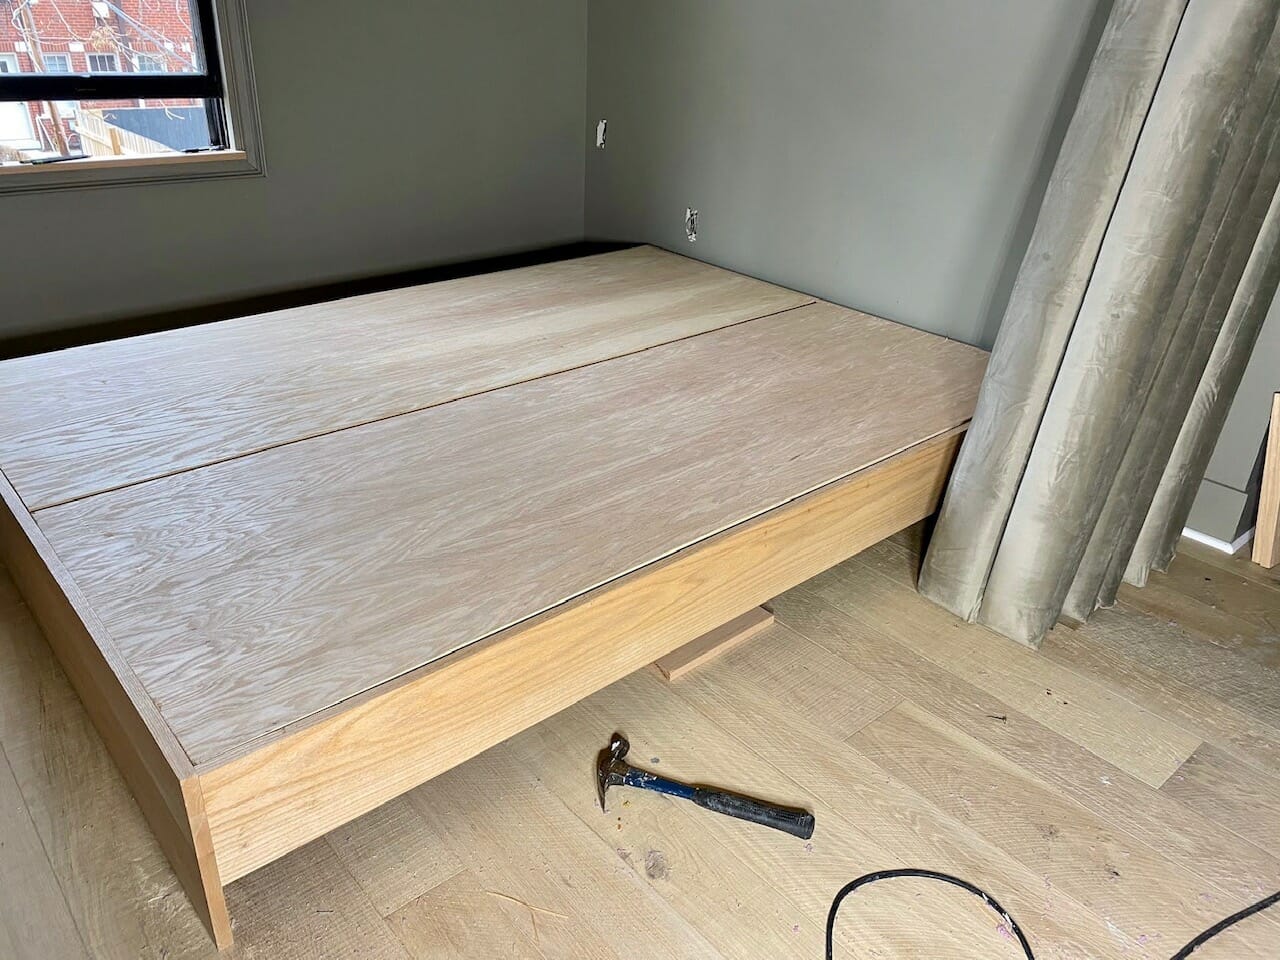
the platform frame
We built a super simple oak platform frame for our mattress to sit on. We started by making the inside of the frame that the plywood sits on.
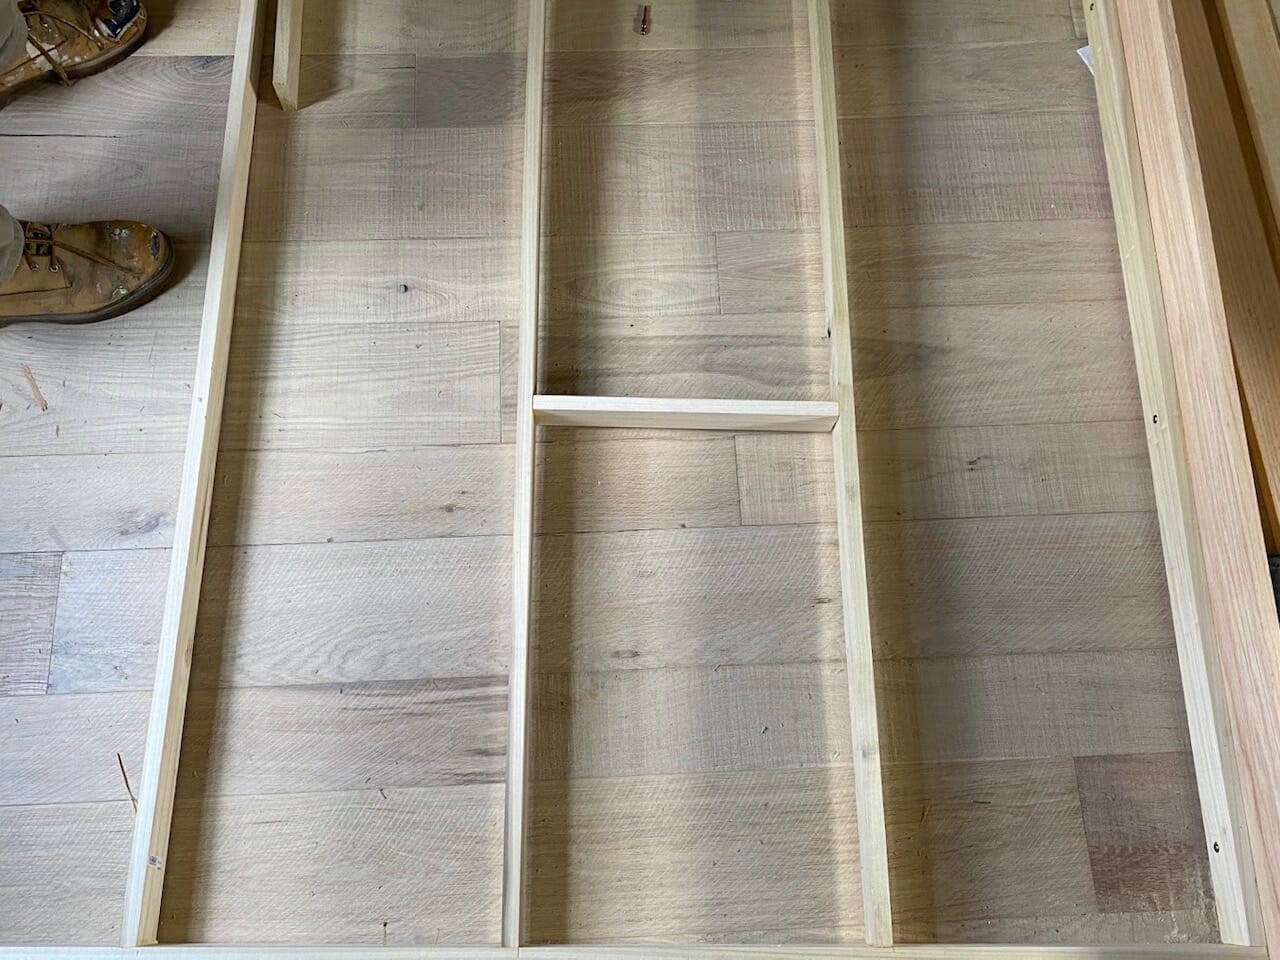
We then attached the interior pine portion to the oak boards on the outside. We recessed it down 3/4″ so that when we place the plywood platform on top, it sits flush with the oak.
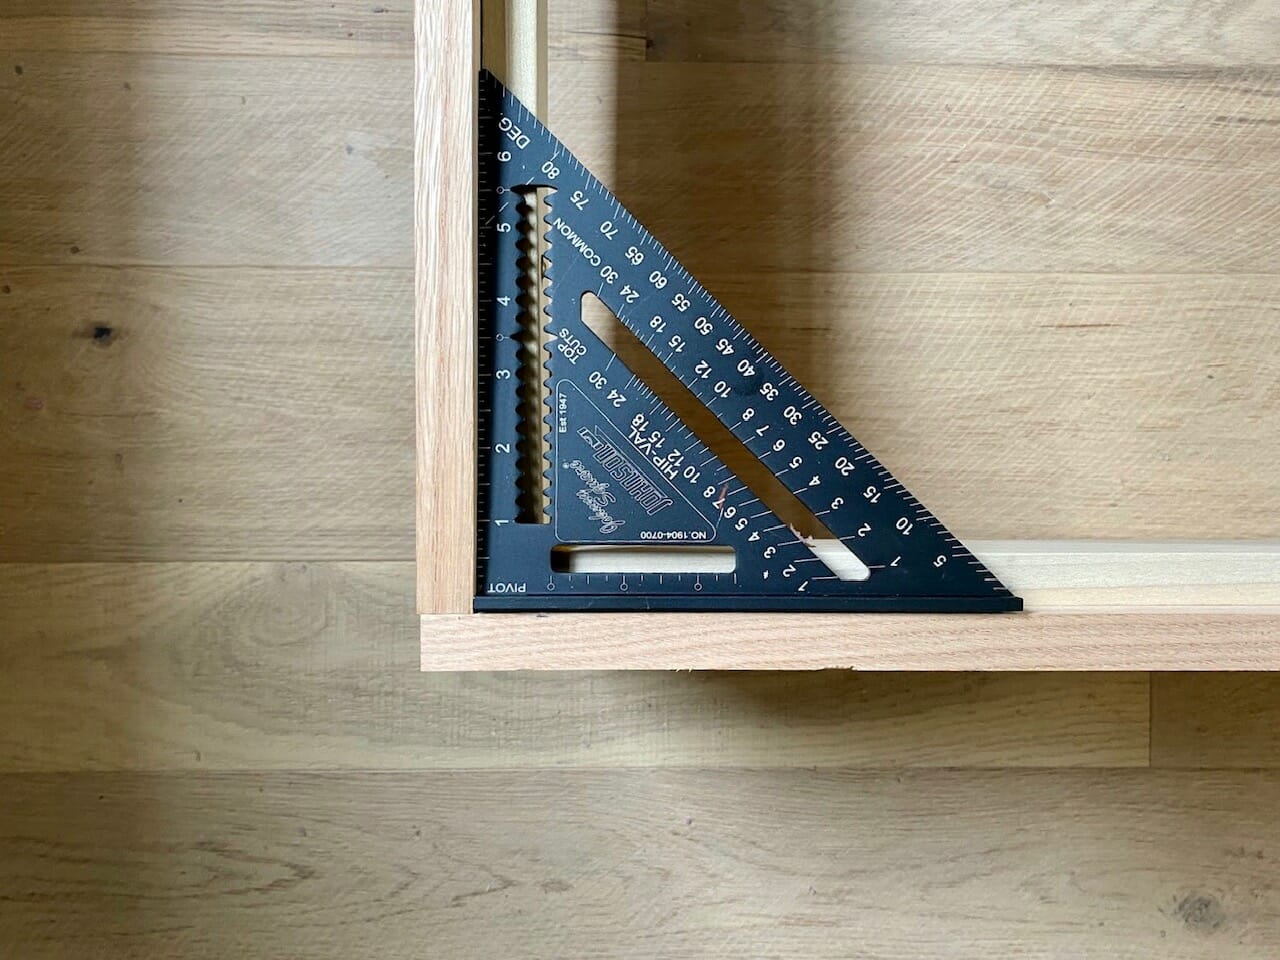
Before installing the plywood platform, we used a square to make sure everything lined up correctly.
We cut two sheets of oak plywood to size, which ended up being about 29.5″ wide x 79.5″ long.
Aaaand done!
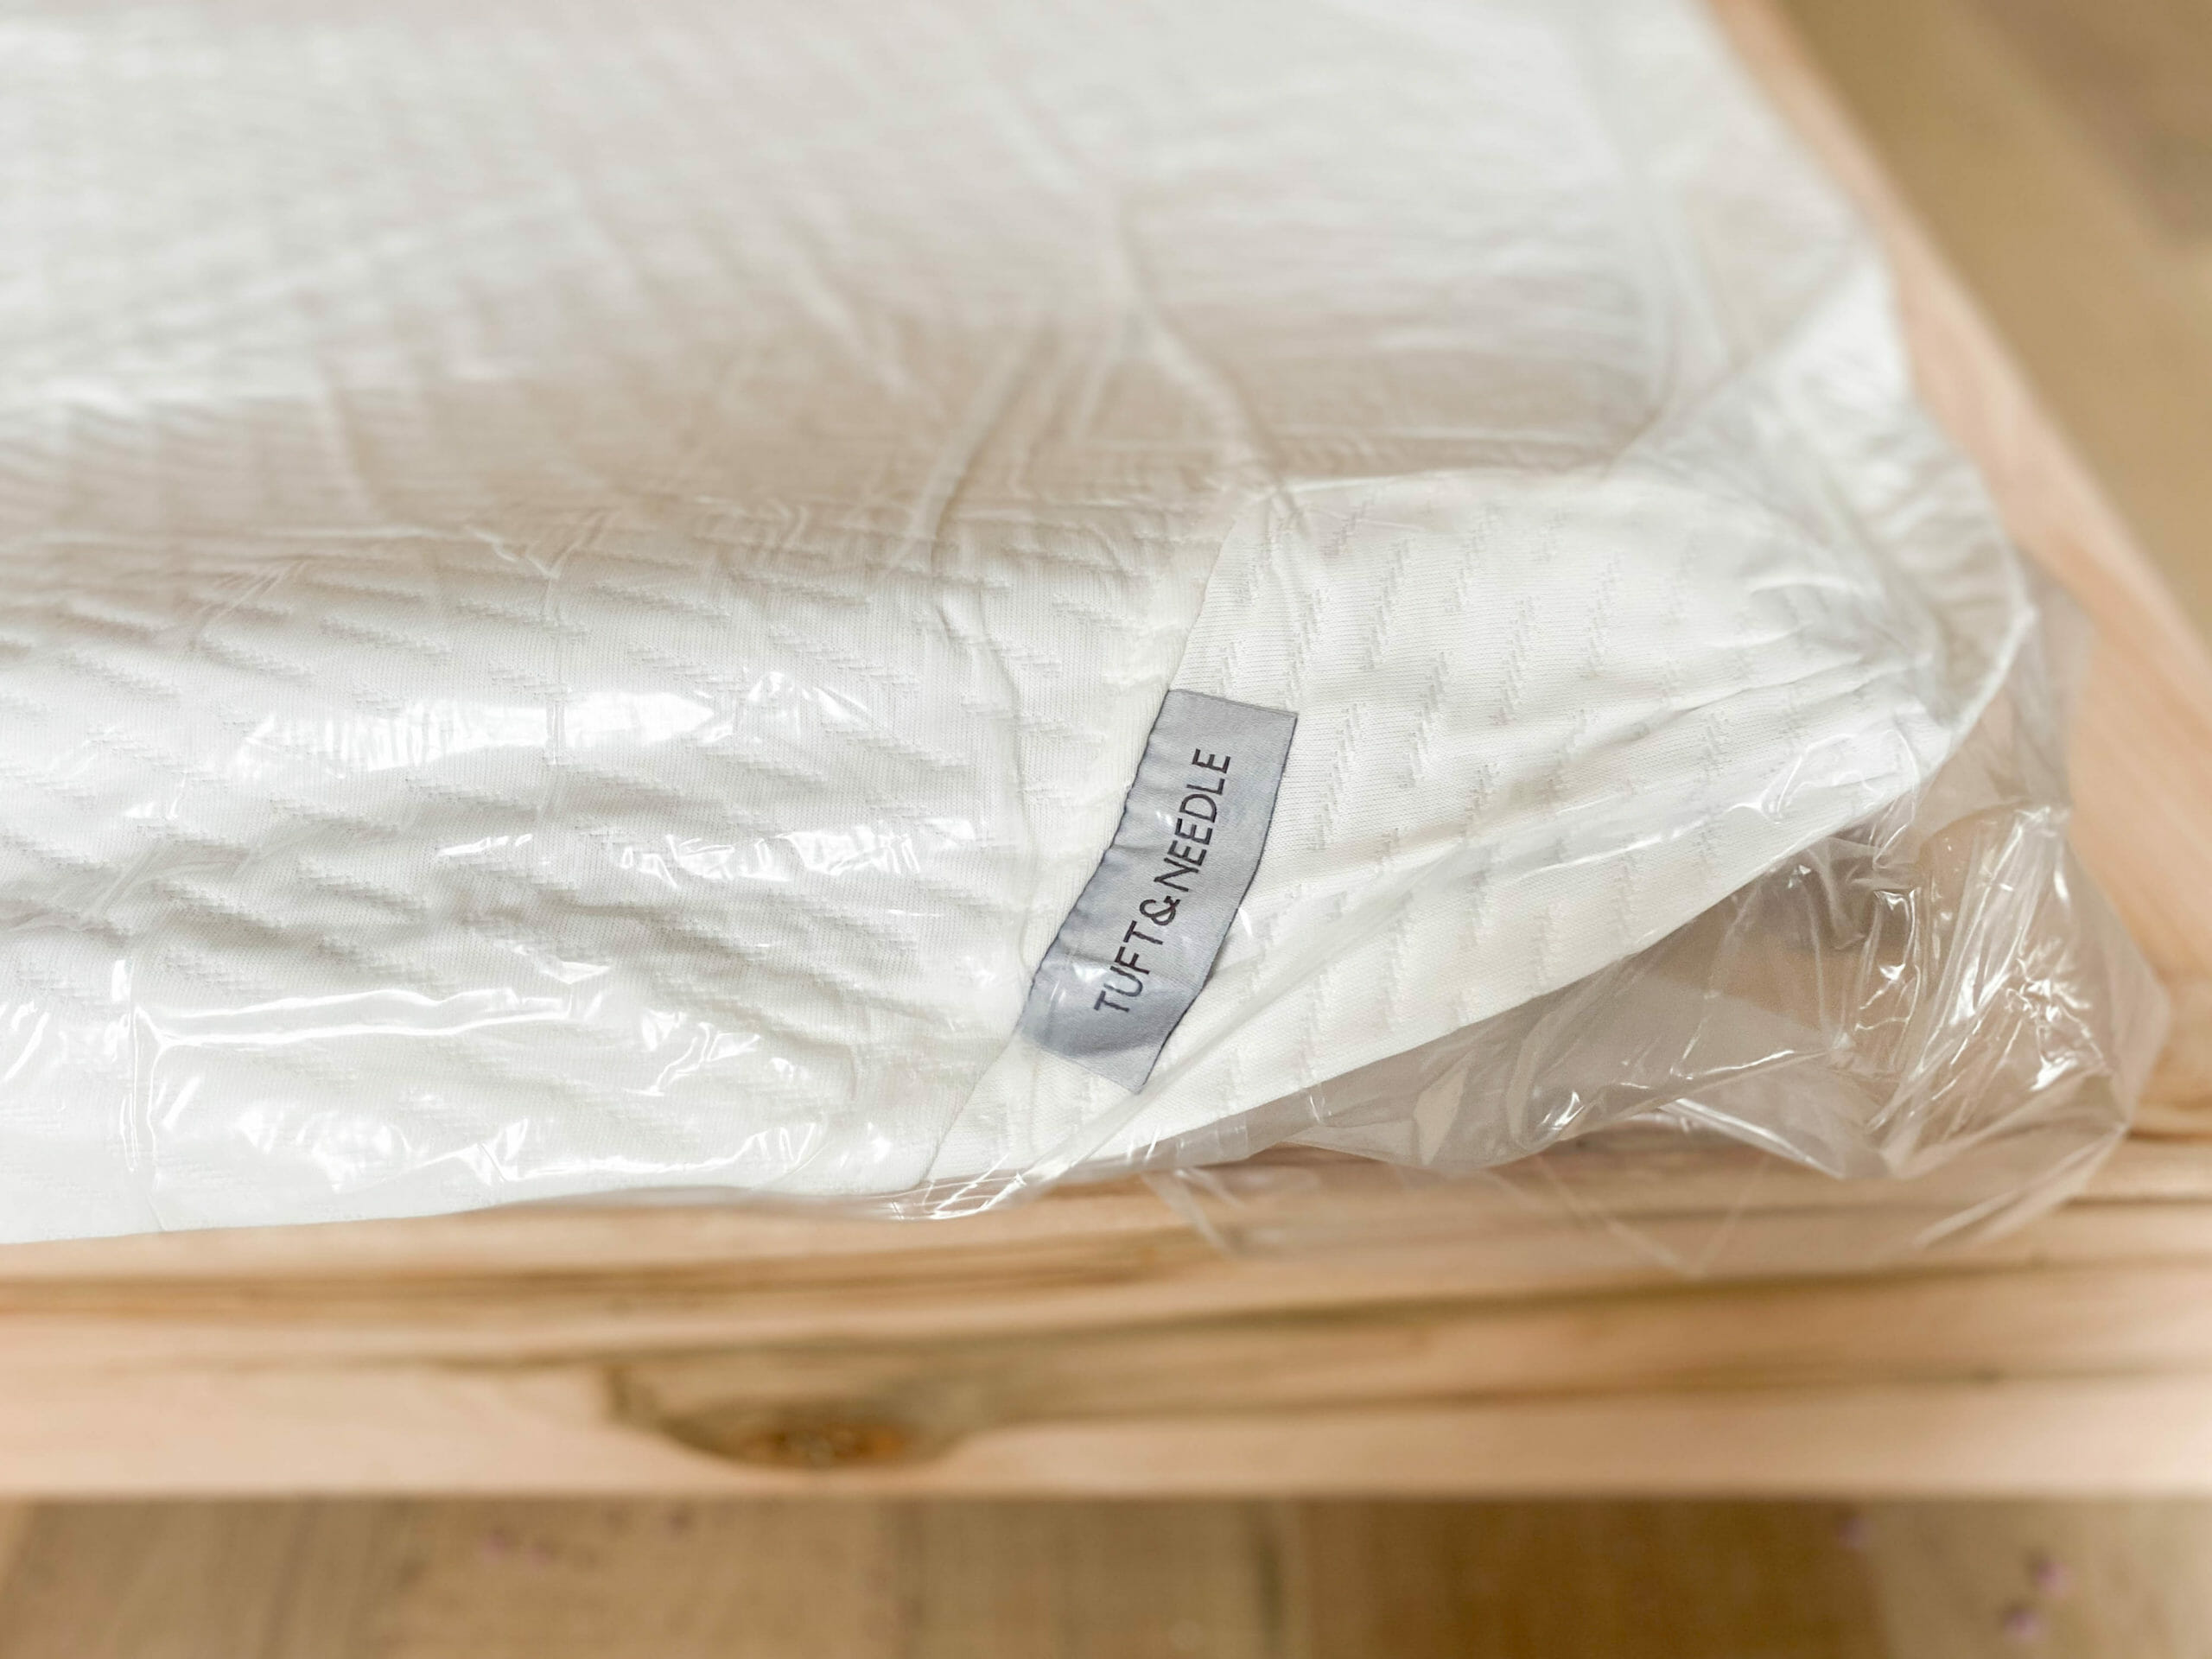
our tuft & needle mattresses (in stock at Lowe’s!)
We’re in Lowe’s many, many times each week and somehow missed THIS:
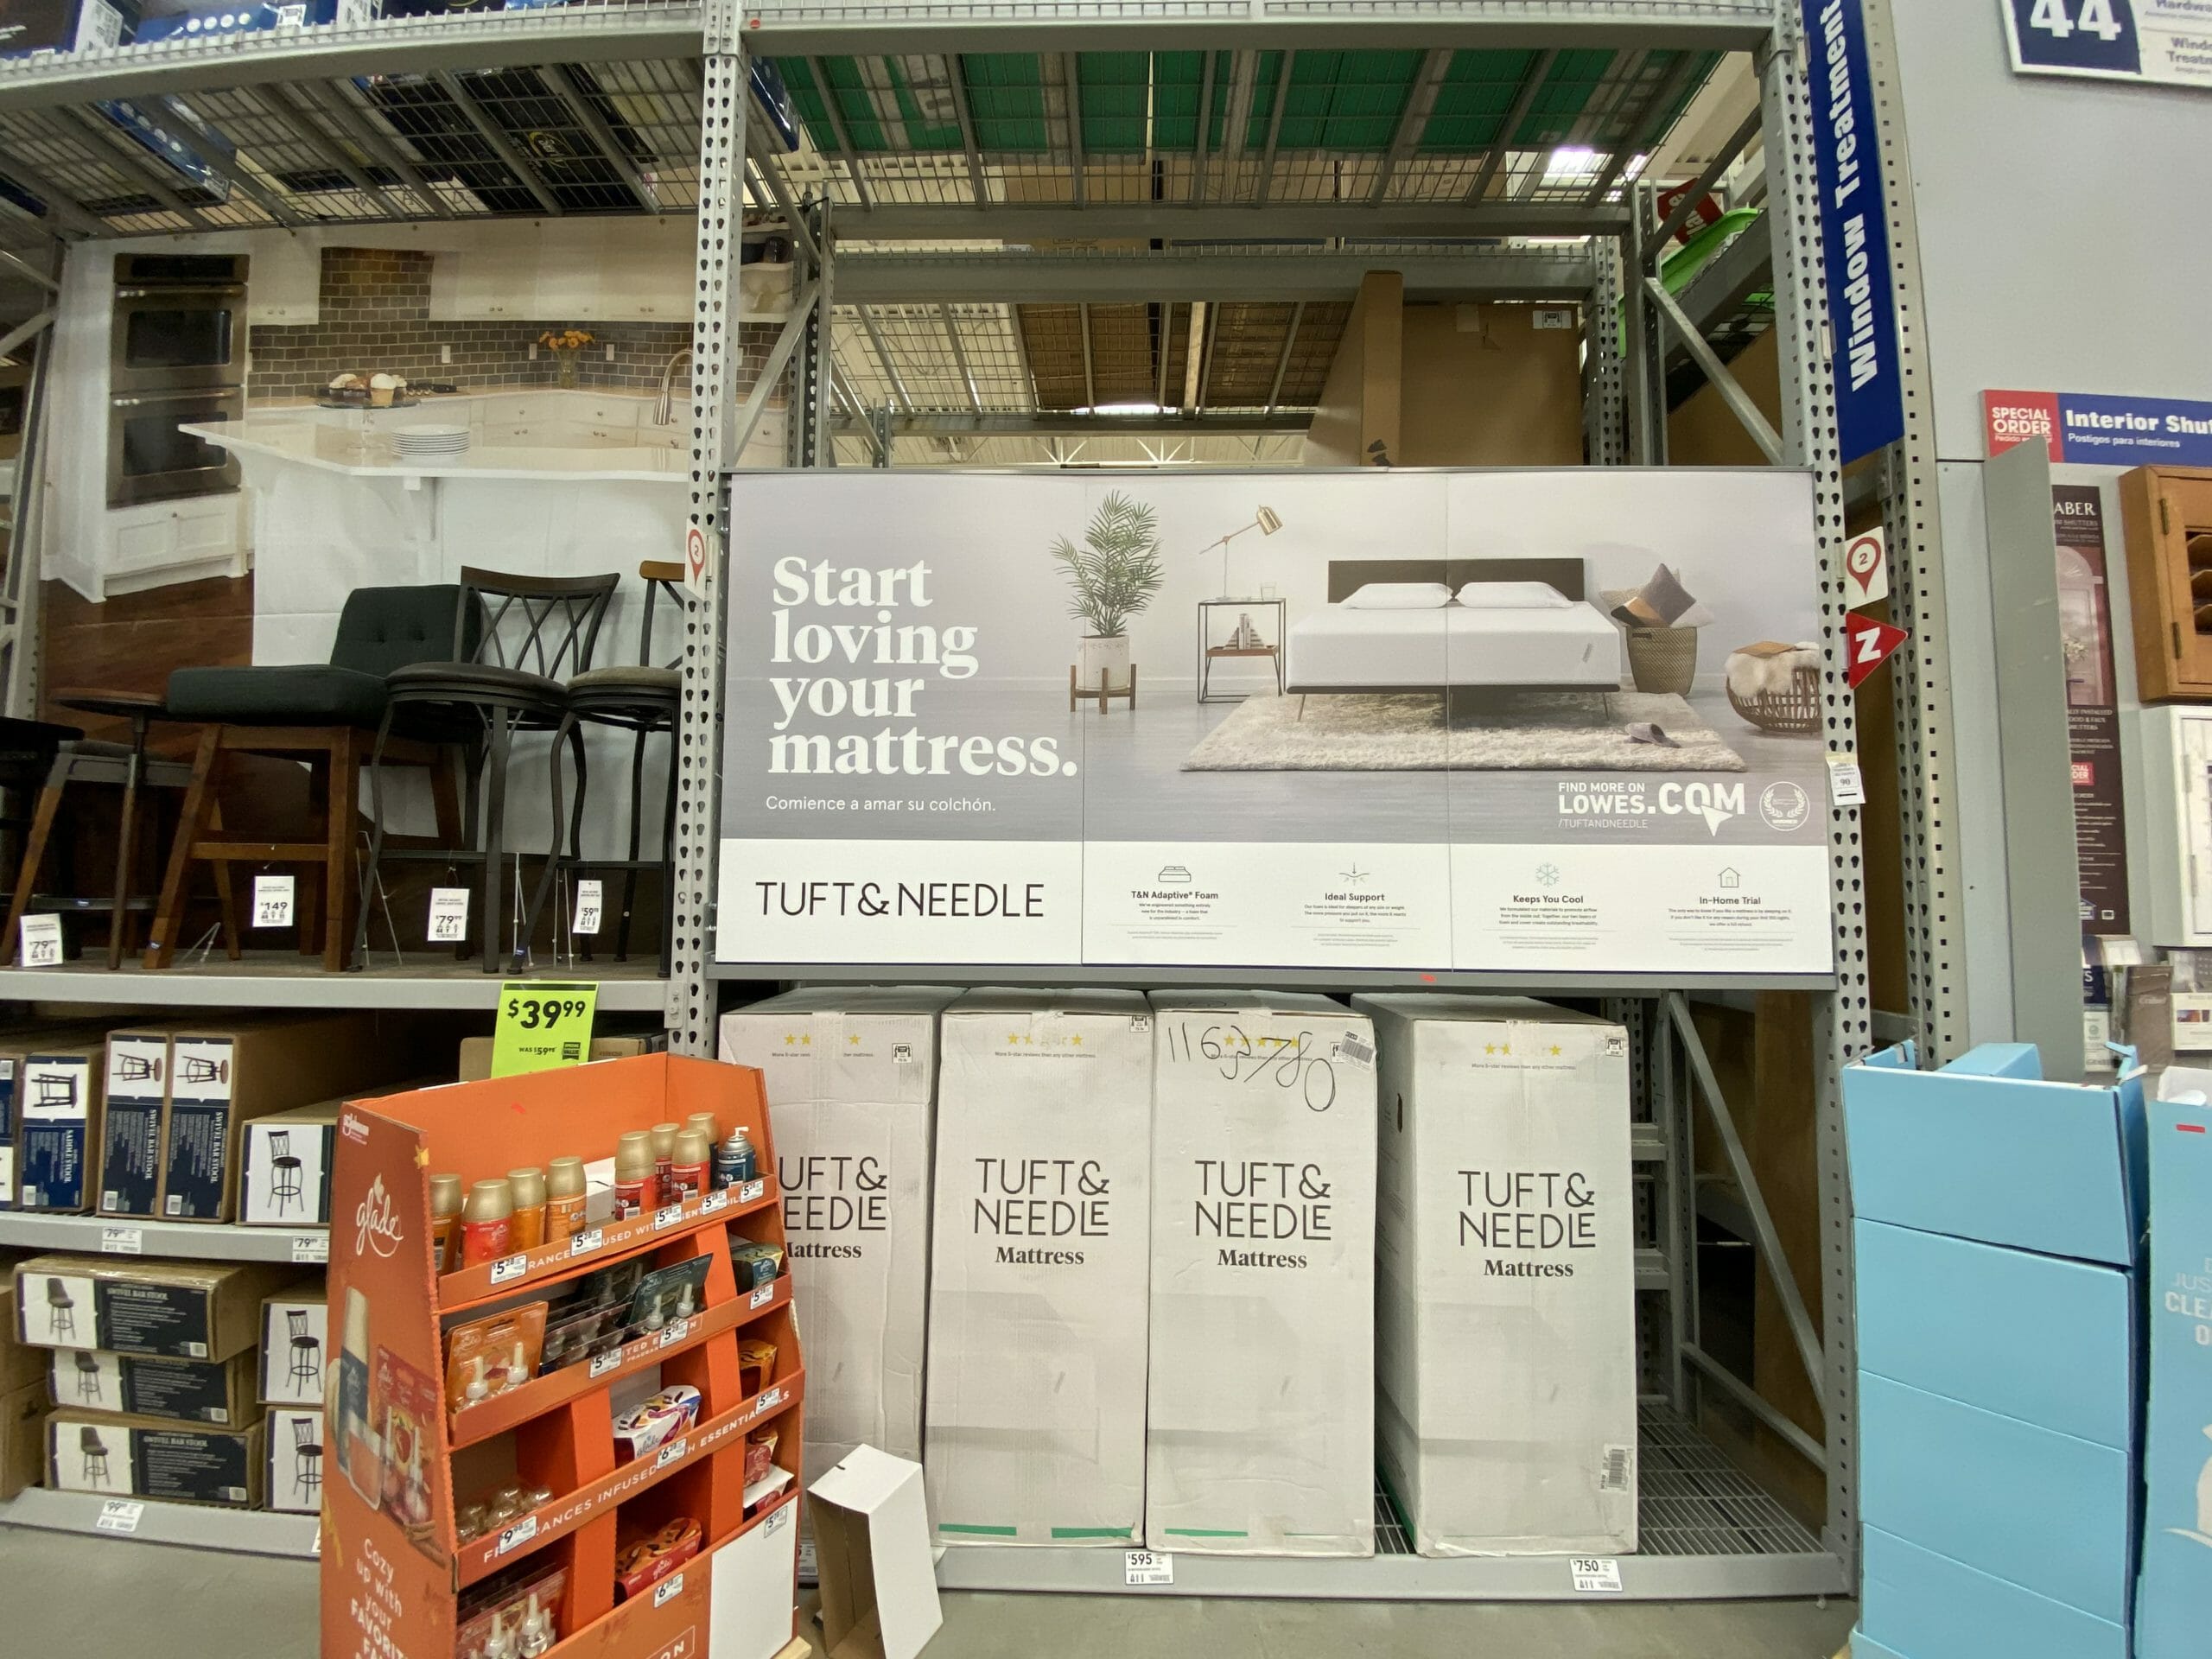
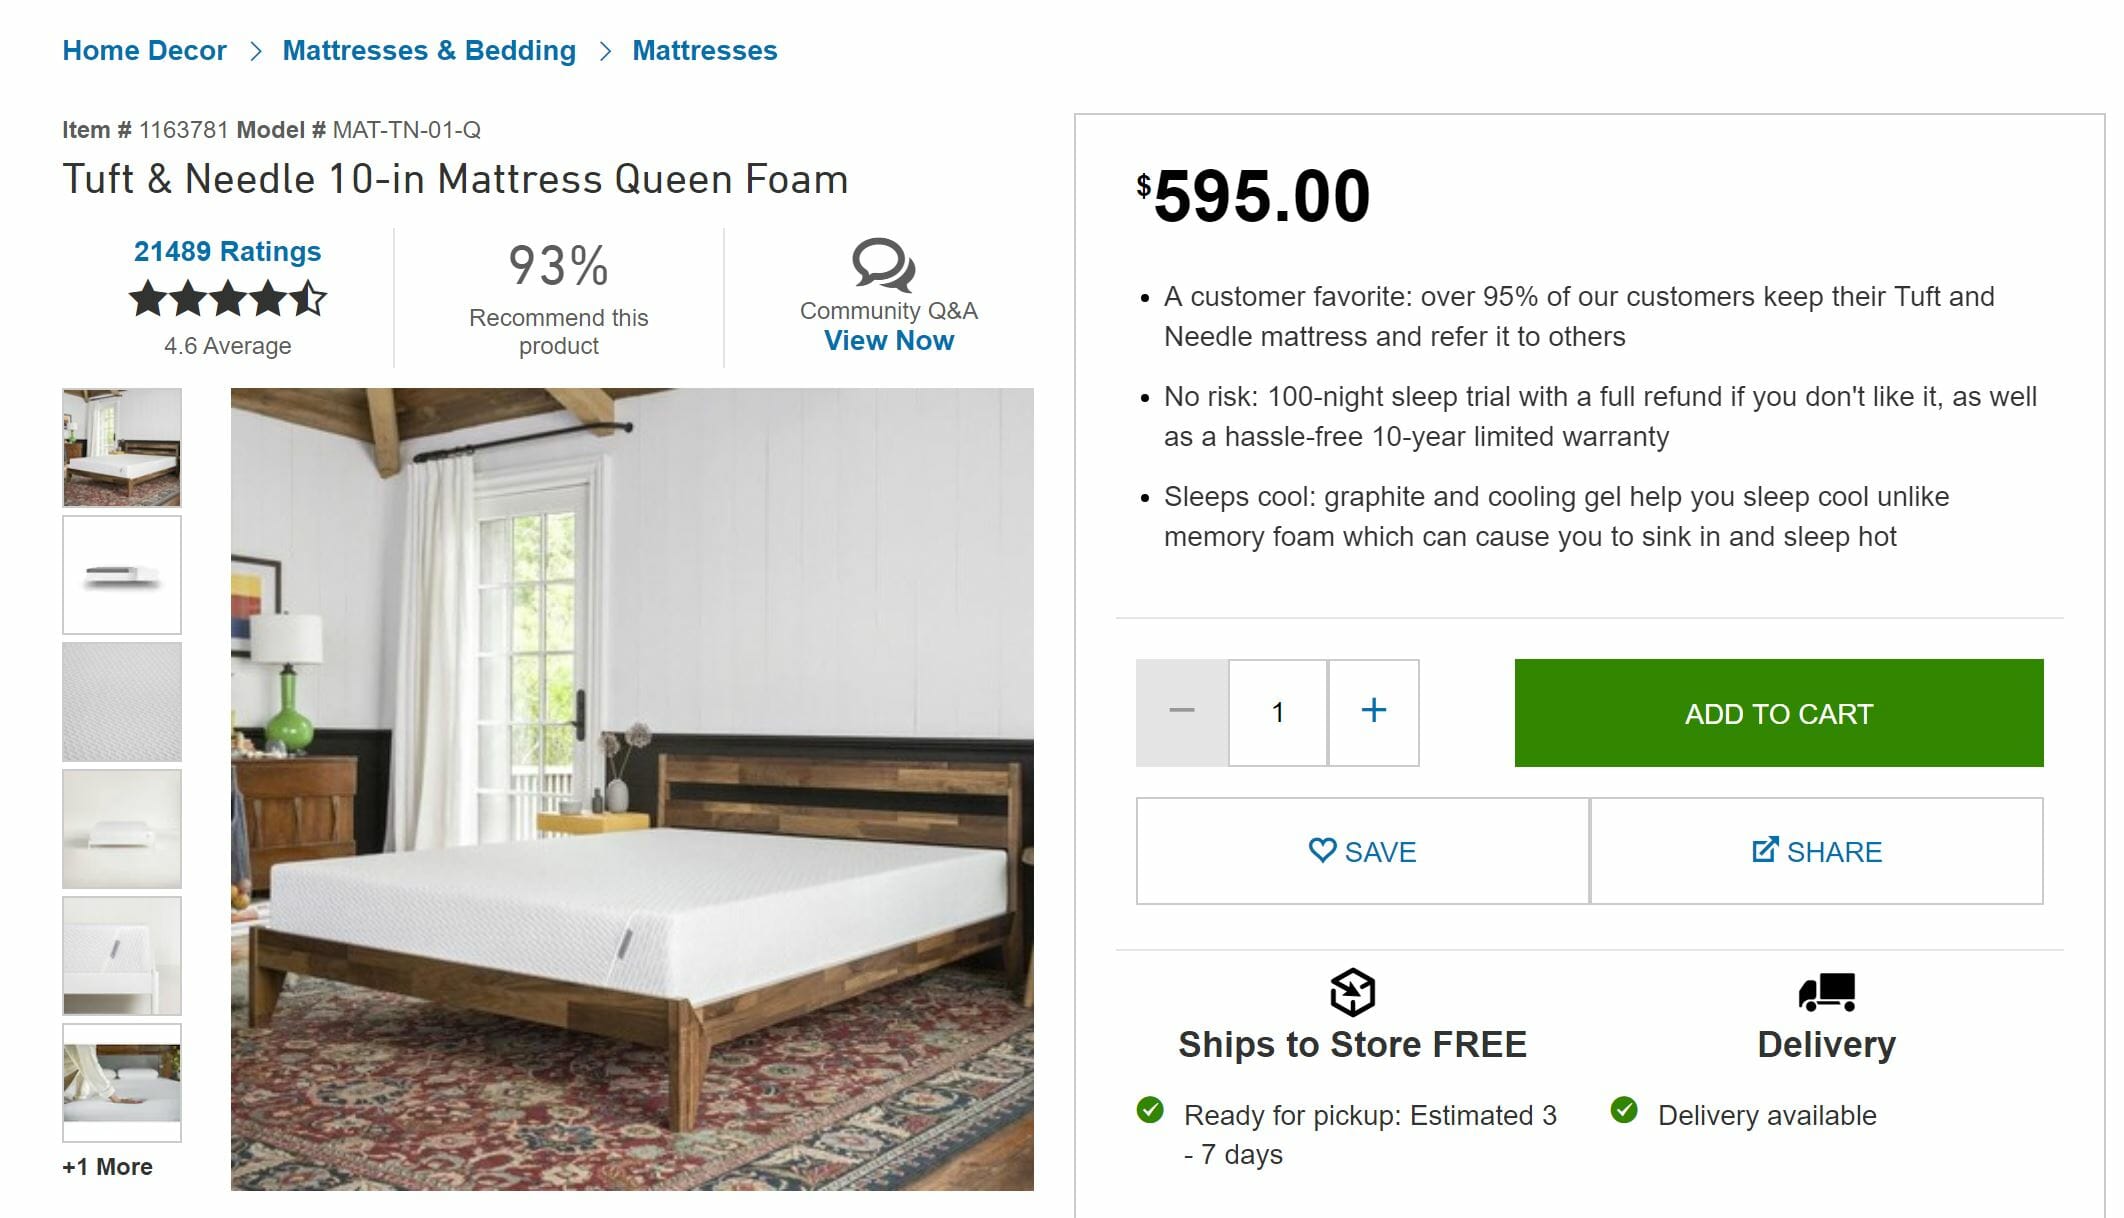
Lowe’s sells mattresses?! Tuft & Needle is one of the better memory foam mattress brands out there, and they are sold IN STORE at Lowe’s! These mattresses have over 21k reviews online, which made us feel great about selecting them for the Airbnb. Comfy beds are a must around here.
We picked up one queen for the smaller guest bedroom, and one king for the larger bedroom. They come in a box and then expand when you open them. Here’s what it looks like out of the box (and a peek at the master, BTW!)
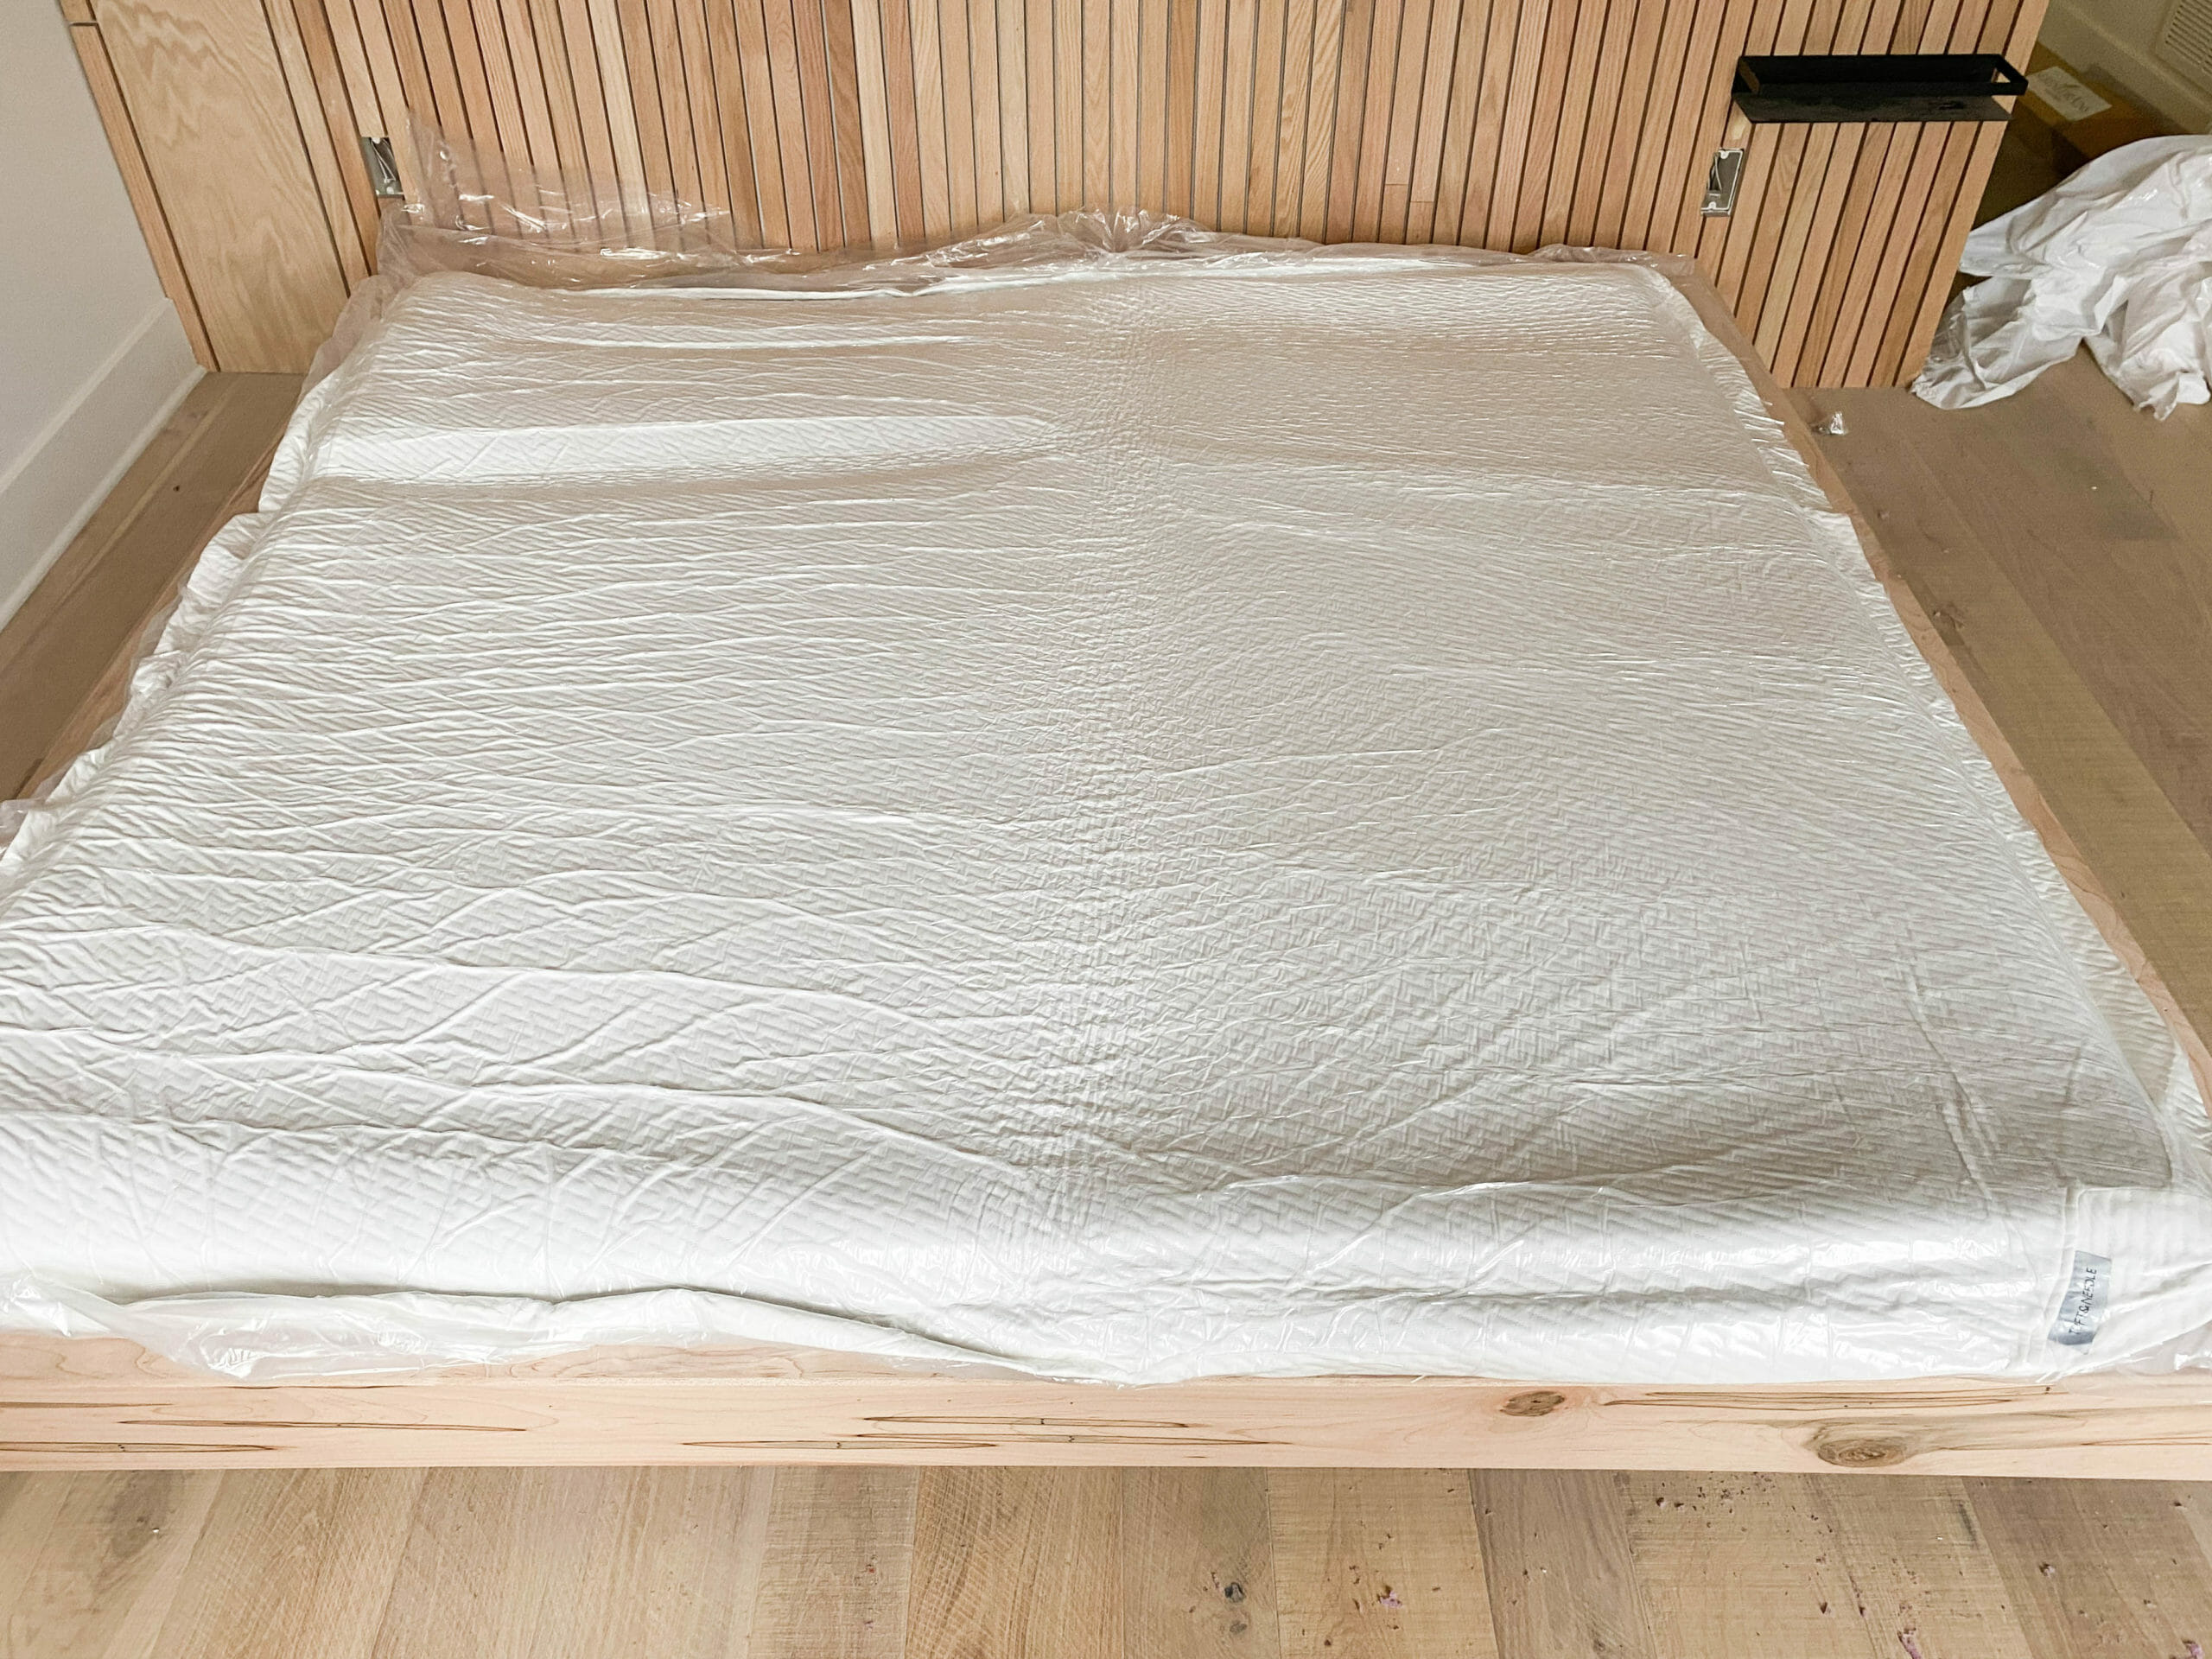
It will fully expand to the 10″ height when we take the plastic off.
recommendations: what we’ll do differently next time
Overall, we were super happy with how it turned out. We’ll definitely be doing this project again in the future — it looks so luxe!
- Use batting. We were able to pull the fabric tight enough to get a mostly smooth look, but batting would have made our lines extra straight. Taking note for next time.
- Make sure the fabric is running the same direction across all tufts before mounting. We mentioned this above, and are mentioning it again. Make sure your fabric is running the same direction across the whole headboard.
We’ll be sharing the full reveals of both of these bedrooms before Christmas (eek!), so stay tuned. Lots and lots of goodies going into these spaces that we can’t wait to show you!!
xo


I saw this post and had to make this. I did emerald green. It’s gorgeous. Thank you!
So glad to hear this! We’d love to see how yours came out!
[…] when we DIY’d a channel tufted bed for our new Airbnb’s guest suite a few weeks […]