

This post is sponsored by Lowe’s.
Whenever Bryan & I check on our first home (now part of our Airbnb rental brand, The Village Host), we take a little walk down memory lane. This was the first home that Bryan & I purchased, the first home we lived in when we moved to Columbus, and the first home that made us realize we love all things design & renovation.
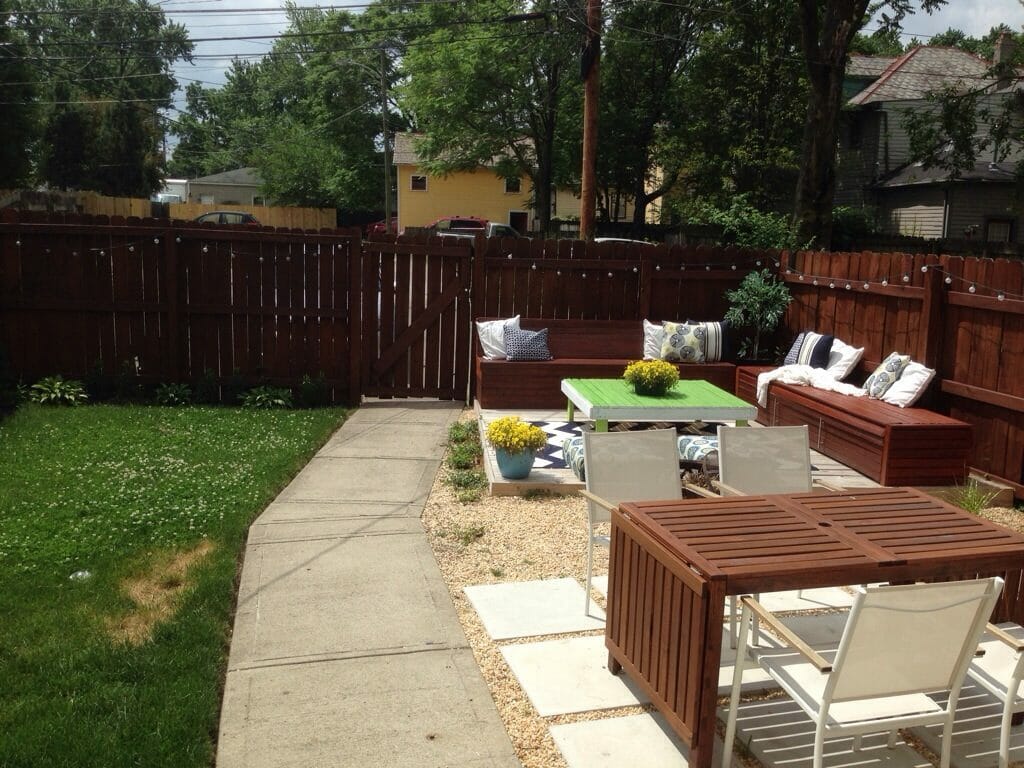
This is also the home that we started this blog out of six years ago, and one of the very first before & after posts I wrote was on this same backyard! We bought all of the materials from Lowe’s and were on a super tight budget (the grand total for the patio, deck, landscaping and furniture came to $967). You can take a peak at the post here — let’s just say we’ve come a long way 😉
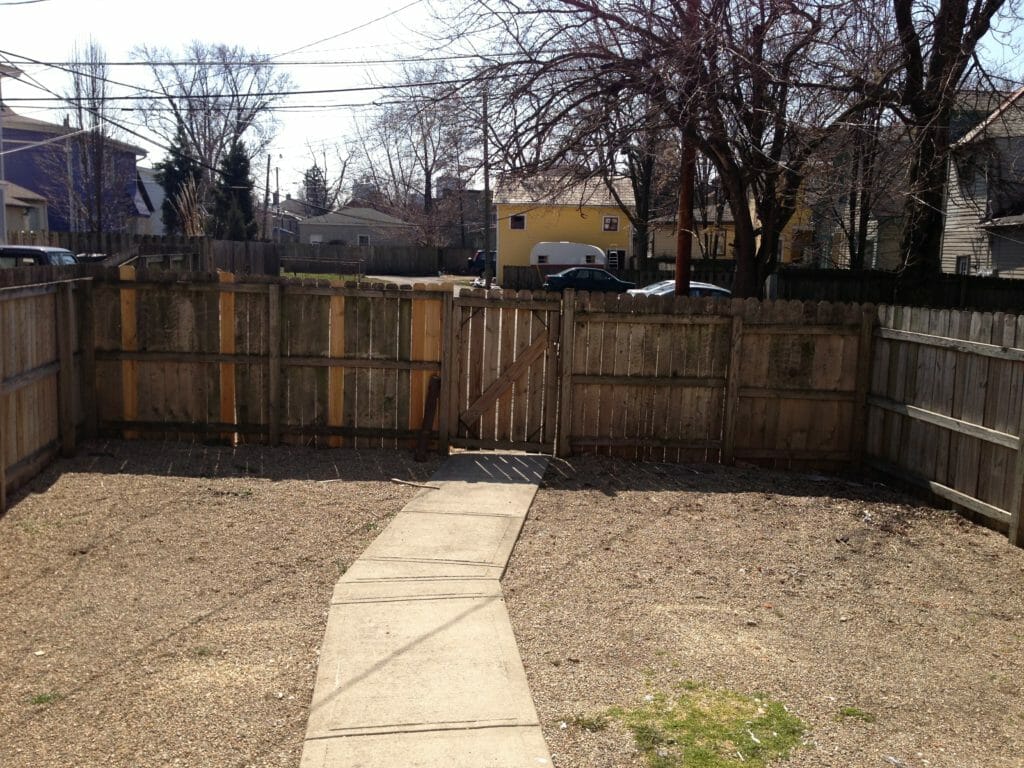
The original yard, when we bought the house in 2013
One of our very first after photos to ever hit the blog, circa 2013.
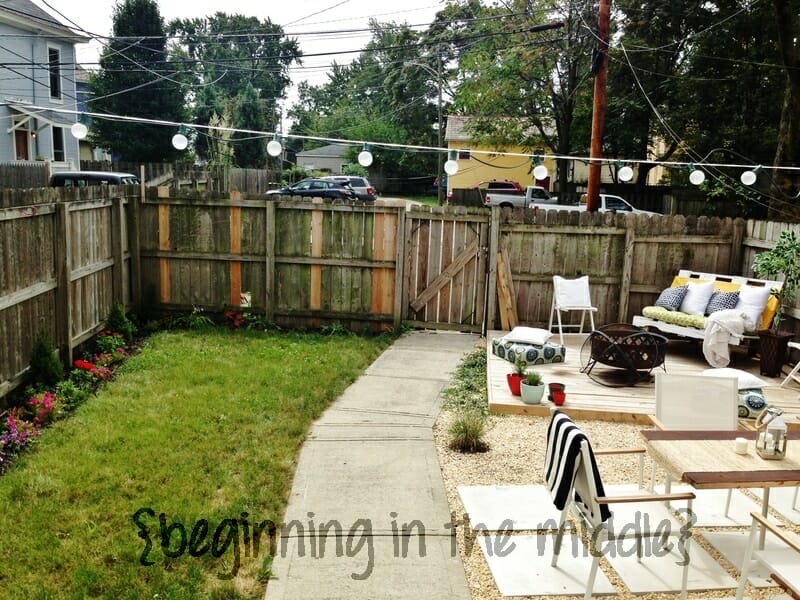
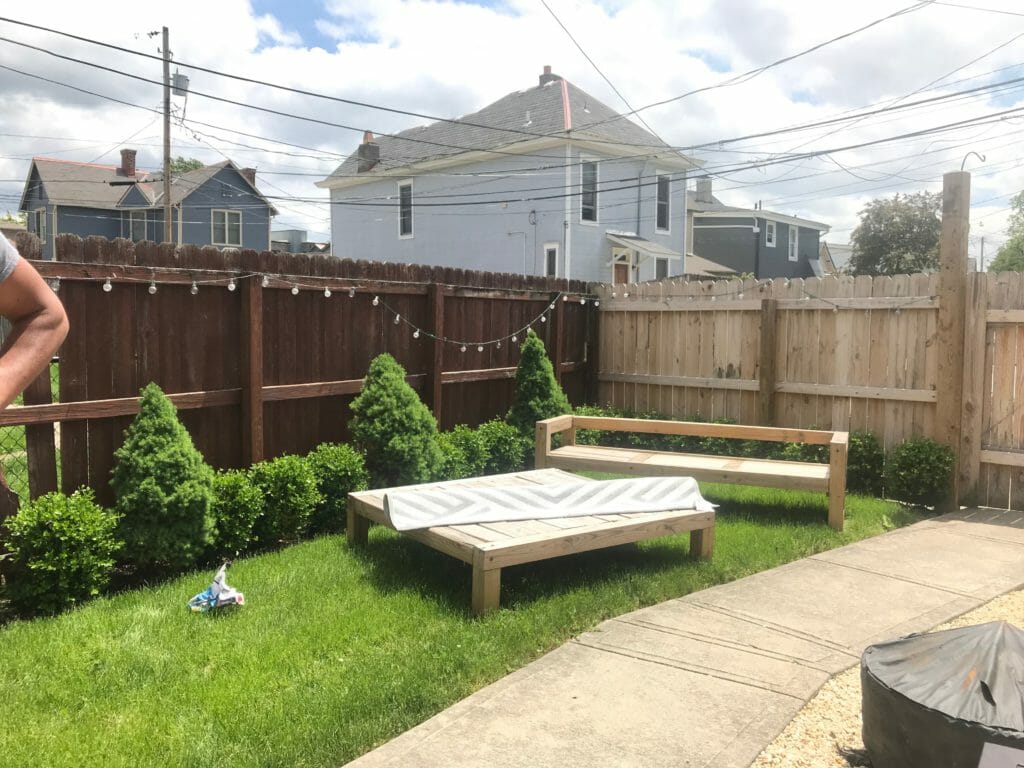
A year later in 2014, once we started renting out the home, we did another mini update by staining the fence and replacing some of the furniture. On this one, we made the mistake of using untreated wood for the benches (our inexperienced selves thought that if we stained & sealed it, it would last. Negative! Ya live, ya learn.)
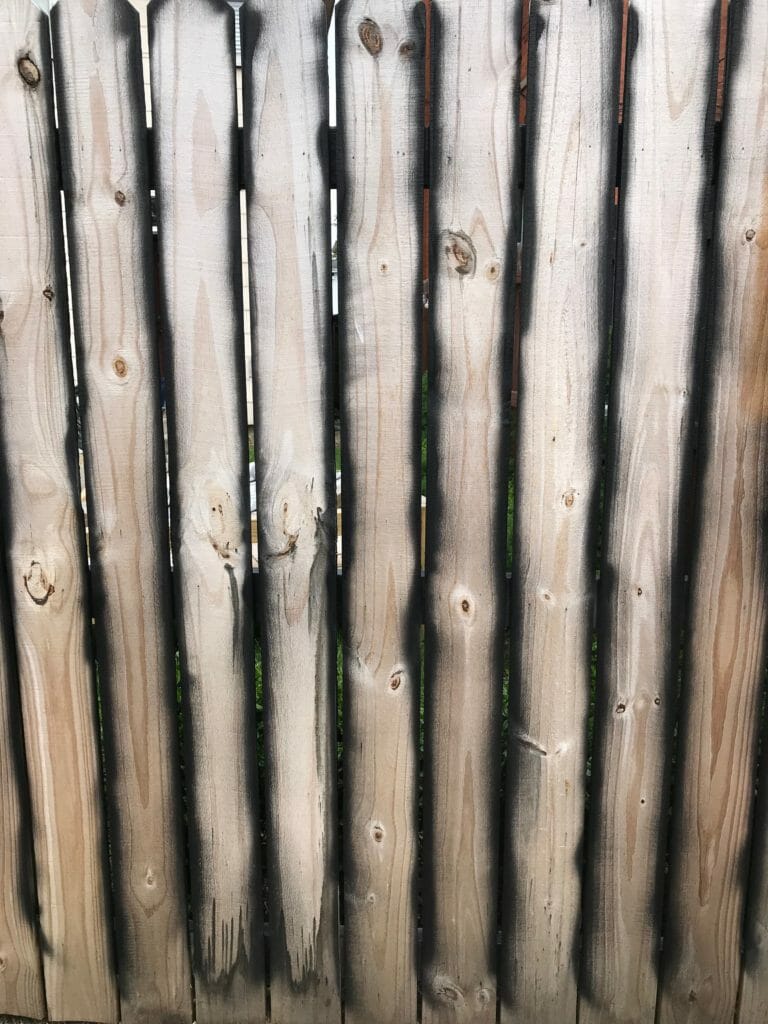
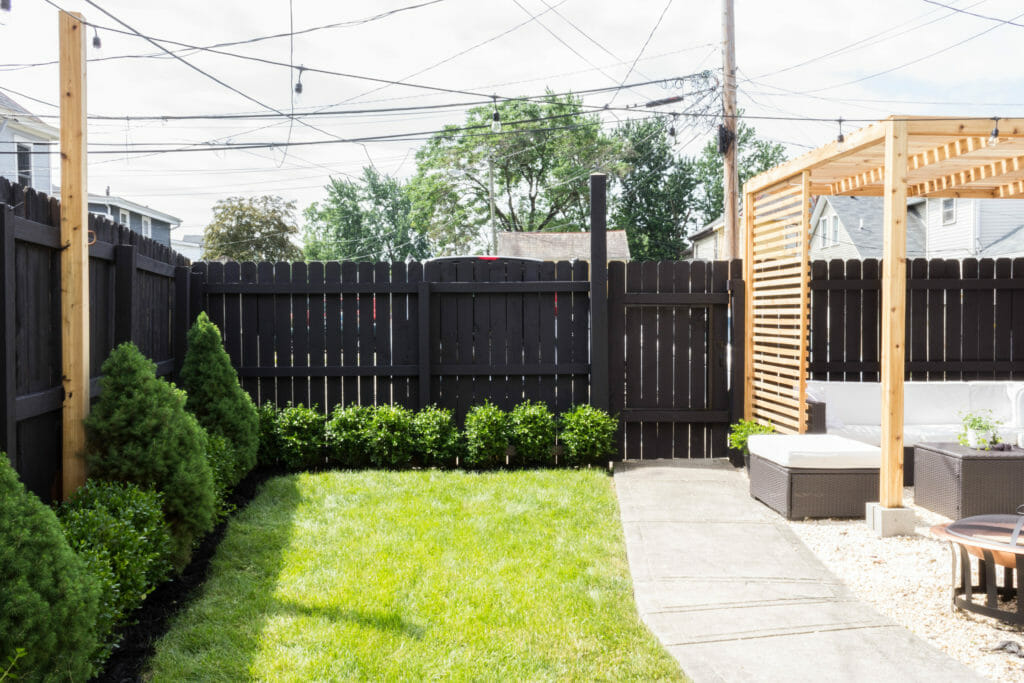
Between then and now, we replaced two sides of the fence and the deck was starting to rot (more on that below). Between the graying fence and the shabby deck, it needed some love. Here’s a snapshot of what we were working with.
And here’s the angle showing the old section of the fence that still had the stain on it, and the new section that we had replaced.
We reached out to Lowe’s to see if they’d be interested in partnering on this new round of improvements we had planned, and when they said yes, we got right to work. On the list this time:
- Paint the fence
- Build a new deck (or figure out something else that looks good & is low maintenance)
- Add more green
We had just 3 days between guests reservations to get this done, so we couldn’t do a major overhaul but are happy with what we accomplished!
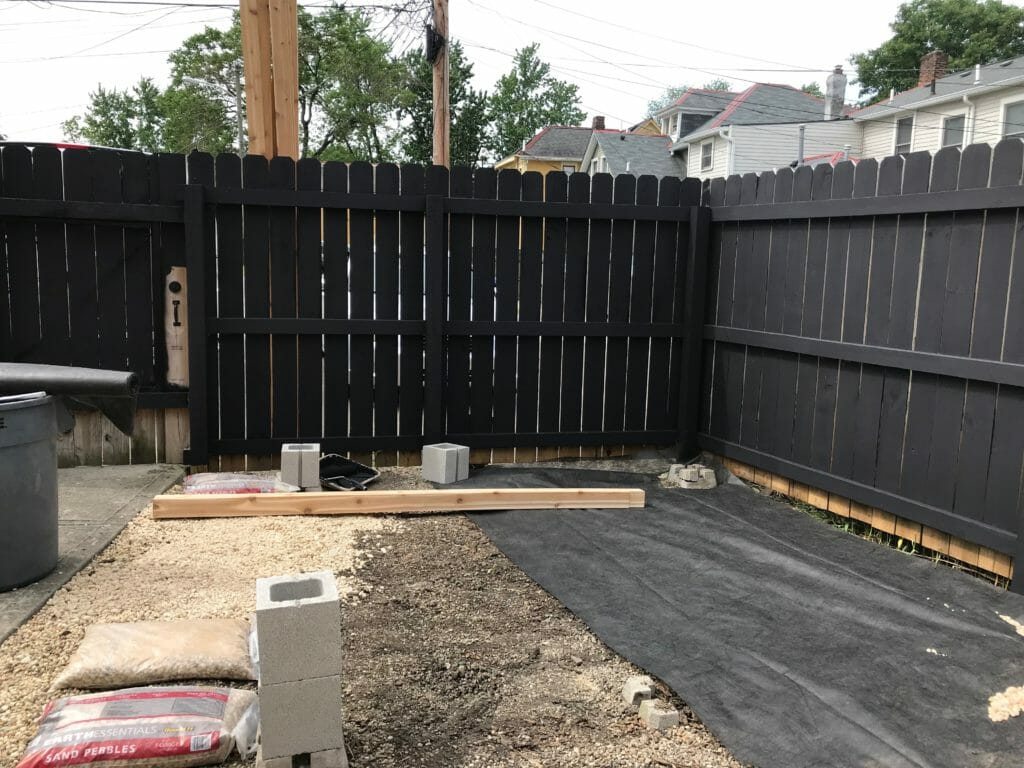
OUT WITH THE DECK
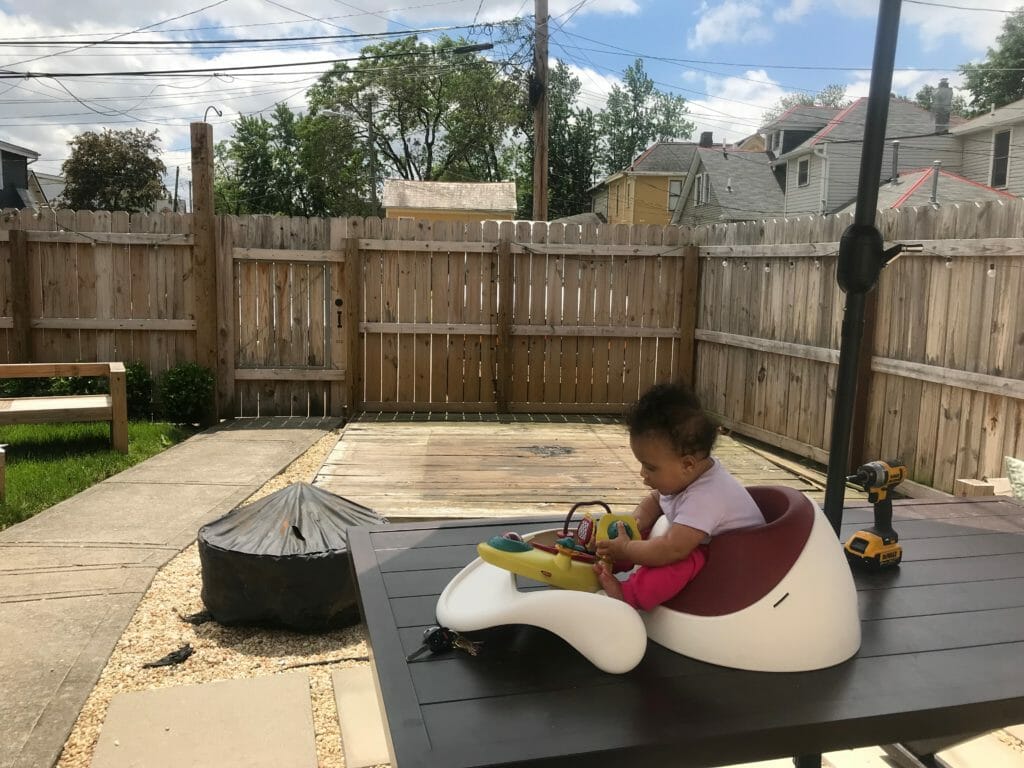
Our first order of business was to remove the old deck. We used pallets as a base for our deck when we installed it originally, and they had started to rot. It felt great taking it all up and starting with a clean slate.
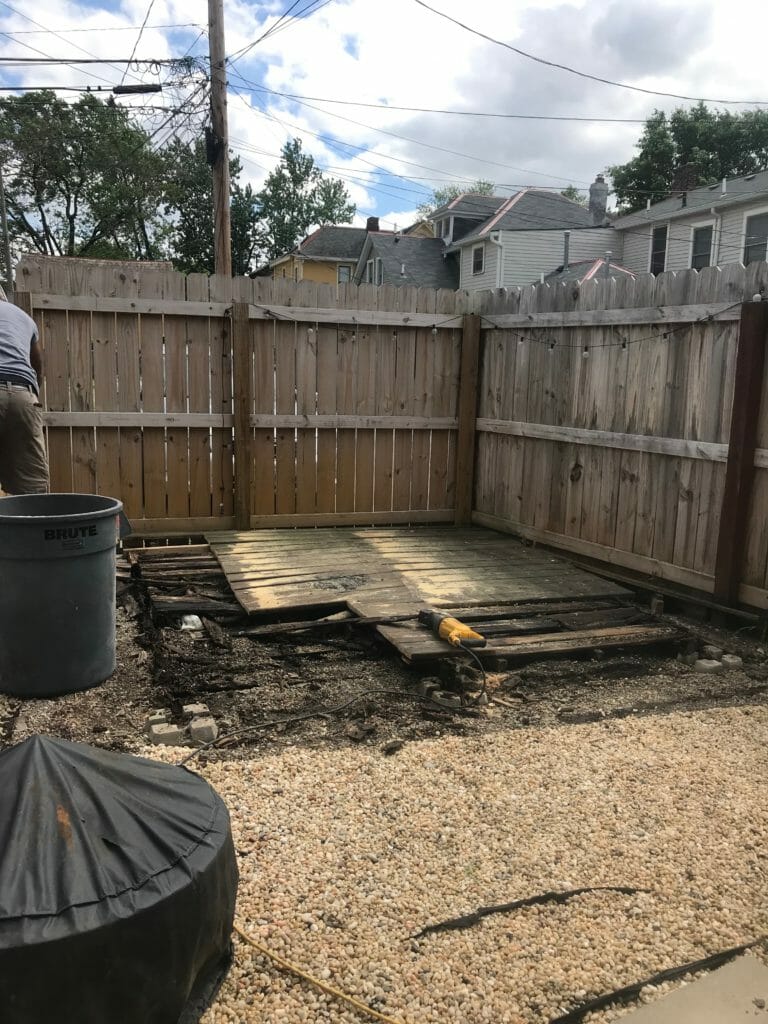
Muchhhh better.
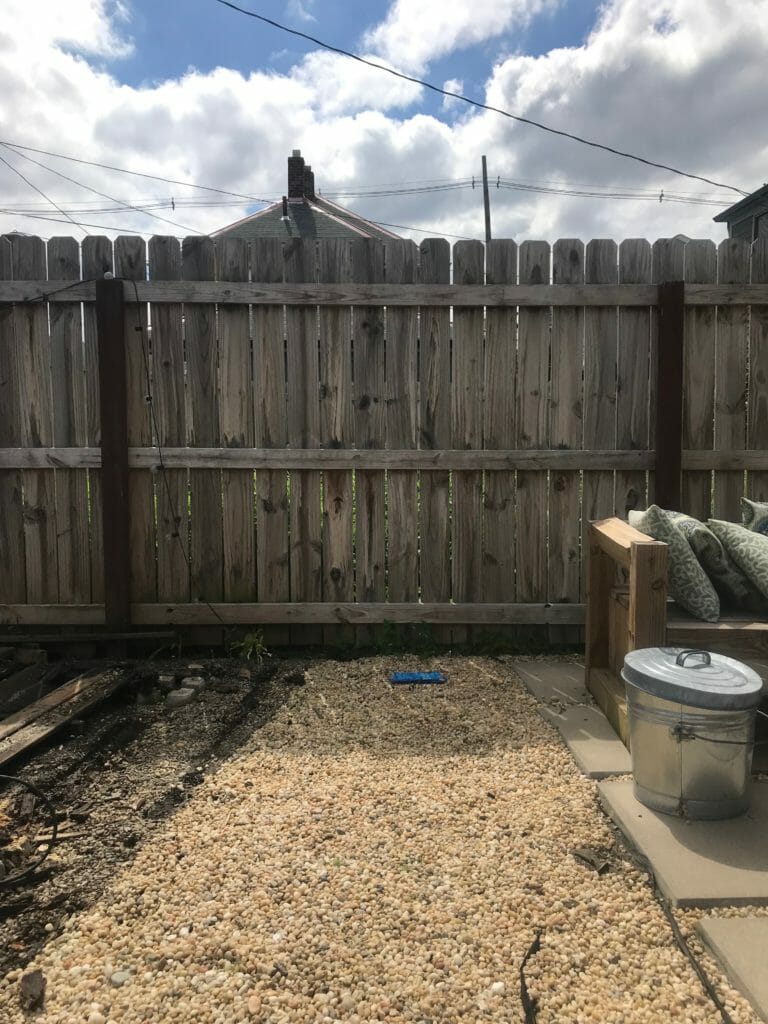
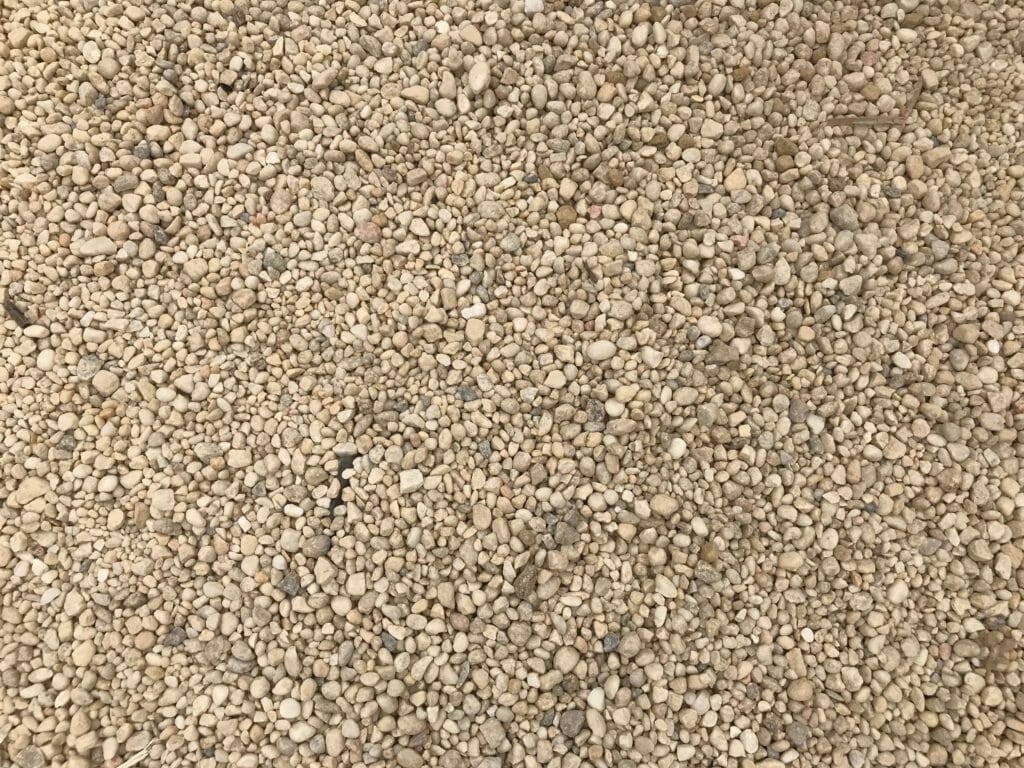
We covered the old deck area with a weed cover and filled it in with the same sand pebbles we used in our previous update. A few people have asked about them getting dirty — ours have stayed clean (ish), likely because the weed barrier keeps the dirt from mixing in with them.
THE FENCE
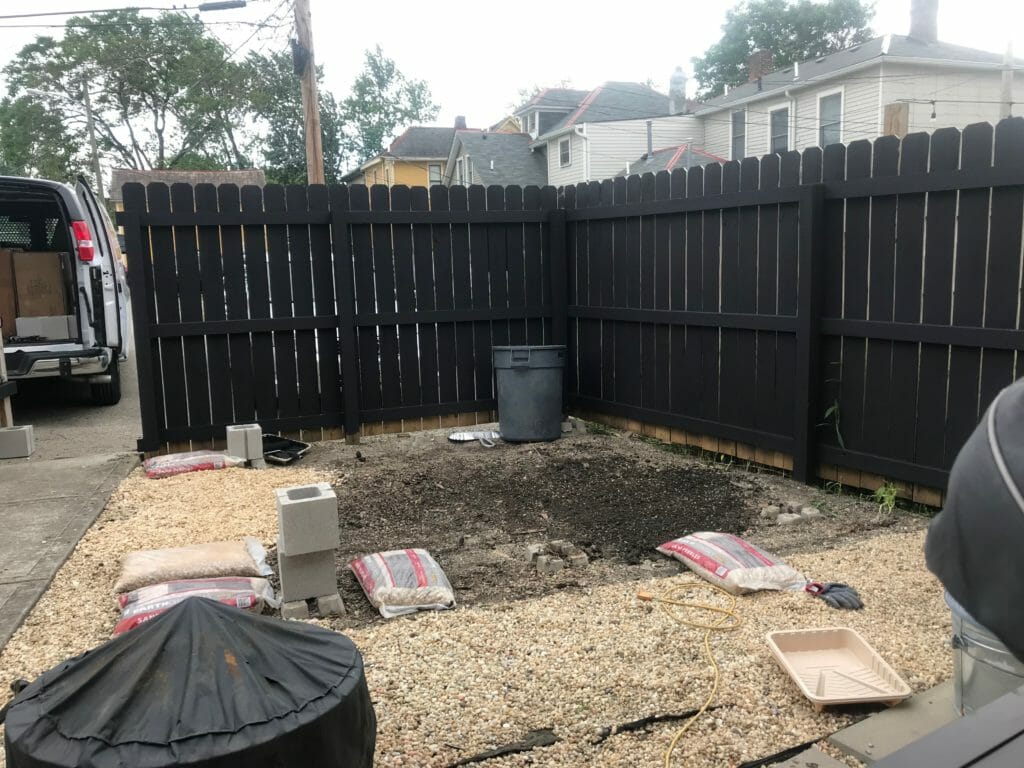
The main reason we painted the fence is because part was stained and part was newly replaced, and we needed one cohesive look on the entire thing. We knew we couldn’t stain over the previously stained portion, so paint was our only option. We chose Caviar in the HGTV Home by Sherwin Williams line at Lowe’s and love, love it. It’s a classy off-black with a touch of brown, and we will definitely be using it again! We chose a matte finish and applied it with a 3/4″ nap roller & set of brushes. (The reason we didn’t spray is because we have neighbors on two of the three sides and didn’t want to risk dealing with the consequences of overspray.)
The paint really makes the fence feel brand new again. It looks more solid on the newer part of the fence…
… and more like a stain on the older part of the fence. Interesting, right? Kinda love it and wish the whole thing was like this!
We did use a little trick on the back length of the fence with the gate to our parking area. This was the only part of the fence we knew we’d be painting both sides of, so we used a can of black spray paint to get into the cracks. Even though the color wasn’t exact, it totally helped fill in the spots that were tricky to get to with a brush & save a bit of time. We went over everything again after it dried with a brush and it all blended together nicely.
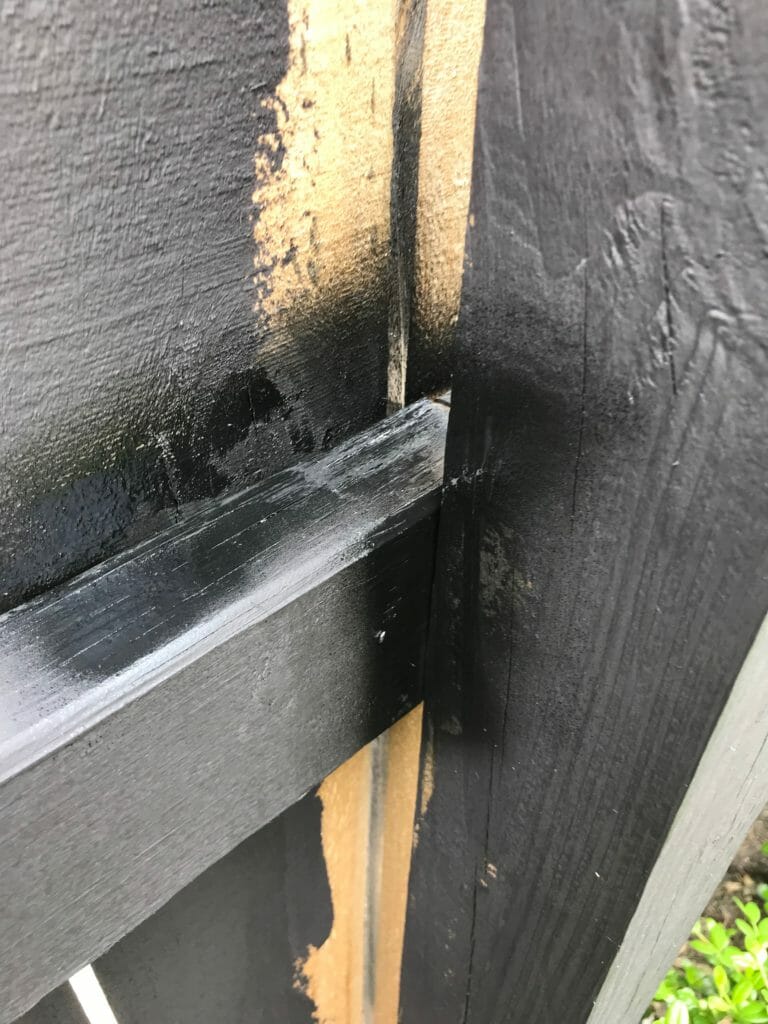
In the photo on the right, you can see what the other side of the fence looked like after spraying between the cracks. This trick only worked on the one length of the fence that we were painting on both sides. On the other two lengths of the fence, we just focused on keeping our roller & brush on the face of the boards and left the cracks as-is so it wouldn’t impact our neighbors’ side.
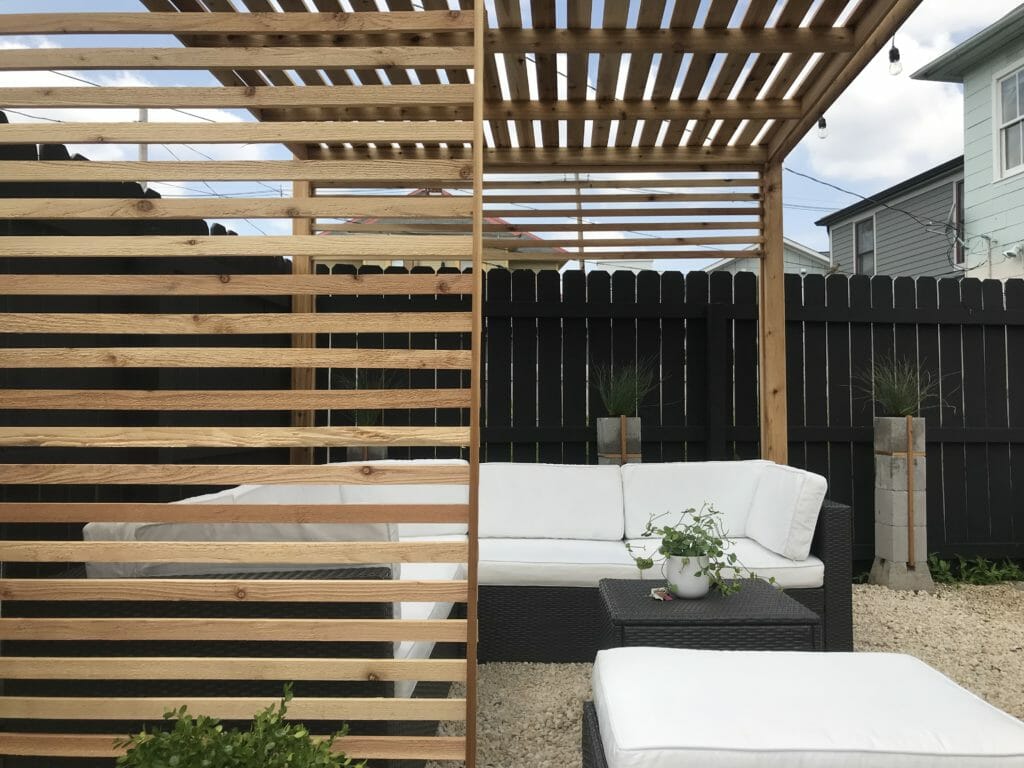
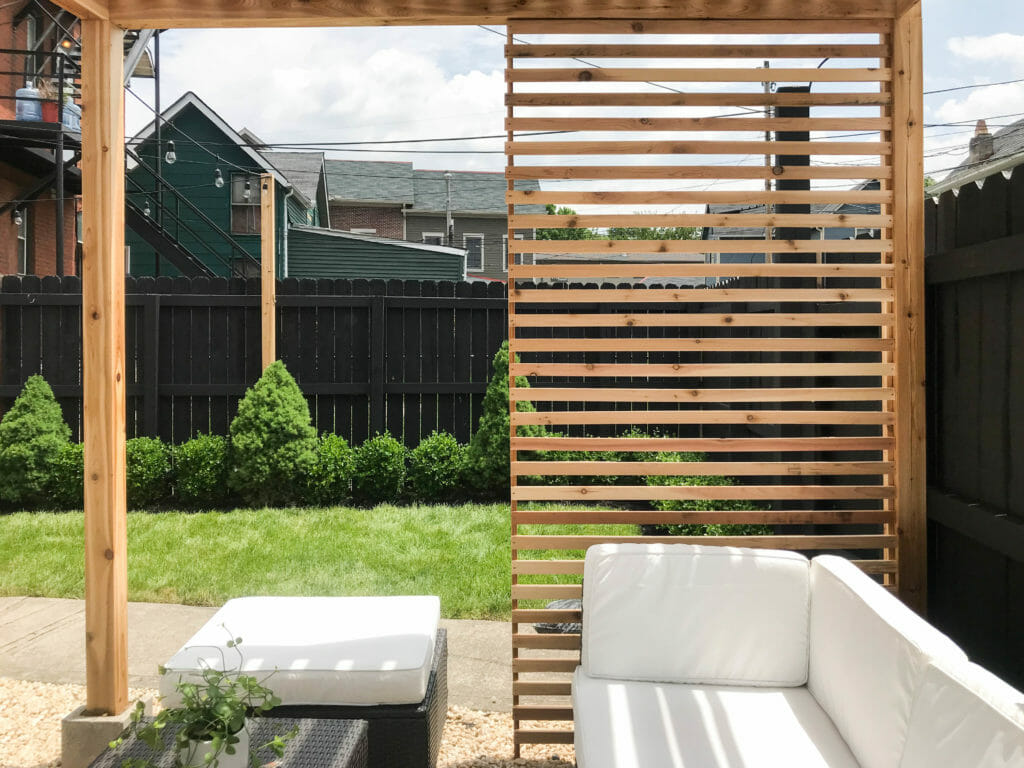
IN WITH THE PERGOLA
One thing we didn’t originally intend to do was build a pergola, but when we were standing in the backyard in the middle of the day with no shade, we decided to go for it. The materials came to about $600, which was in line with the ones we had seen at various stores that were smaller & didn’t have the best reviews.
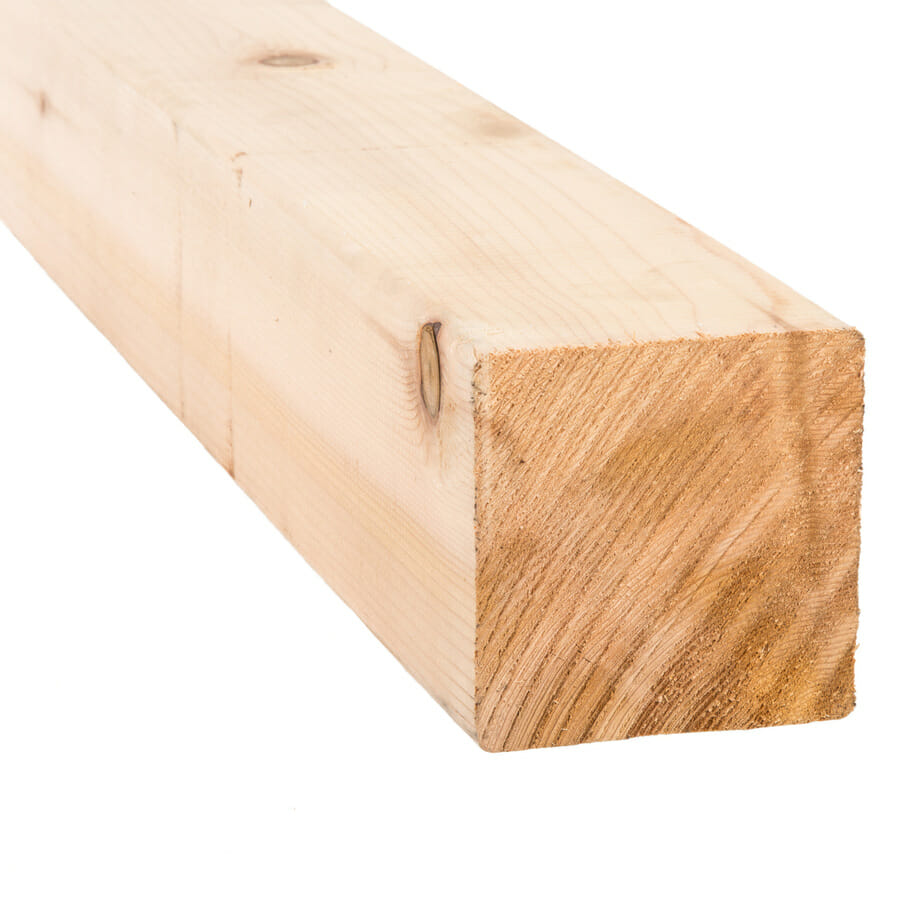
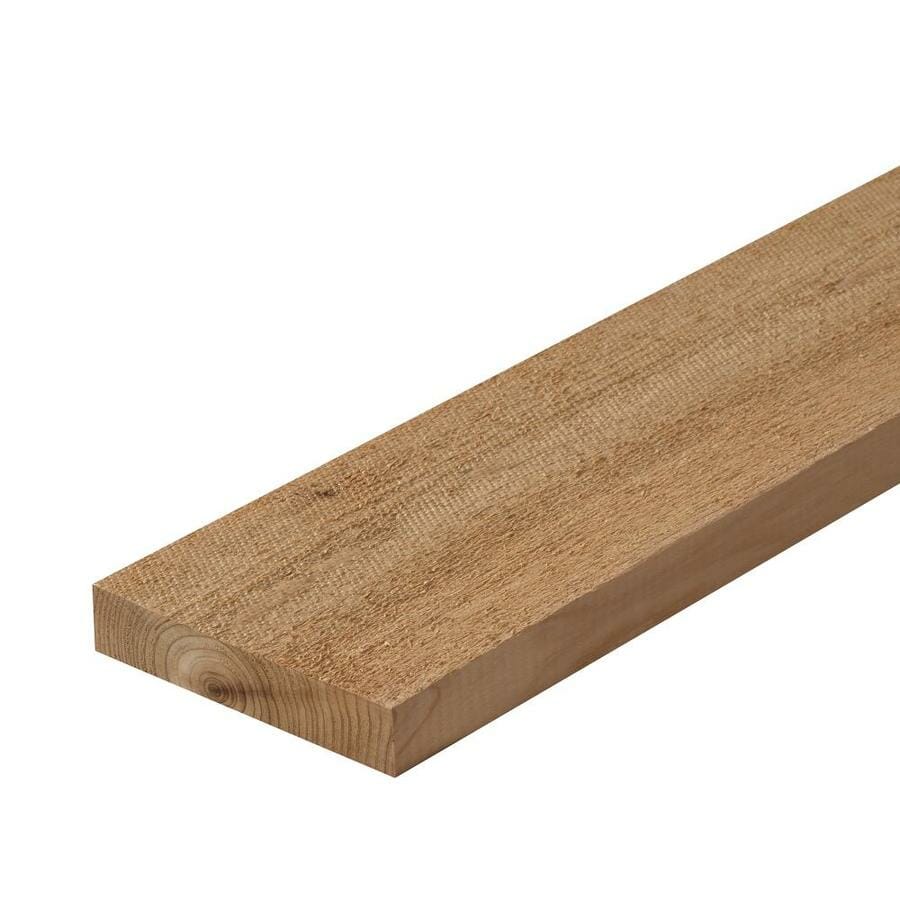
We used six 4″x4″x8′ cedar posts (4 for the vertical supports, 2 horizontals on top), 20 1″x2″x8′ cedar slats for the sides, and 28 1″x4″x10’s for the top. The overall dimensions on our pergola is about 8′ long x 10′ wide x 8′ tall.
-
- 4×4
-
- 1×4
-
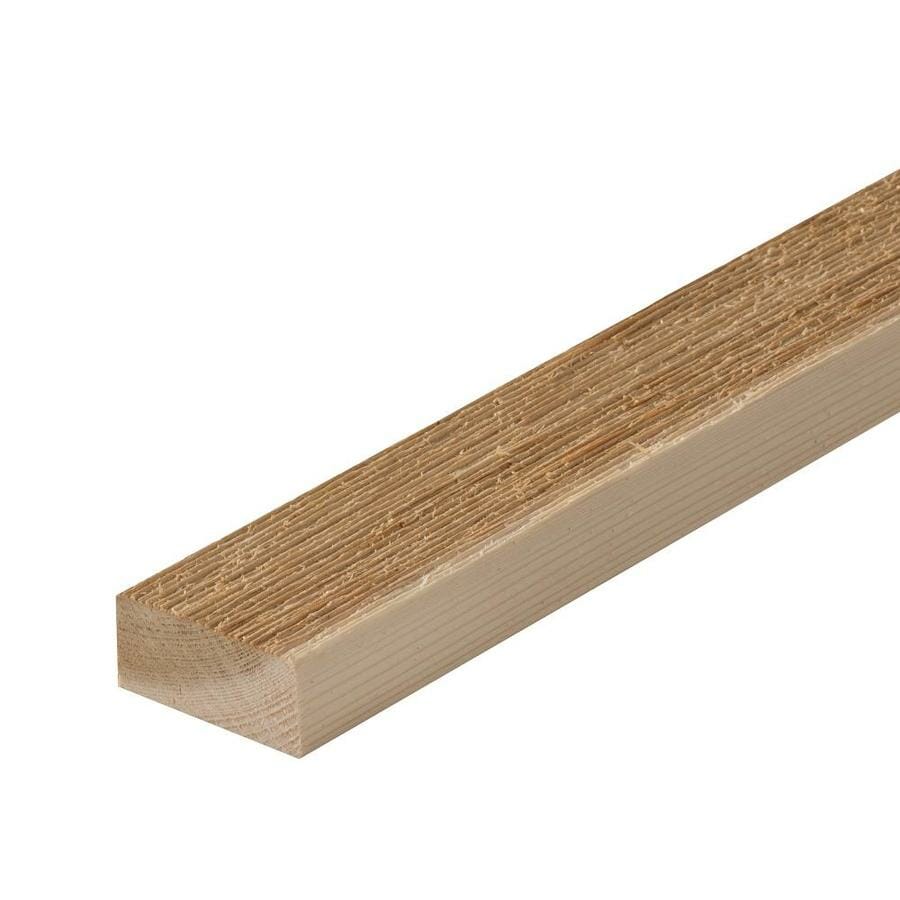
- 1×2
4×4 cedar posts | 1×4 cedar boards | 1×2 cedar slats
On the left and right ends of the pergola, we used the 4×4 posts to build two upside down U’s (3 for each side).
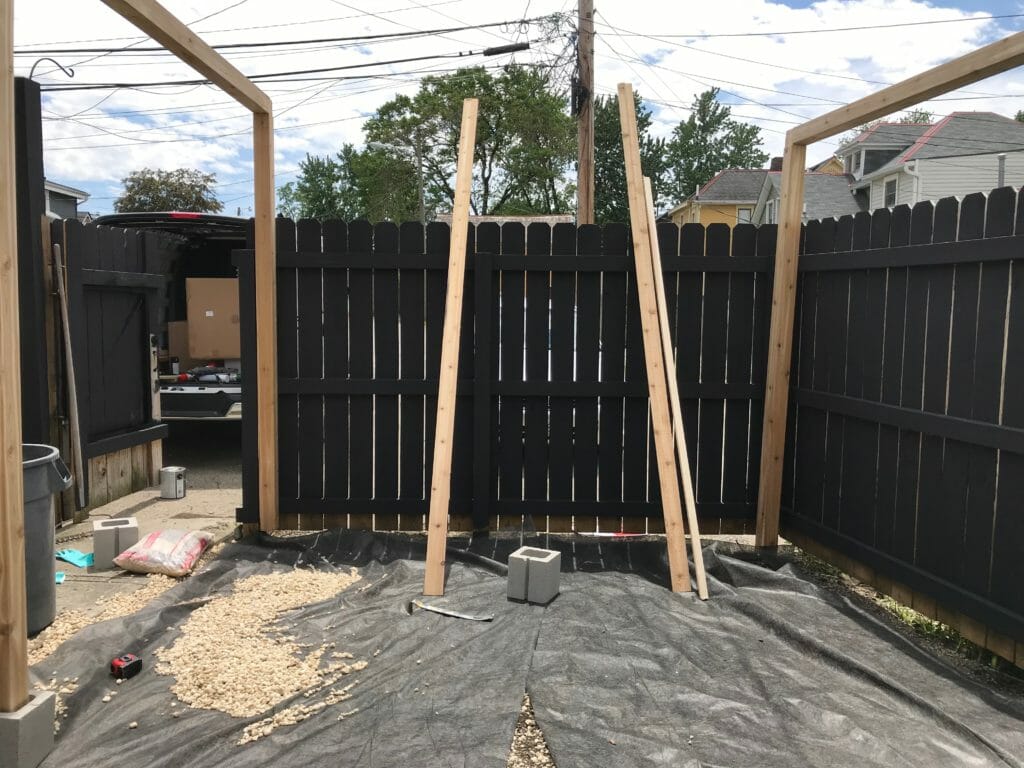
To connect the two ends, we used 10′ 1×4 boards instead of the 8′ 4×4 posts. This allowed us to make the interior larger to fit our furniture.
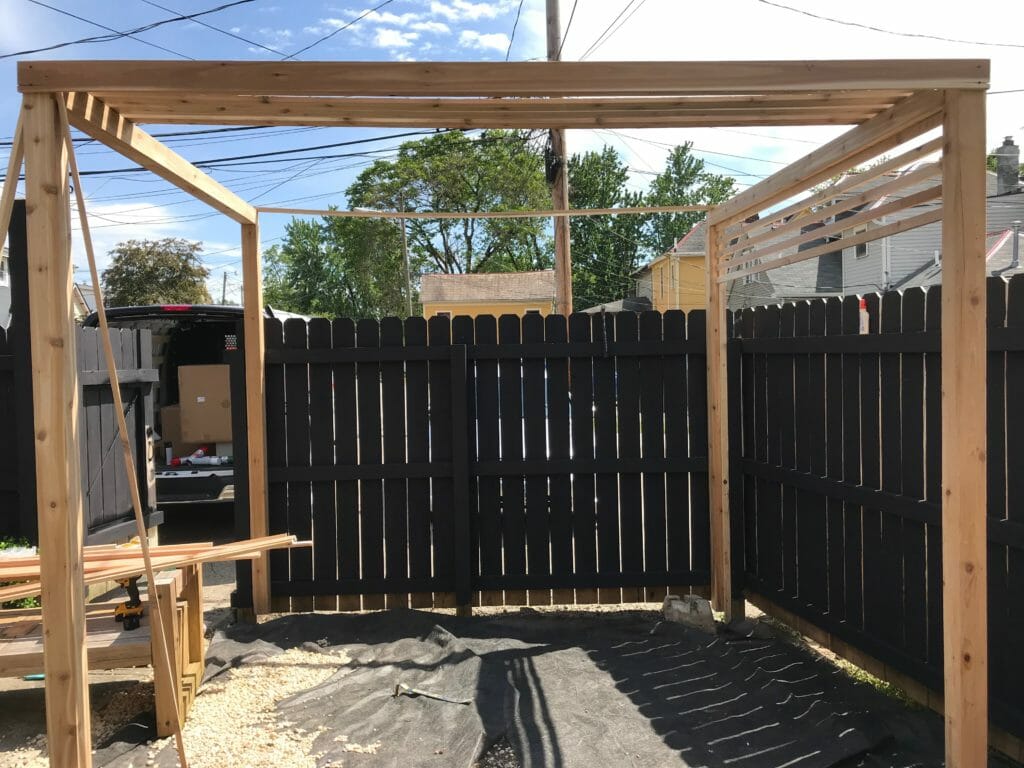
The sun hits the left side of the pergola for about half the day, so we added a full height wall of slats for additional shade. We positioned it next to the sofa so that anyone sitting on it would be covered. We used one of the 1×2 slats as a spacer so they’d all be evenly spread apart, and used small finishing screws to attach each board.
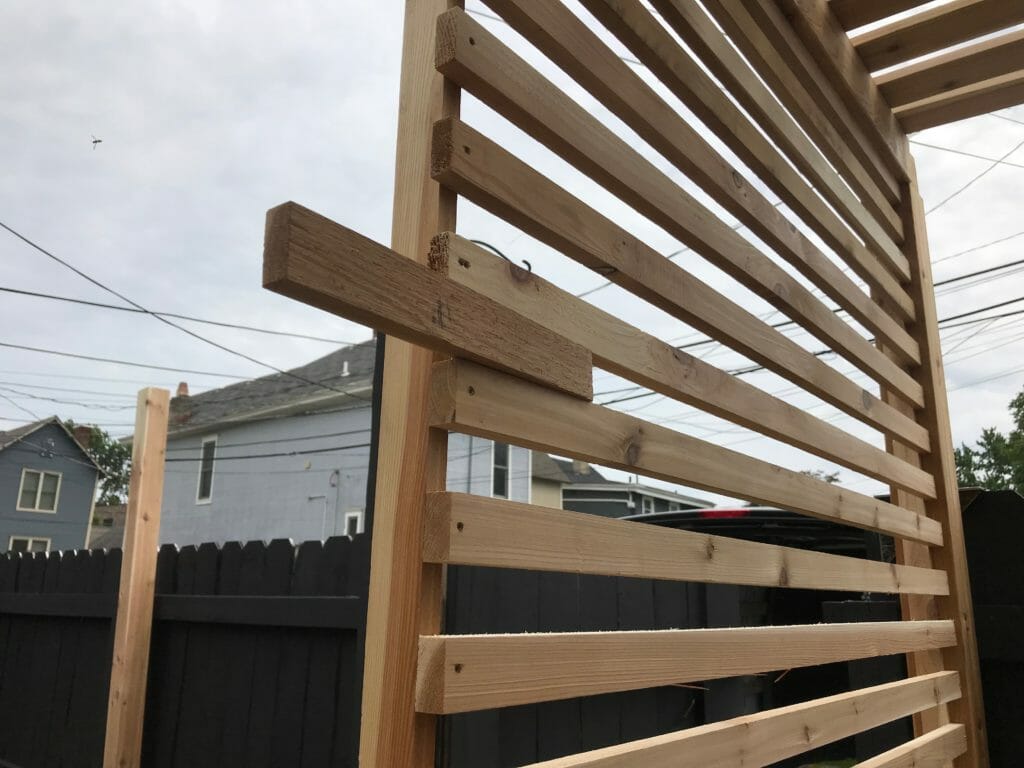
Speaking of screws… we used them instead of nails on everything to hold the wood in place. We’ve tried using nails in the past and shouldn’t have — when the wood warped over time, the nails didn’t do a good job of holding it in place (despite wood glue) & they end up popping out as the wood moved.
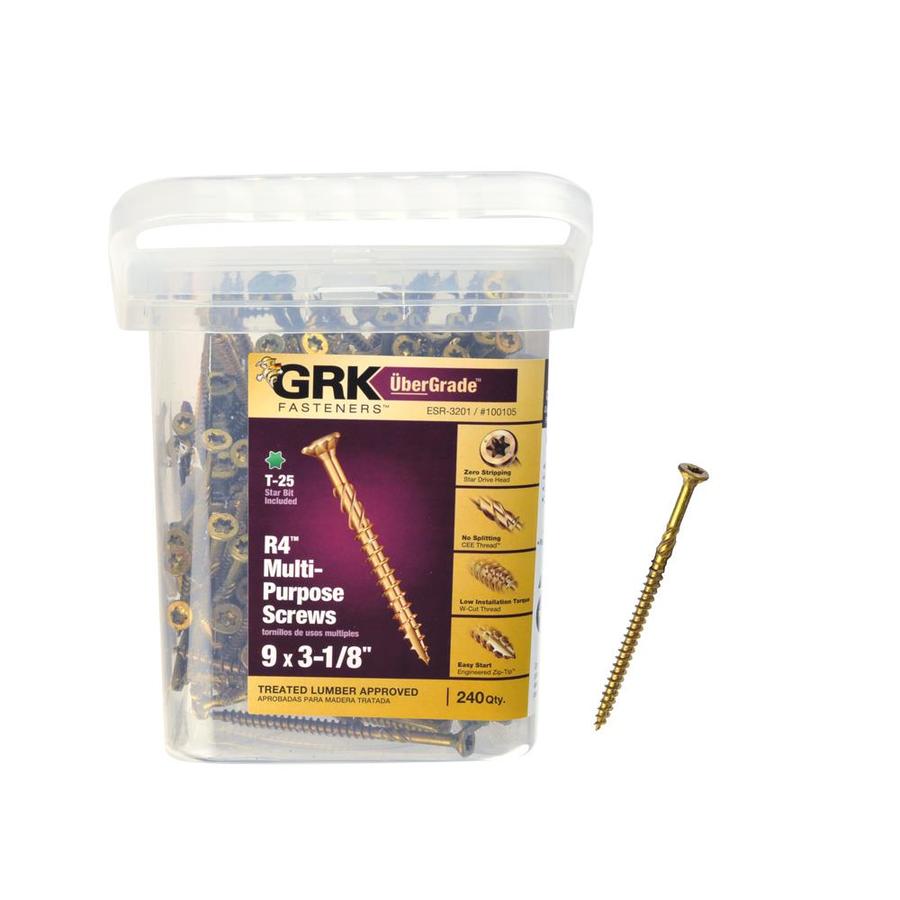
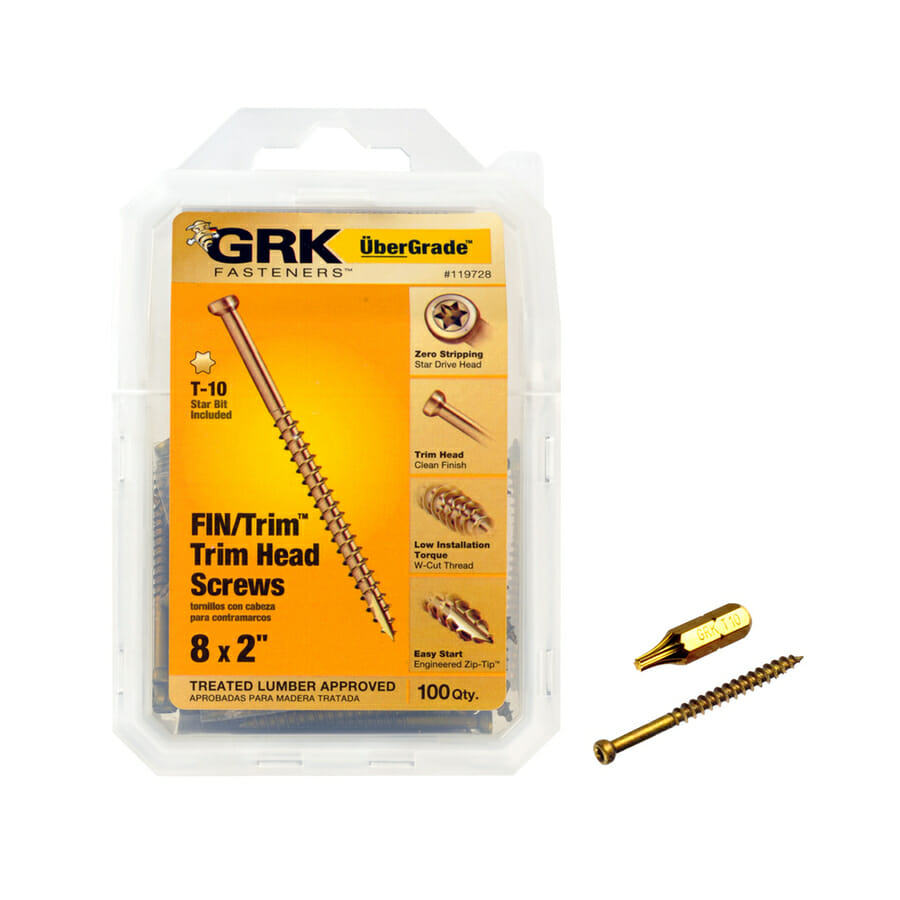
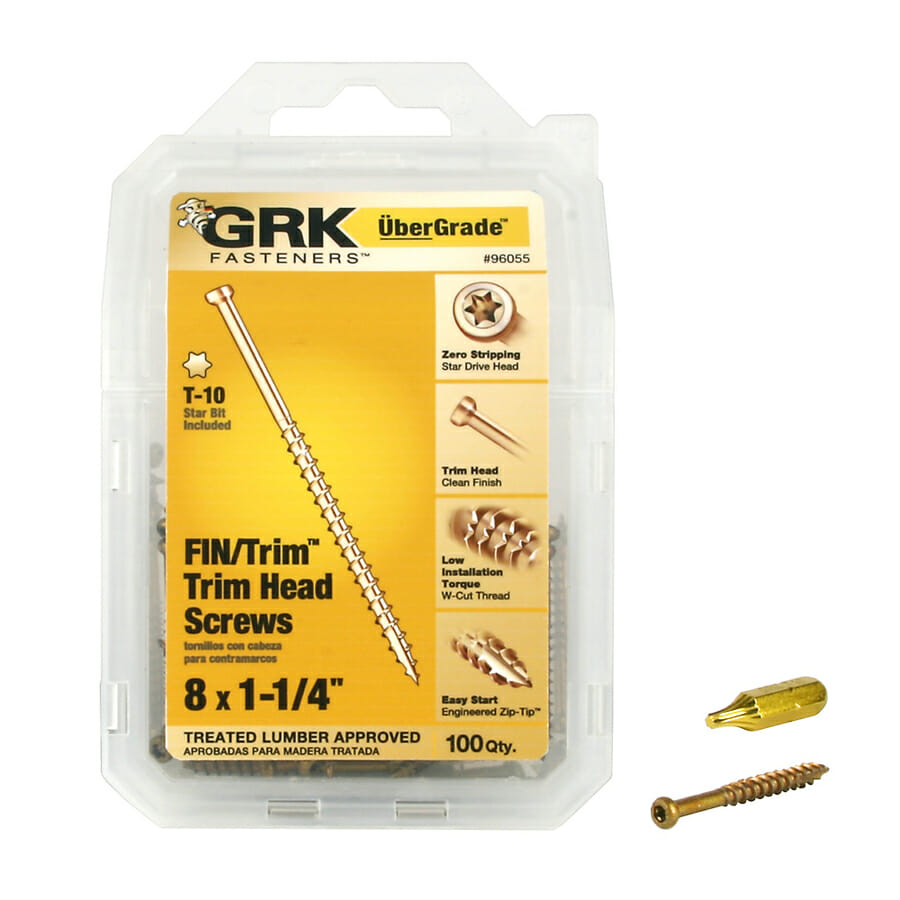
We used the screws on the left for the 4×4 posts (they’re long!), the ones in the middle to attach the 1x4s to the posts, and the little ones on the right for the slats.
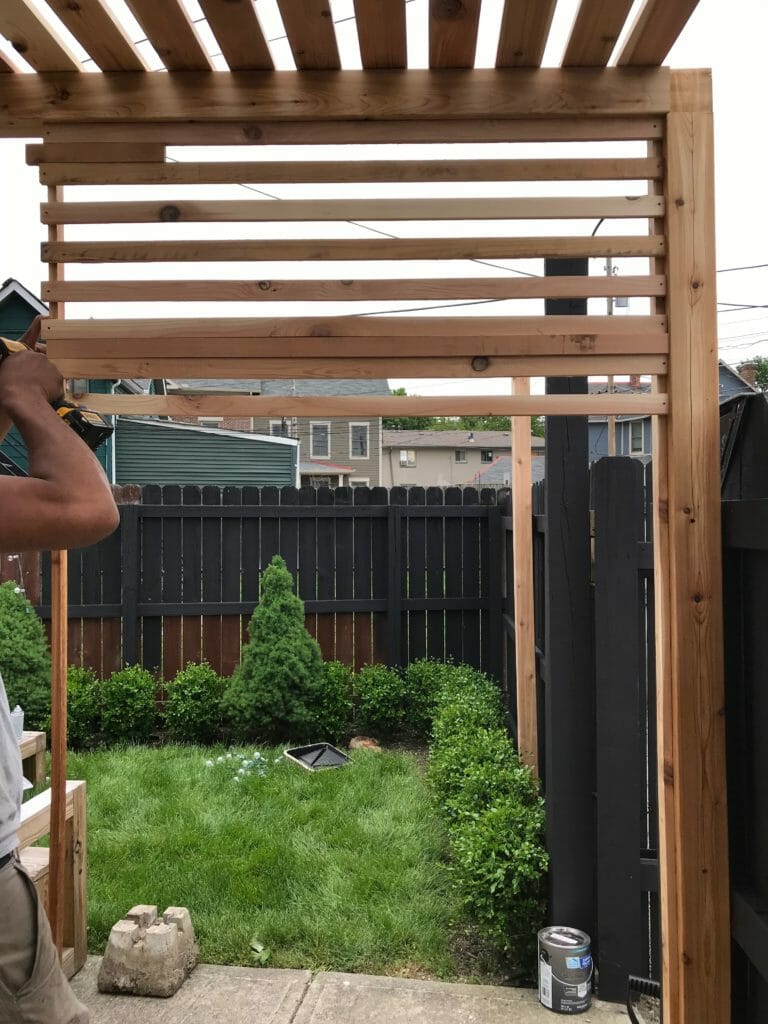
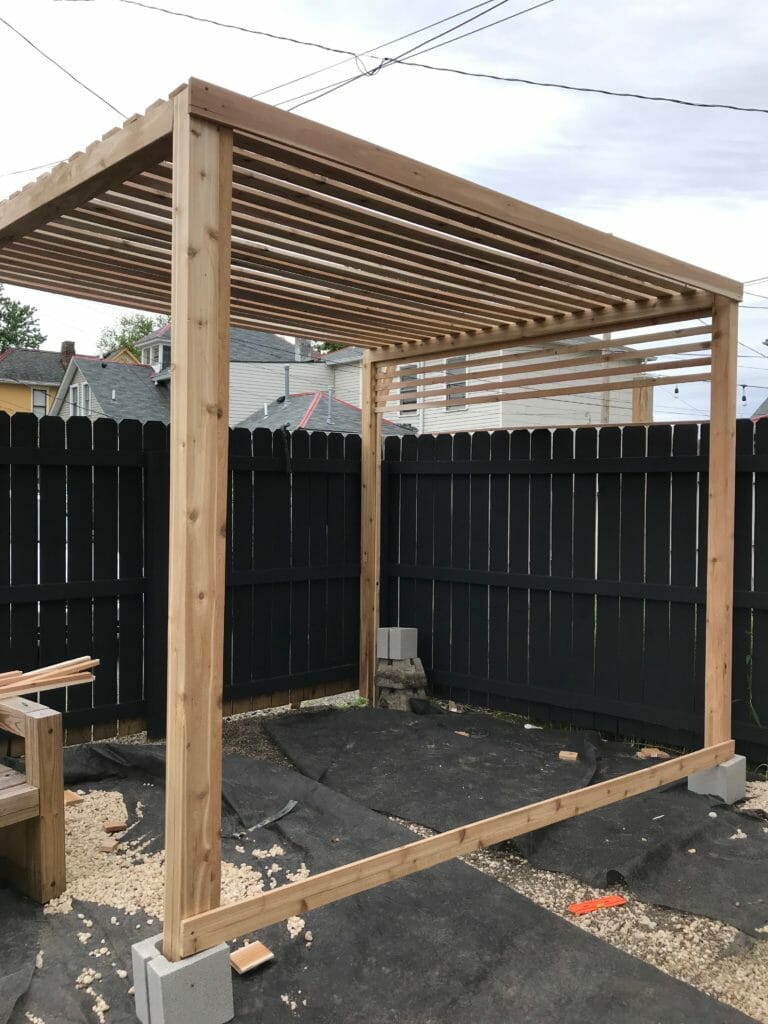
To secure the pergola, we screwed the two back posts straight to the fence. On the front two posts, we used cement blocks that we placed a few inches into the ground and filled with sand. They’re not permanent, but feel pretty solid, especially with the back two posts attached to the fence.
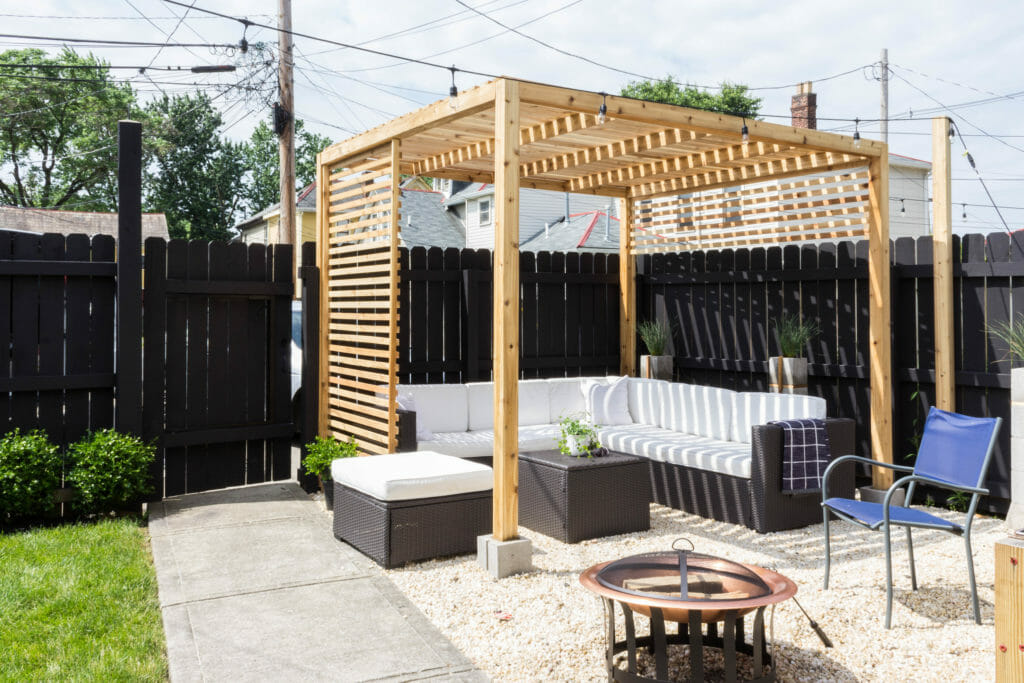
We really love how it turned out, and love that we were able to customize it based on where the sun hits our yard.
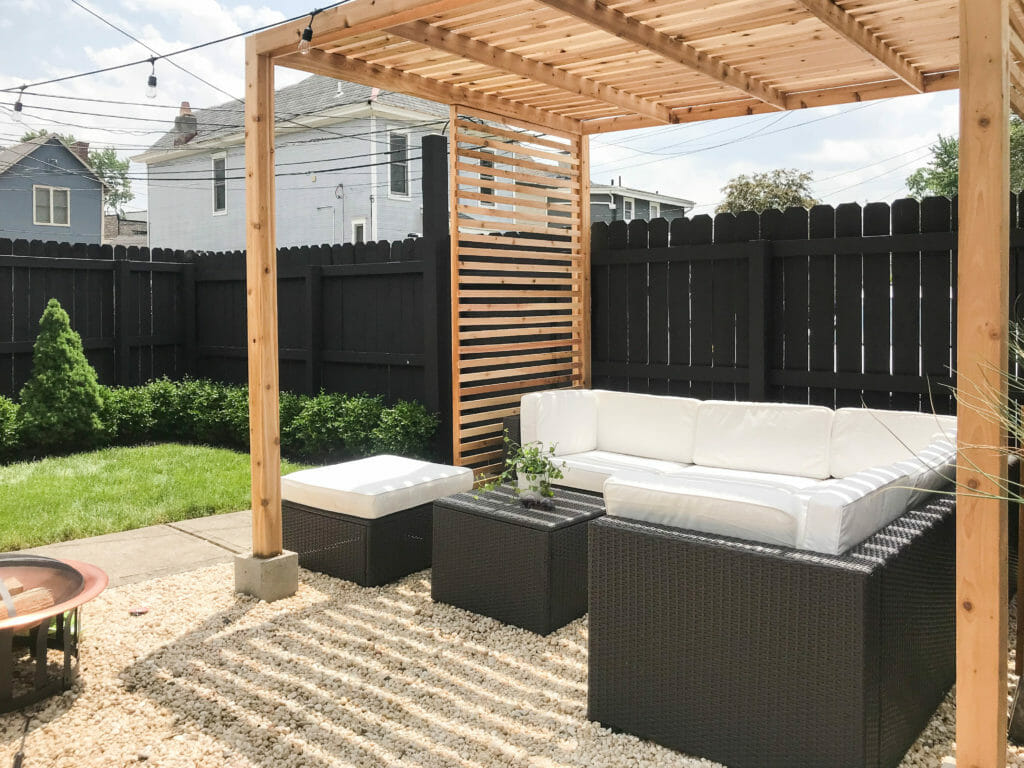
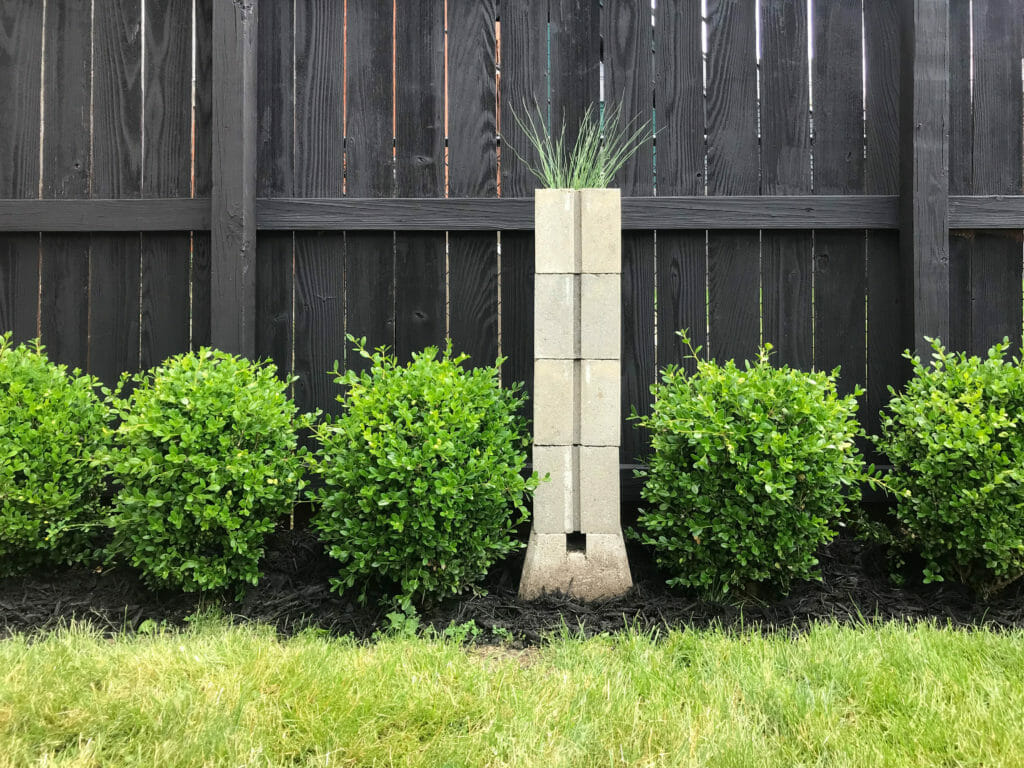
The black fence + cedar + green all looks so good together. We purchased all of the shrubs at Lowe’s six years ago, and they’ve grown so much since then! We’re going to have to move some of them around to make more room for them… that will be a project for next time 🙂
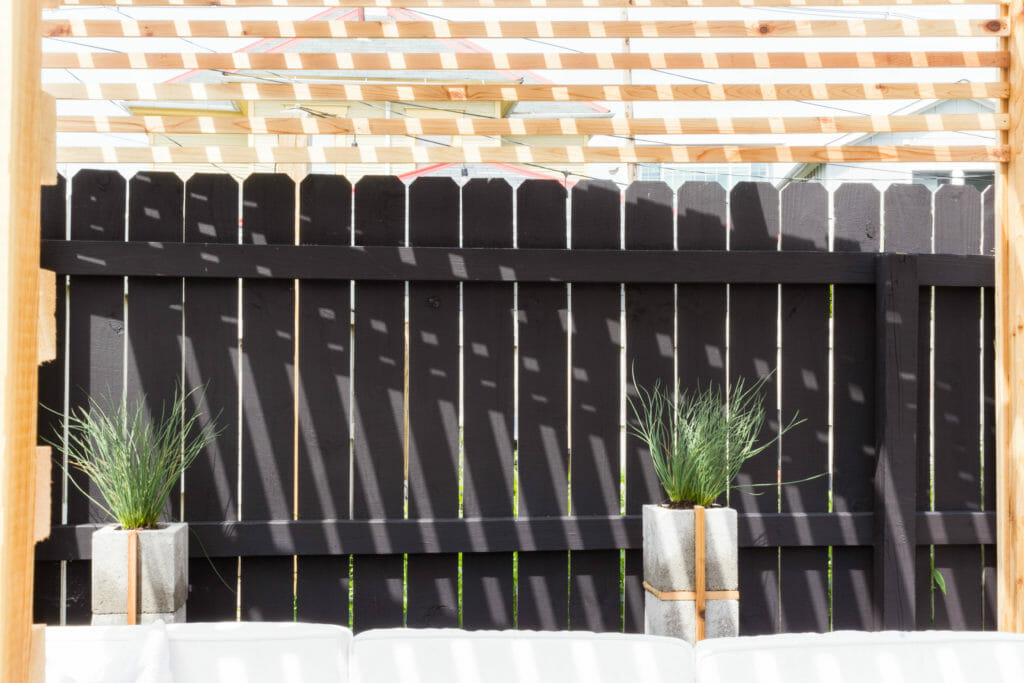
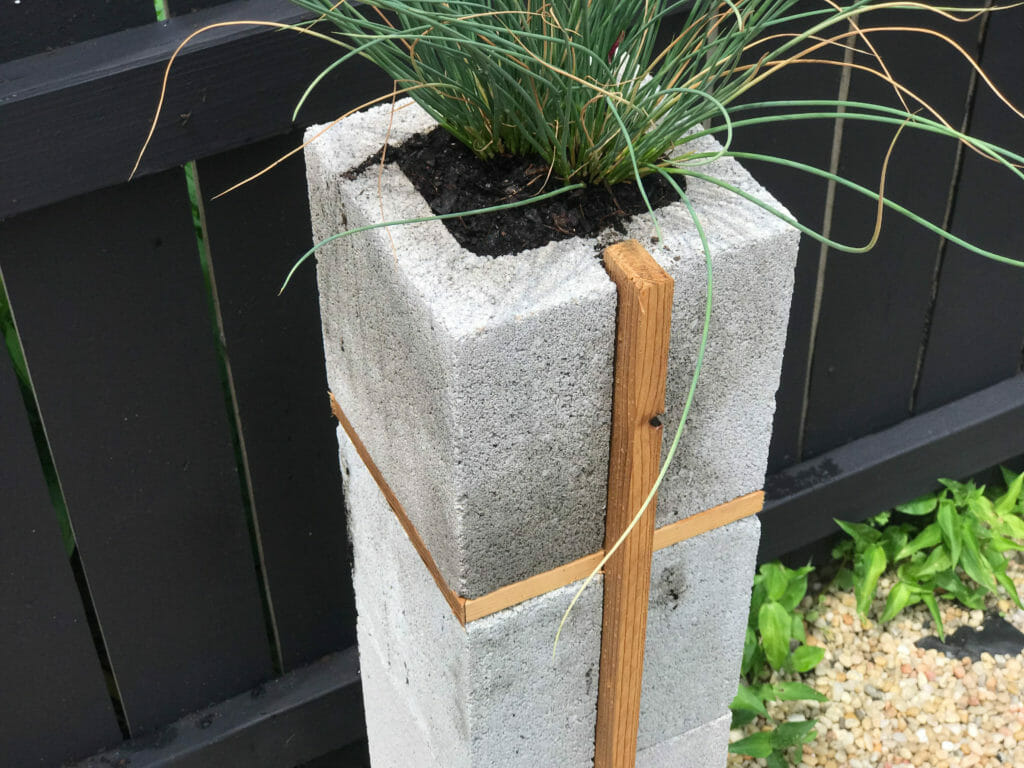
CONCRETE + CEDAR PLANTERS
Bryan picked up a few concrete blocks from Lowe’s ($1 each!) and added some extra 1×2 cedar slats to the groove to make some inexpensive planter boxes for the yard. We filled each one with some ornamental grass and soil, and are looking forward to seeing how they do this summer.
And last but not least… this little lady can ALMOST sit up by herself! Bianca came with us everyday and hung out on the dining table under the umbrella while we worked to get the yard finished.

We’re so happy we had a chance to get this backyard space improved for our guests in time for the summer! Now that the warm weather is here to stay, we hope we’ve inspired you to tackle your own outdoor projects you’ve been putting on the back burner. Lowe’s has lots of great deals going on these next few weeks for Father’s Day, so be sure to keep them in mind as you plan. We’ll be making some other little improvements to this home in the coming months, so stay tuned. And as always, remember to follow us on Instagram for daily updates on life & work in the meantime!


What couch did you use for this project?
it’s from Value City — more on that soon!
Is that your baby???? She is SO beautiful!!!! The space is too but….Bianca ????????????????
Yesss! Thank you so much <3 She’s been a great baby so far.
I love this so much! Our whole fence needs to be replaced at some point but I may try painting it this same color first to give it a refresh until we’re ready to replace it.
Thank you! The power of paint never disappoints 🙂
Love how the makeover turned out! Would love to know how much the pergola costs in materials to get an idea of how this project shakes out! Thanks!!
Thanks Jessica! It came to about $600.
Looks amazing! Did you finish the wood with anything for protection?
we used thompson’s water sealer – totally forgot to mention that 🙂
Love the entire yard! The contrast of the fence to the modern pergola is SO good! How did you connect the top corners of the pergola rather than having the overlap. I love the look but don’t see any Simpson ties or hardware? Thanks for the backyard inspiration!
So many amazing DIY projects in this post – as always, I love your unique style and how you create beautiful spaces with your woodworking skills
Thank you!